
Deck The Home Wood Christmas Signs
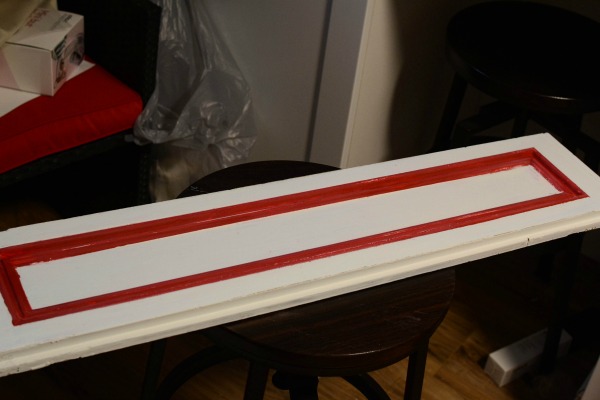
Welcome to another week of the Deck the Home Challenge. This week our challenge was to create wood Christmas signs. Since I am all about reuse, recycle, and repurpose. I created a sign using an old wood kitchen cupboard door!
Trust me, I am not very good at painting. Anything. Never mind trying to paint letters!
That is where my trusty Cricut Maker comes in. I used Cricut Design space to customize the phrase in a font I thought was fun and fitting of the holidays.
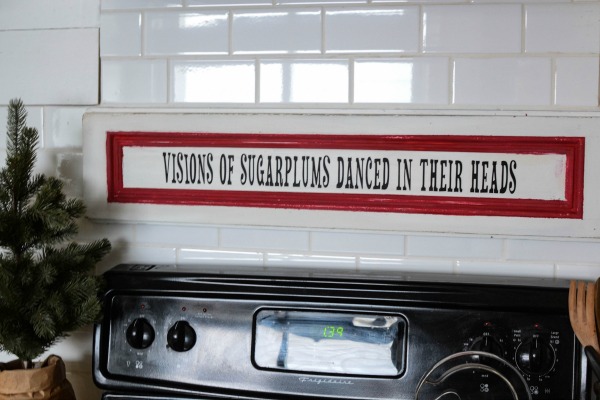
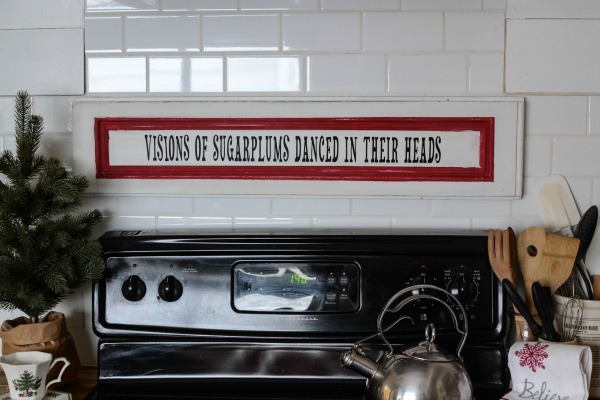
I wanted to make a sign to hang above my stove for the holidays. I usually have this sign hanging there, but thought a fun Christmas quote would be a nice change.
It is such an easy project, and if you are good at lettering, lucky you! You can skip the whole Cricut part!
How to Make Wood Christmas Signs from old Cupboard Doors.
You will need:
- old cupboard door (Habitat for Humanity is a good source)
- Cricut cutting maching
- Everyday vinyl in black
- Cricut transfer tape
- scraper
- white paint
- trim pain (I used red)
- paint brushes

Step One:
Open Design Space, click text and type your phrase. Change font to your liking (I used Sleigh Ride) and resize to fit your project. I used a 12 x 24 cutting make, so I was able to create a cut 22 inches long.
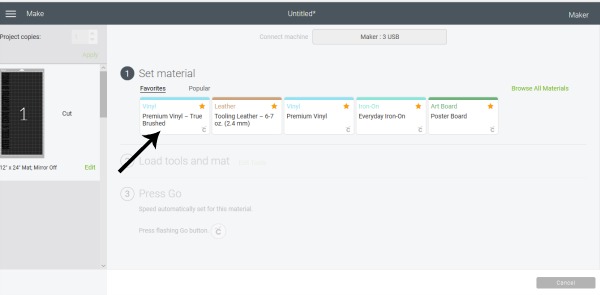
Step 2.
Choose your material.

Step 3.
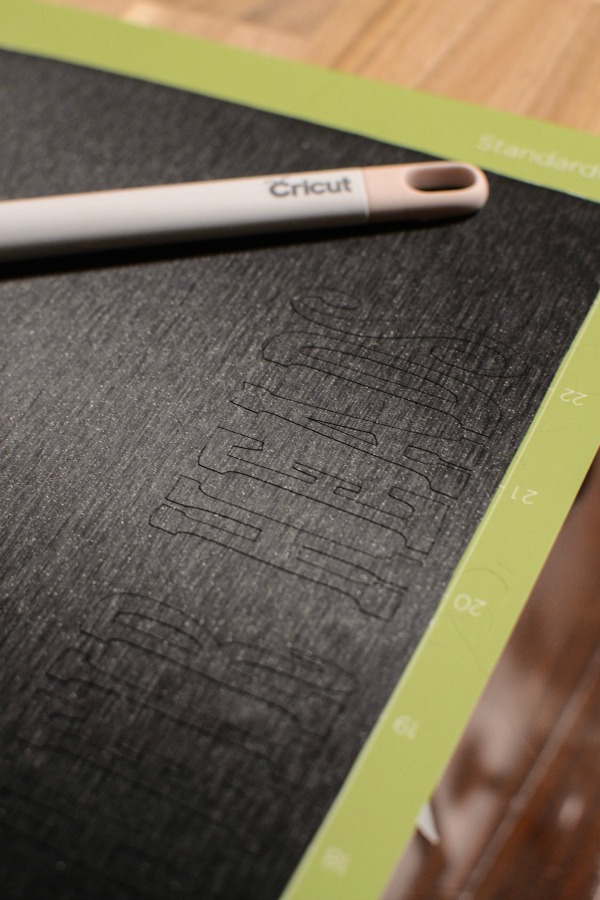
Since I was using a premium vinyl in a brushed finish I change the pressure setting from default to more. I find it makes it easier to weed the vinyl after it has been cut.
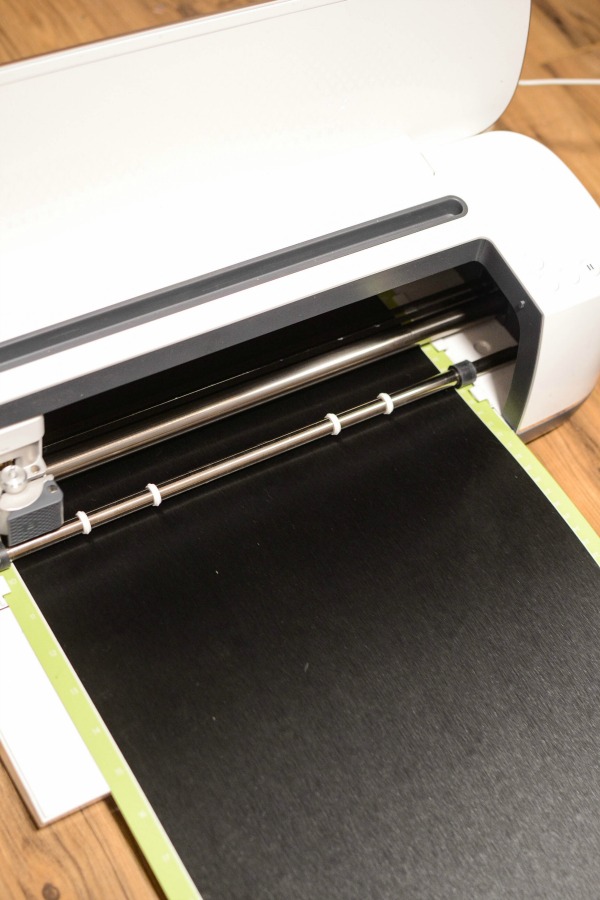
Step Four.
Insert cutting mat and complete cutting process. Since I was using the 24 inch mat, I moved my machine to the floor to allow it to pass through without hitting anything during the cutting process.
Step 5.
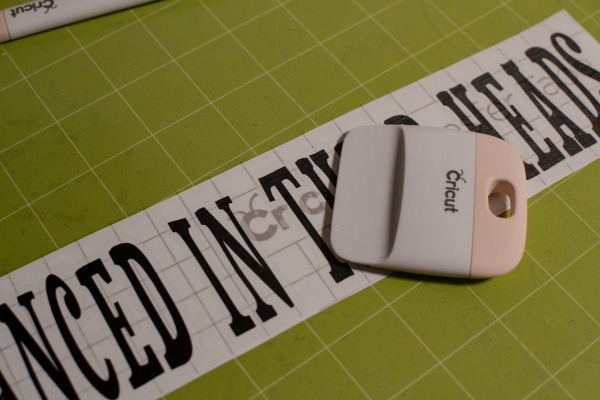
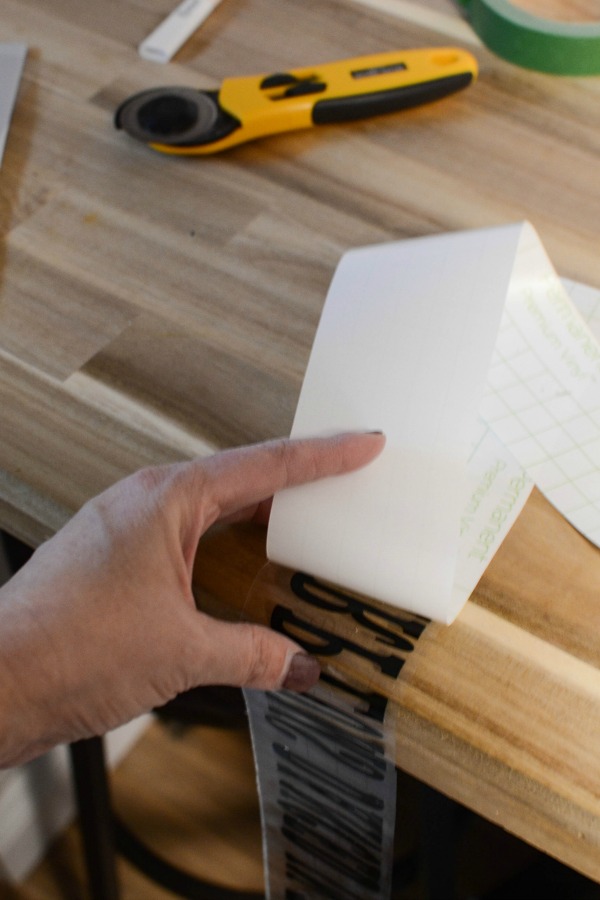
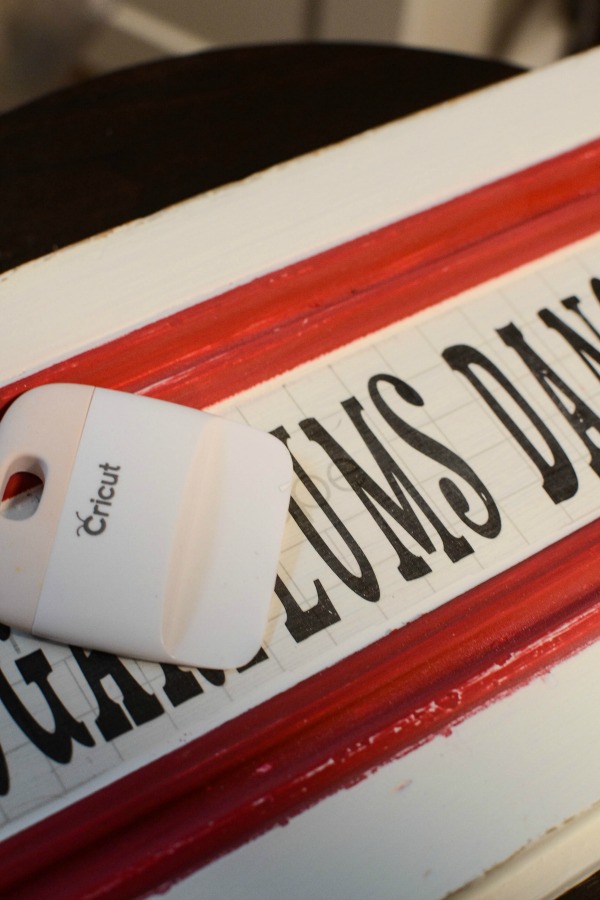
Weed image and apply transfer tape, using the scraper tool to ensure the letters are completely adhered.
Step 7.
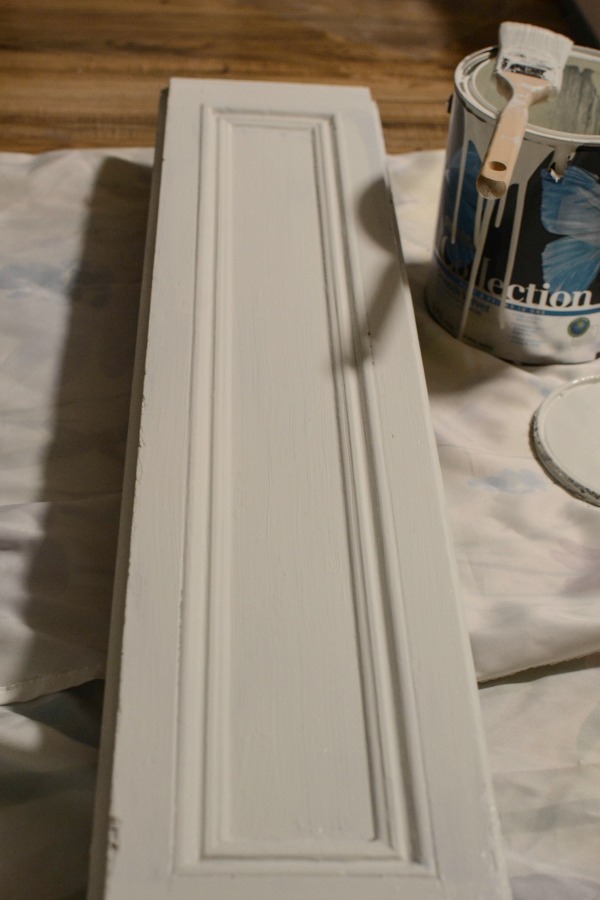
Paint the cupboard door white, and allow to dry.

Step 8.
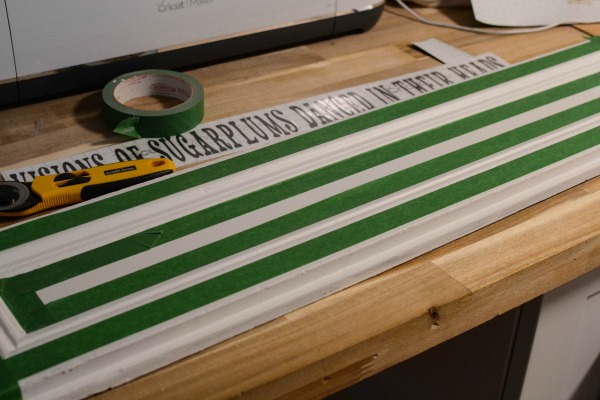
Tape off raised border and paint red (or whatever trim colour you choose). Remove tape and allow to dry completely.
Step 9.
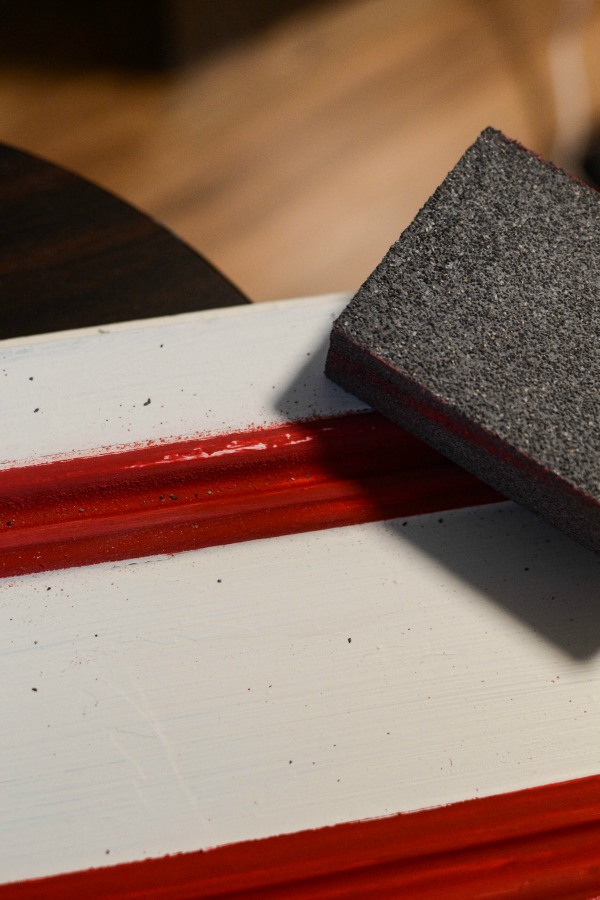
Sand the entire sign to distress to your liking. A little or a lot. Your choice.
Step 10.
Remove transfer tape backing, position into place on your sign and use the scraper to ensure letters are adhered. Slow and carefully peel off transfer tape, leaving the letters in place.
I find low and slow is the way to go! This means, peel off slowly and don’t pull up on the transfer tape. Instead peel it back close to the surface.
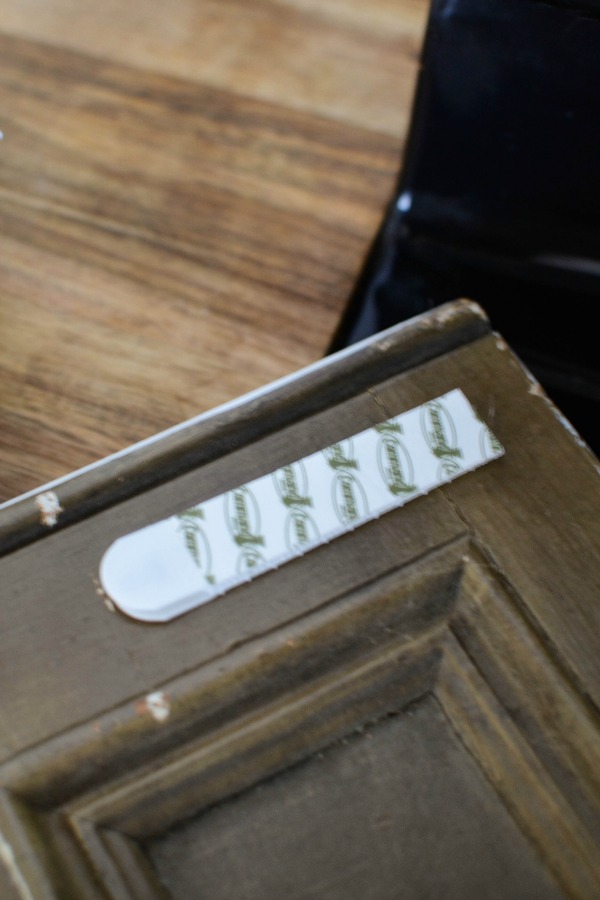
I used On Command Velcro hanging strips to easily hang my sign without having to drill any holes!
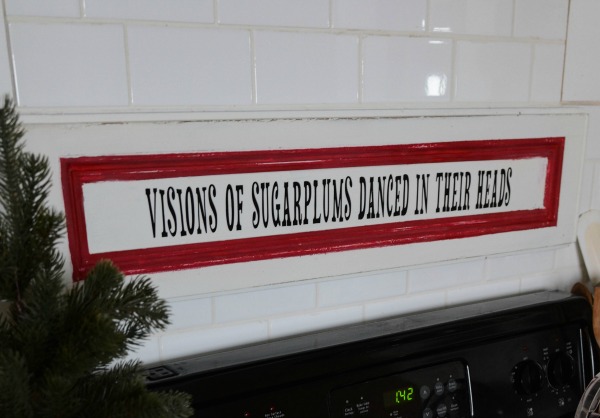
While, I have barely begun to decorate for Christmas, this little sign adds a bit of holiday spirit to my kitchen!


Now it’s time to see all the other Deck the Home bloggers Christmas signs! Visit the link below to see all the photos and links.
Be in the know! It may be a delicious recipe, a stunning tablescape, or decor tips to make your house a home! Simply click here to subscribe. I never sell or share your information, and you can unsubscribe at any time!
Until next time….


Your sign looks so pretty on the cupboard door. I’m not so good at painting letters so thank goodness for my Cricut too.
Thanks Jenny! I am helpless when it comes to lettering. Cricut always saves the day 🙂
I love reusing old wood and cupboard doors. It came out so cute.
Thank you Cynthia! It is always good to find a new purpose for something old!
I would have never guessed that was an old cupboard door. Beautiful sign!! I would gladly display it at my house. hehe 🙂
Thank you Christine!