
One Room Challenge Week 4
Welcome to the One Room Challenge Week 4!
![ORClinkingparticipantCIH[1]](https://www.redcottagechronicles.com/wp-content/uploads/2014/04/ORClinkingparticipantCIH1.png)
If you are just joining in you can visit here!
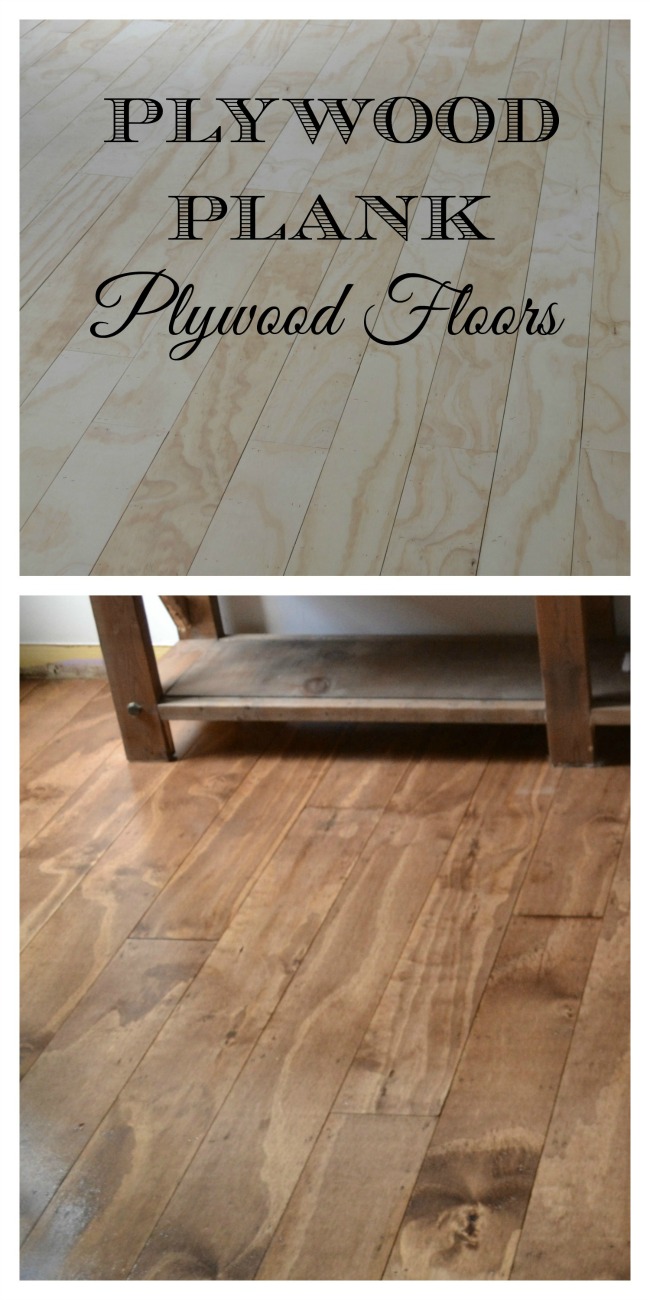
Am I ever see glad to see the back side of week four! The plywood plank floors are done!!
This post may contain affiliate links for your convenience, to allow you to find a similar product used in this project without changing your cost!
LOVE, LOVE, LOVE!
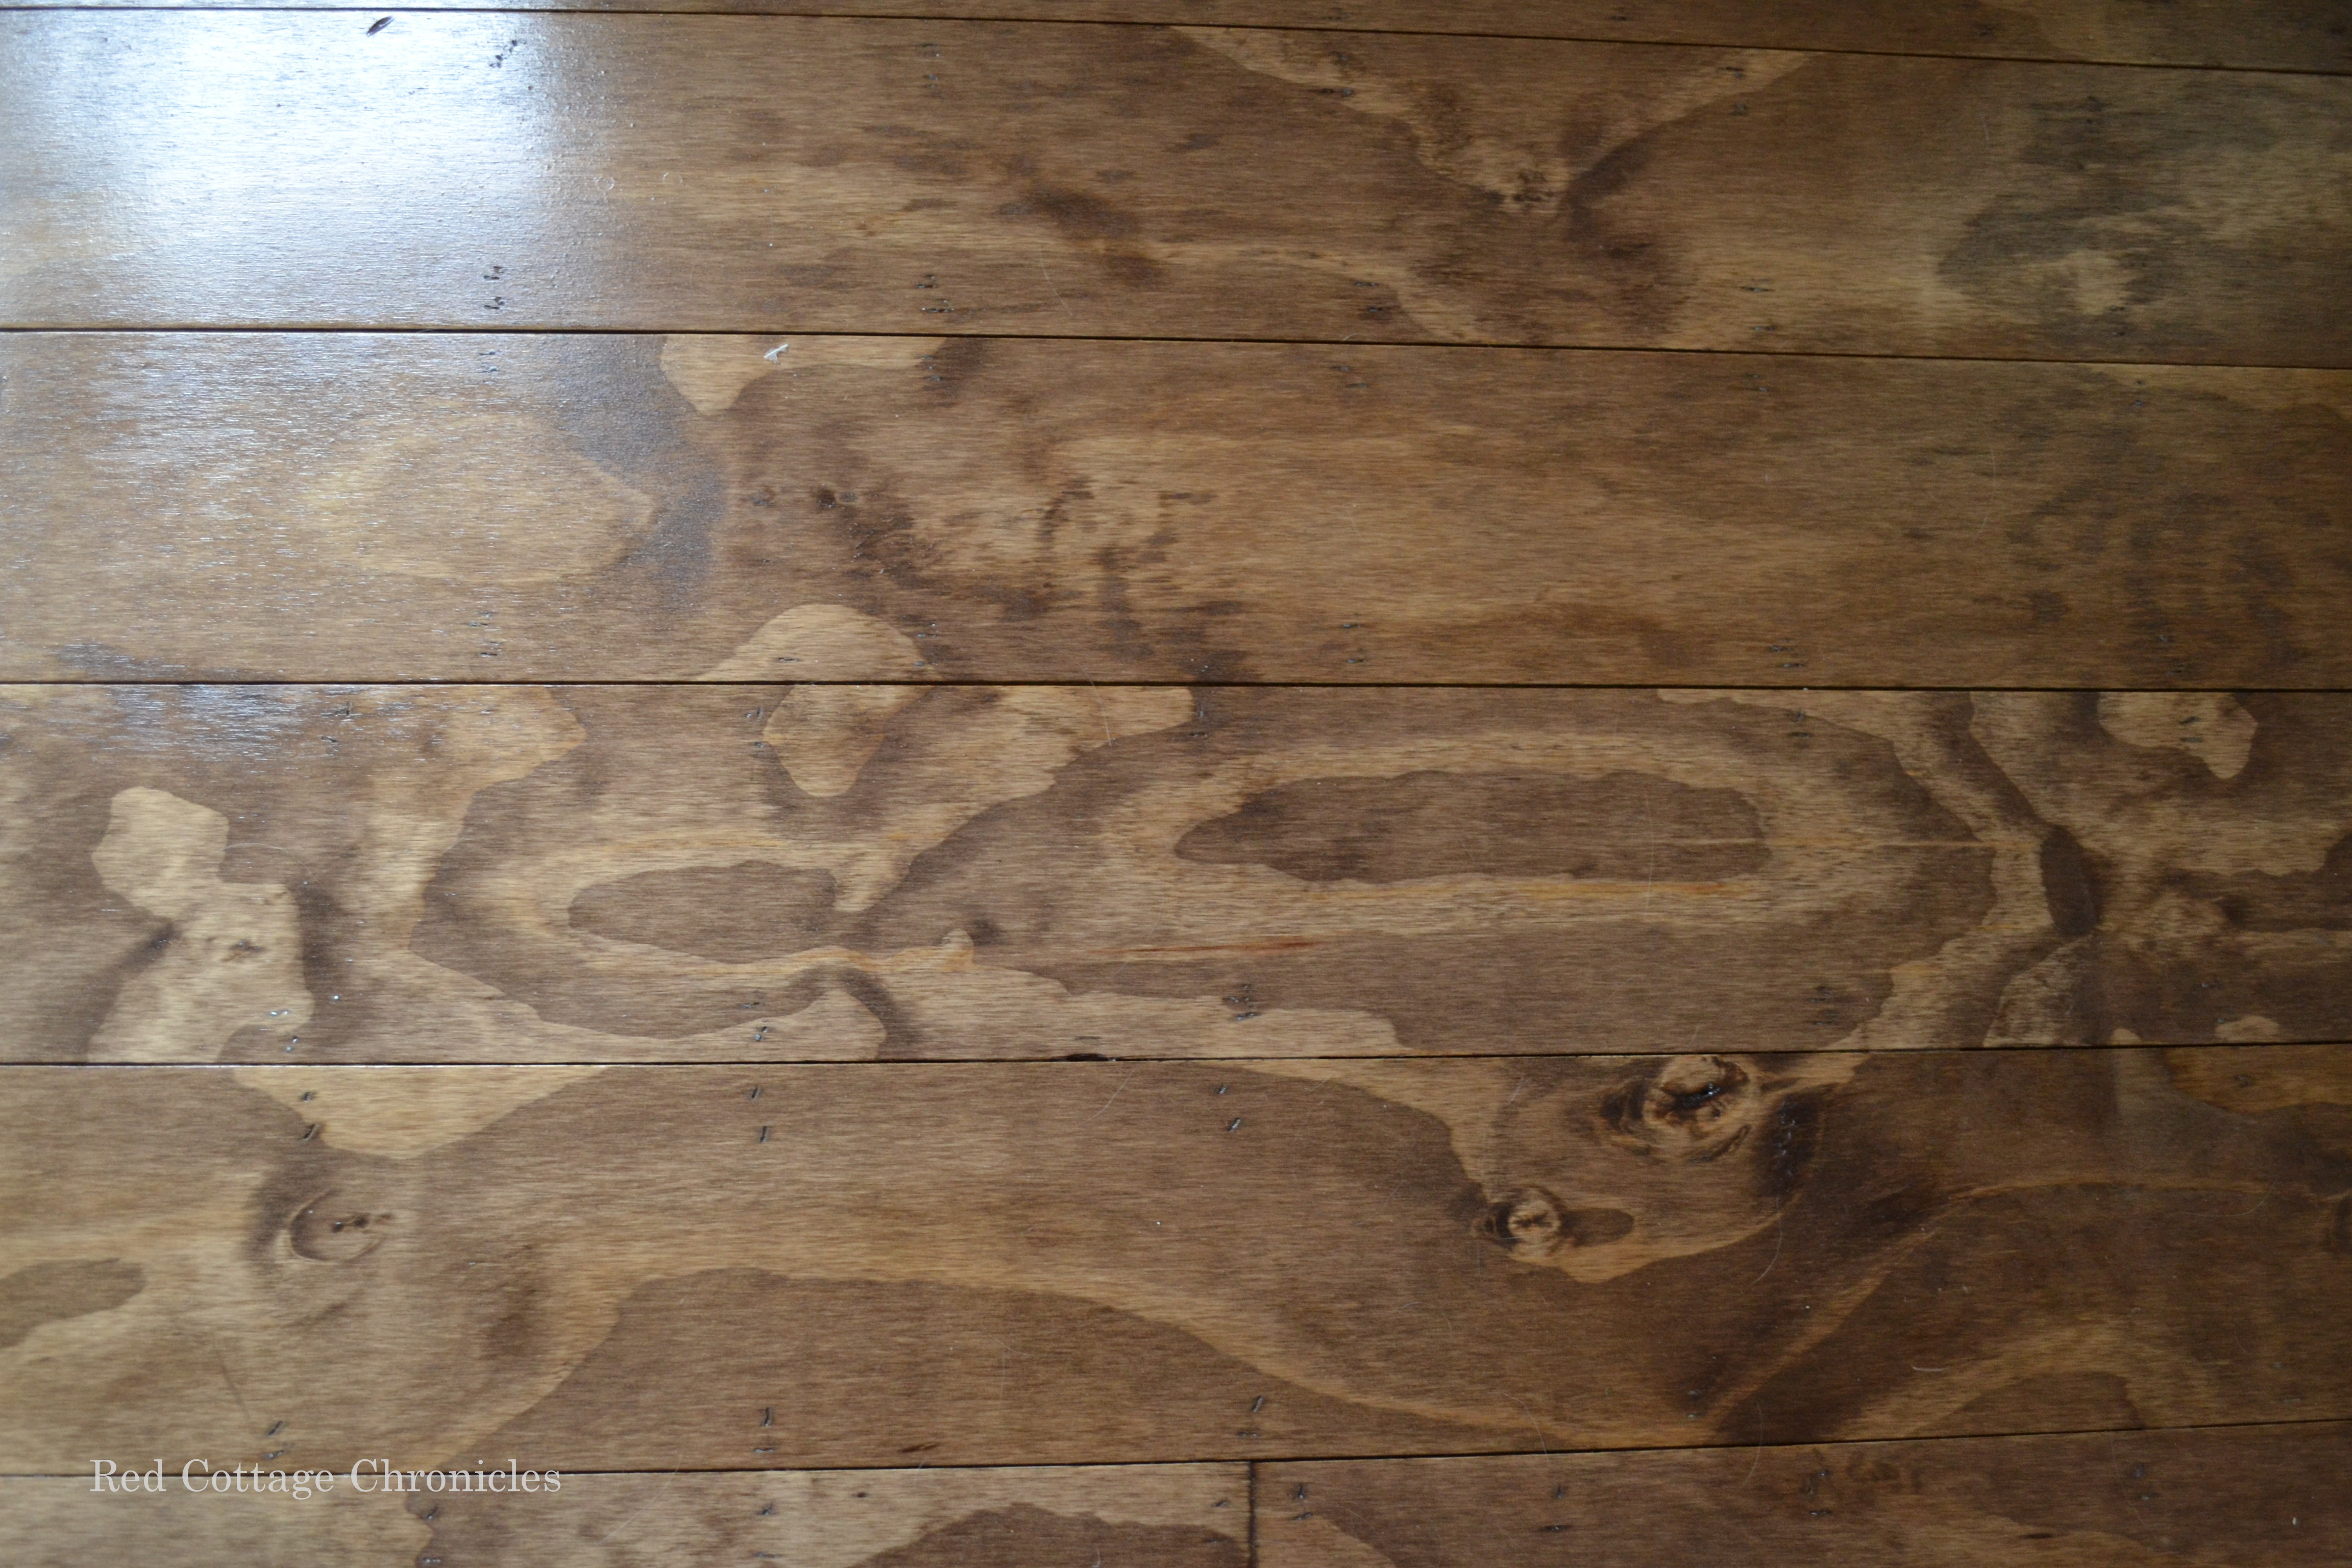
They are the perfectly imperfect. I love the color. They actually look they have been down for a while and lived on, yet have that beautiful sheen you get with brand new floors. I love how the stain pooled around the ends of some pieces and not others.
So lets have a look at the week in pictures, shall we.
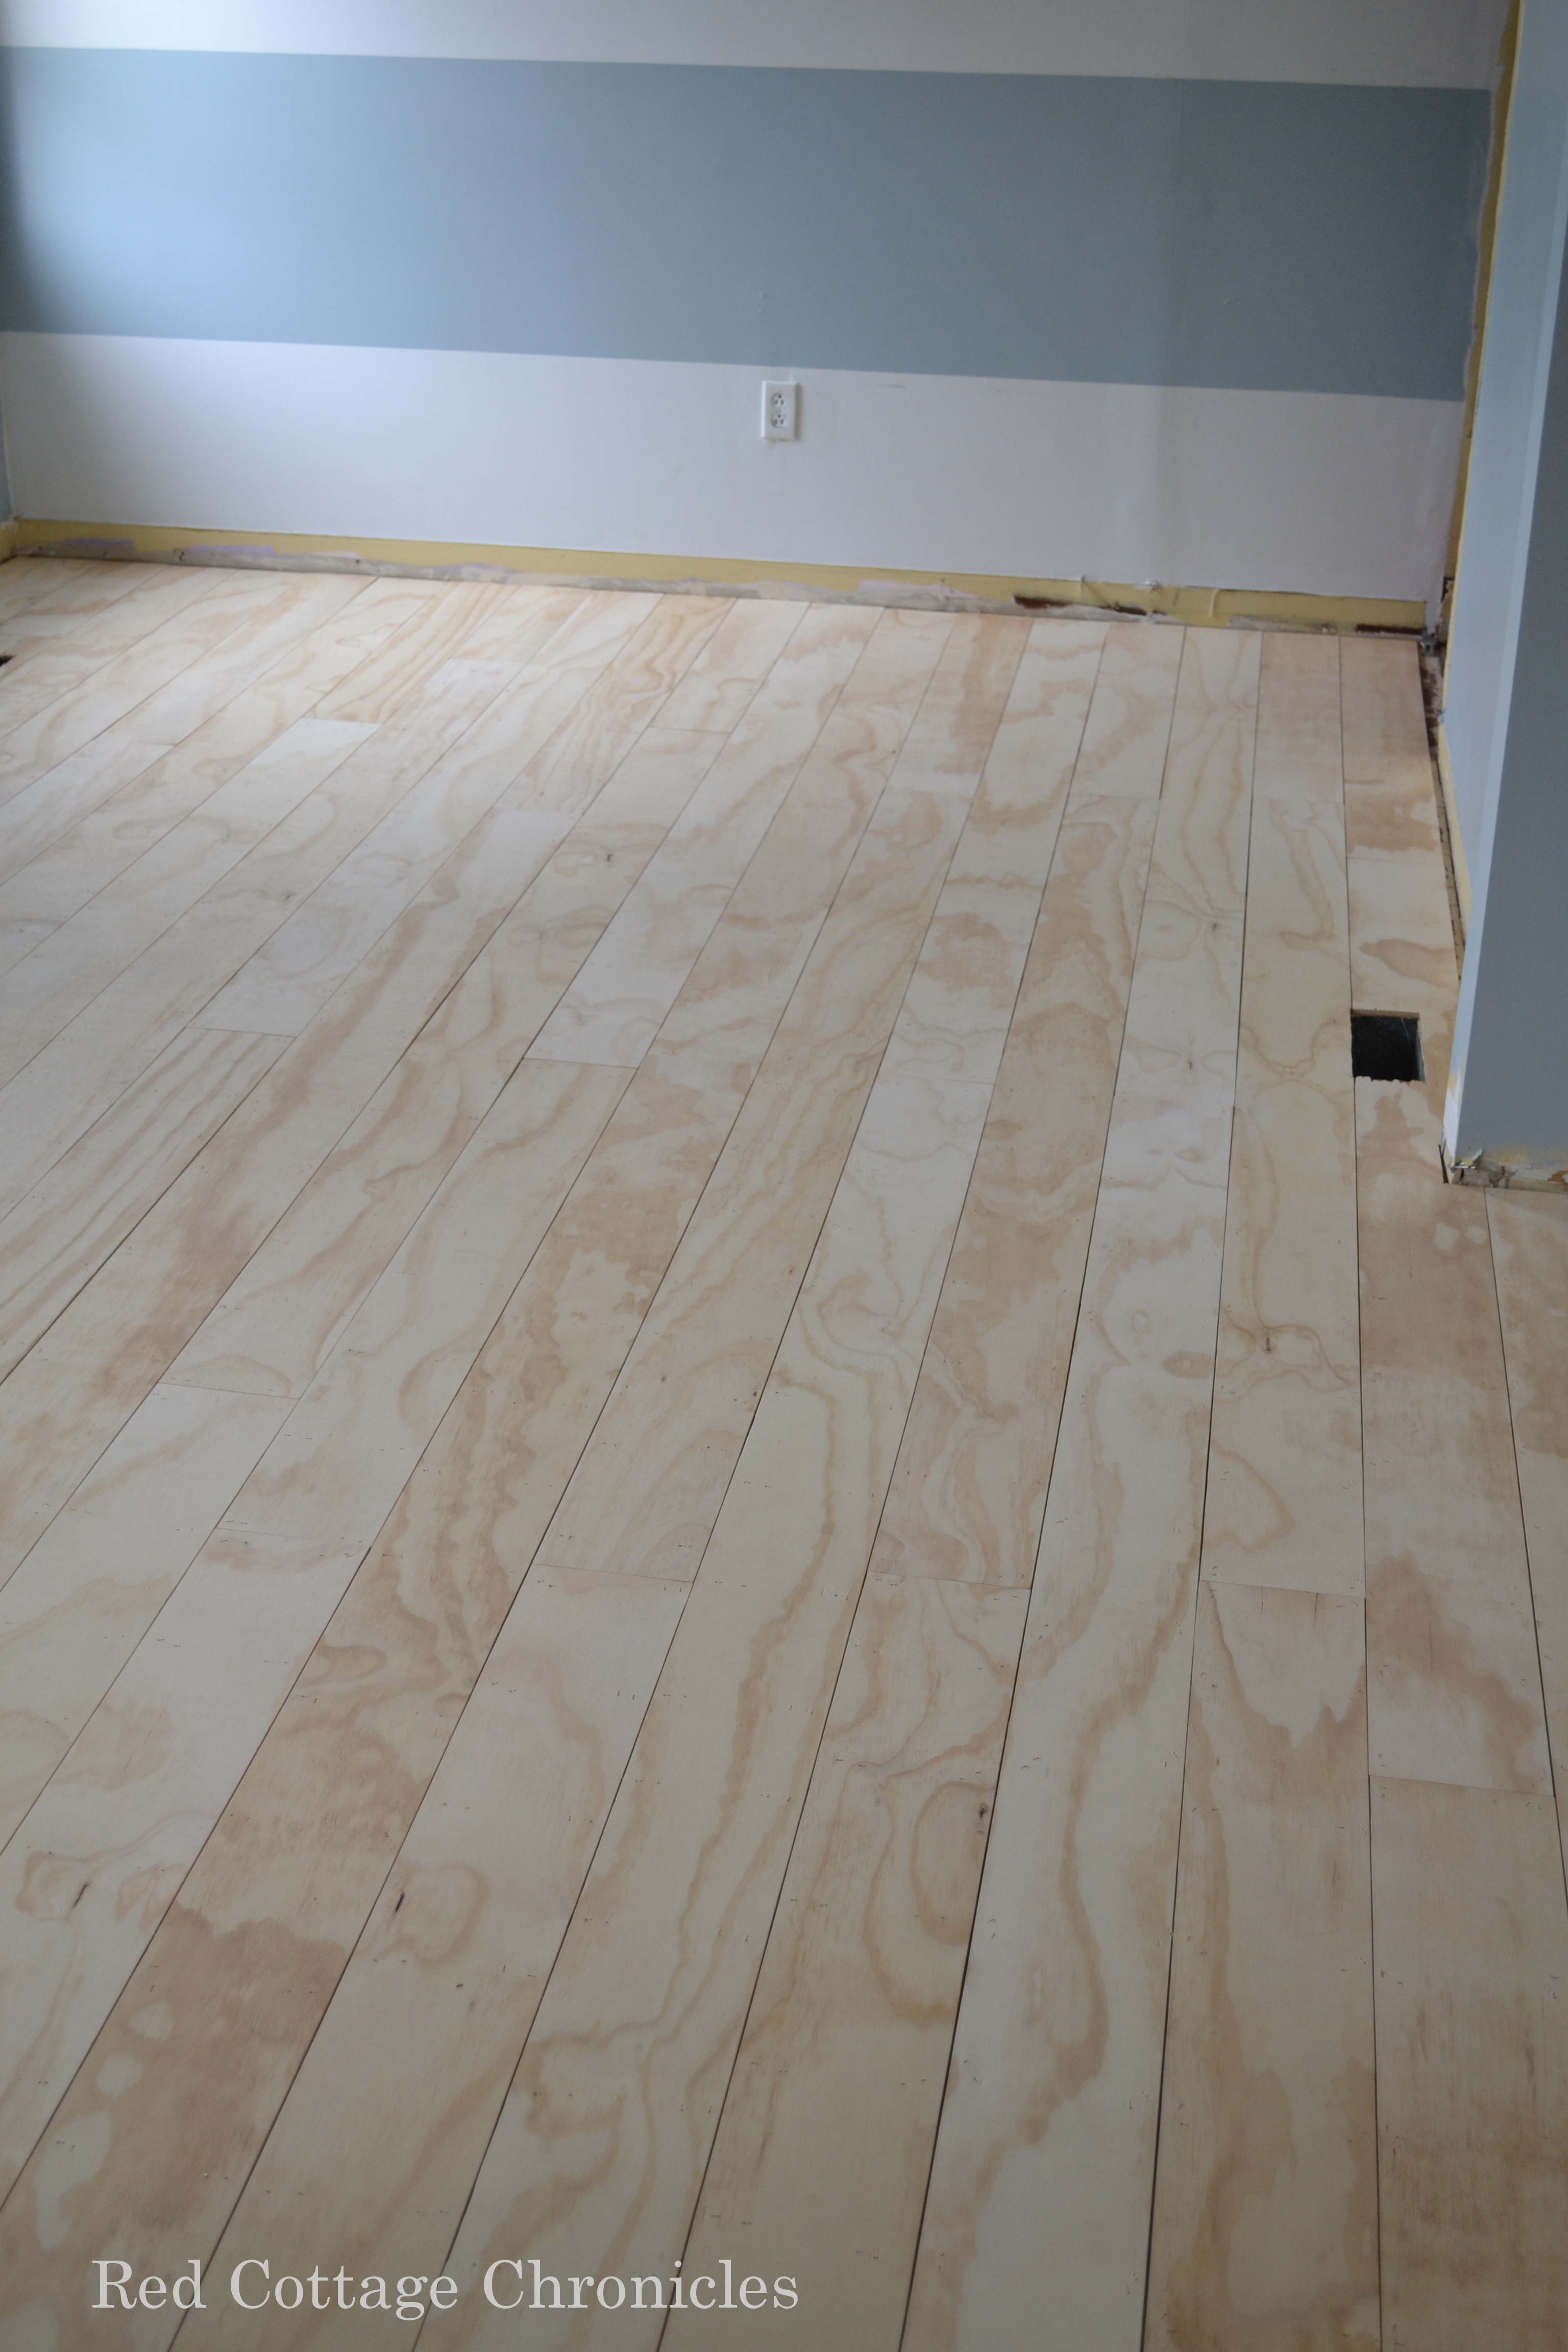
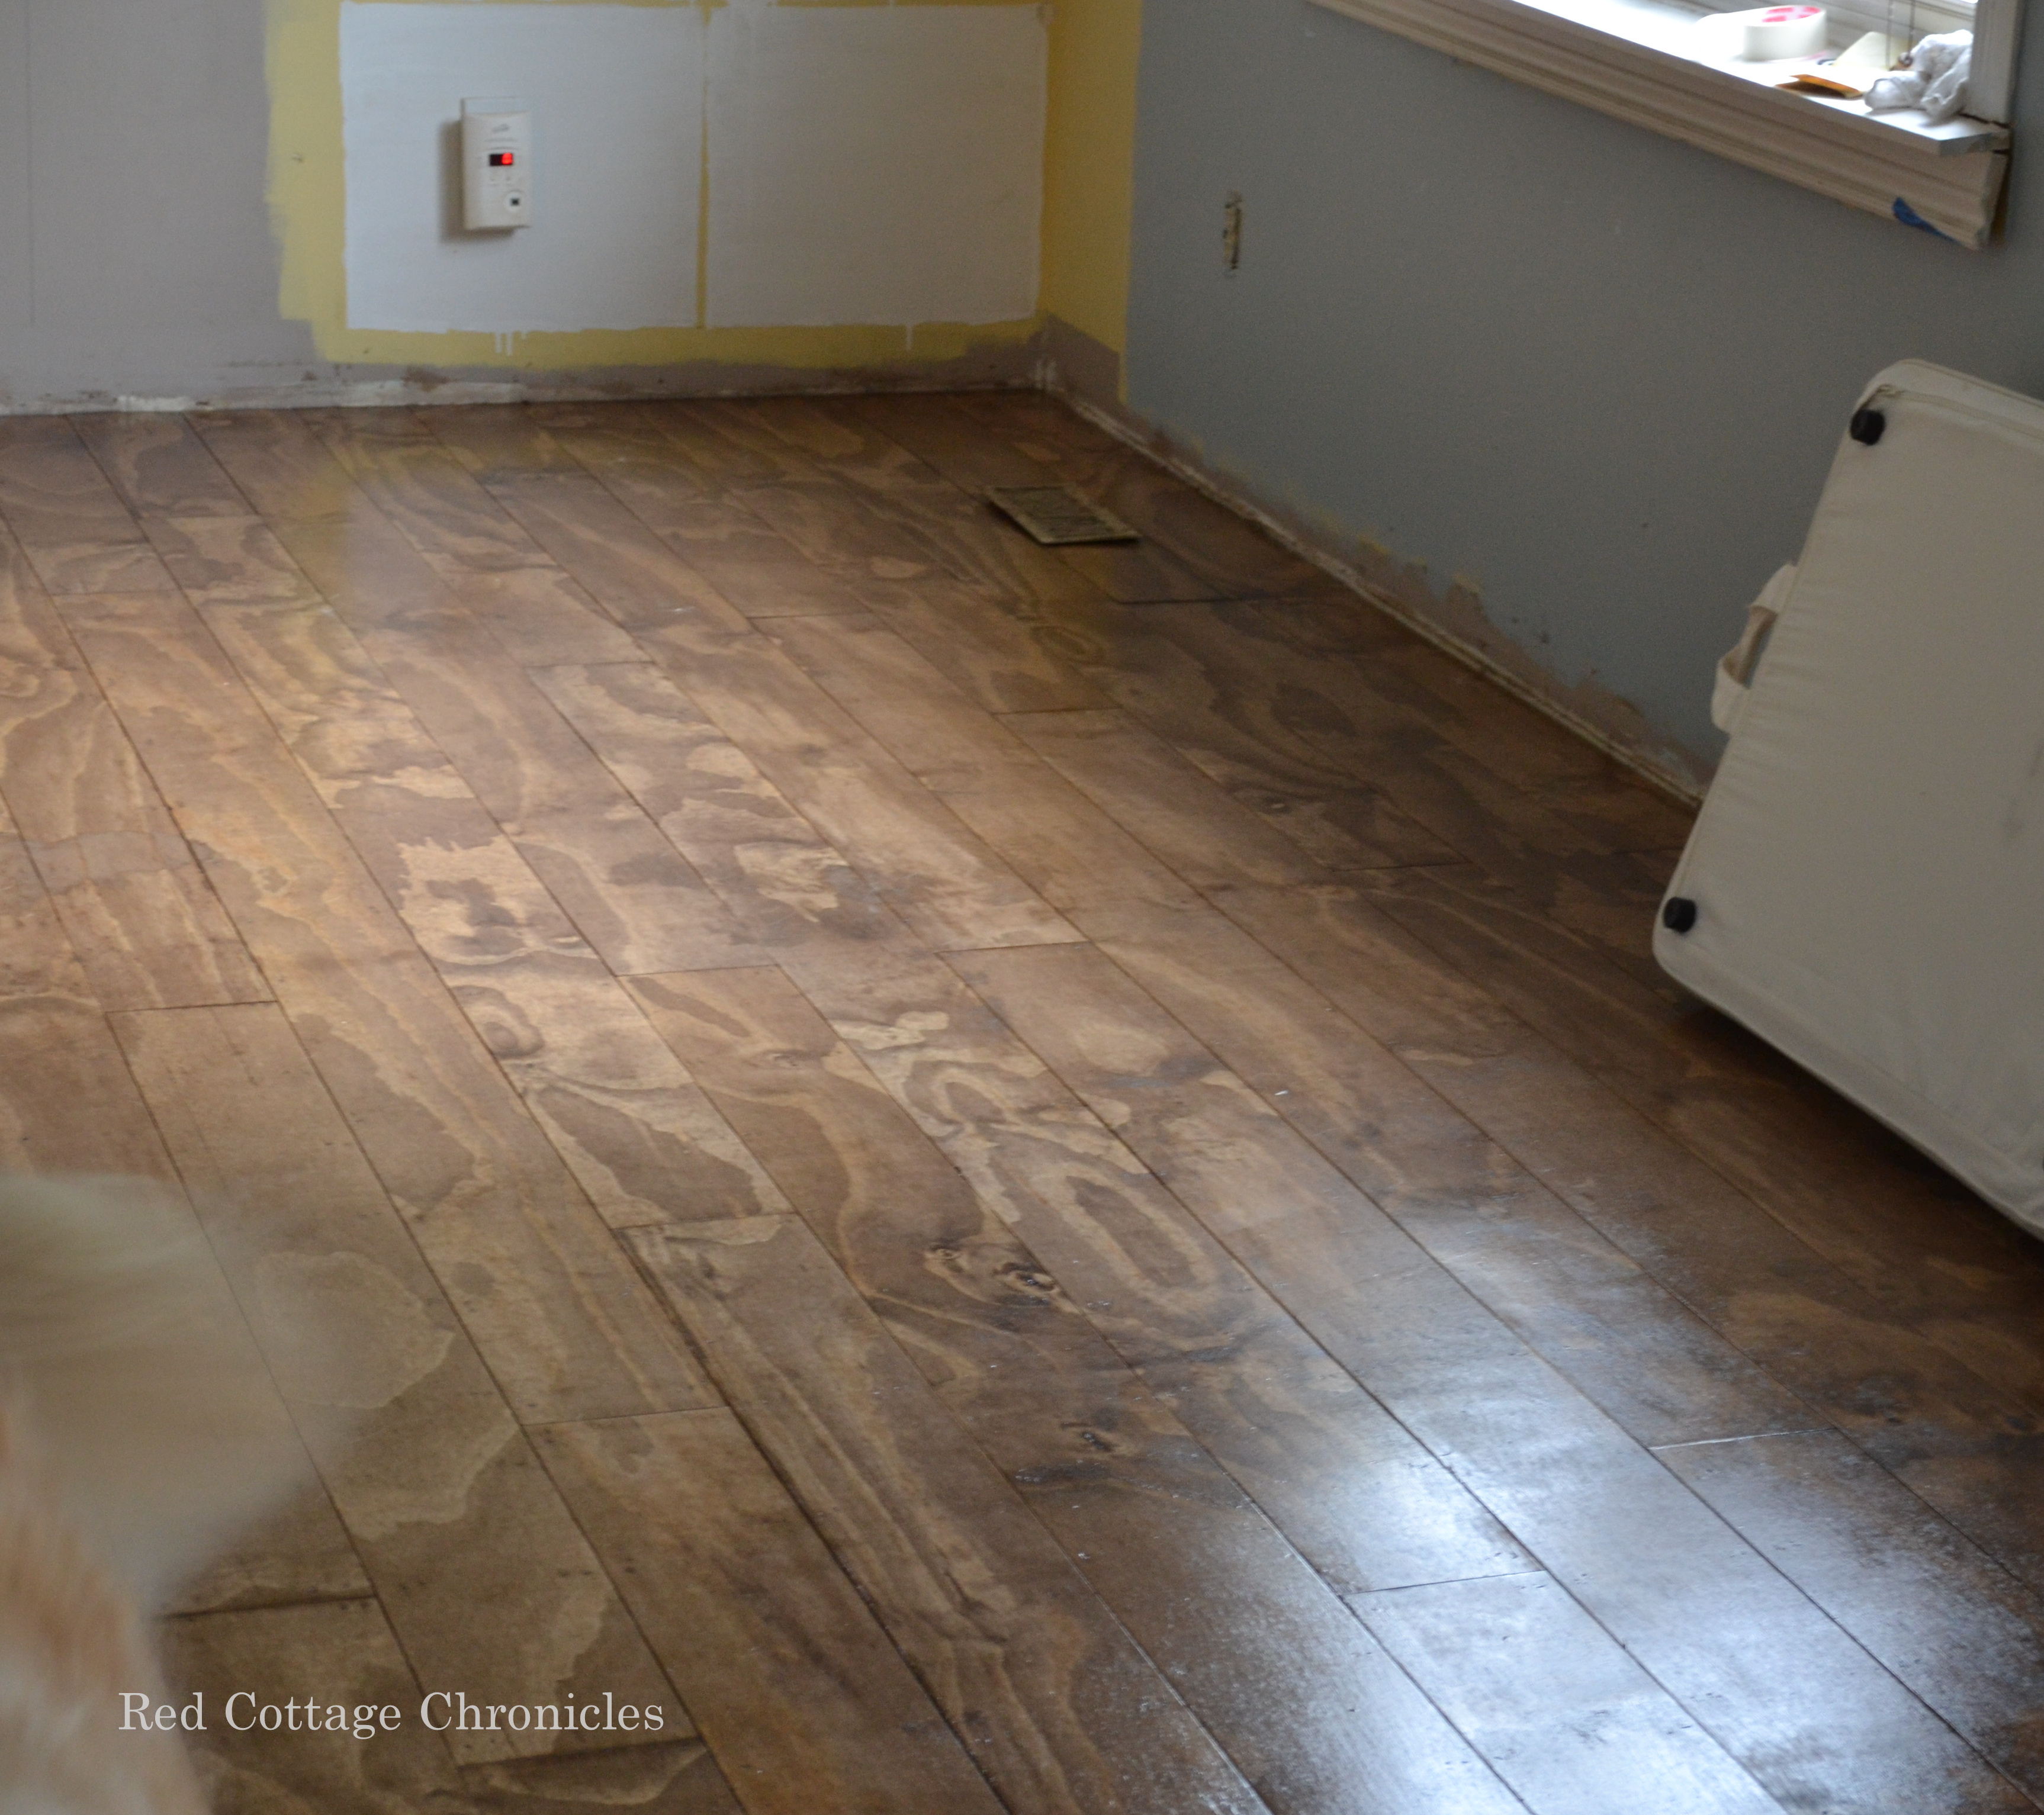
This is where we were at on Thursday evening. All the planks laid.
This is what we did on Good Friday! Can you guess what color we used?
From here we spent the night at my sisters! It was hilarious to see all the dogs hanging out together at her place. Our two goldens, plus her golden and two cocker spaniels. Throw in one moody black cat just for fun. Oh and I can’t forget the two cats up in the “man cave” Finny and Penny that belong to my nephew but were there for the weekend! We are a gluten for punishment!
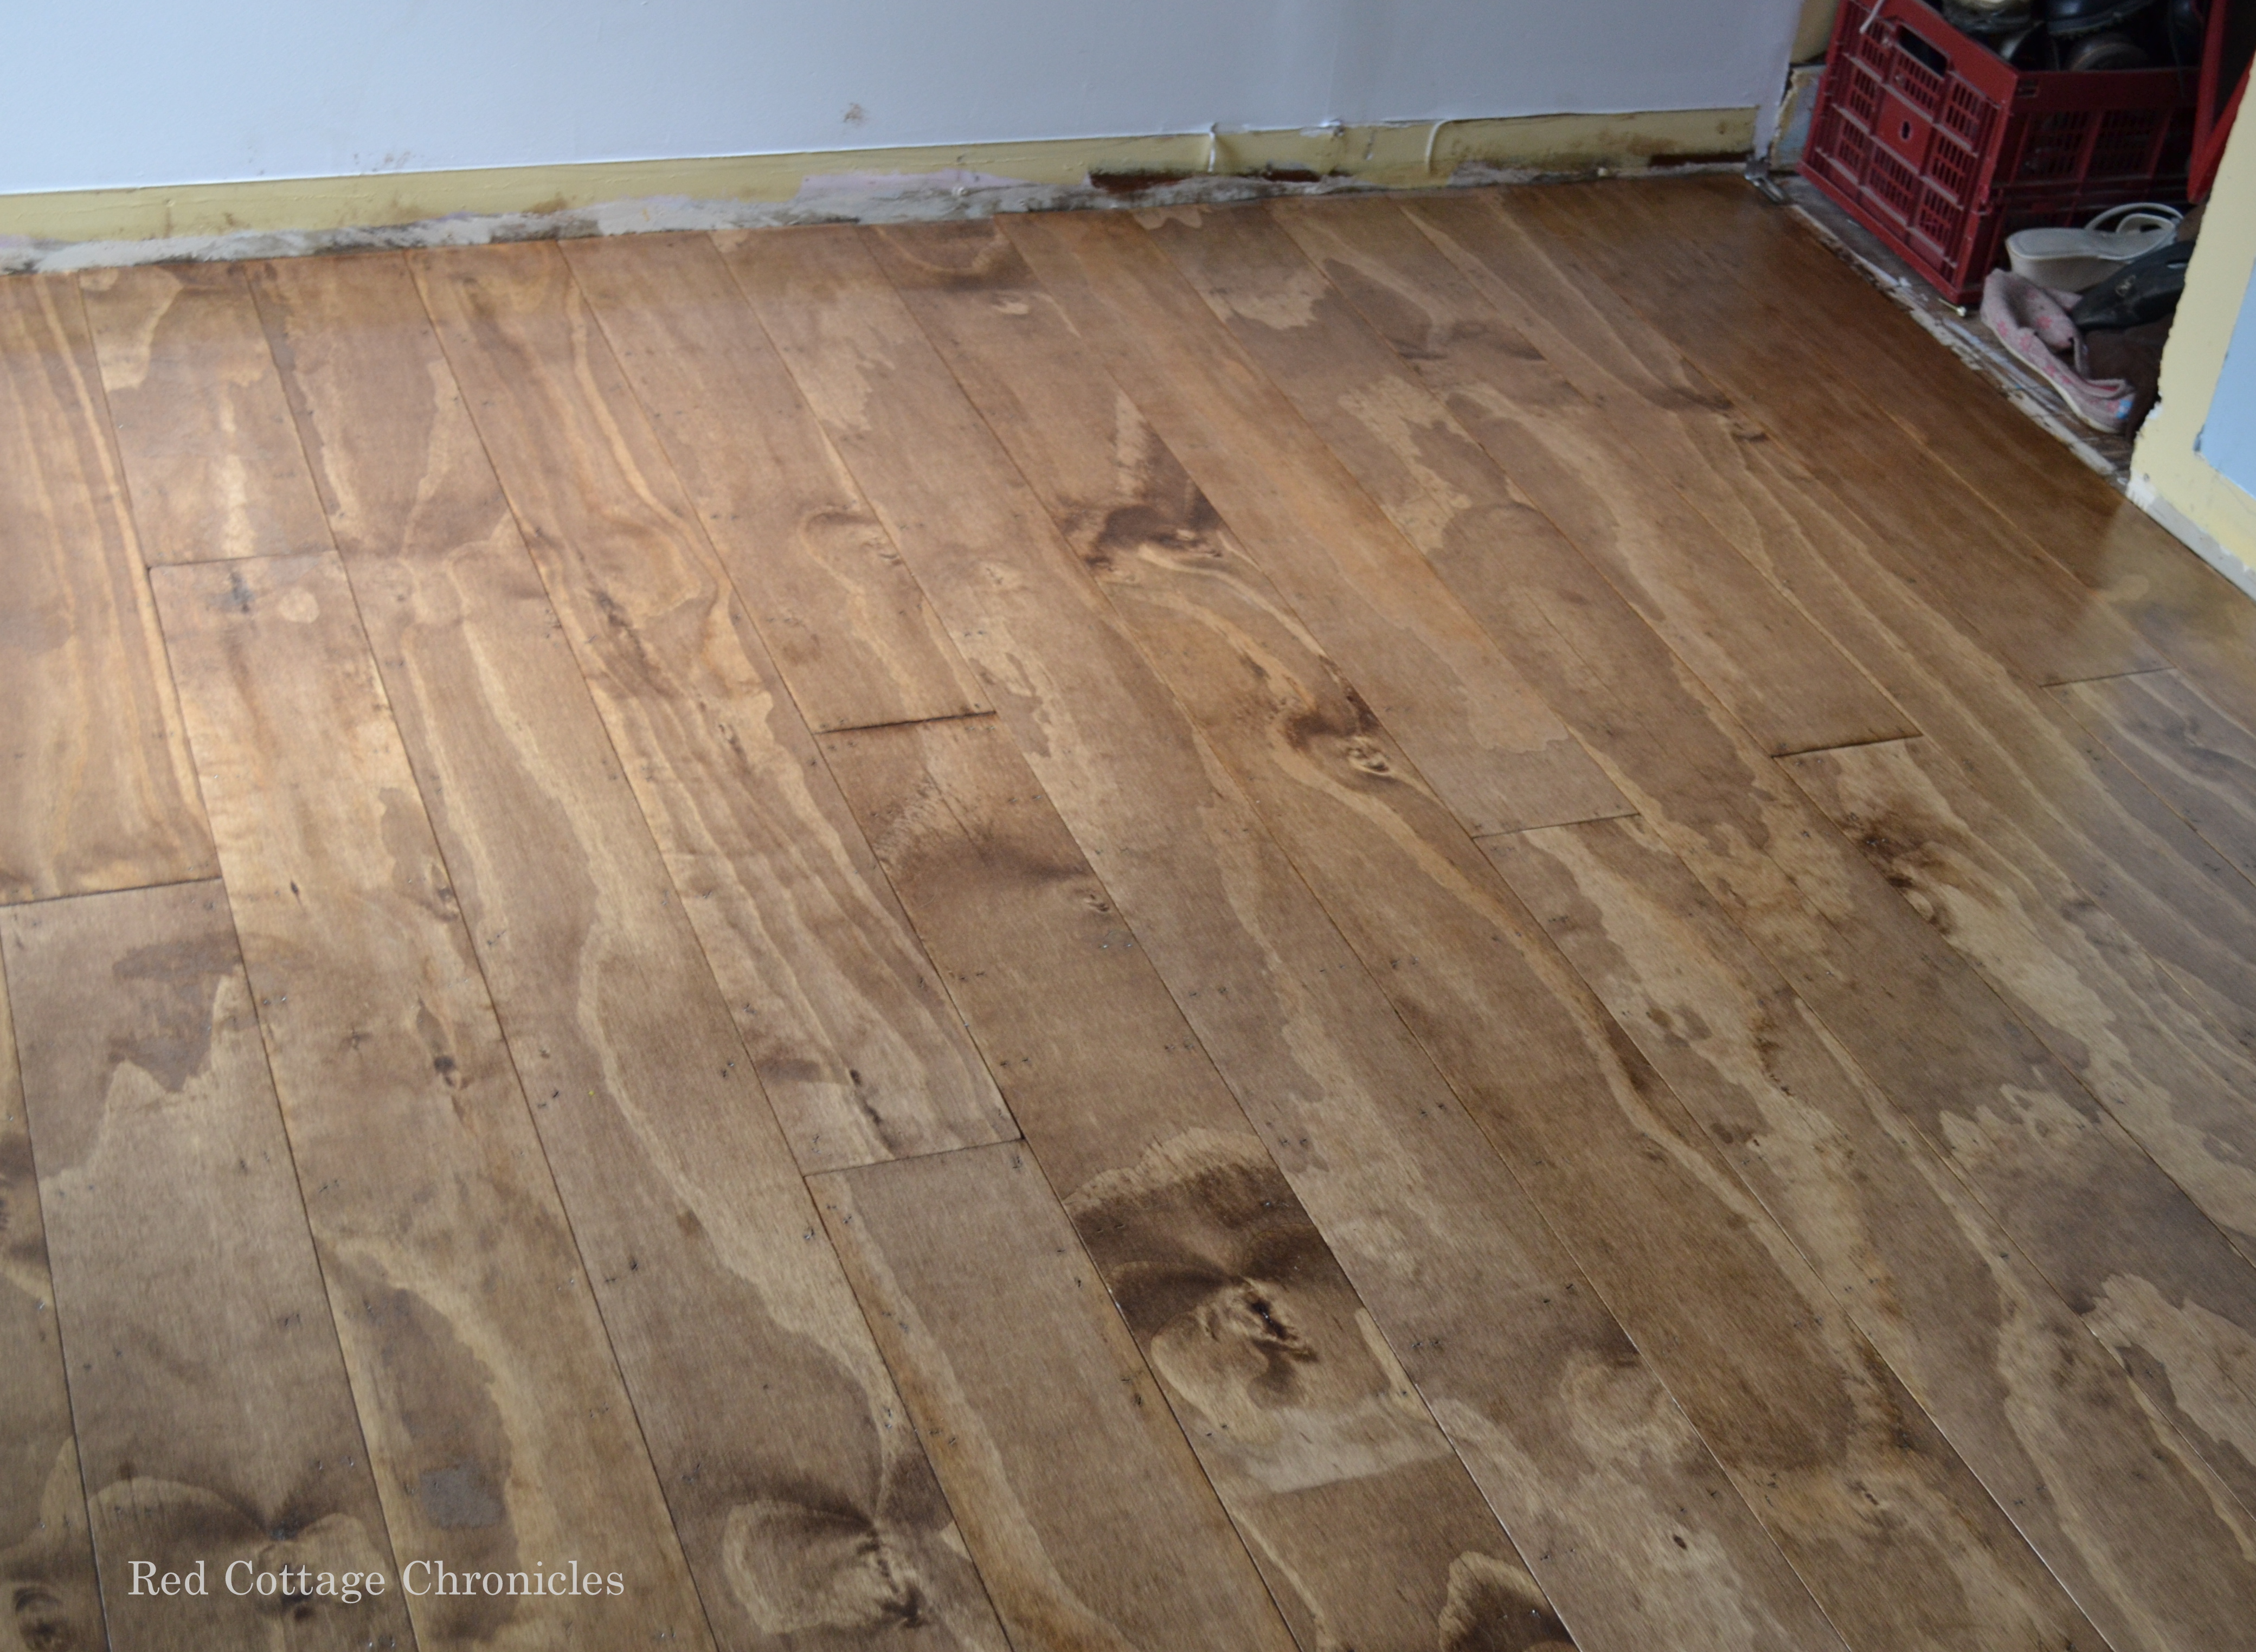
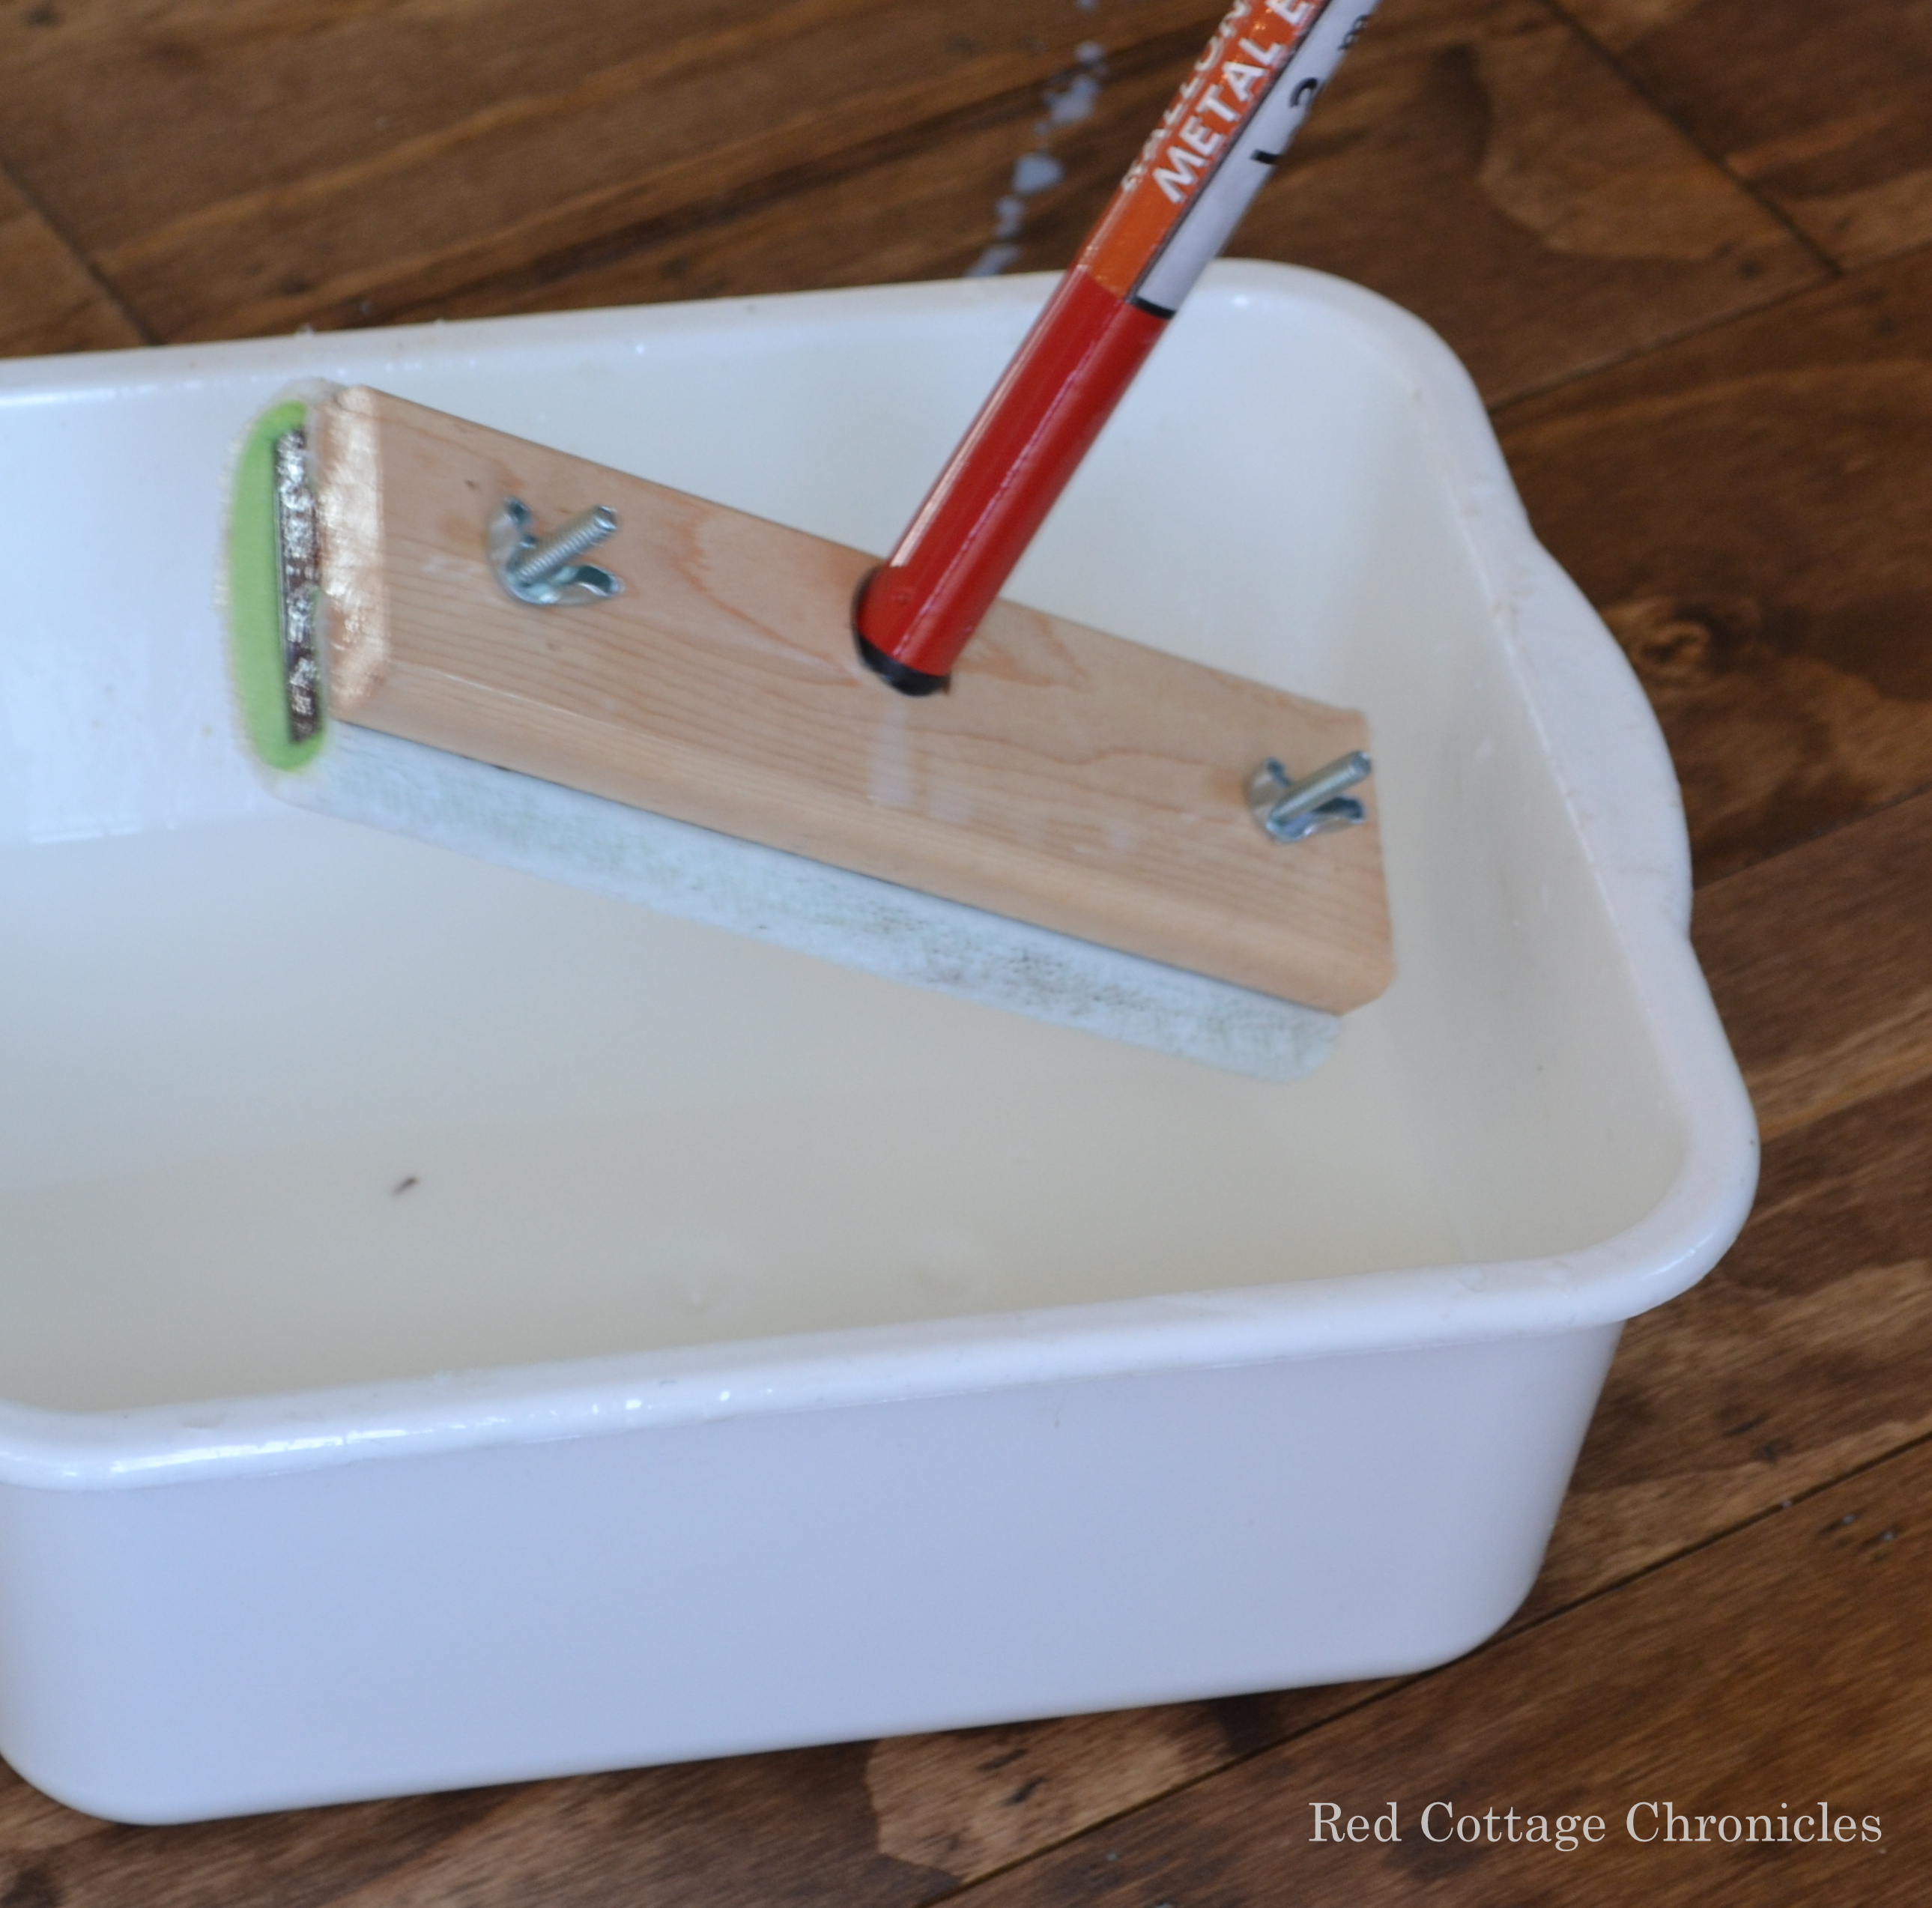 We had gorgeous weather on Saturday. Which was perfect, because I spent the day adding the polyurethane. We went with the 3 coats recommended. We were able to keep the windows wide open, which enhanced the drying time and the ventilation. It really was low odor though.
Then it was back to my sisters for the night!
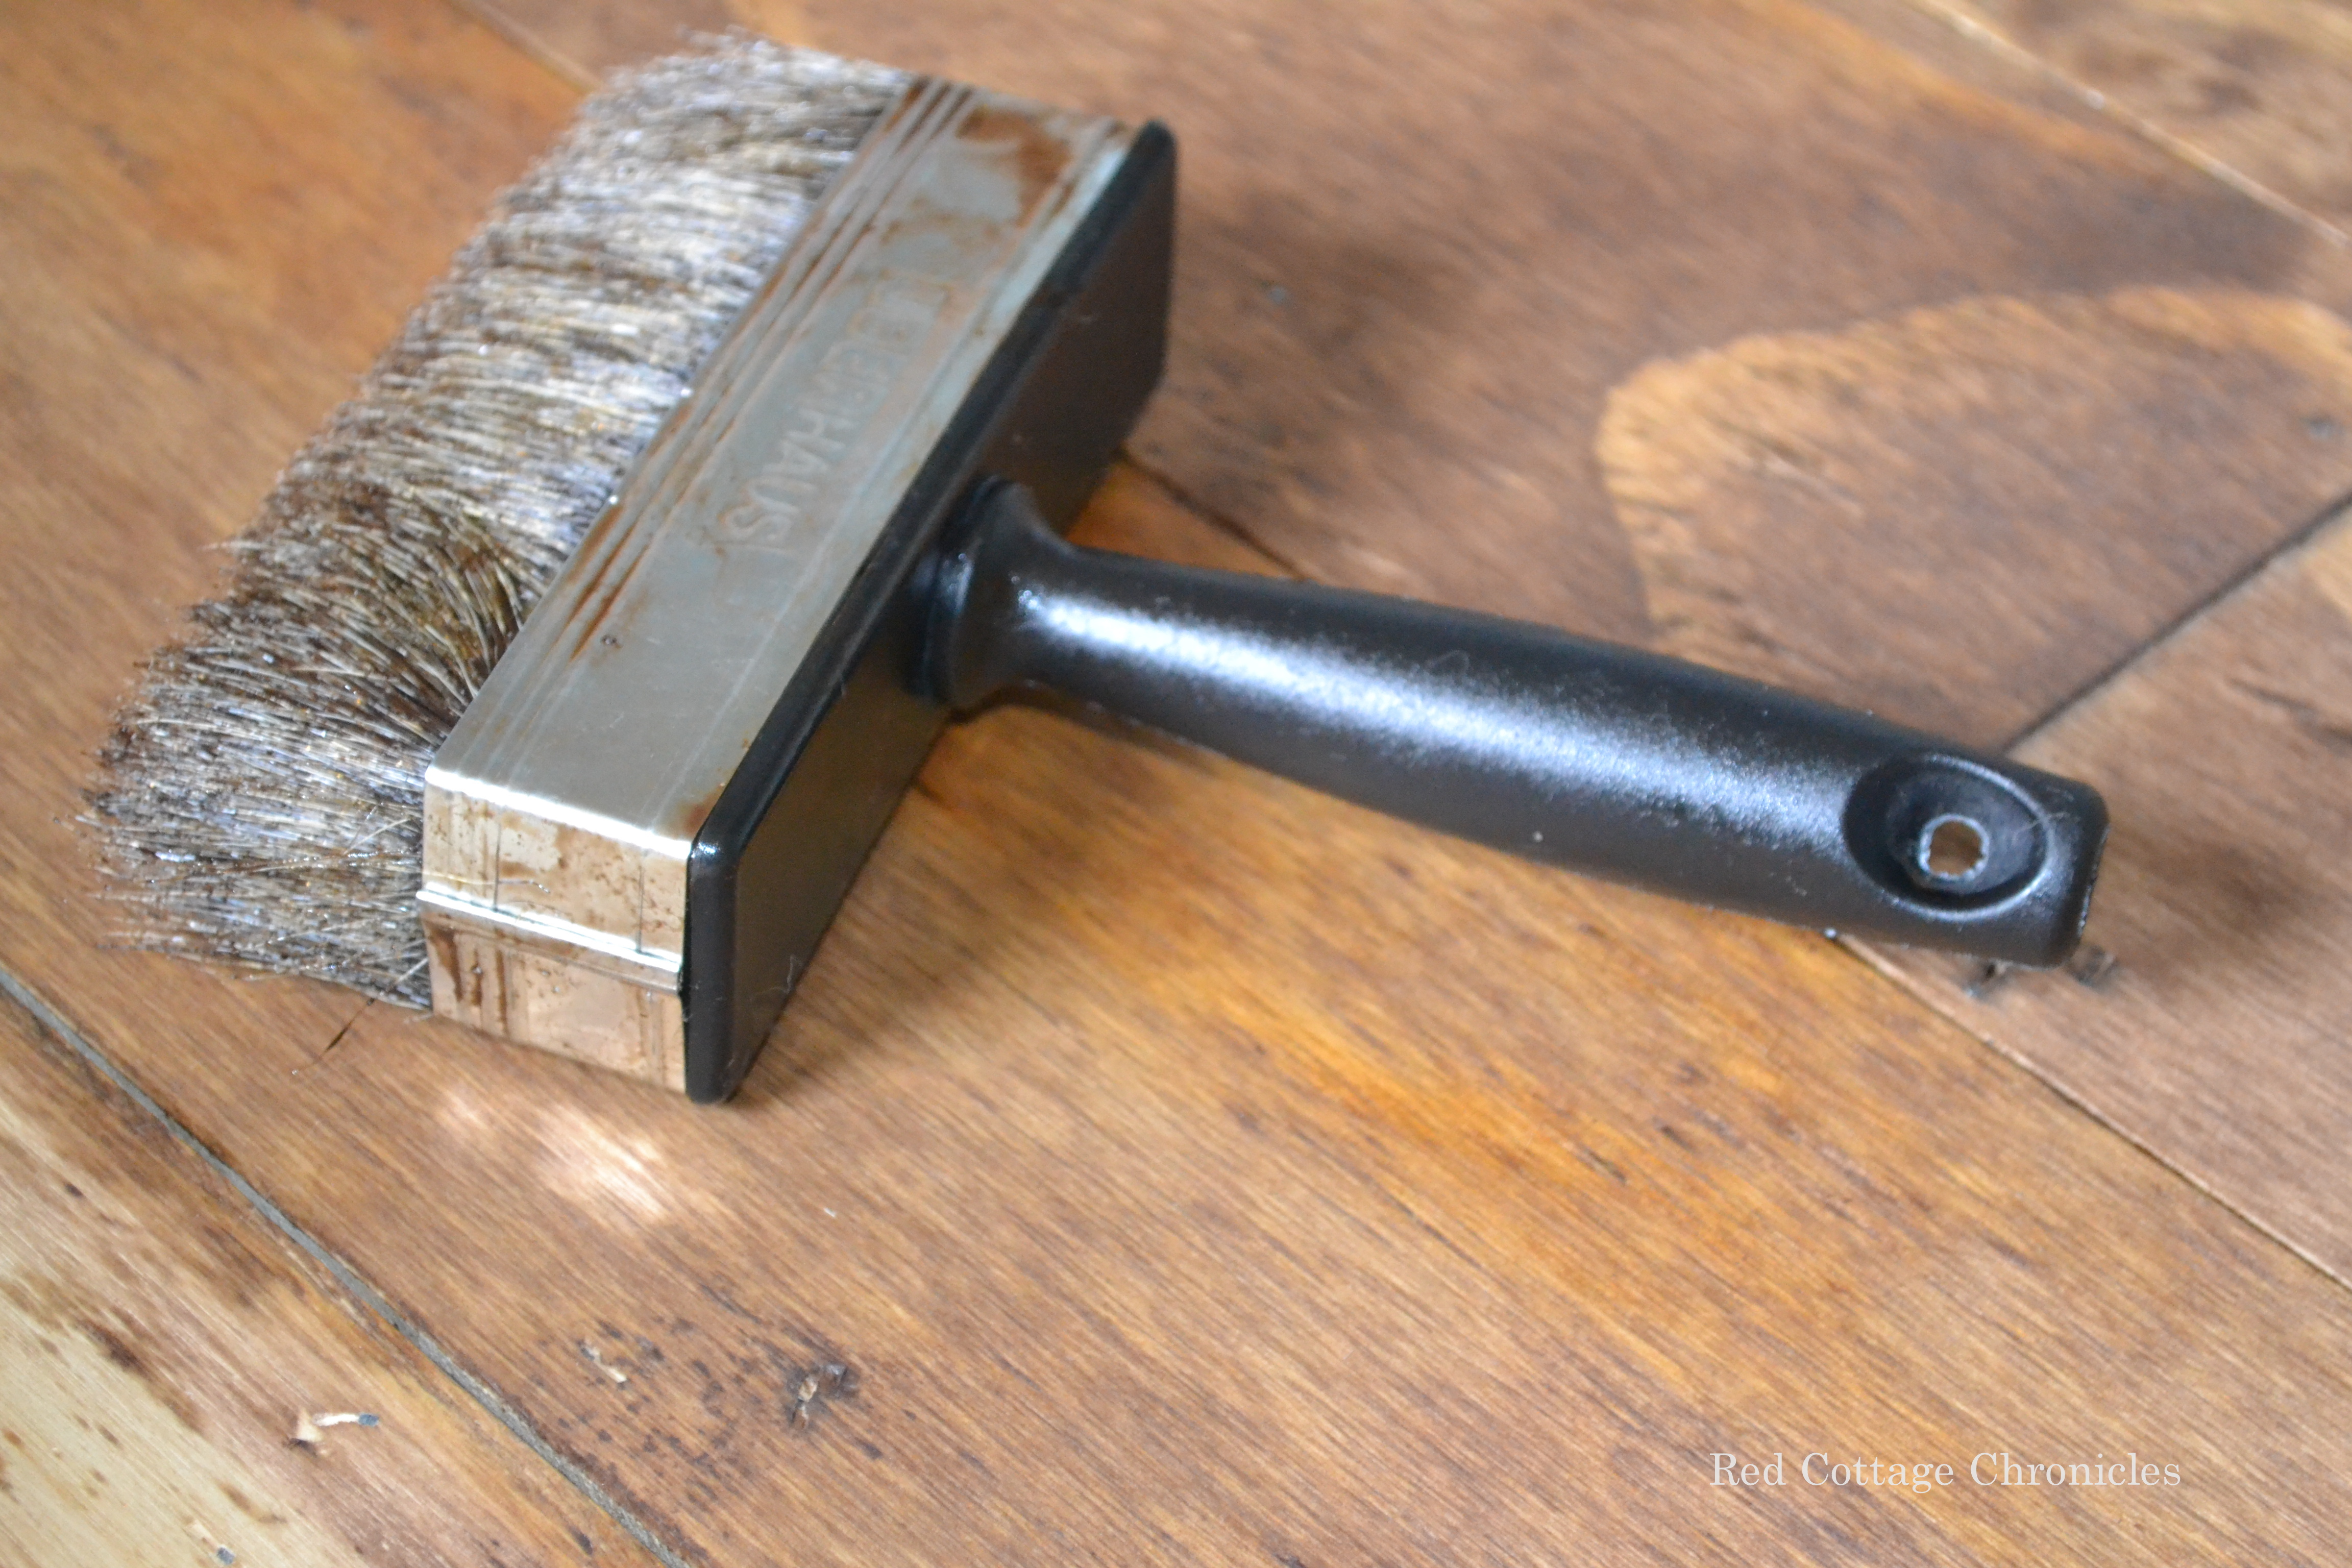
Sunday morning we went back for a peak! By Sunday night we could walk on it lightly and here is what it looks like now!
If you guessed that we used Special Walnut by Minwax you would be right! I was a bit panicked when it first went on. It had a very orangey undertone. I resolved to the fact that it was meant to be but when I started to put on the Varathane the orangey hue really faded and it is now distinctly warm brown.
I love all the detail and character that adding stain enhanced.
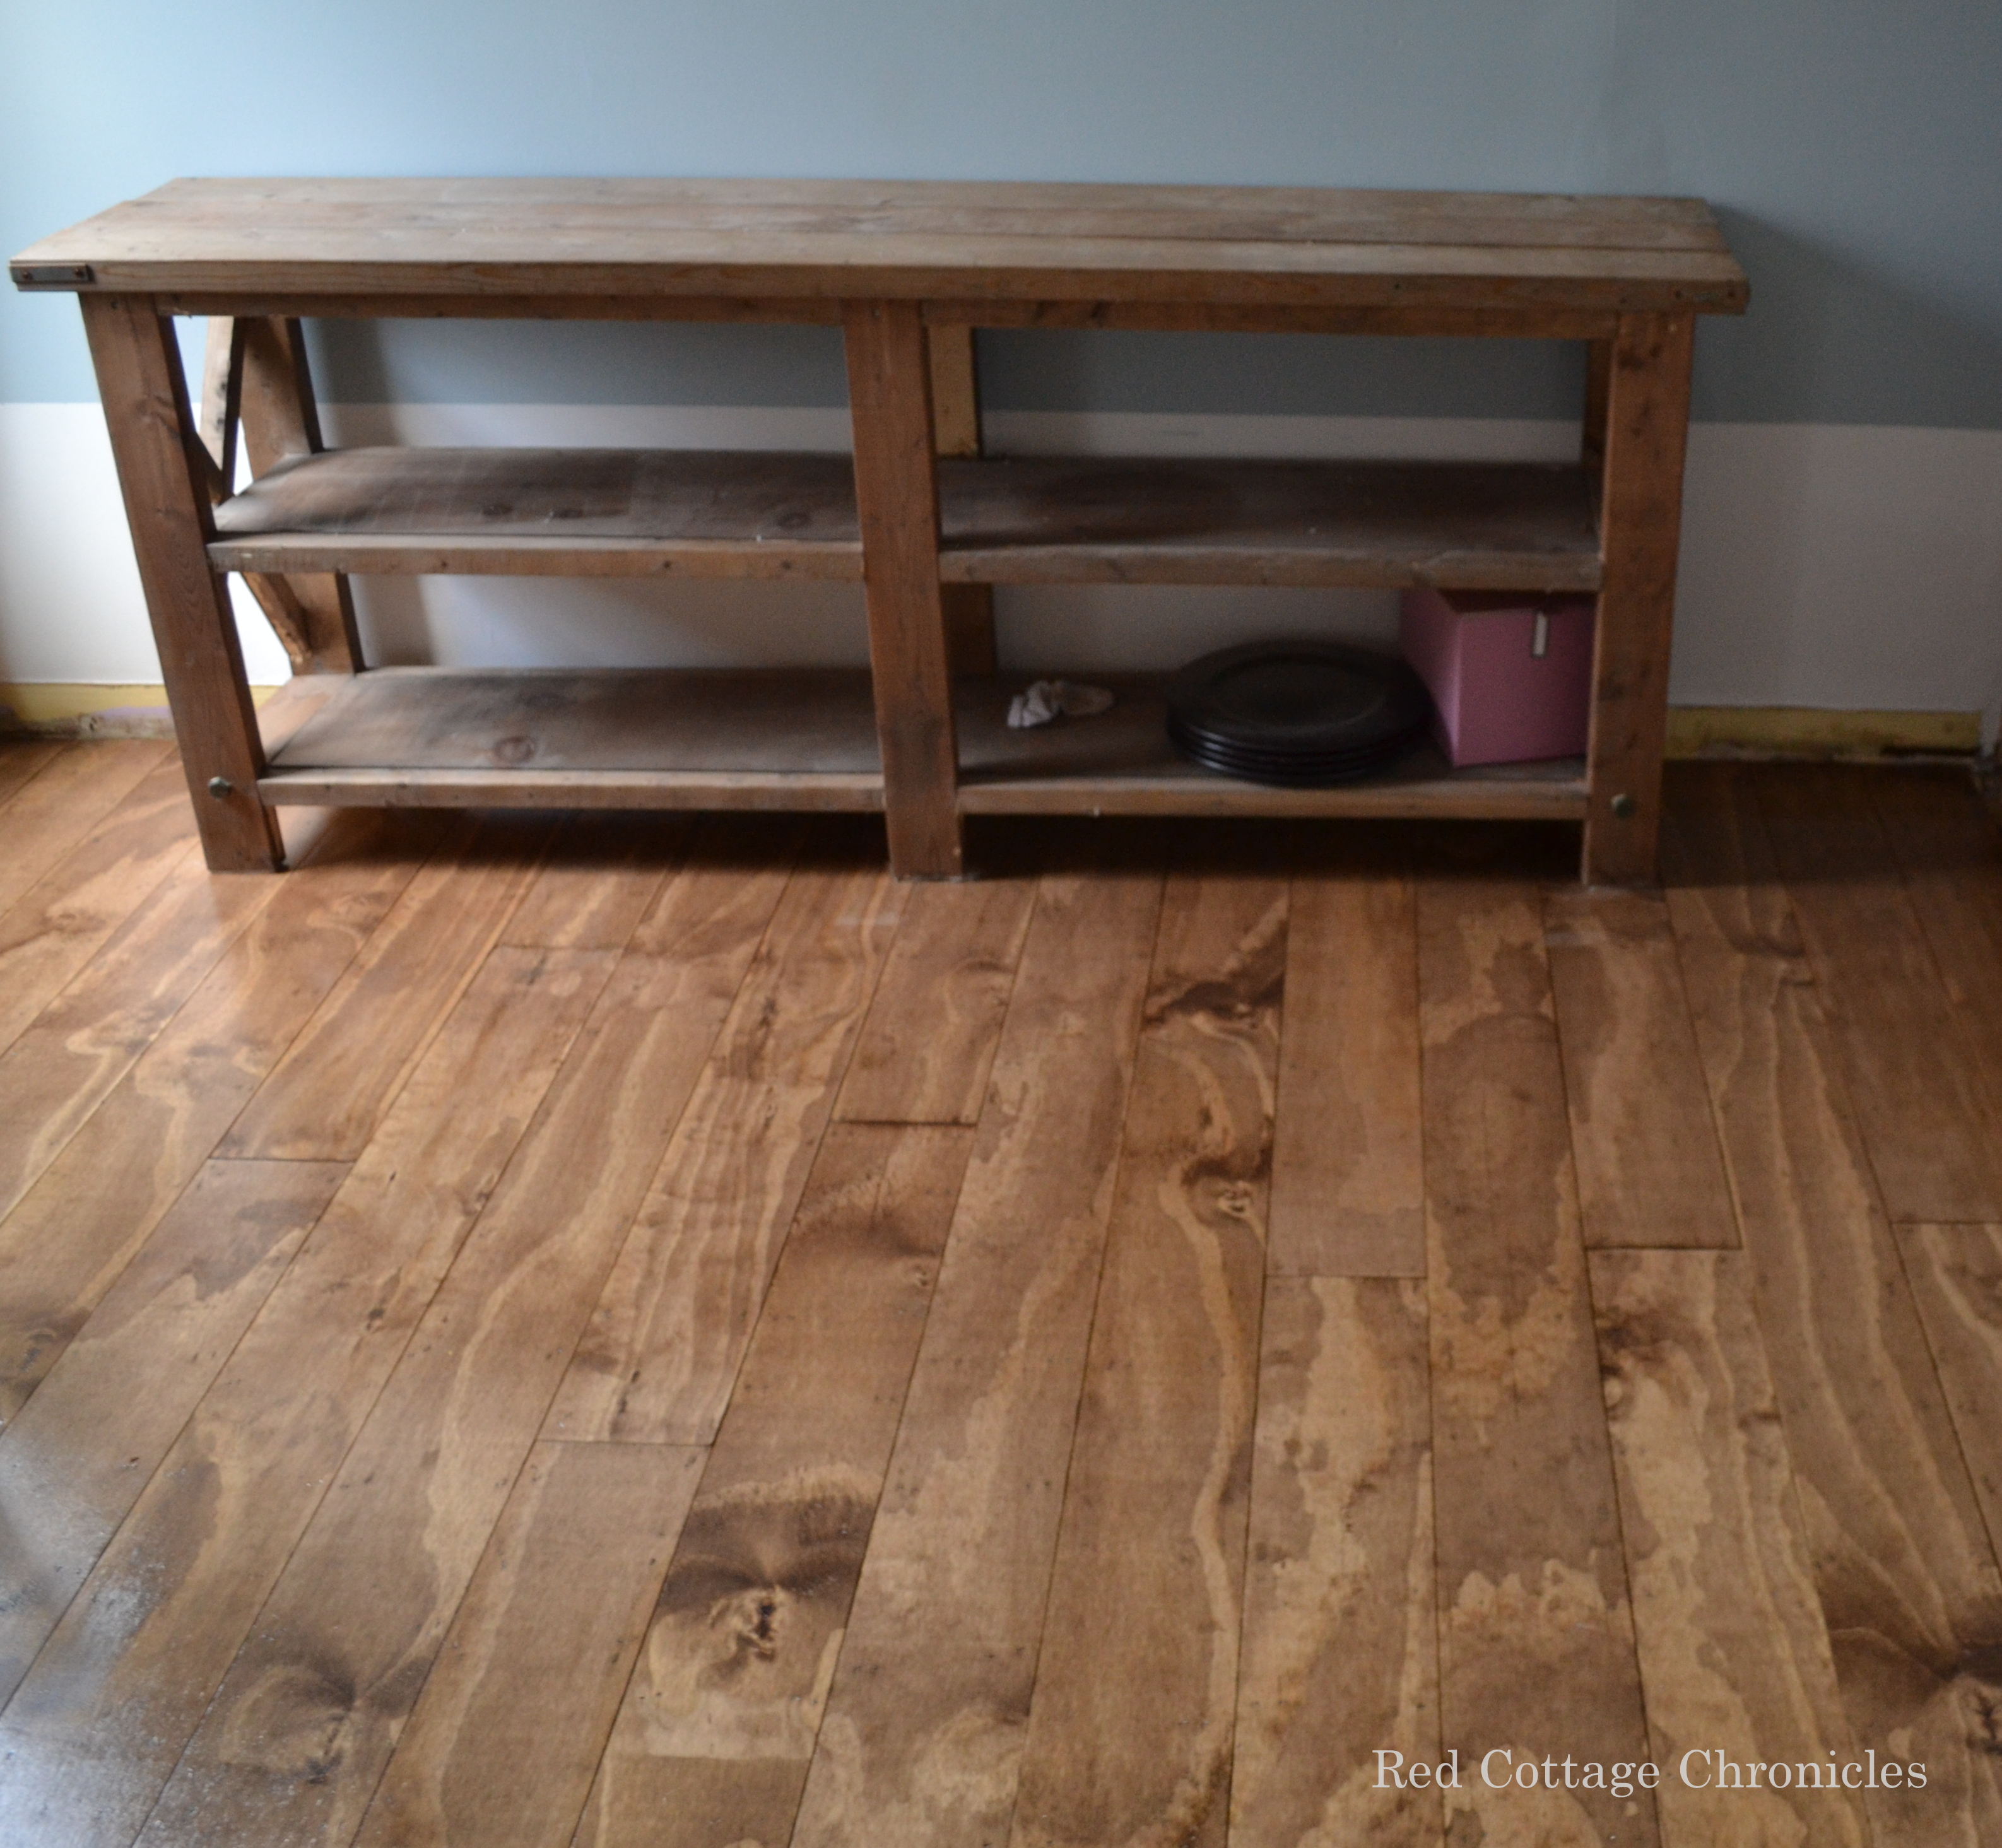
We are very happy with the way it looks with the buffet table that Tim built me (and the matching tv console not shown)!
After three long weeks I think the floor is finally ready for its close up!
So what do you think? Will you ever try your hand at a plywood plank floor? I plan to do a picture tutorial of the process we followed after the One Room Challenge is over!
By the end of the weekend we will have painted all the walls, painted and installed the baseboard and trim and ordered the area rugs. Also attending an auction on Tuesday hoping to score a nice dresser to makeover as a storage piece for right inside the front door.
I have a fairly good idea of how the floor plan will flow, so I am pretty confident we will get this room complete by week six!
You can see how the floors were installed in Week 2 right here! Want to see how they look with the room completed, click here!
Until next time…..


You are killing me with this floor! It looks so great, and I can only imagine how satisfied you must feel! Good luck this week.
Thanks Carol! It gives me the push that I needed to really get through this project…..and maybe start another one when it is finished!!
It looks FANTASTIC!
Your floor is outstanding! I can’t believe it is plywood and I love that you “planked” it and gave it a nice dark stain! well done!
I don’t think I have ever heard of plywood plank floors but I like it.
Thanks Kerry! My husband waited until after we were done that he was skeptical of my plan, but is happy he let me go ahead with it 🙂
The floor is awesome! Can’t wait to see more!
XO,
Krista
http://www.goodwillglam.com
Boy they sure do look great! Good start to the room:)
It looks like a lot of hard work, but what a payoff!! Beautiful; I love the swirls that appear with the stain. Great job! Can’t wait to see how you outfit the room. 🙂
Thank you Carrie! I am so glad this part is over and I can move on to dressing the room!
Awesome!!! They are beautiful Maureen!!!
Thanks Lori!
hello floors look great but question we have a dog so does the top coating prevent stain or water damage
Hi Mike! Yes, the top coat does act as a sealer to prevent water from penetrating into the wood. We do try to avoid spills, but also have two drooling Golden Retrievers, with wagging tails that have caused a few glasses to go flying! I can’t say we have had any stains at all given that we wipe up the spills as soon as the happen. Now, a word of caution. The plywood we used is of a softer wood and hence are at risk of scratches. For us, we wanted that older floor look, so the scratches don’t bother us, and a large area of the floor is covered with area rug. Hope that helps!
I am drooling over these floors! Looks fabulous!
Thank you Krystine!
That floor looks Amazing!!
Wow! I know it was a lot of time and work, but well worth it! Your floor looks amazing!
Love the look … the grain is fun and different and I like it!! Never heard of plywood planking … Applause!
Your floors are amazing! Great job!!!
Wow! The floors look amazing. Didn’t know you could use plywood planks for floors. Great job!
The floor looks amazing! Never would have thought of using plywood plank floor! Love the character of the floor.
How amazing!!! Those floors are stunning and I would love to read a tutorial on them at some point.
Winner, Winner, Winner….the floors look amazing. Great job.
i really like this idea and I think it looks great. Could you give an update on the plywood floor? How has it held up for the year since you installed it? Any squeaky boards? Approximately how many nails in each plank? Thanks so much for your feedback. i am hoping to do this as an interim project until we decide what to install for life.
Hi Erin! I can honestly say almost a year later and I still love those floors! They have held up remarkably well. We do have a large dog and expected some scratches (I am of the midset it gives it more character) so there are scratches here and there, but are not really visible unless I am looking for them. The finish is still fresh and new looking. I use Method wood floor cleaner with a damp mop once a week to keep them clean and this works well. I will be doing an update post with pictures soon!
I absolutely love this. We are working on our master bedroom closet & studio office. I had said this is what I wanted to do the floors. Great job!
Thank you Lynn! While it seemed like a daunting task at the time, I would do it again in a heartbeat!! Choosing the color was the hardest part!!
I love your floors and am in the process of doing something similar at our home. Your right the color is the hardest part! What brand of stain and what color did you use?
Hi Nate! We used a stain by Minwax (if I recall correctly) the colour is called Special Walnut
Oops! I just saw that you used Minwax Special Walnut! It seems so much lighter than the sample you showed in a different post? Why is that? Can I asked how you applied the stain? Brush? Rag? Did you let it sit awhile or wipe it right off? Thanks!
I believe the sample we did two coats, but when it was on the entire floor I was really happy with just the one! We brushed it on and wiped off with lint-free rags, letting it sit for only a few minutes before wiping off. We actually poured the stain into a clean plastic dishpan that would accommodate the wide brush we used. For both the stain and the poly.
Thanks so much for the tips! I love the color and will be giving it a try myself!
No problem! Glad I could help 🙂
I absolutely love your floors and look forward to doing this in our home. I was wondering what brand and sheen of polyurethane did you use?
Thanks so much! We used Varathane Diamond Wood Finish for Interiors. I found it went on very well and was easy to work with. Just be sure that the surface is completely dust free before you begin!!
I know this is an old post, but it just helped me convince my wife that regular plywood makes for a beautiful floor. I now have a new project..
Almost 2 years in and we are still in love with our plywood floors! Would love to know how your project works out 🙂
What kinda of plywood did you use and what size.
We used 3/8″ good one side spruce plywood! And I will mention, that we took our time to look through the sheets to select ones with nice notes and character in the wood!
Maureen,
Did you sand the floor at all during this process? I am dying to replace my carpeting with plywood floors!
Hi Melanie! We did not sand the floor at all, other than just giving the edges a quick sand before installing each board with a sanding block, to soften the edge a wee bit. Other than that, no sanding at all.
How did you link this together ? Like laminate flooring is notched an put together how did you so the plywood it looks awesome.
Hi Dez! We actually didn’t link them together on purpose. Instead we used dimes as spacers between each board. It leaves just a hint of a space and gives it a more “rustic” feel!
They look great! We are hoping to do these in our living room, but I’m a little apprehensive. Mainly bc I am nervous about the dirt that gets in the cracks? How have you kept them clean? Also how does it hold up on liquid spills??
Thanks Tara. As far as the cracks, I sweep daily, but give it a good vacuum weekly. If it looks like there is build up in the cracks I just use the crevice tool and run it along the crack. It really isn’t a big problem. As far as spills, so far so good. And we have had spills, and a new puppy 😉 The top coat doesn’t let the liquid penetrate the wood and we have had no stains because of spills! Hope this helps.
How brave you are, Maureen! I’m coming late to the party, but I have to say that your floors are genius! I’m wondering if anyone has laid plywood on a concrete slab and how they did it? I’m considering this for my condo, but I believe a slab requires some kind of vapor barrier. I’d love any feedback any of your followers might contribute. I’m a new subscriber and really enjoying your content….thank you for sharing your ideas!
Hi Heather! Welcome 🙂 I would imagine that if you search google for laying hardwood or laminate on concrete, you will come across a tutorial. I will pose the question to my a few builder friends and see if I can help you find a solution. Is it above grade?
Did you paint the under floor before putting the plywood planks down? If so what did you use and what color? If not does the underfloor show in the cracks?
Is there any reason why you didn’t put each plank tight to each other (no space)?
What size were your planks?
I have seen some other post that people stained and poly (3 coats) the planks before installing them. The final fourth coat of poly went on after the floor was all down. What is you opinion on doing this process first?
Did you fill the voids on the back side of the plywood before installing them?
I love the look and can’t wait to start the project.
Thank you for your reply
Hi Suzanne! We did not paint the floor prior to lying the planks. The original floor was a dark brown hardwood and the cracks in between ore really quite tiny, so the floor beneath is not visible. I don’t recall there was any real reason that we did not butt them up tight against each other. I looked at several tutorials before doing ours, and I most, if not all used some type of spacer between. We stained and poly’d after the floor was installed as we do not of a garage or other indoor area large enough to prep them prior. As far as filling in the voids on the other side of the plywood, I don’t recall that there were any. We cut our planks to a width of 6 inches by 8 feet in length. Hope that helps!
Wow, very very nice! My husband and I are remodeling our house one room at a time. I love the wide planks and will be adding them on concrete. I want to add 6 x 4 wood pieces along the edges to give it a pop. I am so tired of seeing ceramic tiles everywhere and the farmhouse look made in China way. I want to make all my pieces and repurpose old pieces to suit my unique personality. I really love what you have done. How have the floors stood up all this time?
Thanks a bunch! I am very pleased with how the floors have stood up, especially since we have two large, active dogs! There are some scratches but I knew that would happen using a softer wood, and I like how they add an aged patina to the overall look!
Your floors are beautiful. Did you use a wood conditioner prior to stain?
Hi Jan! We did not use a wood conditioner first, just went straight in with the stain which has held up well.