
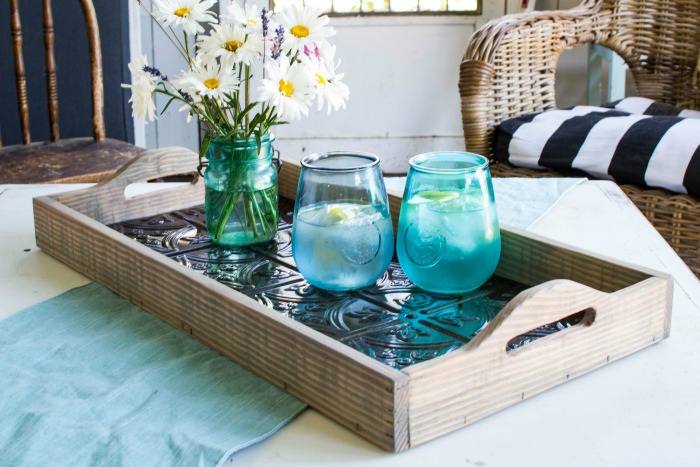
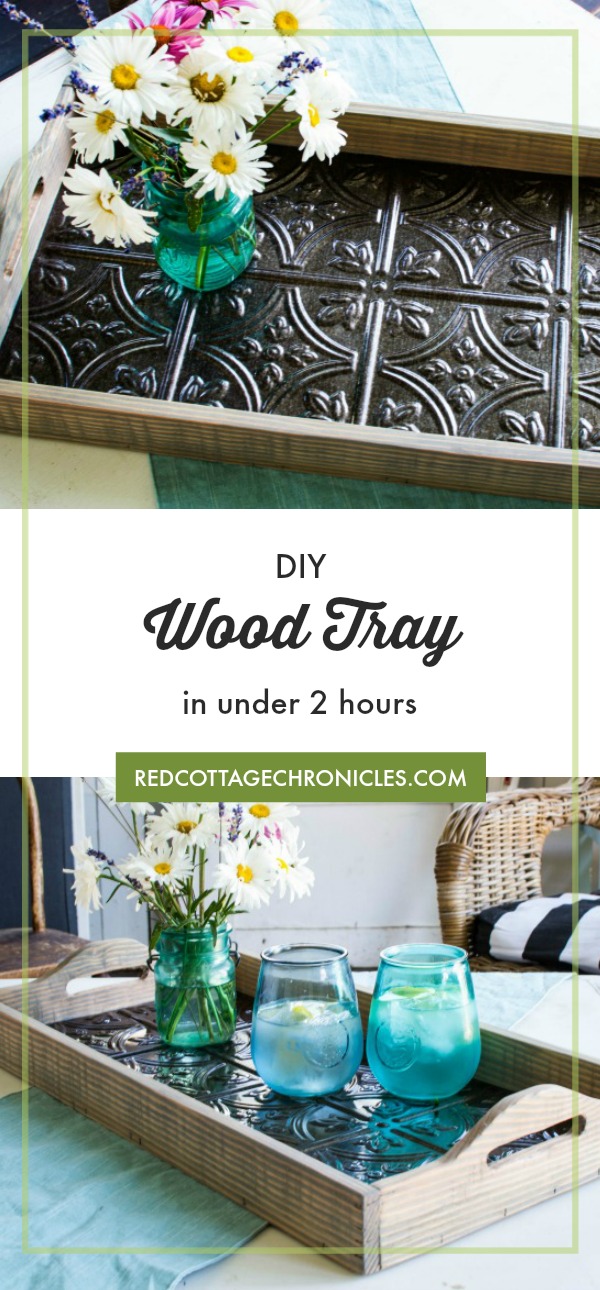
DIY Wood Tray
It has been a couple of months, but I am happy to be joining the At Home DIY Challenge again this month. My project this month is a DIY wood tray that is lined with faux tin!
You can click on the link at the end of this post to see all the other At Home DIY Challenge participants projects.
The theme for July was to create a DIY project that would take no longer than 2 hours to complete (not including any dry time for paint or stain). This project fit the bill perfectly. Just a few cuts, some sanding and assembly!
I happened to come across a tray similar to this in Homesense recently, but not only was it more than I wanted to pay for a tray, it was also labelled to be used for display purposes only.
I wanted a rustic wood tray that is functional, sturdy and large enough to carry things from inside to out during the summer months, but also stylish enough to use in the centre of the coffee or dining table.
To make your own DIY wood tray you will need:
- 1 1″x3″x5′ pine (or spruce) – cut 2 @ 25″ long
- 1 1″x4″x2′ pine (or spruce) cut into 2 @ 12″ lengths
- mitre (chop) saw or circular saw
- jig saw
- sandpaper (80 or 100 grit)
- palm sander (optional)
- dremmel with sandpaper bit (optional)
- PL premium 8X adhesive
- Brad Nailer
- stain
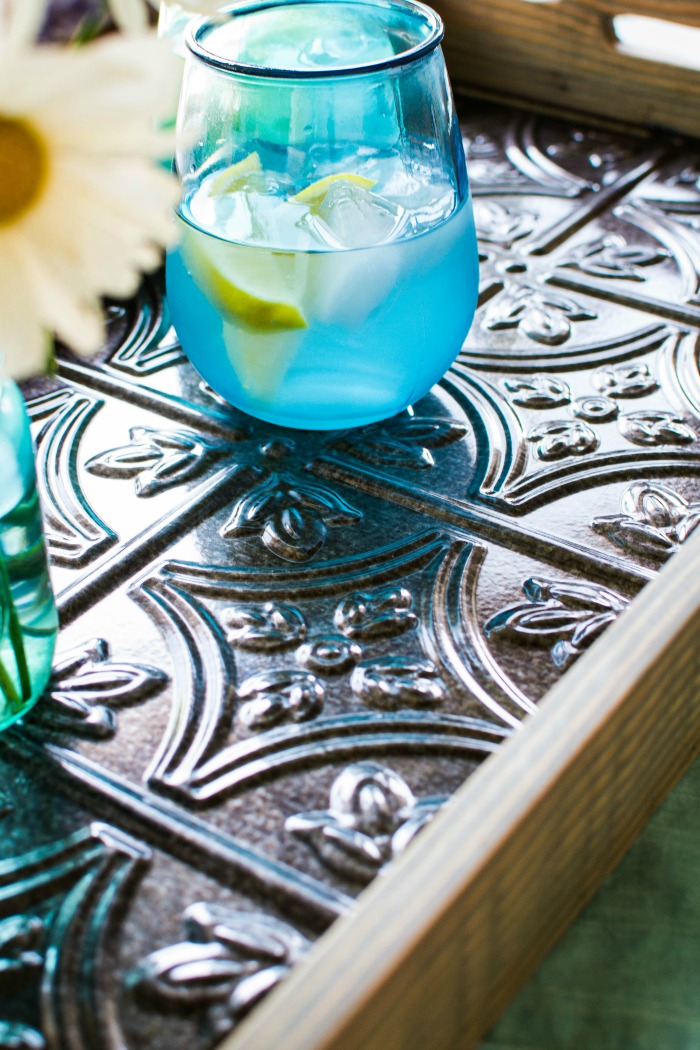
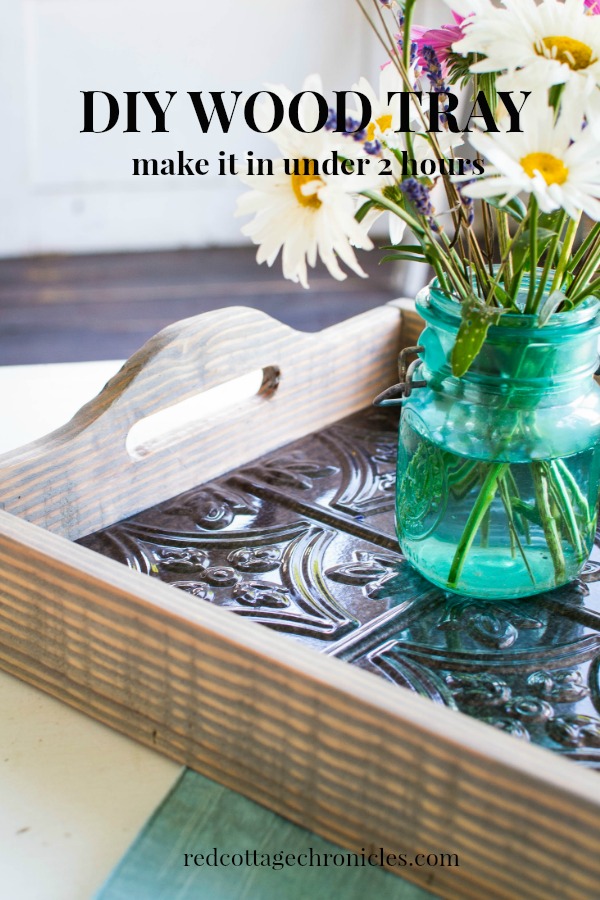
- faux tin ceiling tile
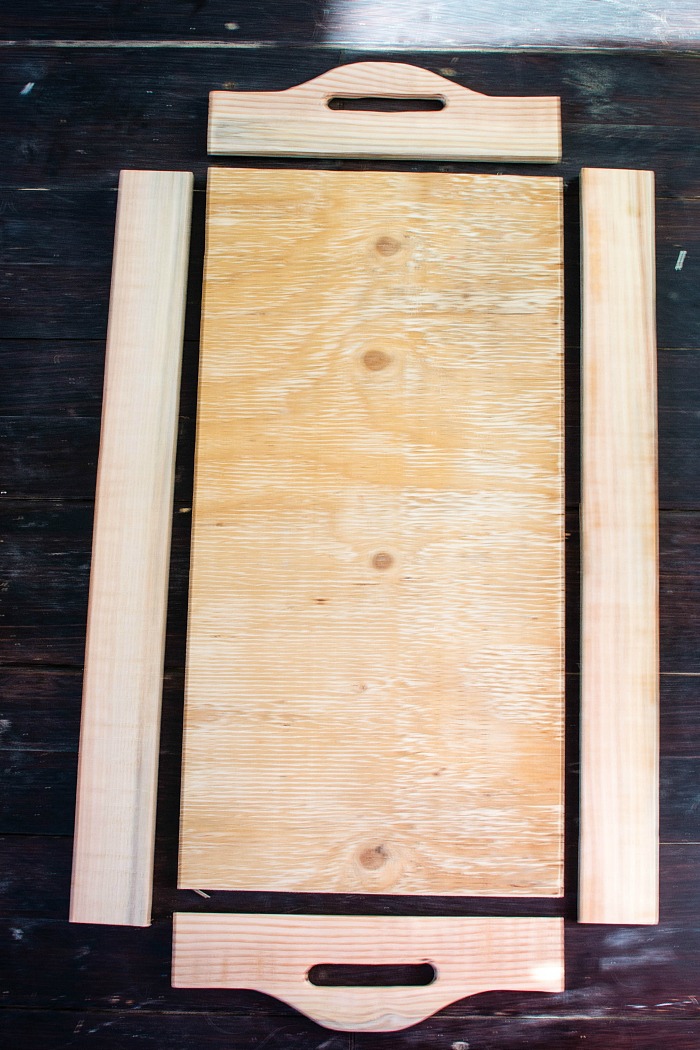
- scrap plywood cut to 24 x 12
How to make a DIY wood tray:
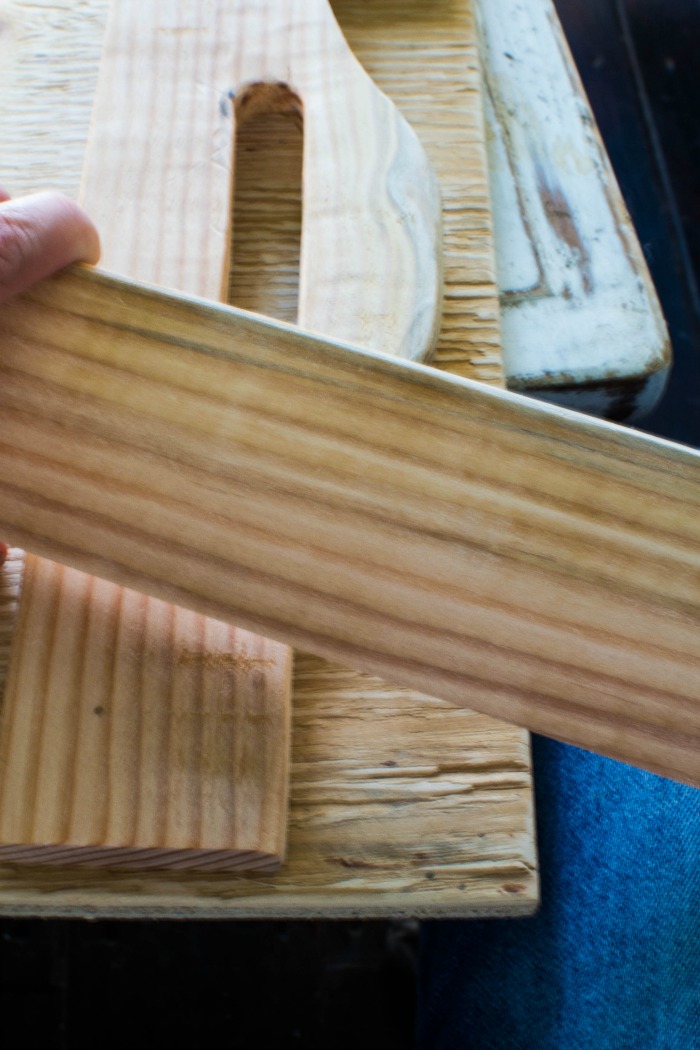
- cut 2 lengths of 1″ x 3″ lumber at 25″ each, and sand to slightly round top edges
- cut 2 lengths of 1″ x 4″ lumber to 12″ each
- To create the handles and curved end piece print this pattern PDF and center on each piece of 1 x 4 to trace pattern. Carefully cut out with a jigsaw and sand to create smooth round edges in the handle and the top edge of each piece.
(Sorry for the blurry image!)
- Cut plywood to 12″ by 24″
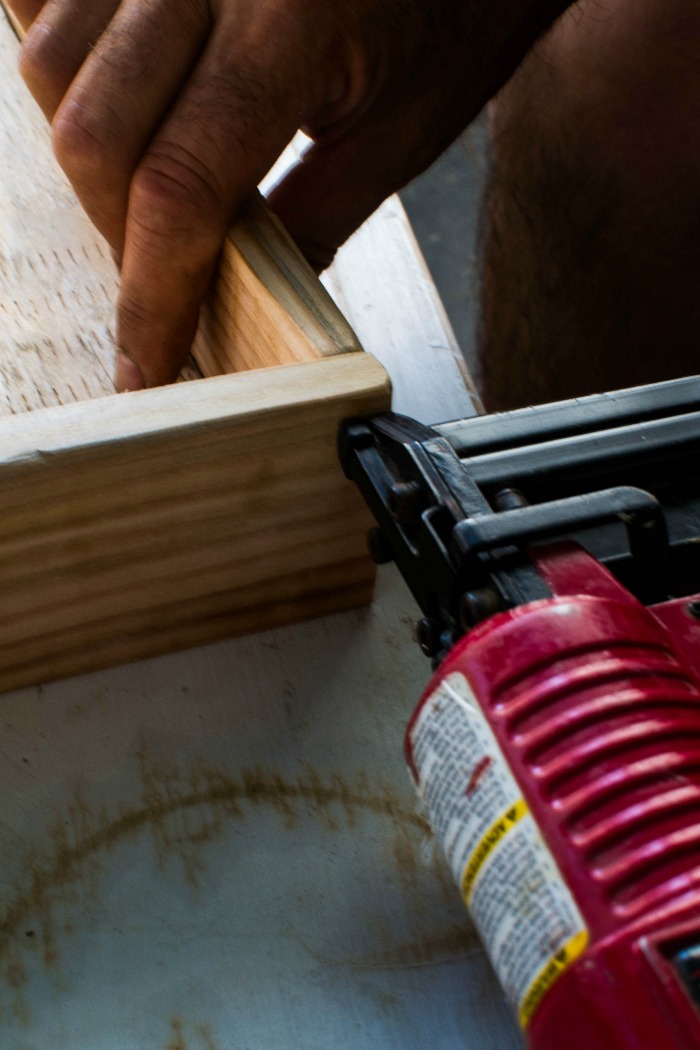
- apply PL Premium adhesive to one short edge of plywood. Position one end piece against the edge and fasten into place with a brad nail gun
- continue applying adhesive around the perimeter edge of the plywood, fastening each side piece in place until all four sides are attached.
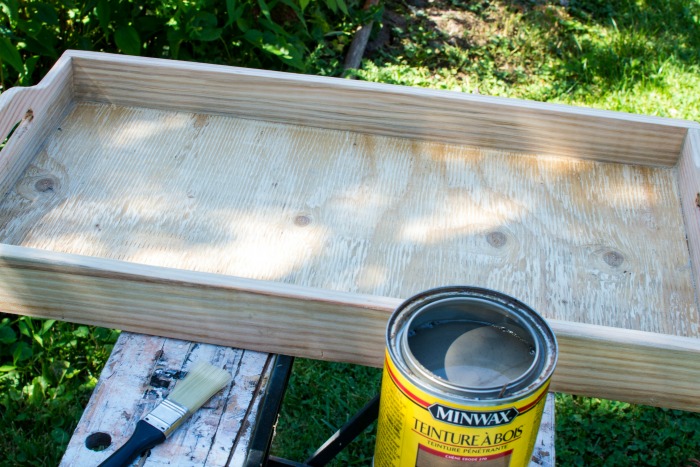

- stain (or paint) all four sides inside and out with the colour of your choice
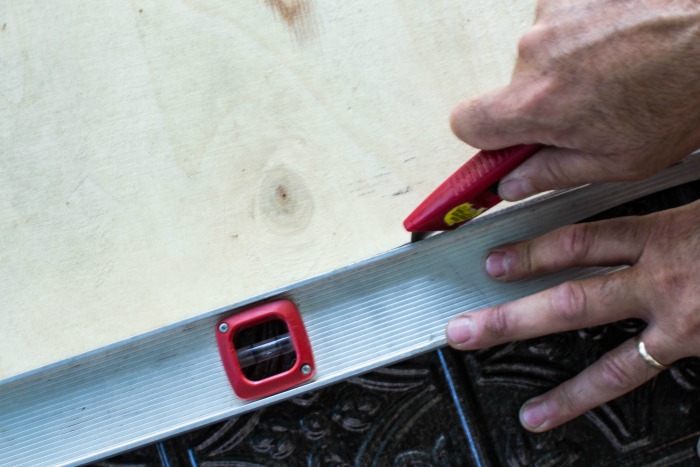
- using a utility knife, carefully cut the faux tin ceiling tile exactly 12″ by 24″ to fit the plywood (we cut it a slight bit to0 big the first cut and trimmed it down to the exact size)
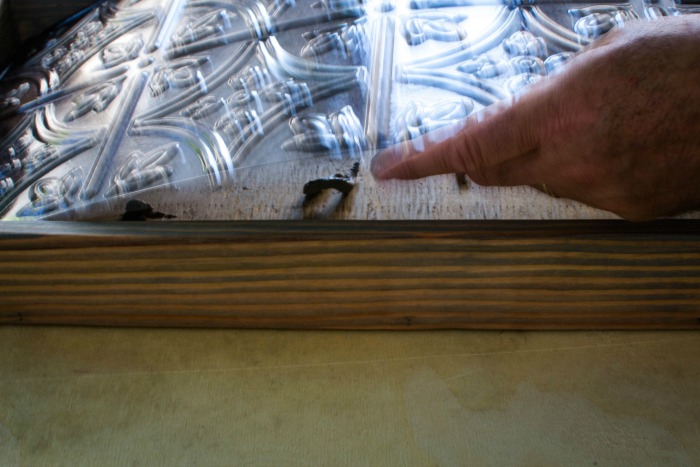
- Apply adhesive to the plywood (you don’t need a lot)
- Press the faux tin ceiling tile down into the bottom of the tray firmly
That’s all there is to it! In under 2 hours you have made yourself a rustic farmhouse style DIY wood tray to be proud of.
We were lucky enough to have everything on hand with the exception of the ceiling time, so not only was it a quick project, but also low cost!
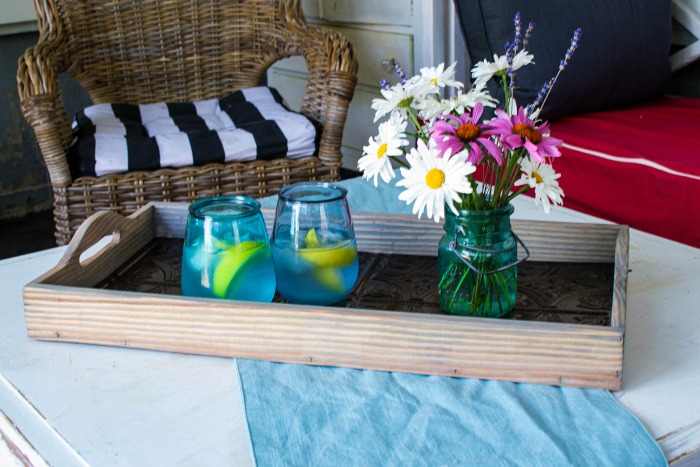
Since the tray is lined with the faux tin (aka plastic) it easily wipes clean.
I can already envision using this tray in a multitude of ways. I am so glad I didn’t buy the one in the store. Although it was lovely, I am much happier having a fully functional tray!

Oh, and what a fabulous gift this simple tray would make! Think house warming, wedding shower or even get a head start on Christmas.
Thank you for stopping by Red Cottage Chronicles today. As always I appreciate each and every visitor and love to read your comments! If you aren’t already part of the red cottage community, please subscribe to be notified when a new post is available (2 to 3 per weeks!).
And don’t forget to click the 2-Hour DIY Projects link below to see all of this weeks projects!
Until next time…..


Love the metal inlay for the tray! Thanks for the pattern! I have a tiny tray that I just may use that metal idea in! 🙂 Pinned! Thanks, Maureen! Would love to see you at Tuesday Turn About tomorrow!
Very nice, it looks so pretty. Thanks for the detailed instructions.
Oh cool!!! I want a tray like that! It’s beautiful. Great tutorial!
Oh my gosh! I love it Maureen!!
Love your tray, Maureen! It is sooo pretty with the ceiling tin inside the tray and I love that you already had everything on hand to make it except the tin. We have some scrap fencing and if I sand that up I might be able to make one. Would be fun! 🙂 Pinning and sharing. <3
Thank you for the tutorial and PDF,
Hugs,
Barb 🙂
I love the use of the ceiling tile in the tray, it looks great!
So many beautiful details! From the custom handles to the tin inlay, it’s lovely. Perfect for any style or home. Thanks for the great tutorial, too.
This turned out so cute!
Great DIY project! I love the metal you chose.
I never would have thought about the metal in the bottom of the tray! I just redid my own tray and I SO WISH I would have done this! Brilliant!
This is beautiful, I love the texture and color of the tin on this tray. Makes for a lovely and unique piece.
Ooh I love the tin you used in the bottom, it is an unexpected texture that’s so beautiful.
Love the use of the tin ceiling tile for the bottom of the tray! Really makes the tray stand out!