
How to Build a Fireplace (Faux or Electric Insert)
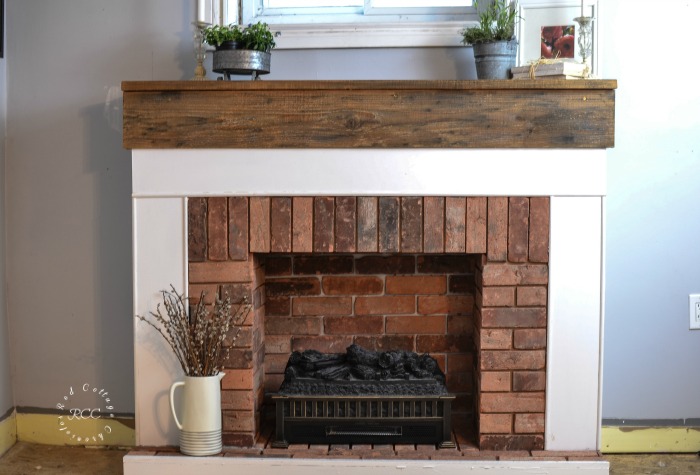
Have you ever wanted to know how to build a fireplace for an electric log insert? That is what I needed to know about 5 years ago when we built our first fireplace. We have now built two in our home, one very different from the other. We have a more formal one in our living room, and have just built this more rustic one for our family room.
Both this fireplace and the first one we built are made for electric inserts, not for wood burning or gas fireplace inserts, and hence are not fire safe!
There are so many realistic electric fireplace inserts available these days. They are a fraction of the cost of gas, which made it possible in our budget!
Every month our At Home DIY team of bloggers are assigned a do-it-yourself theme, and this month’s theme is DIY home improvement projects. It just so happens that we have been working on converting what was once my daughter’s bedroom and a small storage room into our family room.
At the end of this post you will find links to all of this months home improvement projects!
So far we have demo’d the walls between the two rooms, laid the raised floor tiles and down all the patch work on the walls. We also are so close to completing the fireplace, I wanted to share it with you today!
While I have included step by step how we built our fireplace, I have not included cut sizes. This is simply a play by play of the steps we took to build our fireplace.
There are lots of photos in today’s post. This project is being undertaken in a basement with little natural light, and many of these photos are taken by the Mister with his iphone so I apologize in advance!! We are by no means experts, carpenters or builders! We are just home owners who enjoy diy (often on the fly!) and doing home improvement projects on a budget. This tutorial is for entertainment purposes only and what worked for us may not work for you! Our full DIY statement is available at the end of this post!
How to Build a Fireplace:
Supplies:
- 2 x 3 x 8 lumber
- 5/8″ MDF (we used 2 for our fireplace)
- rough lumber for the mantel (we used rough cedar planks my husband was given for free)
- Brad nails
- nail gun and air compressor
- PL Premium contractors glue
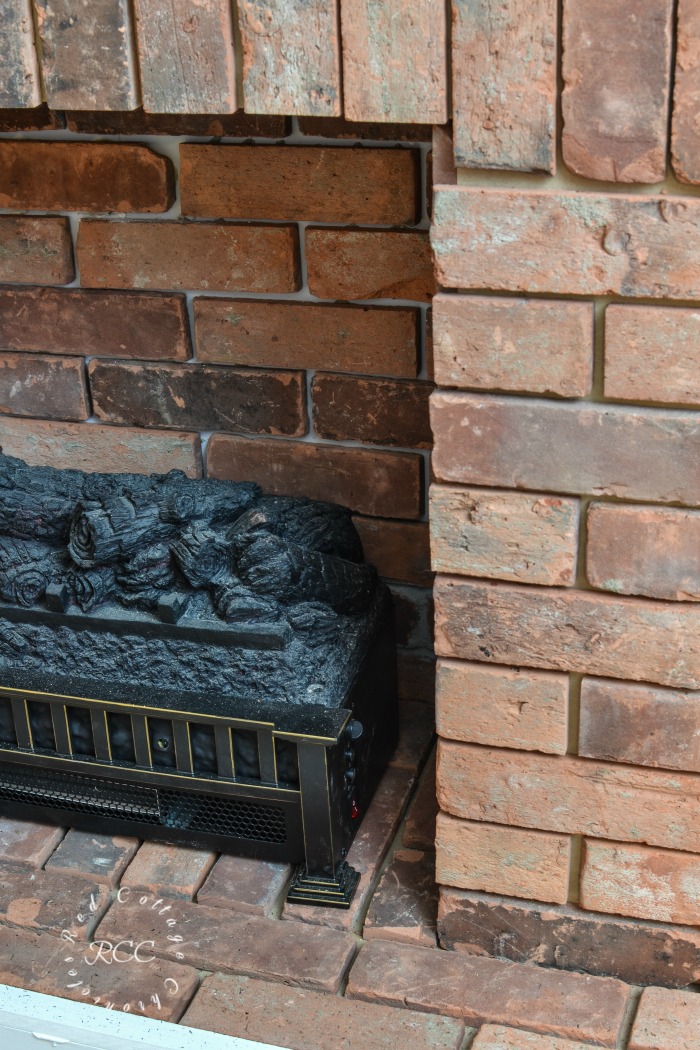
- electric log insert
- reclaimed brick tiles (we bought ours locally)
- stain for the mantel – optional (I used black Fusion Mineral Paint watered down to a wash)
- grout
Step 1
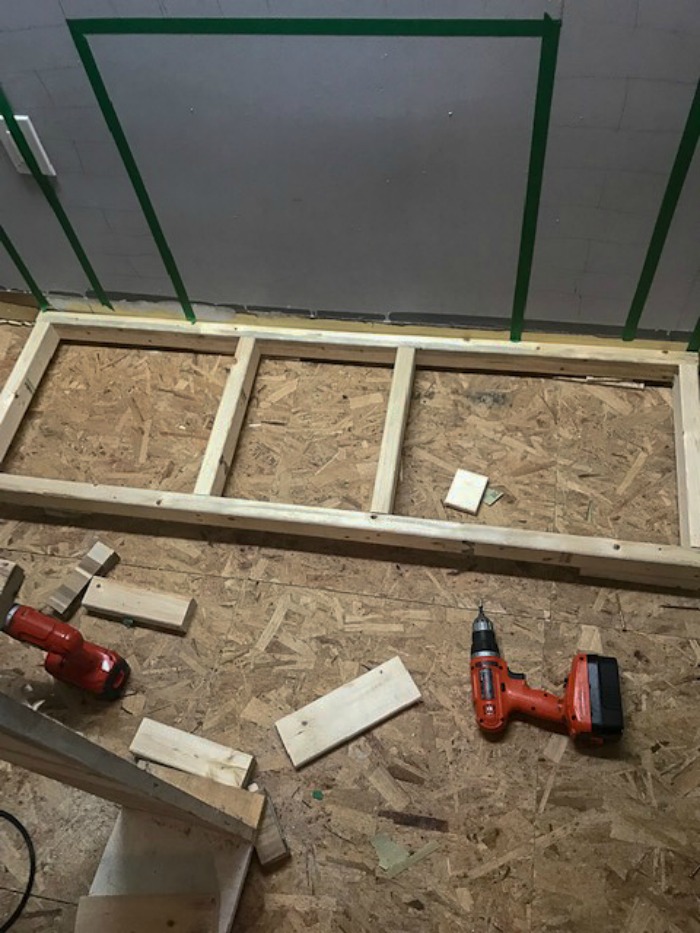
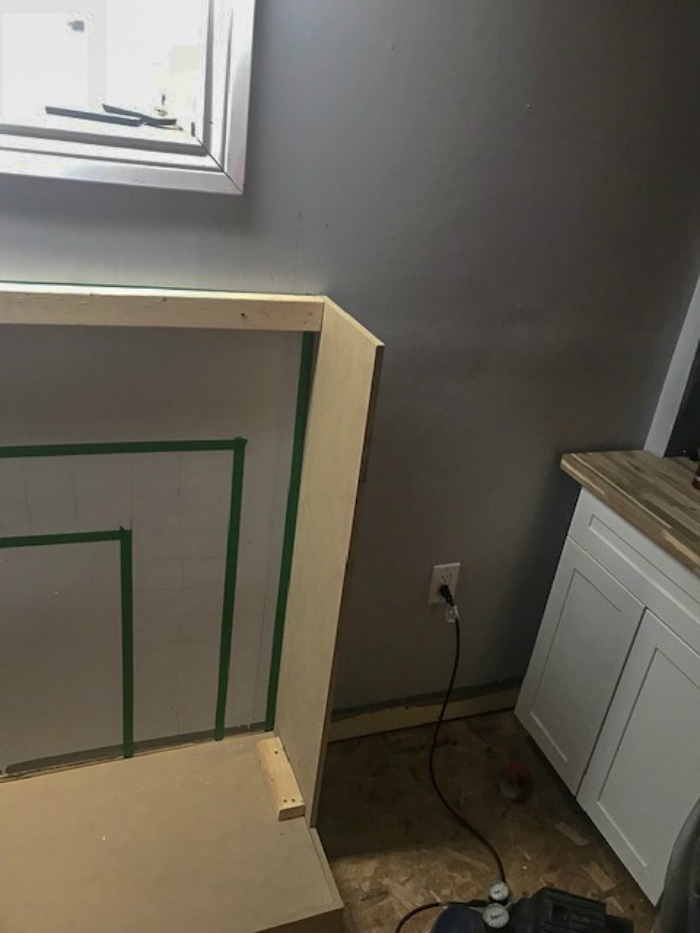
Using Painters tape, mock up the size of your fireplace on the wall. Using 2 x 3 lumber cut to fit your size, build a box for the hearth (base) of the fireplace. Because our floor slopes up at the edges we used shims to bring it to level.
Step 2
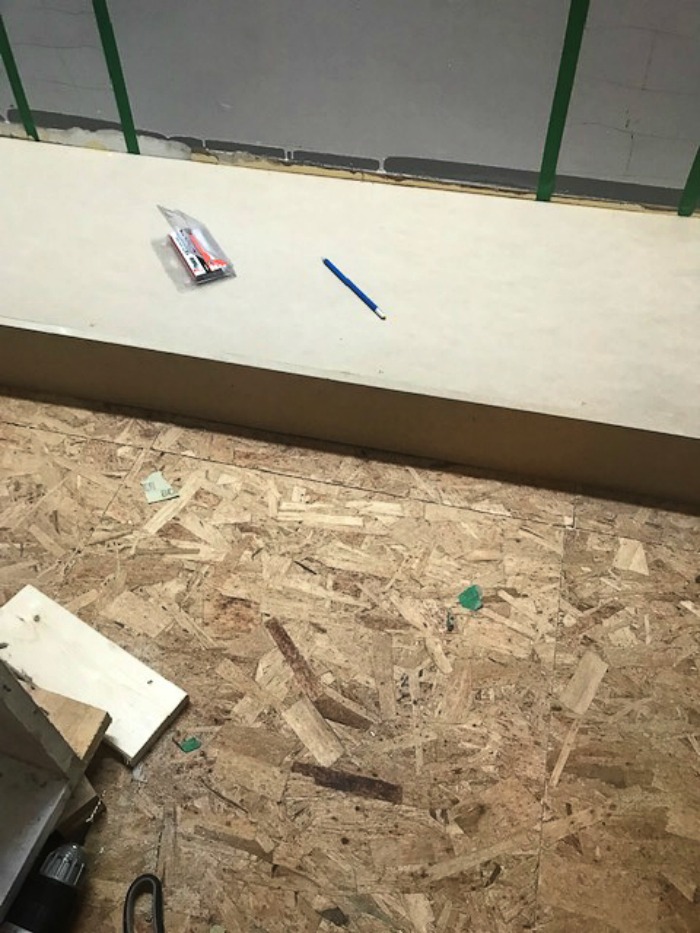
Cut MDF to fit the top and sides of your base. Secure in place with carpenters glue and brad nails.
Step 3
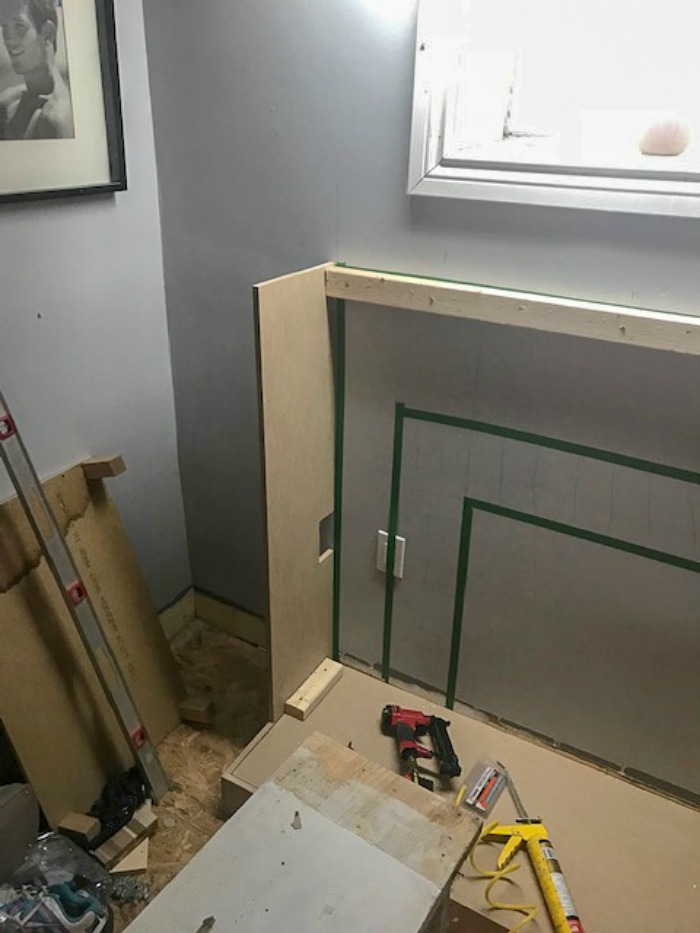
Level and secure a 2 x 3 at the top of your fireplace mock-up using 2 1/2 inch wood screws, securing to studs. Cut a piece of 2 x 3 about 2 inches narrower than your sides and secure to the base as shown in the photo above. Fasten the sides to this 2 x 3 and to the top 2 x 3 using carpenters glue and brad nails.
Step 4
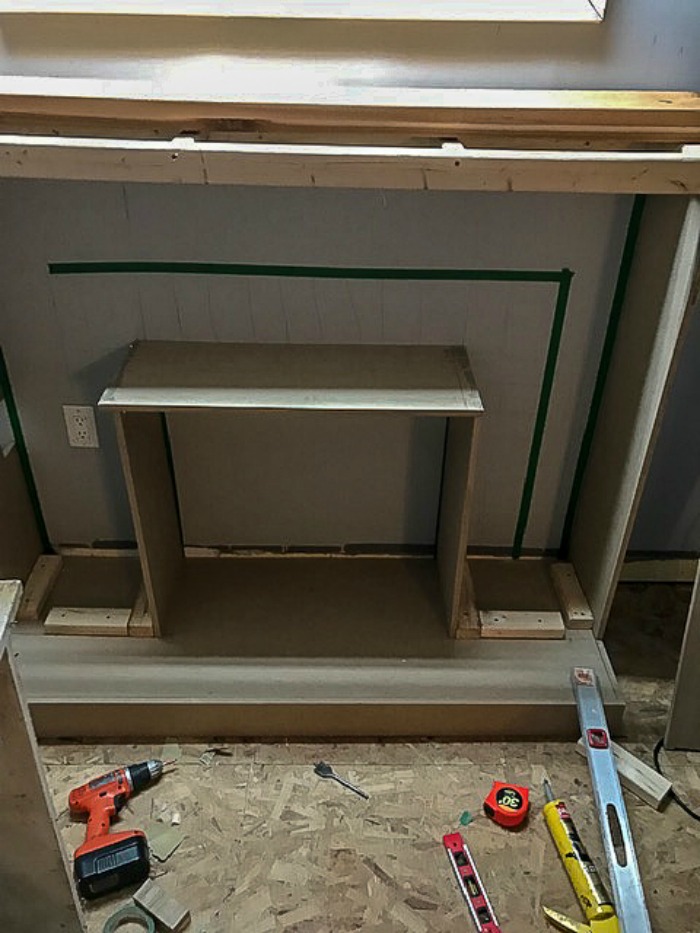
Attach a 2 x 3 cut to fit across the top front and add braces one third in from either end. Frame the fire box by fastening 2 x 3 cut to fit on the base (as in the photo above), securing the sides to these 2 x 3’s with carpenters glue and brad nails. Glue and nail in the top of the fire box.
Step 5
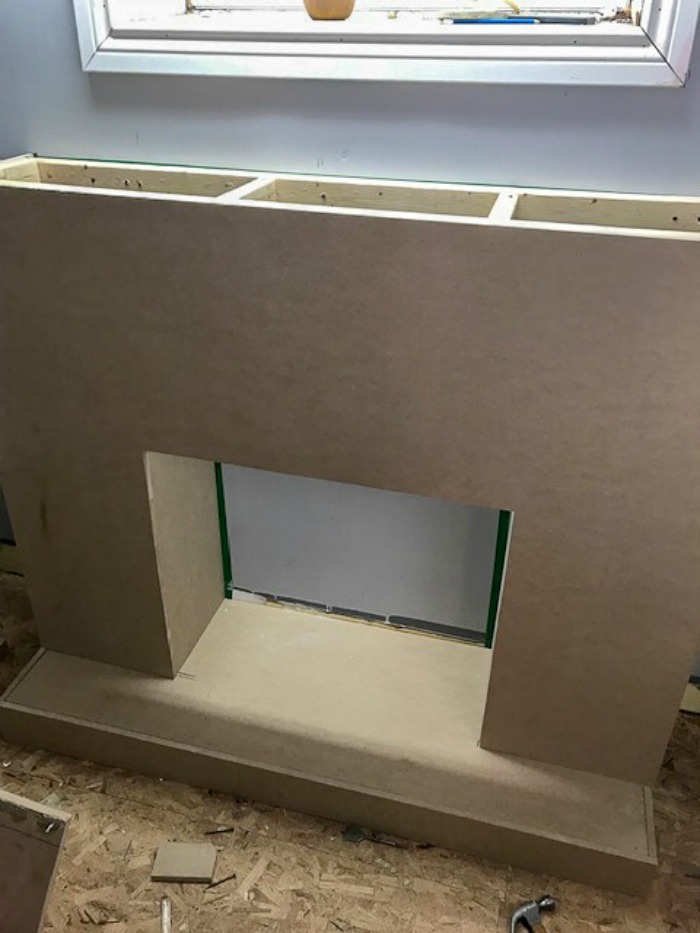
Measure and cut the MDF for the facade of the fireplace. Glue and nail into place.
At this point Tim cut a small hole in the side for he plug to through. He also cut larger hole in the far side of the fireplace so we can reach in and unplug the log insert whenever necessary.
Step 6

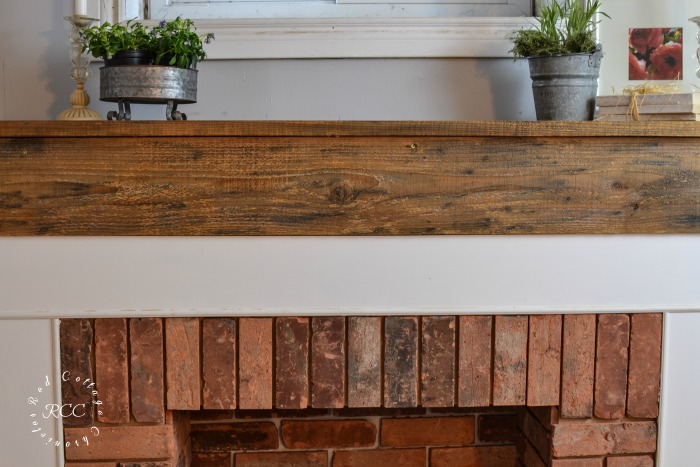
Secure the mantel to the top frame using wood glue and 2 1/2 inch wood screws.
(We wanted our mantel to look like a really thick beam, so we added an additional piece of the rough cedar to front and sides.)
Step 7
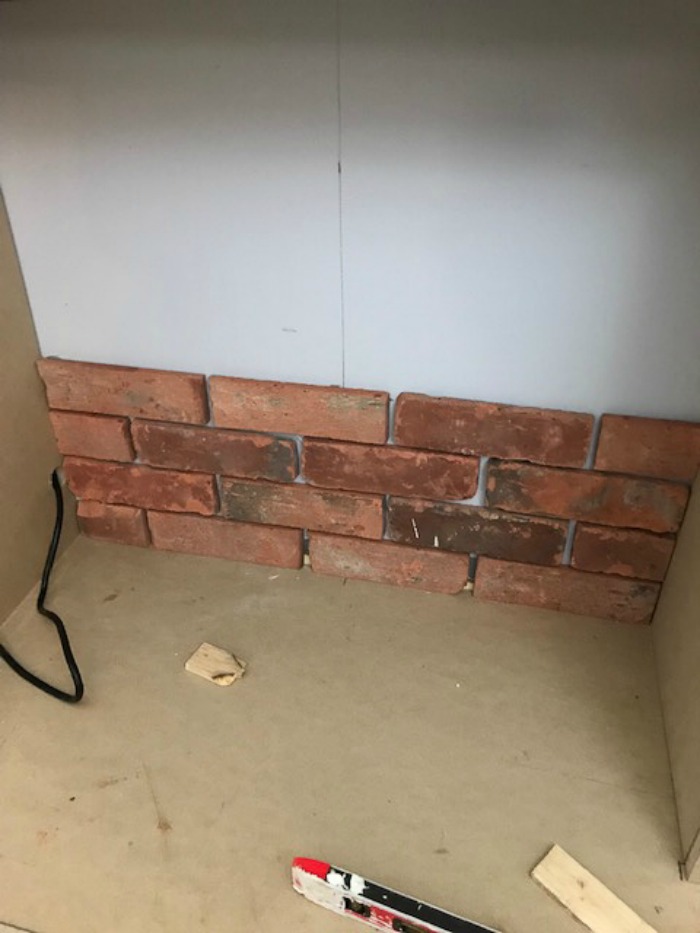
We used the PML premium contractors glue to fasten the reclaimed brick tiles, beginning at the back wall, then doing the floor and finally the sides and front.
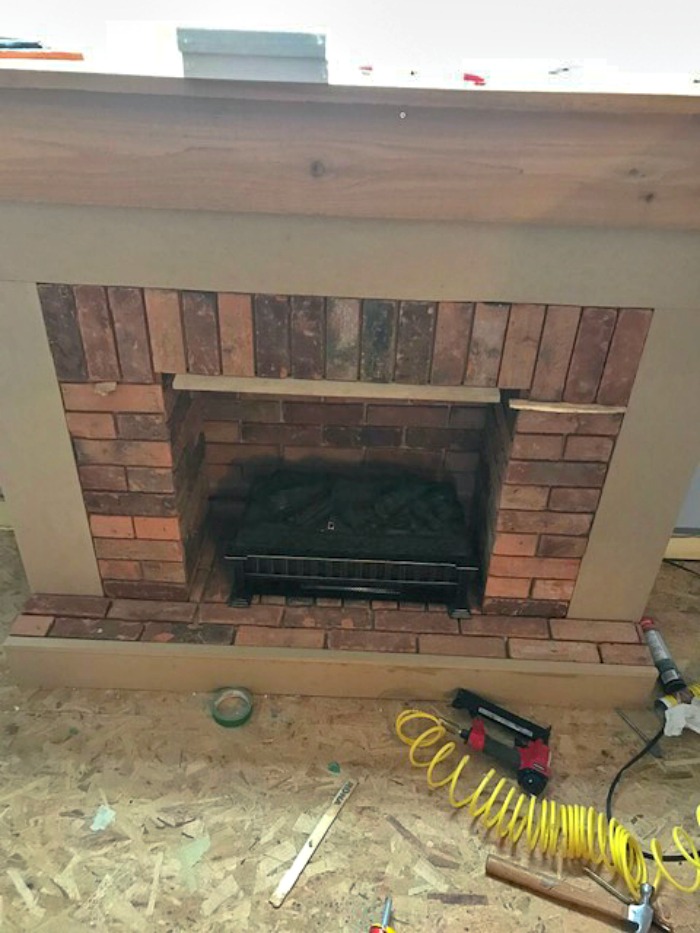
We used piece of 1/4 inch strapping as a spacer between the brick tiles. Doing the vertical surfaces required about 10-15 minutes between rows to allow the glue to set up keep the tiles from sliding down.
(As I mentioned, we are no experts and do things to suit us, so I am sure there may be other adhesive to use that may not require you wait between the rows!)
We used Lepage Polyfilla Brickfix brick morter filler to grout the brick.
Step 8
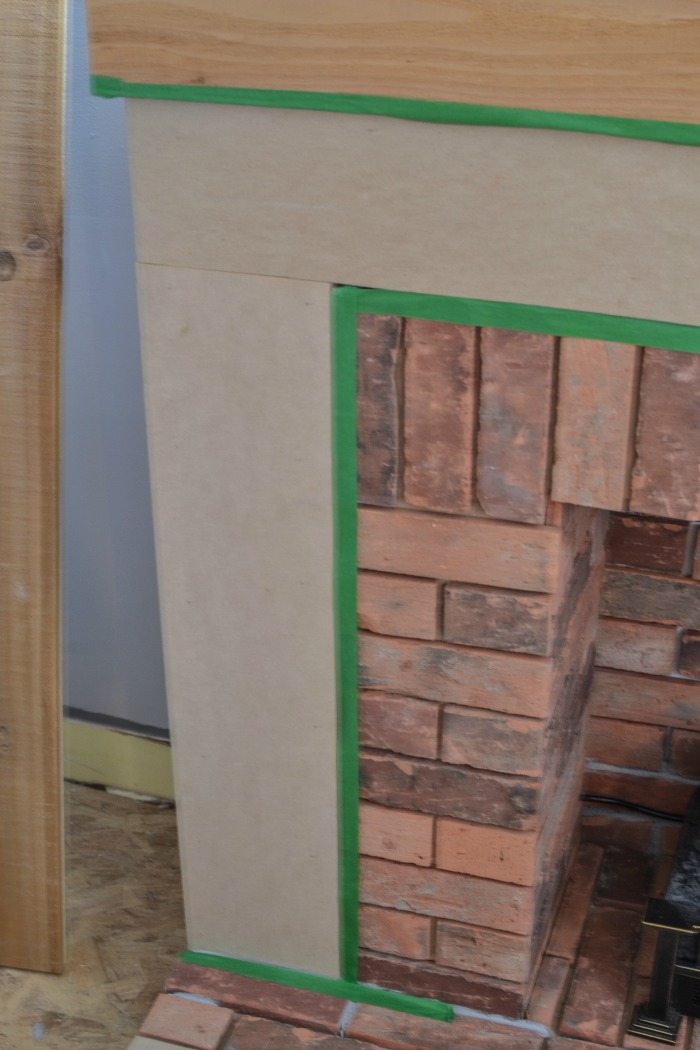
Prepare to paint by taping off around brick and mantel.
We used PARA Paints Crysler Hall White, applying three coats to the MDF. Allow to dry for an hour or two and remove the painters tape.
Step 9 (Optional)
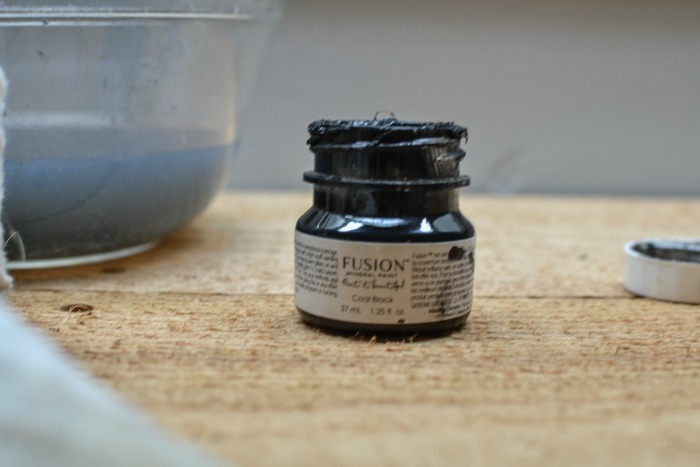
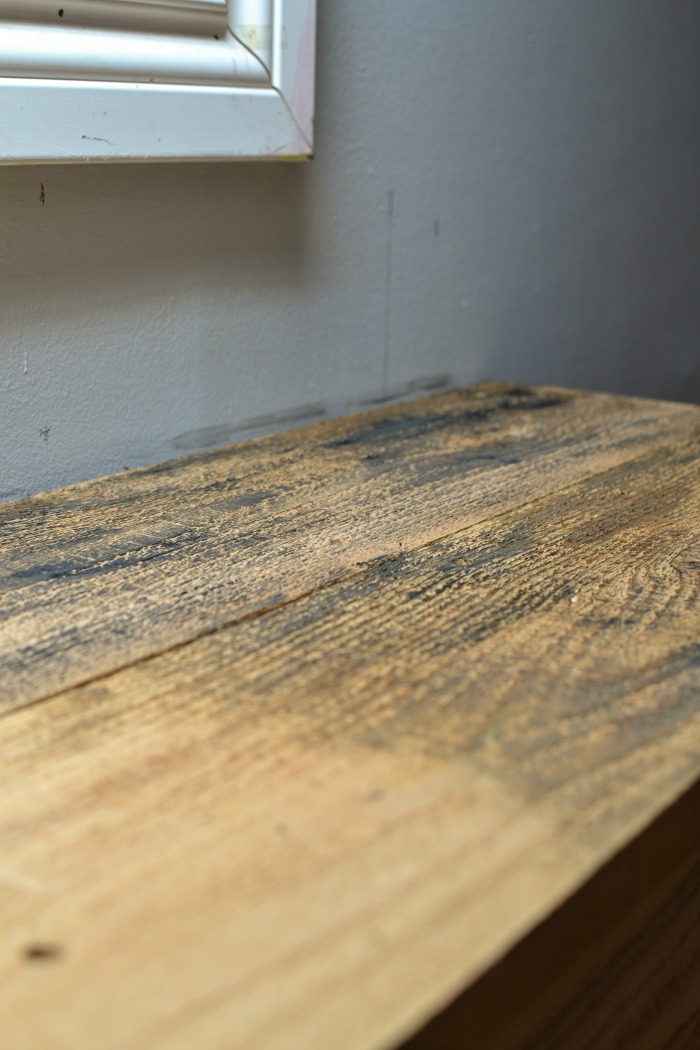
Depending on what type of wood you are using for the mantel, you may choose to stain or treat the wood. I wanted to tone down the orange tone of the cedar. However, not wanting to be resourceful, I used a sample pot of black Fusion Mineral Paint applied with a cotton rag dipped in water, rubbing it into the nooks and crannies of the rough wood.
Step 10 (the final step)
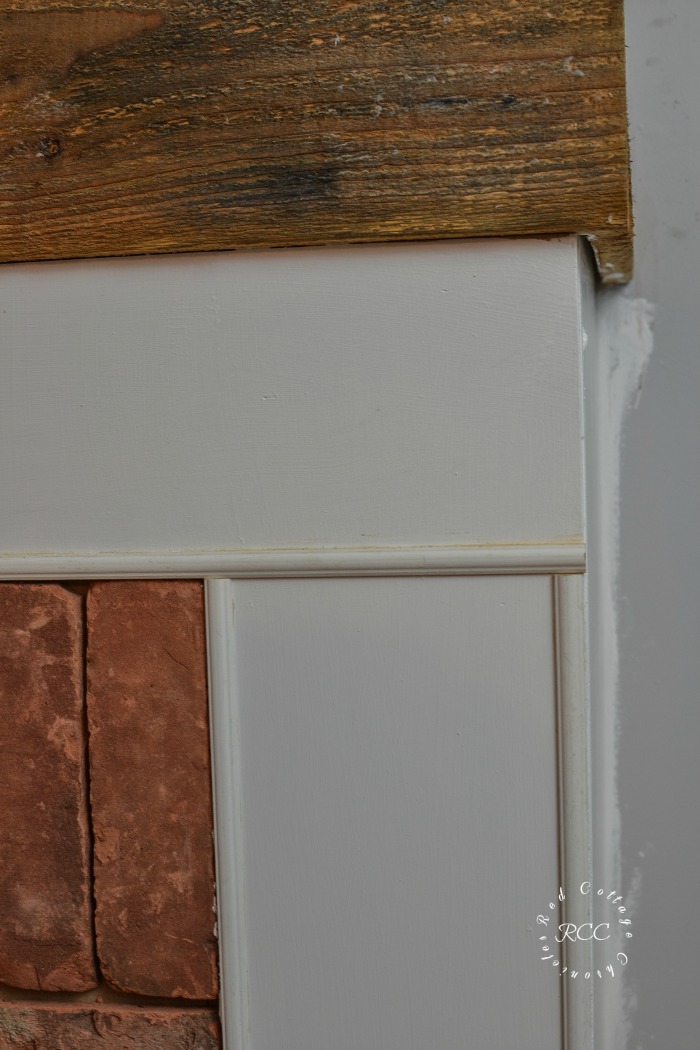
Add trim decorative trim around the brick and where ever suits your style.
And that my friends is how to build a fireplace! At least that is how we build a fireplace!
We still have some touch-up painting to do, as well as the grouting.
As for the rest of the room, while it seems like there is a lot left to do, it really won’t take long. Painting the entire room, installing the flooring, customizing billy bookcases to create a media centre, and installing a wine fridge make up the to-do list.
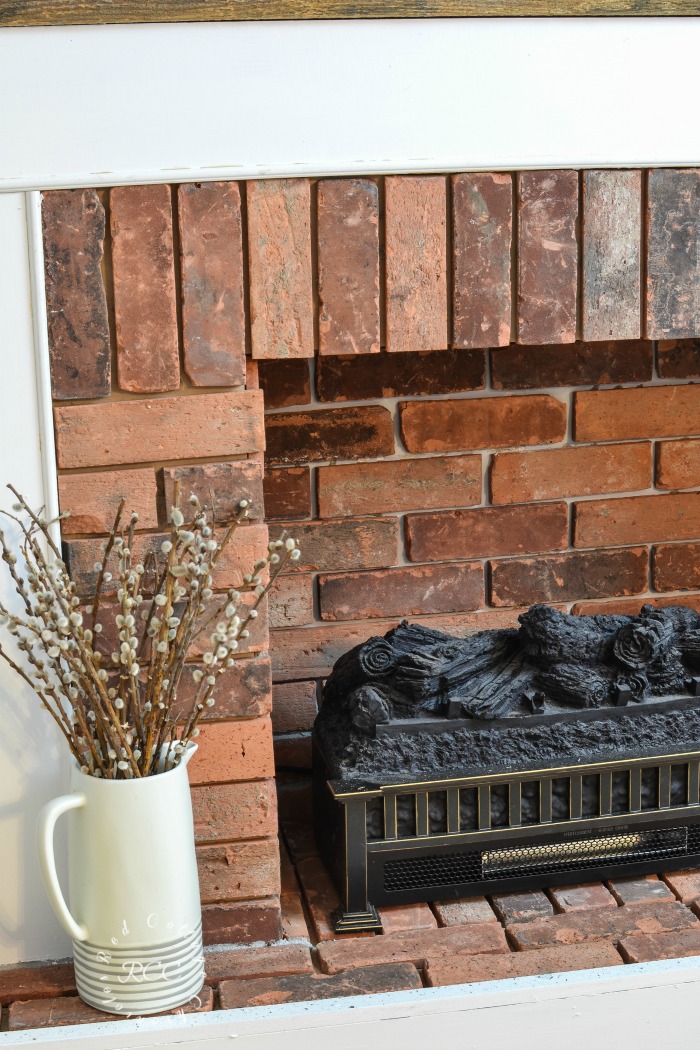
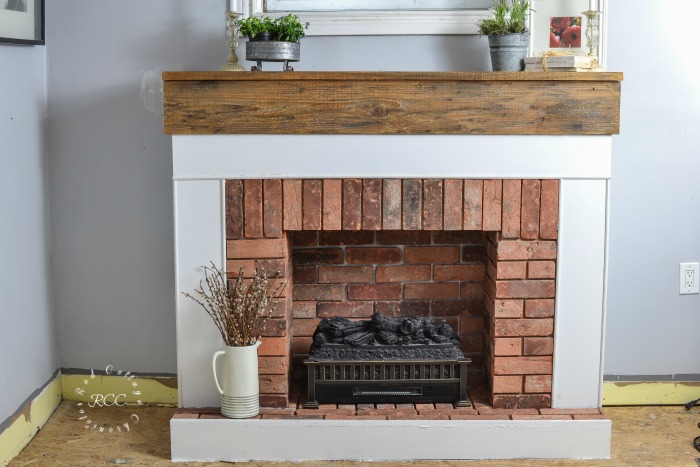
If you haven’t guessed by the style of this fireplace, we want a bright, yet cozy feel to our family room. We wanted the fireplace to resemble one that might have been built in an old farmhouse many years ago.
I am so pleased with how it turned out, and can’t wait to see how it looks when the whole room is finished!
Until next time…

**This blog is for inspiration and entertainment purposes only and should not be taken in place of expert advice. Please consult with a professional when attempting any new project. Always take proper safety precautions when attempting any DIY project and read instruction manuals before using any power tools or devices you are not familiar with. Attempt any and all projects at your own risk. I am not responsible for any outcomes, injuries or mishaps that may occur while you attempt any project or idea you discovered on this blog.


This turned out so well! What a way to add value and give that space a really custom look. I love this fireplace tutorial!
Wow. I am so impressed! I’d literally never considered building a fireplace from scratch, but now I can’t wait to have a space where I can!
I’m so impressed with your fireplace project. It looks so professionally made. Well done!
Incredible! Absolute perfection. I love the aged brick and the style it adds to your home. What a lovely way to add personality to any home.
I love your fireplace!! Thanks for sharing your tutorial, I really want to create my own fireplace maybe I can talk the hubby into it!!
What a cool project! It looks great in that room!
Oh goodness is that fireplace ever wonderful!!! Love love love the tutorial!!
Wow Maureen, what a great project! It looks really amazing and I’ll bet it’s so nice to have the added warmth during the colder months!
Beautiful!!!!! Ummmm… your friend down the street REALLY REALLY would like one too!!! I just need to make room. Hahaha.
Seriously.. its lovely. Great job Tim and Momo!! xx
Oh man that looks so real. You did a great job and it’s a beautiful focal point for your living room. Beautiful!
oh my gosh! I can’t believe how great this looks! well done!