
DIY Fireplace

I have shared with you a few times how I style my mantel for different seasons, like my recent spring mantel you can see here. Today I thought I would share how the actual fireplace came to be.
I think God knew what he was doing when he paired my husband and I together! I have the vision and he brings it to life! I know if you ask Tim he would tell you he didn’t even know he had the know-how or the skill to attempt some of the projects I have asked him to create! The more I ideas I have for him, the better he gets. The outdoor harvest table was the most recent big build and I have lots lined up for this year.
Our fireplace is the very first project I asked him to build. Inside the house. He had built a deck and our screen porch outside.
We lived our first 20 years in our home without a fireplace and I really wanted to have one. We often priced out various gas models, but they were always way above our budget so I figured I was destined to be without.
Then one day, after a visit to Canadian Tire Tim mentioned he had seen an electric firebox on sale for under $200 and asked if I thought I could live with an electric flame. I was a bit up in the air, but we went to the store and I had sales staff unpack it and plug it in so I could see how realistic the flame was. Sold! Not only did it look perfectly fine, it would provide heat to the living room just like a gas one. And our DIY fireplace was born!
I knew exactly what I wanted it to look like, and with just the right combination of moldings I knew Tim could make it happen. I was right. He did a fantastic job!
I don’t have any pictures of the build because it wasn’t even on my radar to be blogging about it some day and I was too excited to see it finished to care what it looked like before it was complete.
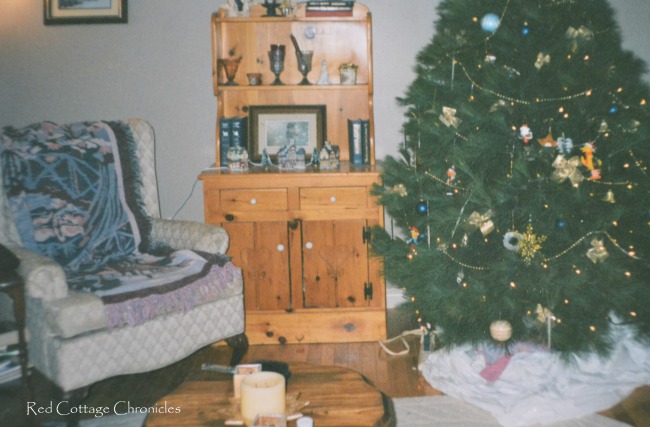
Here is one of the only pictures of the space before the fireplace (circa 1995ish). I did my best to style this hutch for each season.
Tim started by building a box out of MDF to the size I felt was just right after mocking up sizes using painters tape on the wall. He cut out the opening at the bottom to put the insert.
Next he built a long low box to create a hearth and attached the firebox to the hearth. Not rocket science, but still I was pretty proud of him. Now the rest was up to me. He gave me free rein has to how I wanted it to look.
Off we went to Rona and spent a very long time in the moldings aisle, and had some very heated discussions. mostly because he was beginning to get a bit panicked about the moldings I was putting in the cart. I had to remind him more than once that I had no doubt he could make it happen exactly like I had envisioned it!
I truly didn’t have any doubt in my mind. He thought we were biting off more than we could chew.
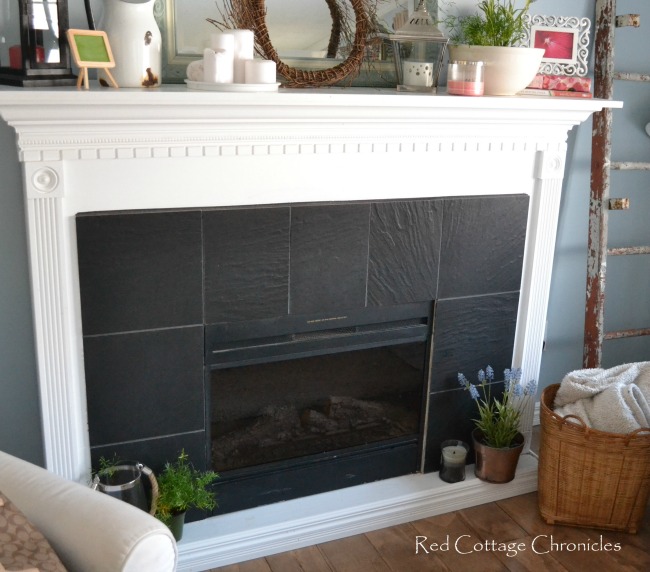
We came home with crown moulding in two sizes, a decorate rope molding and a dental molding. We also chose 4 square medallion moldings and a flat grooved molding to face the front, and a baseboard molding for around the hearth. I guess looking back I can understand it must have been pretty intimidating!
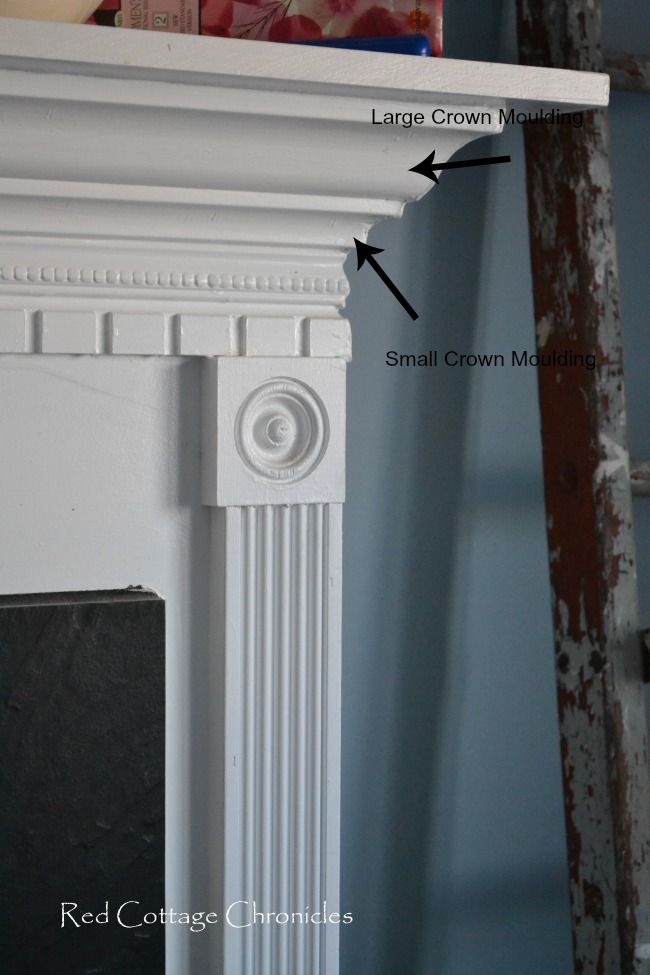
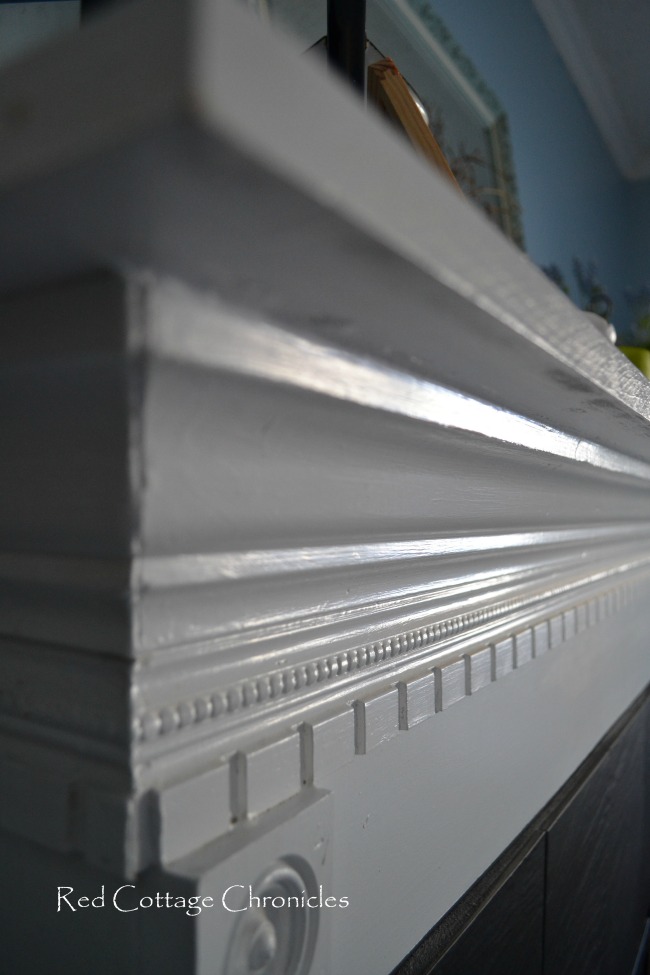
He started by installing the largest crown molding around the top of the firebox and then the small crown directly under that. They were the trickiest to install given the angles when it came to cutting the corners. We bought at least a couple of extra feet of these moldings so he could practice.

Next was the decorative rope moulding, which has a lovely curled edge top and bottom, but installs flat. Finally was the dental molding, which was also a simple flat molding that just required 45 degree corner cuts.

The moldings down the front were easy peasy. Just a square medallion top and bottom of each side with a length of the grooved molding in between. No angle cuts required.
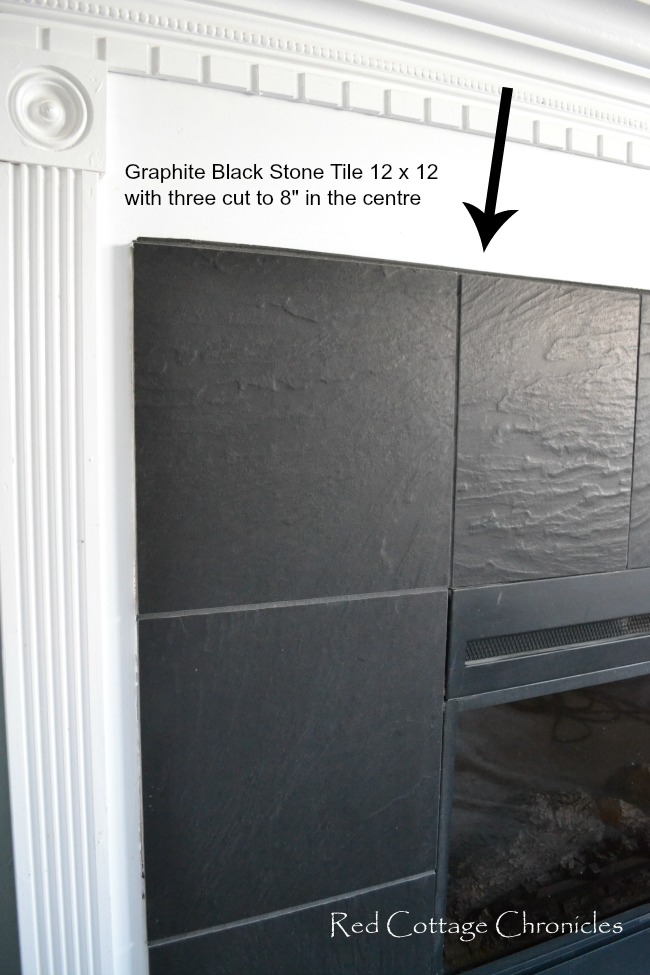
We chose a graphite black textured stone tile to surround the actual fireplace insert. They were special order and thankfully we ordered two extra just in case, and only broke one. They only came in 12 inch by 12 inch size so in order to create balance Tim cut 3 of them to 8 inches to centre in the top row. The tile store colour matched the grout to the tile.
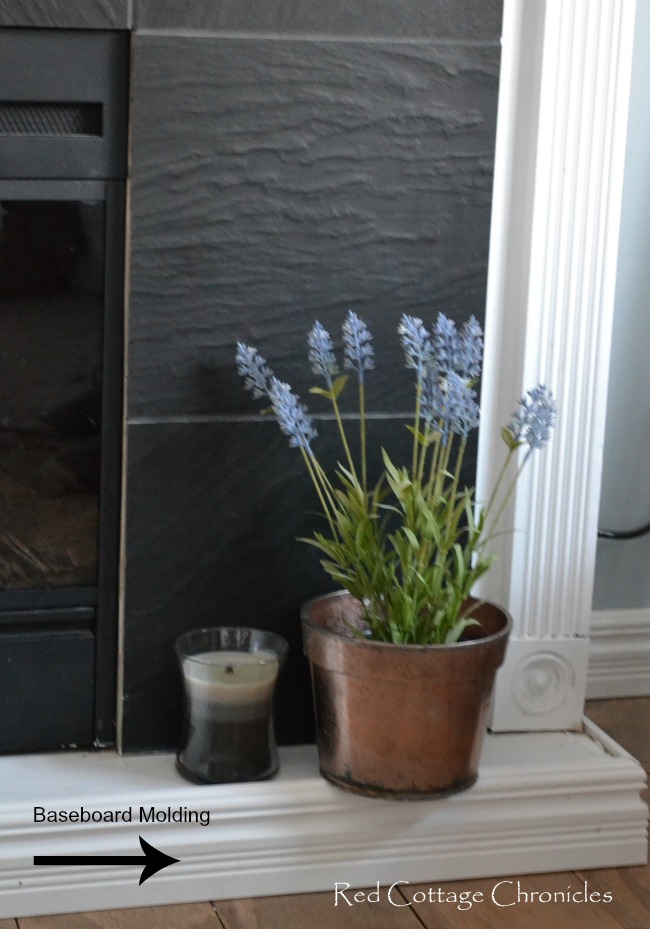
Finally, he added baseboard molding along the hearth and integrated it into the baseboard going all around the room giving the fireplace a built in look. It is slightly higher than the heart itself, which is perfectly fine with me.
For this project he invested in a compound mitre saw and an air nail gun which really made the job much easier. They have turned out to be the two tools that have more than paid for themselves over and over again!
I think it took about a week to complete working a bit each evening. Two coats of white trim paint and some caulking made it complete. I don’t know if Tim was so happy it was done because it was a big project or because it looked so awesome!
All that was left was to decorate it, and I have been doing that about 6 times a year ever since he made it.
The total cost was under $500 including the electric insert, and I must say it is rock solid and so much prettier than some of the gas fireplaces I had almost been willing to spend $4000 on. But I think the most valuable part of the project was not the low cost, but rather the confidence patience Tim now has when I show him another project I have in mind!
Until next time…..
Maureen
Want to keep up with all the projects at The Red Cottage? Simply enter your email below!


Hi Maureen,
I love how your fireplace turned out. I used to have an electric fireplace in my living room, but it didn’t look anything like yours. I actually didn’t even know it was electric. Great job!
Bobbi
Thank you Bobbi! I was really afraid to go with an electric insert for fear it would look too fake, but I am so pleased with the outcome and wouldn’t hesitate to do it again!
That turned out really well. Tell your hubby he did a great job!
Thanks Lori! I will be sure to let him know.
Very beautiful! We just built a mantel, too. I found you on Hometalk, where I just posted mine. 🙂 So satisfying to see the results, eh? Love the black stone tiles!
Thank you Kammy! I will definitely be stopping by to have a look at your mantel! Don’t you just love all the inspiration on Hometalk?!