
DIY Christmas Tea Towel
I love to find ways to decorate for Christmas that don’t cost an arm and a leg. And, since I spend A LOT of time in the kitchen leading up to the holidays I usually start my decorating in the kitchen!
I have wanted to try image transferring for quite a while, and thought what better time than now! Fancy Christmas tea towels can be expensive. While I am careful with my “special” more decorative tea towels, the rest of the family are not. My go-to tea towels are inexpensive grain sac towel and of course my favorite Ikea tea towels which by the way make great cafe curtains!
I went to Creative Market to find some fun Christmas images to download and created this printable image to transfer. If you don’t know about Creative Market, it is a great place to find images and fonts to create images for pretty much any occasion under the sun!
* this post contains affiliate links which help you easily find the products I use, but also I may receive a small commission (at no increased cost to you) if you decide to make a purchase!
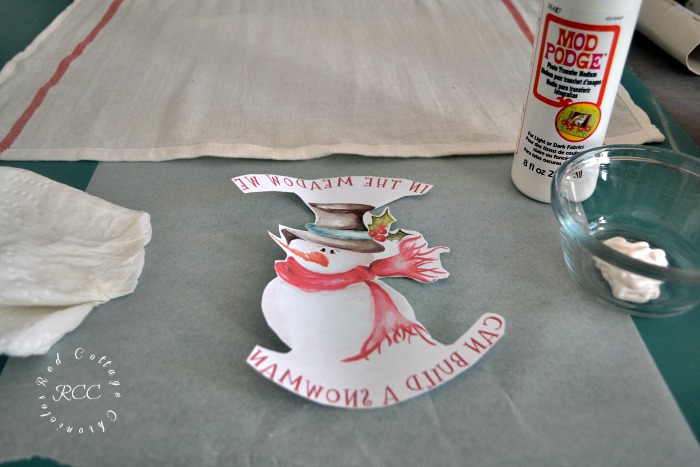
For this project you will need:
- plain cotton tea towel
- wax paper
- Mod Podge Image Transfer Medium
- small paint brush
- Damp Paper Towel
- Image of your choice (you can download the image I used here)
- old credit card or other straight edge
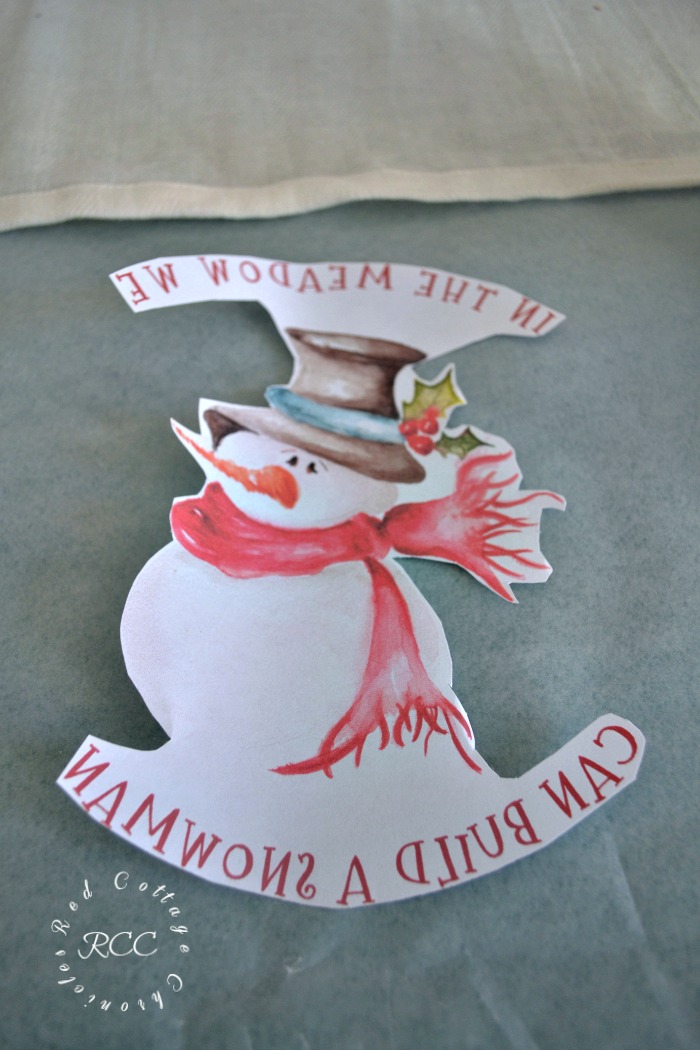
Be sure to mirror the image you are printing if there is text. Trim the image as close as possible. The Mod Podge transfer image will have a white background when it is transferred as you will see in the photos below. The closer you trim to your image the less white will be visible.
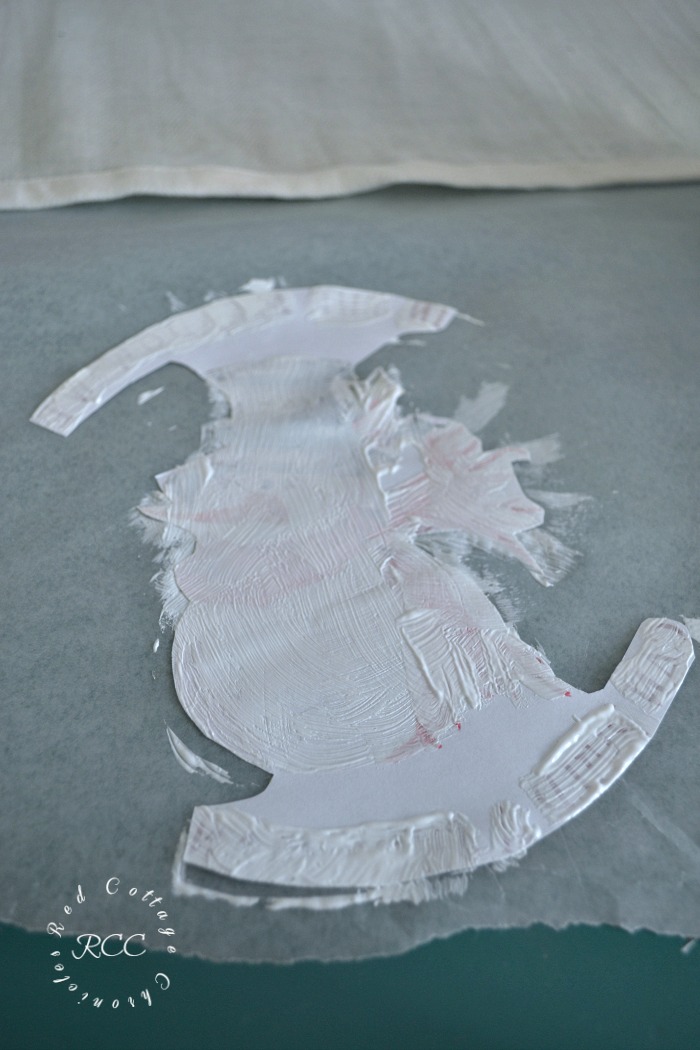 Place your image face up on a piece of wax paper. Generously apply the Mod Podge transfer medium to cover the entire image. You will want to barely see the image through the transfer medium.
You will notice that I did not Mod Podge the white areas between the text and the snowman. I didn’t want to transfer this area of plain white paper to the towel.

Carefully turn the image over and position it onto your towel. I centered my image in the lower half of the towel.
Using an old credit or debit card (or other straight edge), gently smooth the image onto the towel. Gentle is the key word. You want to be sure the entire image is in contact with the towel, but be careful not to tear the paper as it will be soft from the transfer medium.
If any transfer medium seeps out the edges, simply wipe away with a damp paper towel.
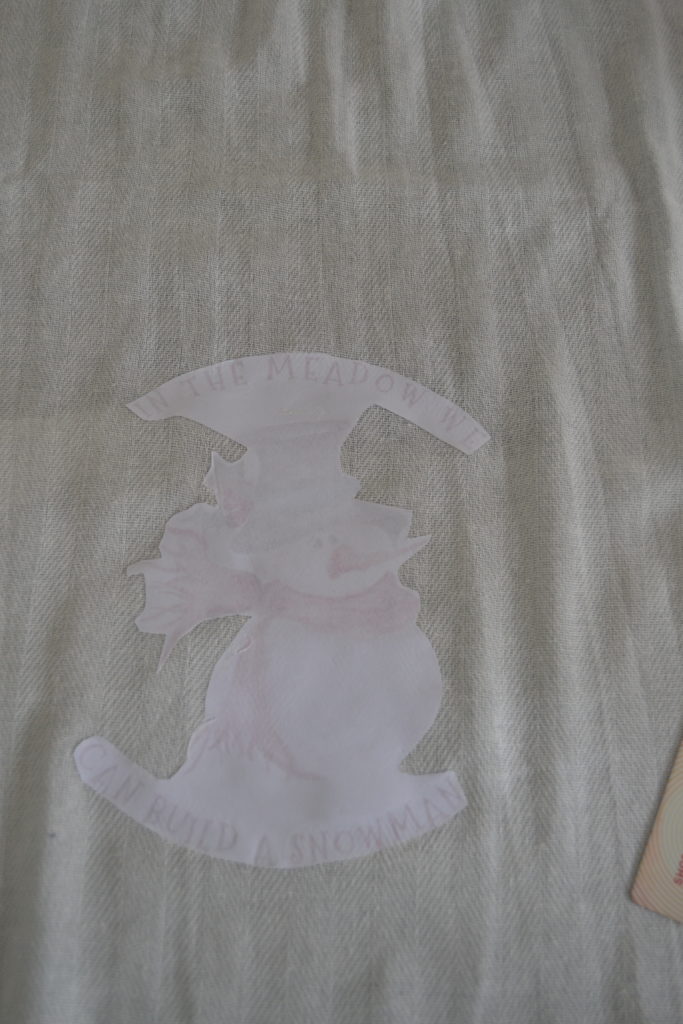
Leave to set for a full 24 hours. Do not peak. Trust me. 24 hours!
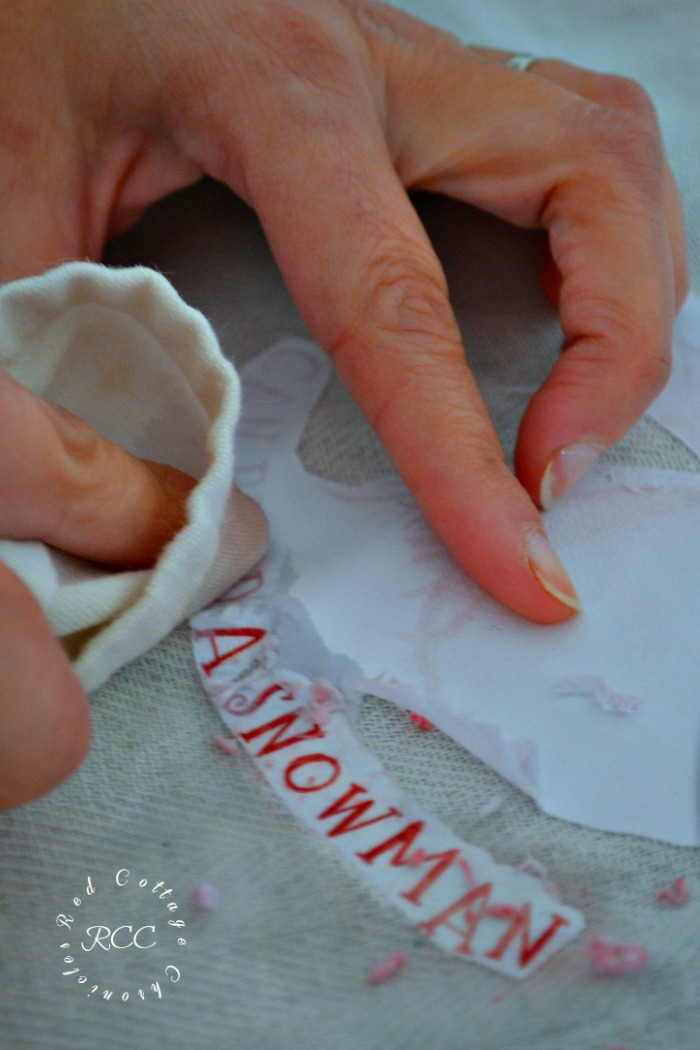
After waiting 24 hours, using a damp towel gently rub off the paper to expose the image is now transferred to the towel. If the ink bleeds off onto the towel, just use the damp towel to blot it up.
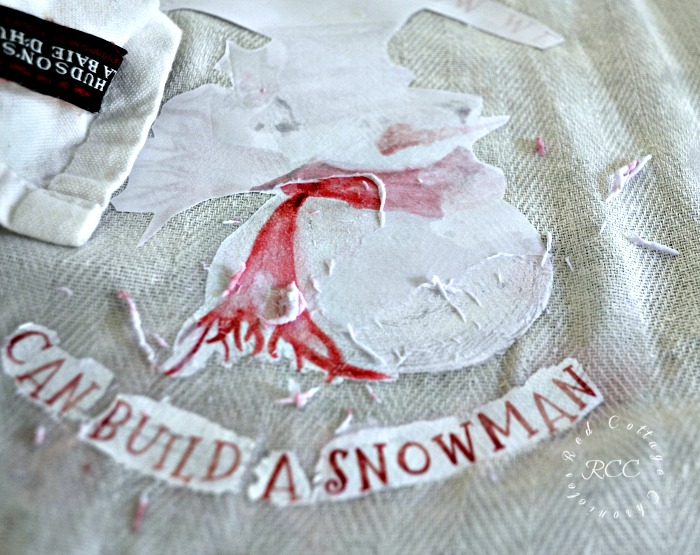
Continue until all the paper has been removed from the image.
There were a few small areas where the Mod Podge had lifted from the towel around the image. I simply clipped it off with small scissors.
I wanted to wash the tea towel before using it, to soften up and fade the image. Keeping in mind the image will fade with laundering, this I really like the finished look!
I waited until the next day to throw the towel into the washing machine.
After washing, I hung the towel to dry and then pressed it with a warm iron being careful not to iron over the image.
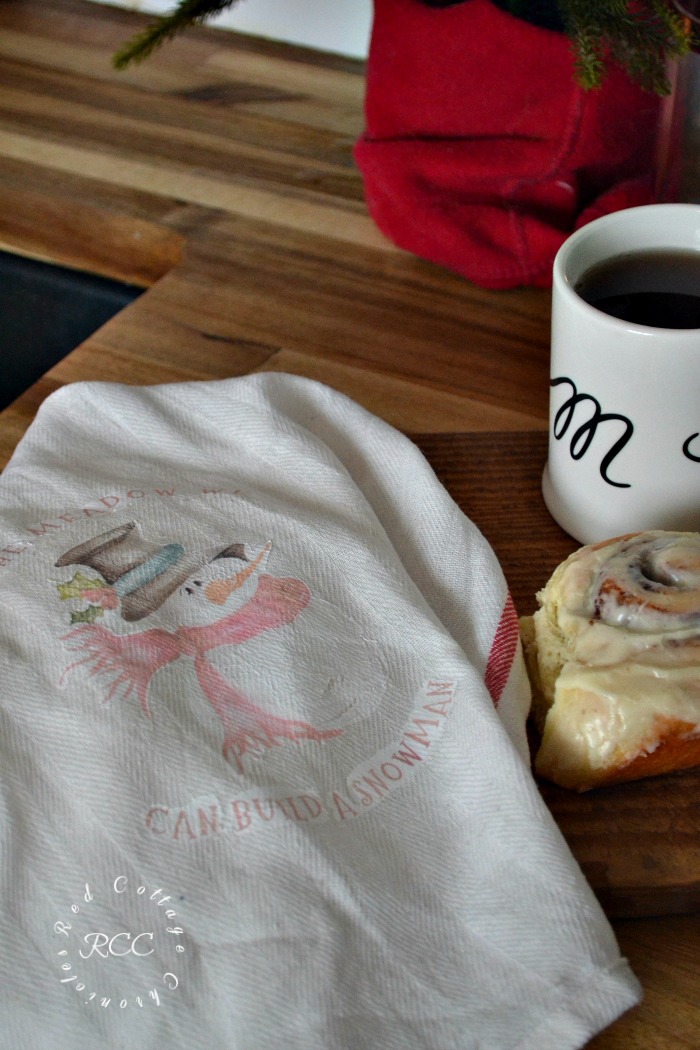
I am pretty pleased with how it turned out. I think it faded just enough to give it that worn look I was going for. And, I can’t beat the cost!
Since I have never done any image transfers before, overall the Mod Podge transfer medium was really easy to use. A little goes a long way and I imagine I can transfer plenty more images with the small bottle I purchased. The only thing I wish was different about it, is I wish it transferred to a clear background instead of white.
Still, not a game changer. I will definitely be honing my image transfer skills and creating a few more Christmas Tea Towels before the holiday’s!
Until next time…..


I love how it turned out vintage-y looking!
Really cute tea towel, Maureen! Love how it turned out. I did some heat transfers back in August/September when I was making chair covers out of drop cloth, well, I used iron on transfer paper and it worked great! I just had to make sure it was really stuck on and let the paper cool before pulling the backing off. Thought I’d share in case you’d like to try it sometime. 🙂
Thanks for letting know about the iron on transfers Barbara! I wanted to try that, but wonder if I could cut it down to size instead of ironing on the entire sheet. I will definitely give it a try 🙂
Maureen I too have been meaning to try this method because it looks so pretty. I want to thank you for this great tutorial. I think it has just the right amount of fade. Lovely!
It’s beautiful. Great job.