
Decorating Plastic Easter eggs with Mod Podge and Napkins
Decorating plastic Easter eggs with pretty paper napkins and Mod Podge is not only easy, but a very inexpensive way to decorate your home for spring!
If you are anything like me, you like to decorate for the seasons, but don’t have the budget, nor the storage space for all the seasonal decor. This easy spring tablescape is another example of low cost seasonal decorating.
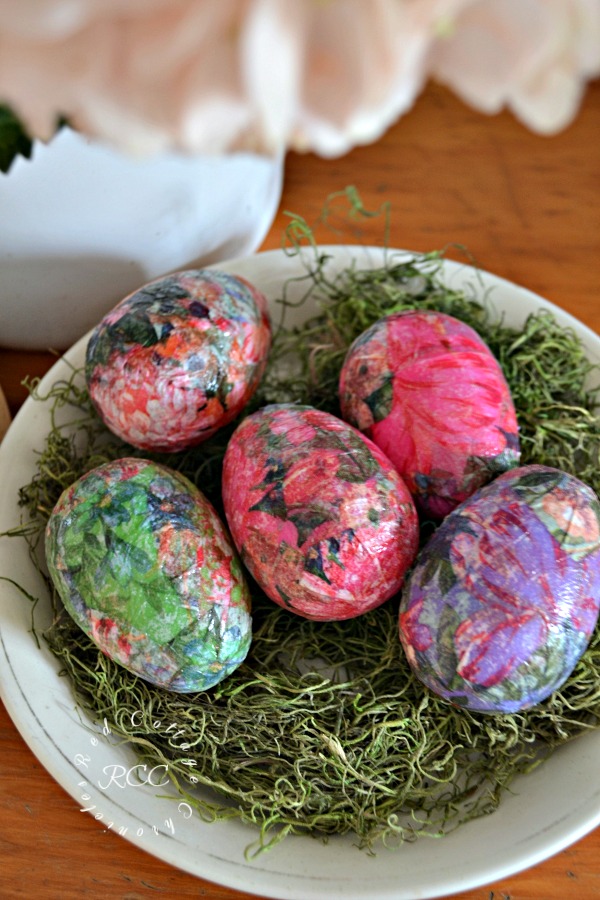
Who knew decorating plastic Easter eggs could look so good? These simple Mod Podge Easter eggs are made from dollar store supplies. Plus, they take up almost no space to store.
Supplies you will need for decorating plastic Easter eggs
- medium sized dollar store plastic eggs
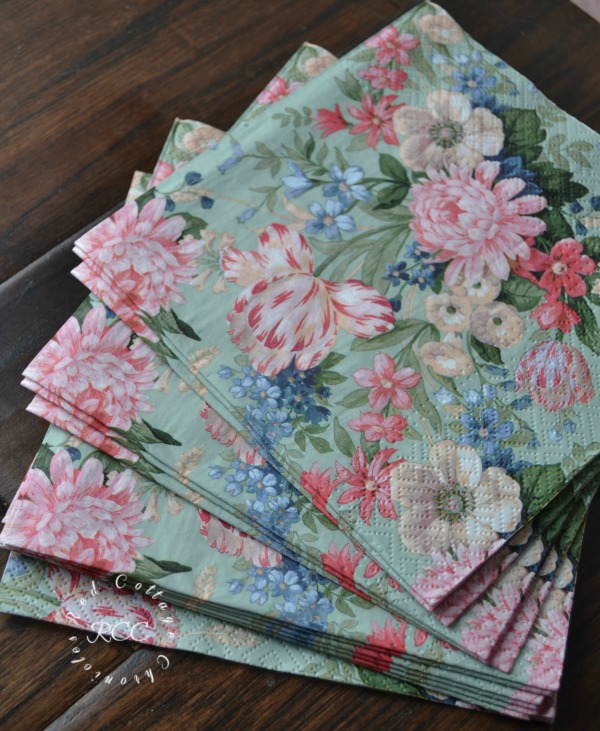
- floral paper napkins
- Mod Podge
- small paint brush
- scissors
How to decorate plastic Easter eggs with Mod Podge
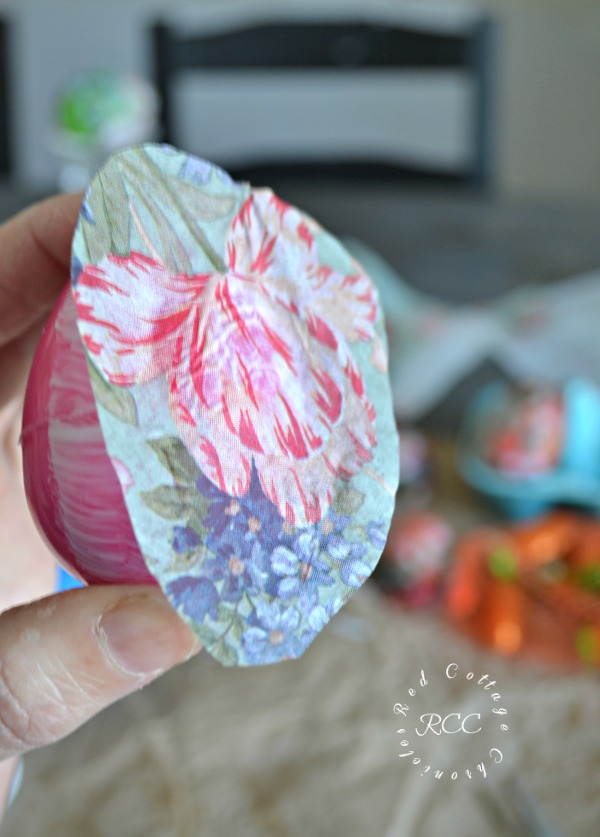
- I chose napkins with fairly large flowers, but choose whatever speaks to your style and decor
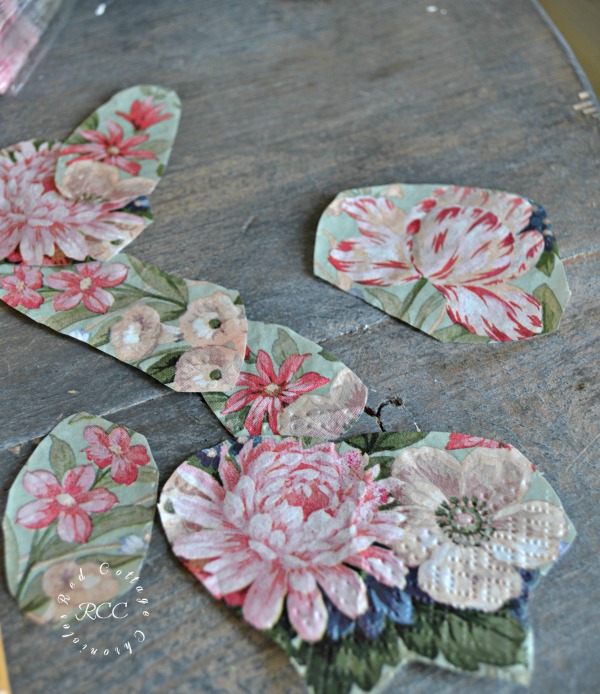
- Cut napkins our around the flowers or pattern to create several small and medium pieces, as shown above
- Most napkins will have multiple levels, but you will just use the top printed layer
Tip:
The plastic eggs that I got from our local dollar store had tiny plastic tabs on each side, which I just snapped off when I separated the egg and filed smooth with a nail file before snapping the egg back together.
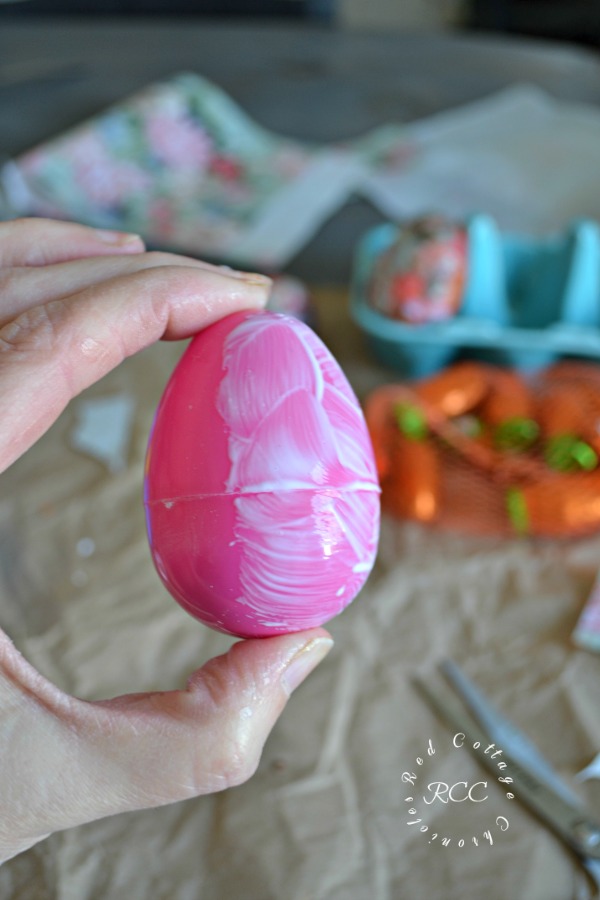
- Using a small paint brush, apply a fairly generous coat of Mod Podge to one side of the egg.
- Place a piece of the napkin over the Mod Podge and using your finger, gently press down all edges against the Mod Podge
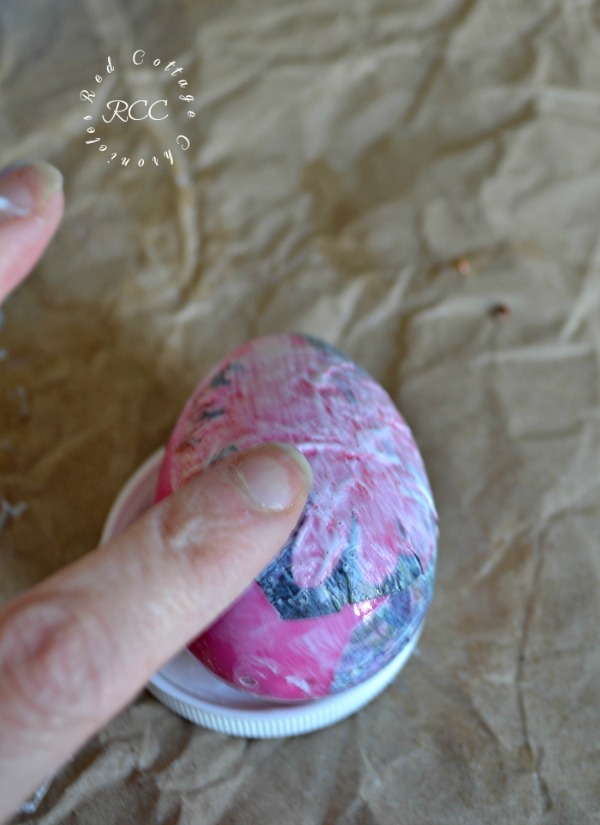
I found it the easiest at this point to use your finger dipped in more Mod Podge to smooth out any wrinkles. Ensuring your finger is coated in the glue will help prevent accidental tearing.
Note: The key is to not press or rub too hard or the napkin may start to rip. If this should happen, simply place another small piece of napkin over it.
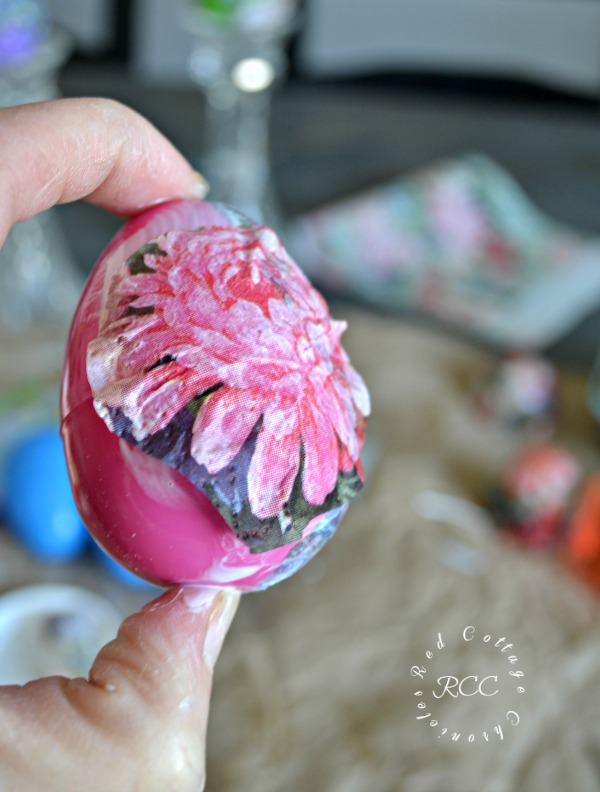
- Rotate the egg around, and repeat with another coat of Mod Podge, another piece of napkin, smoothing it out with a finger dipped in the Mod Podge
- Continue the above steps until the entire egg is covered with the napkin
Tips I used for decorating Easter eggs with napkins and Mod Podge
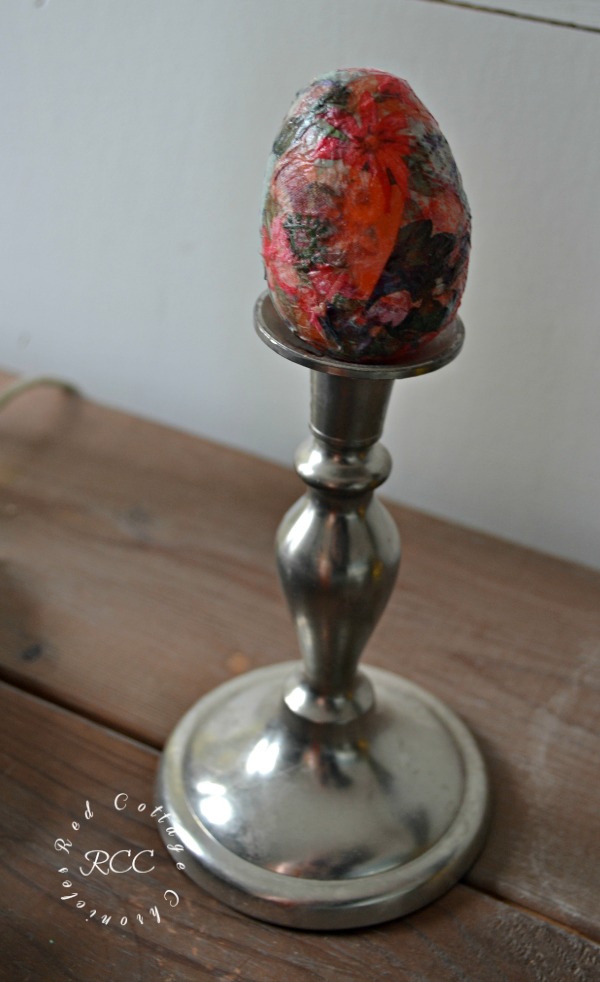
I carefully placed each egg in an empty candle stick to dry over night.
Try using several different colored eggs. Each one gives the egg its’ unique color, as the color will show through!
When they were all completely dry I placed them in a dish filled with grass! They add a touch of spring decor to the living room without spending a lot of money.

How well does Mod Podge work on plastic
I was pleasantly surprised with how well the mod podge adhered to the plastic eggs. They looked perfect throughout the spring season, and showed no signs of discolouration, peeling or cracking when they were tucked away in a plastic shoe box with other spring decorations.
The total cost was under $10, and that includes the Mod Podge (using a Michael’s coupon of course!) I was even more impressed with myself when I saw similar paper mache eggs at a local home decor store for a whopping $24.99 for four! With my supplies I could have made a dozen!
What do you think? A pretty, easy project that doesn’t break the bank!
Until next time……


