
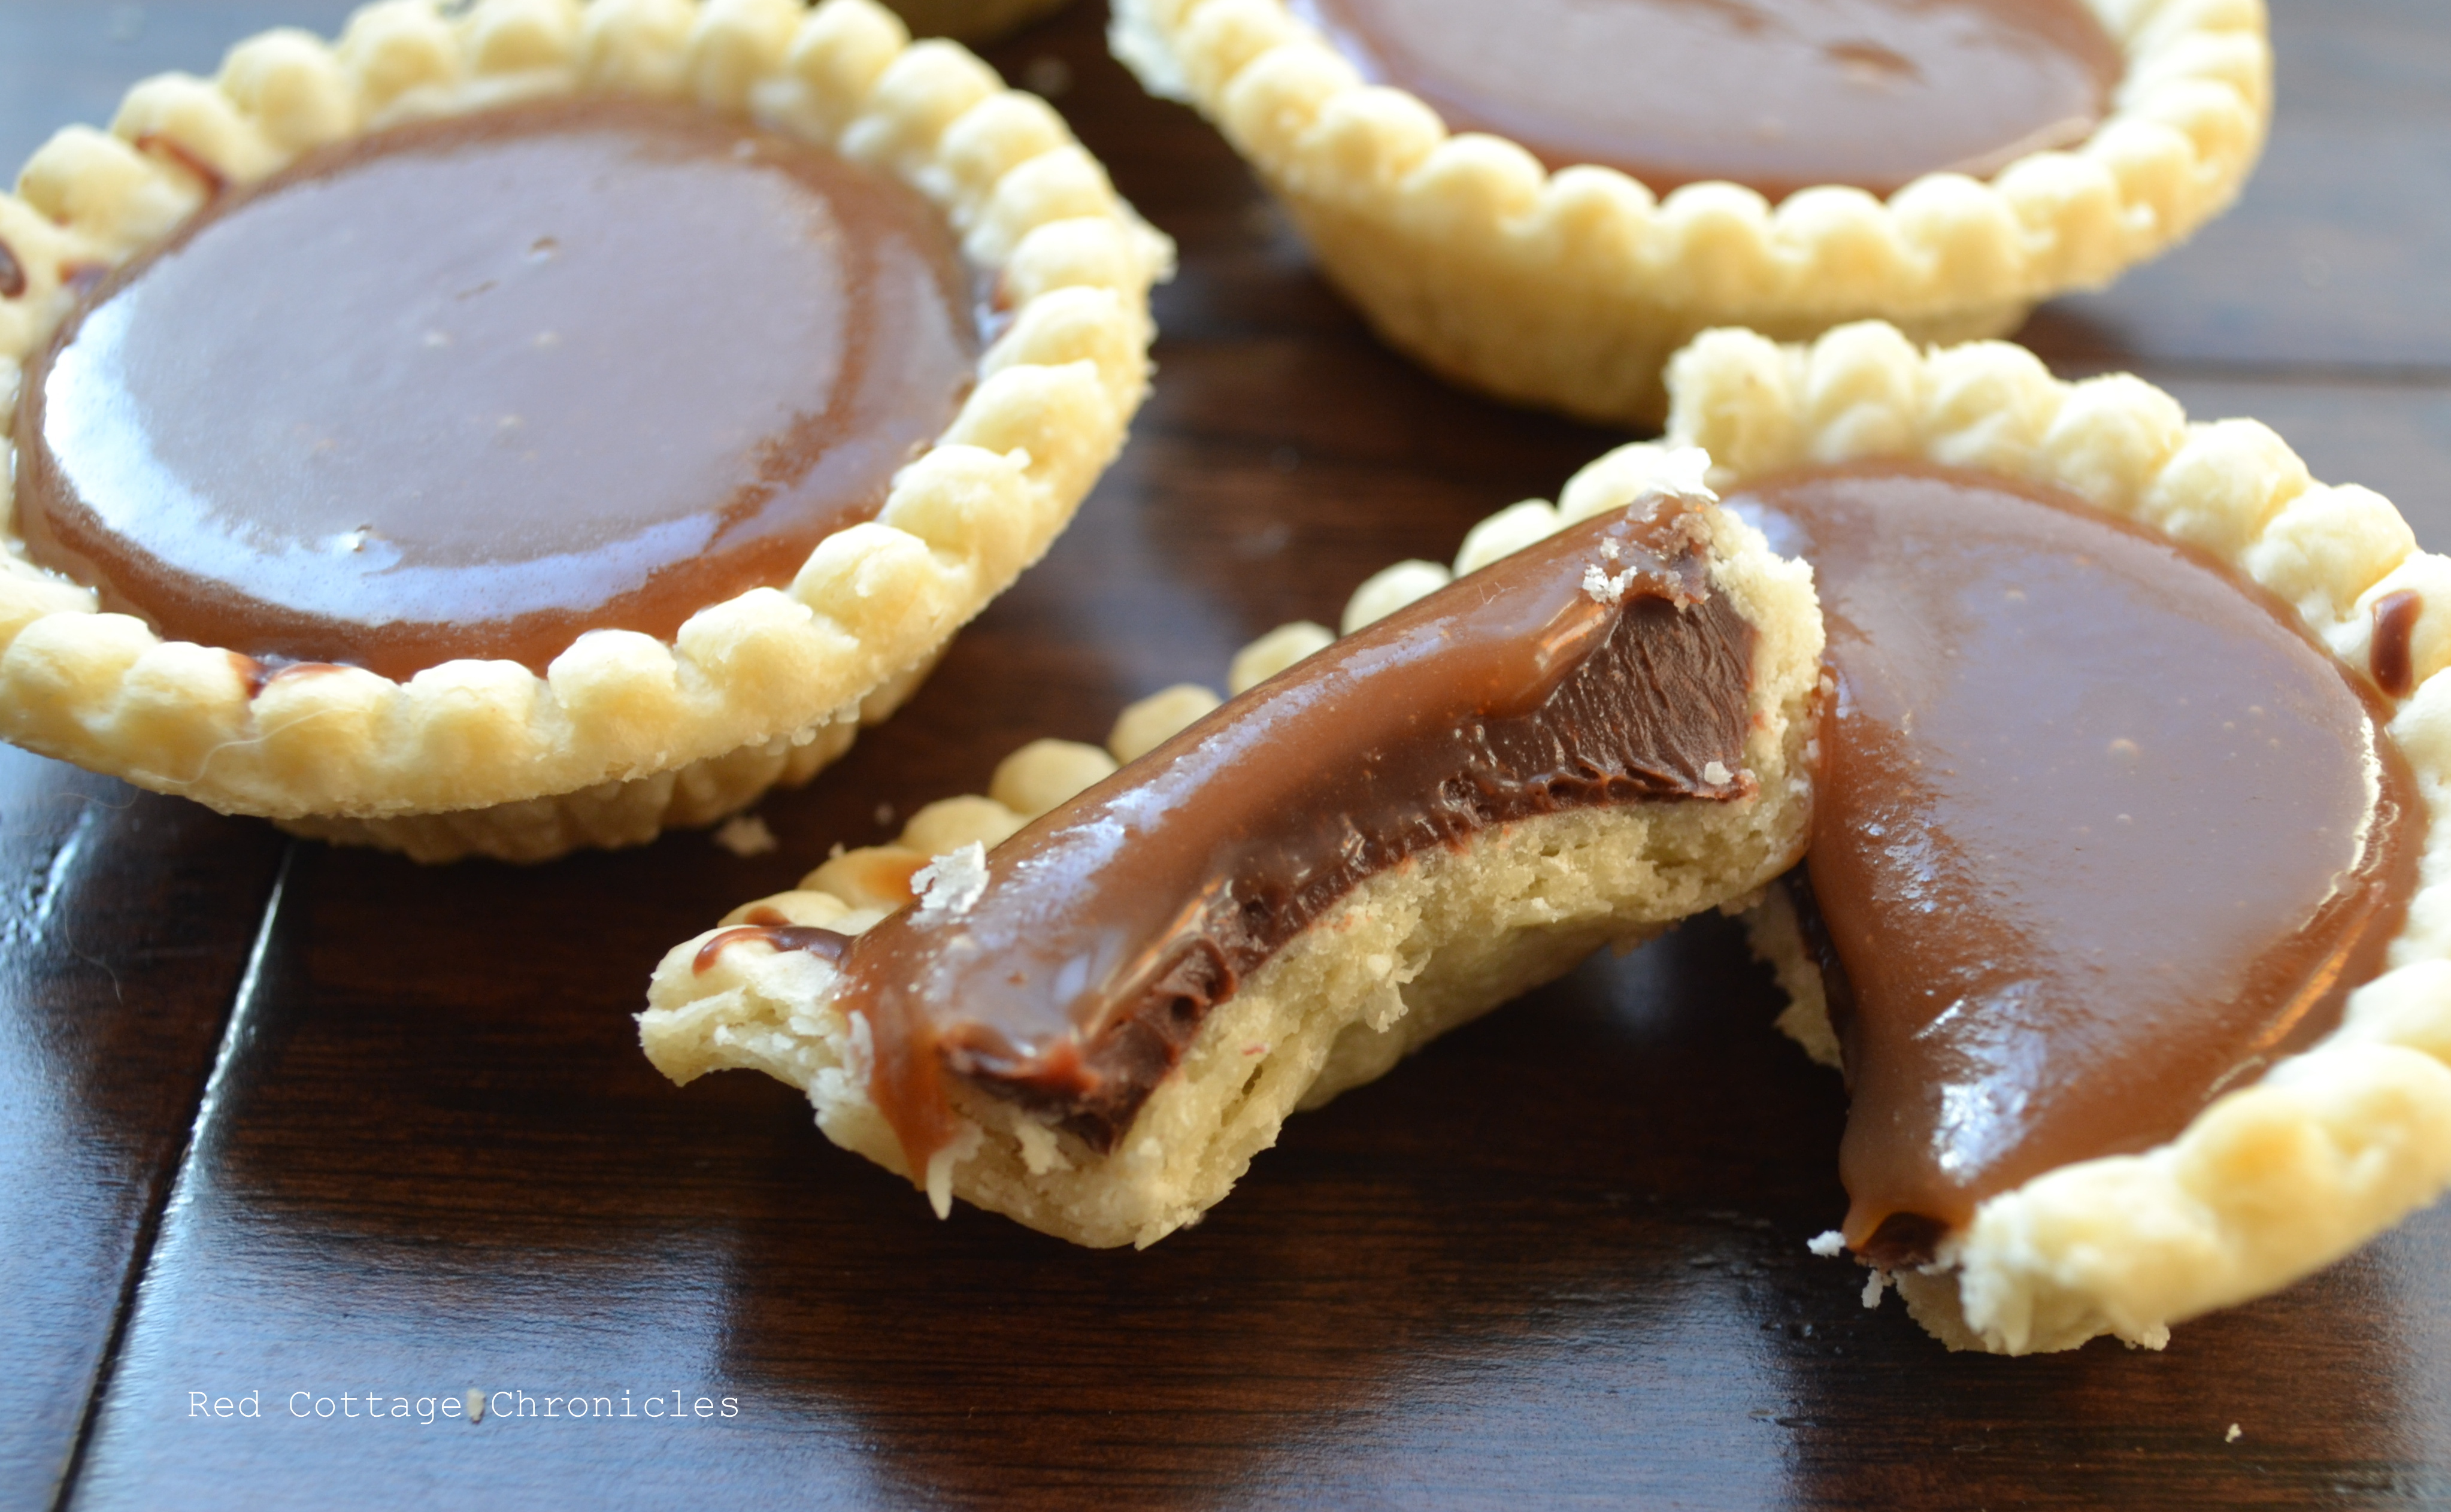
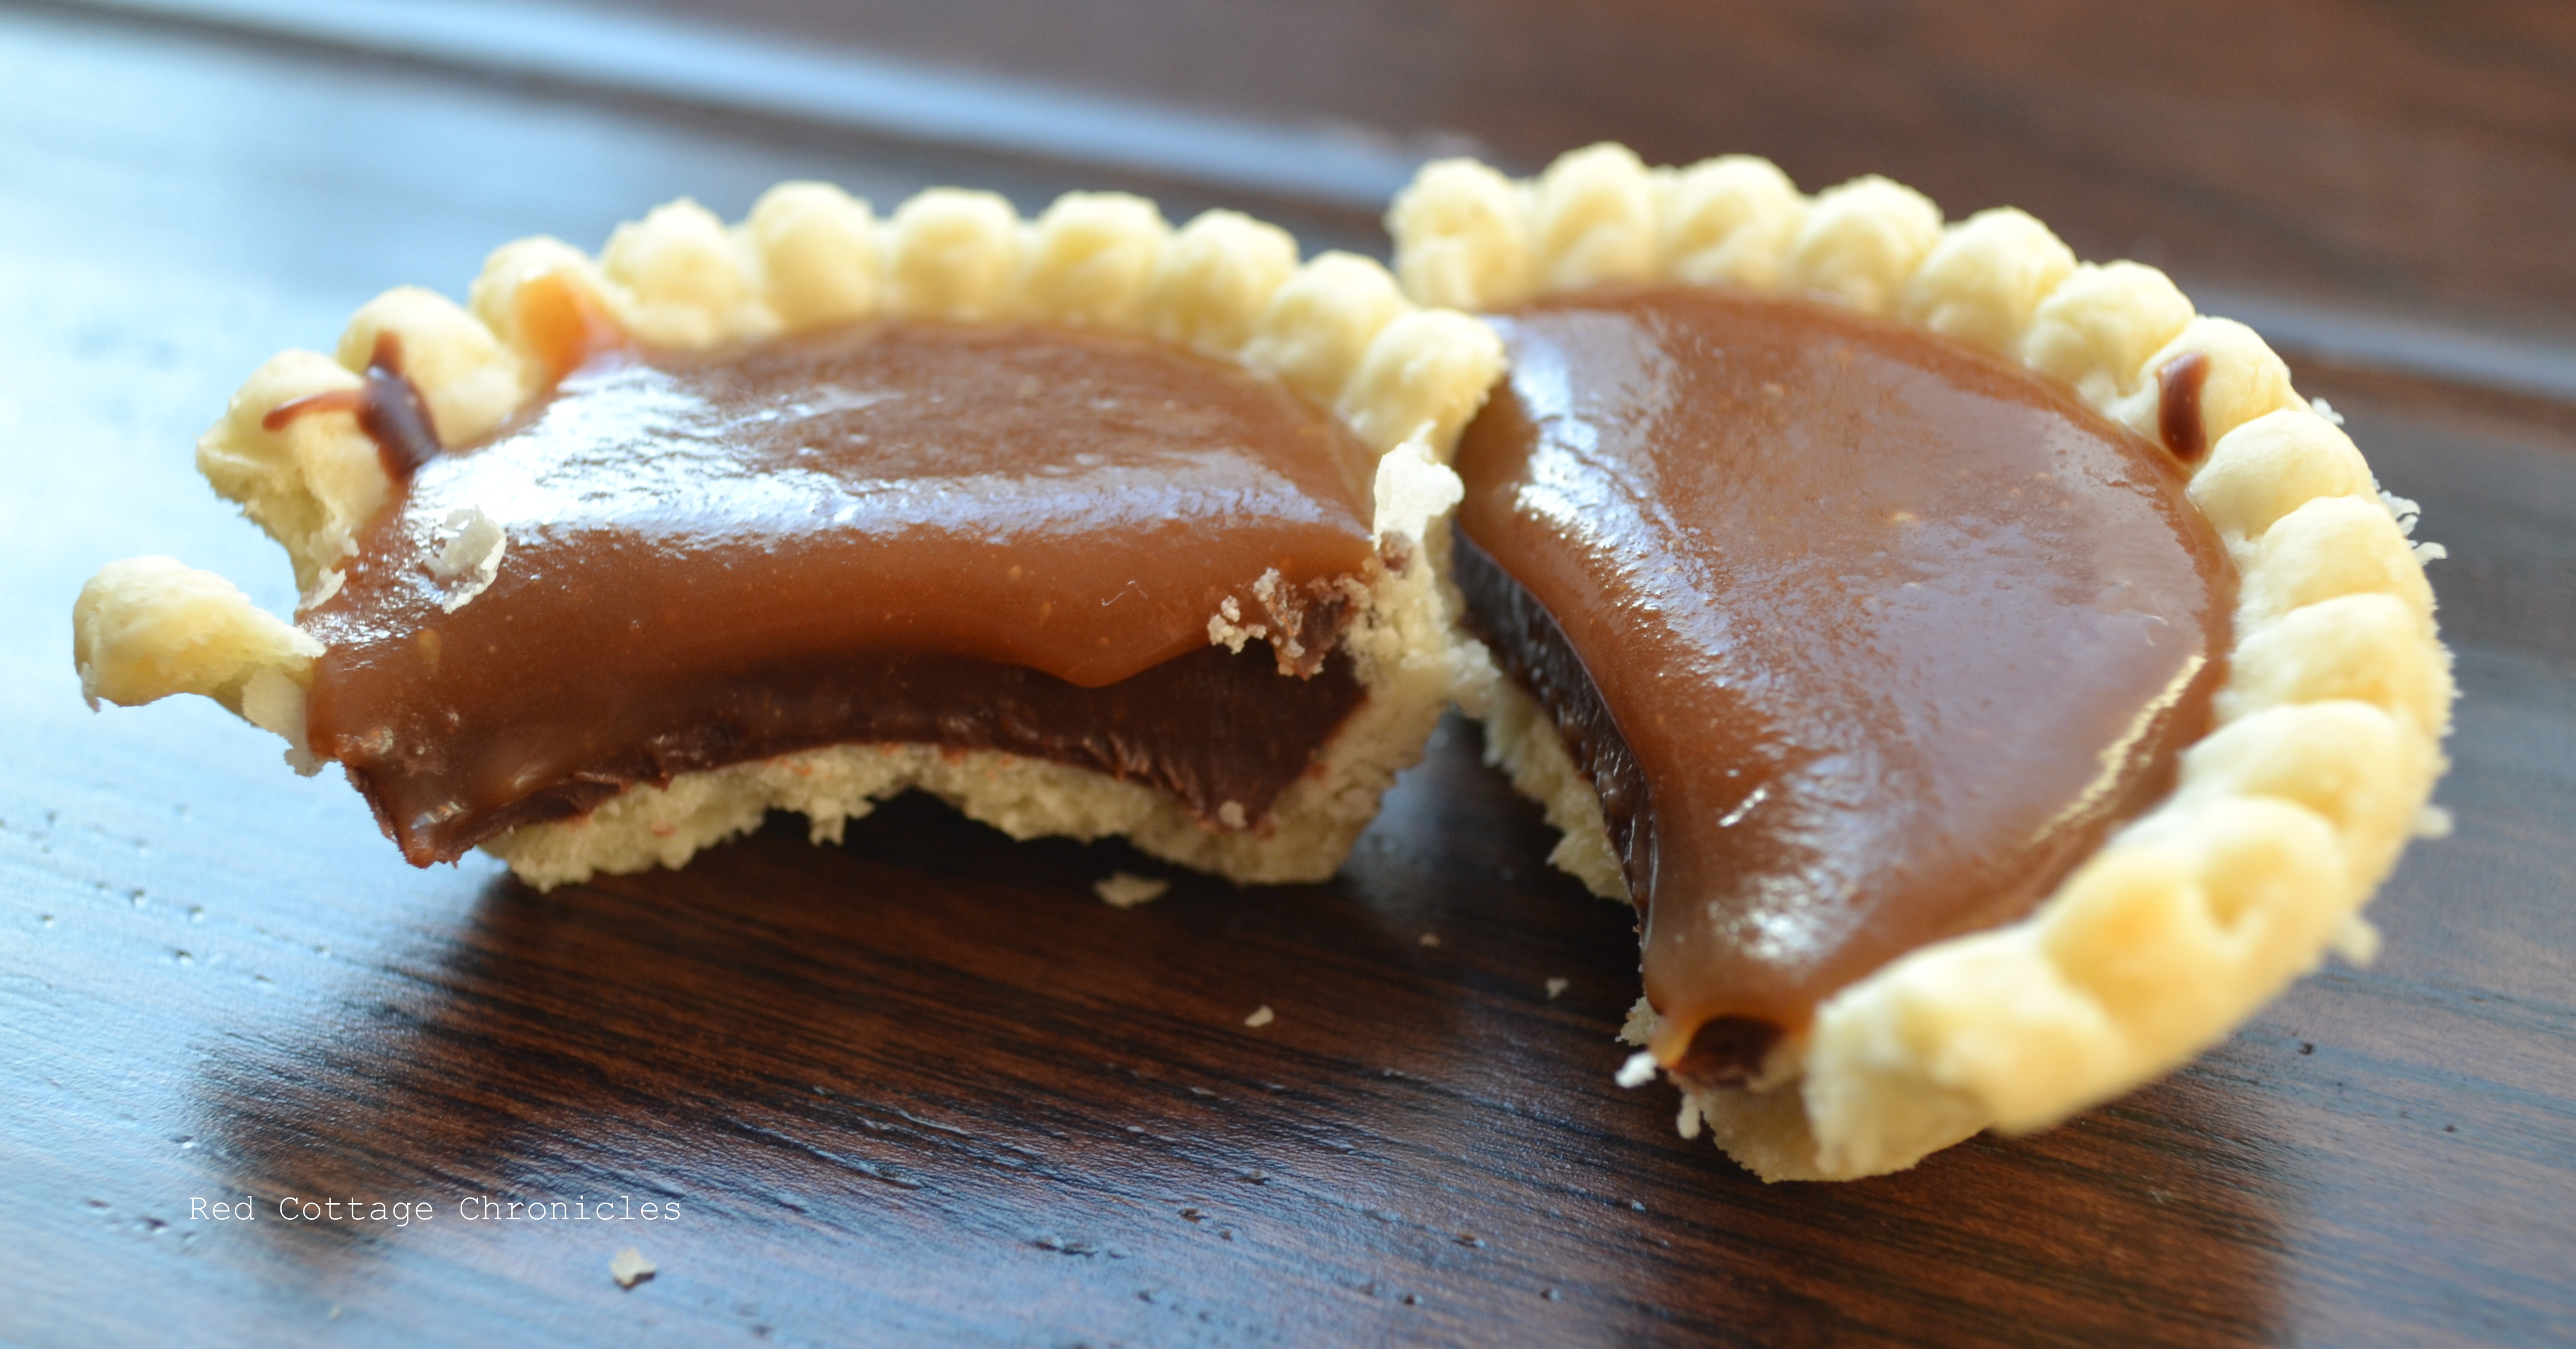
Chocolate Truffle Tarts
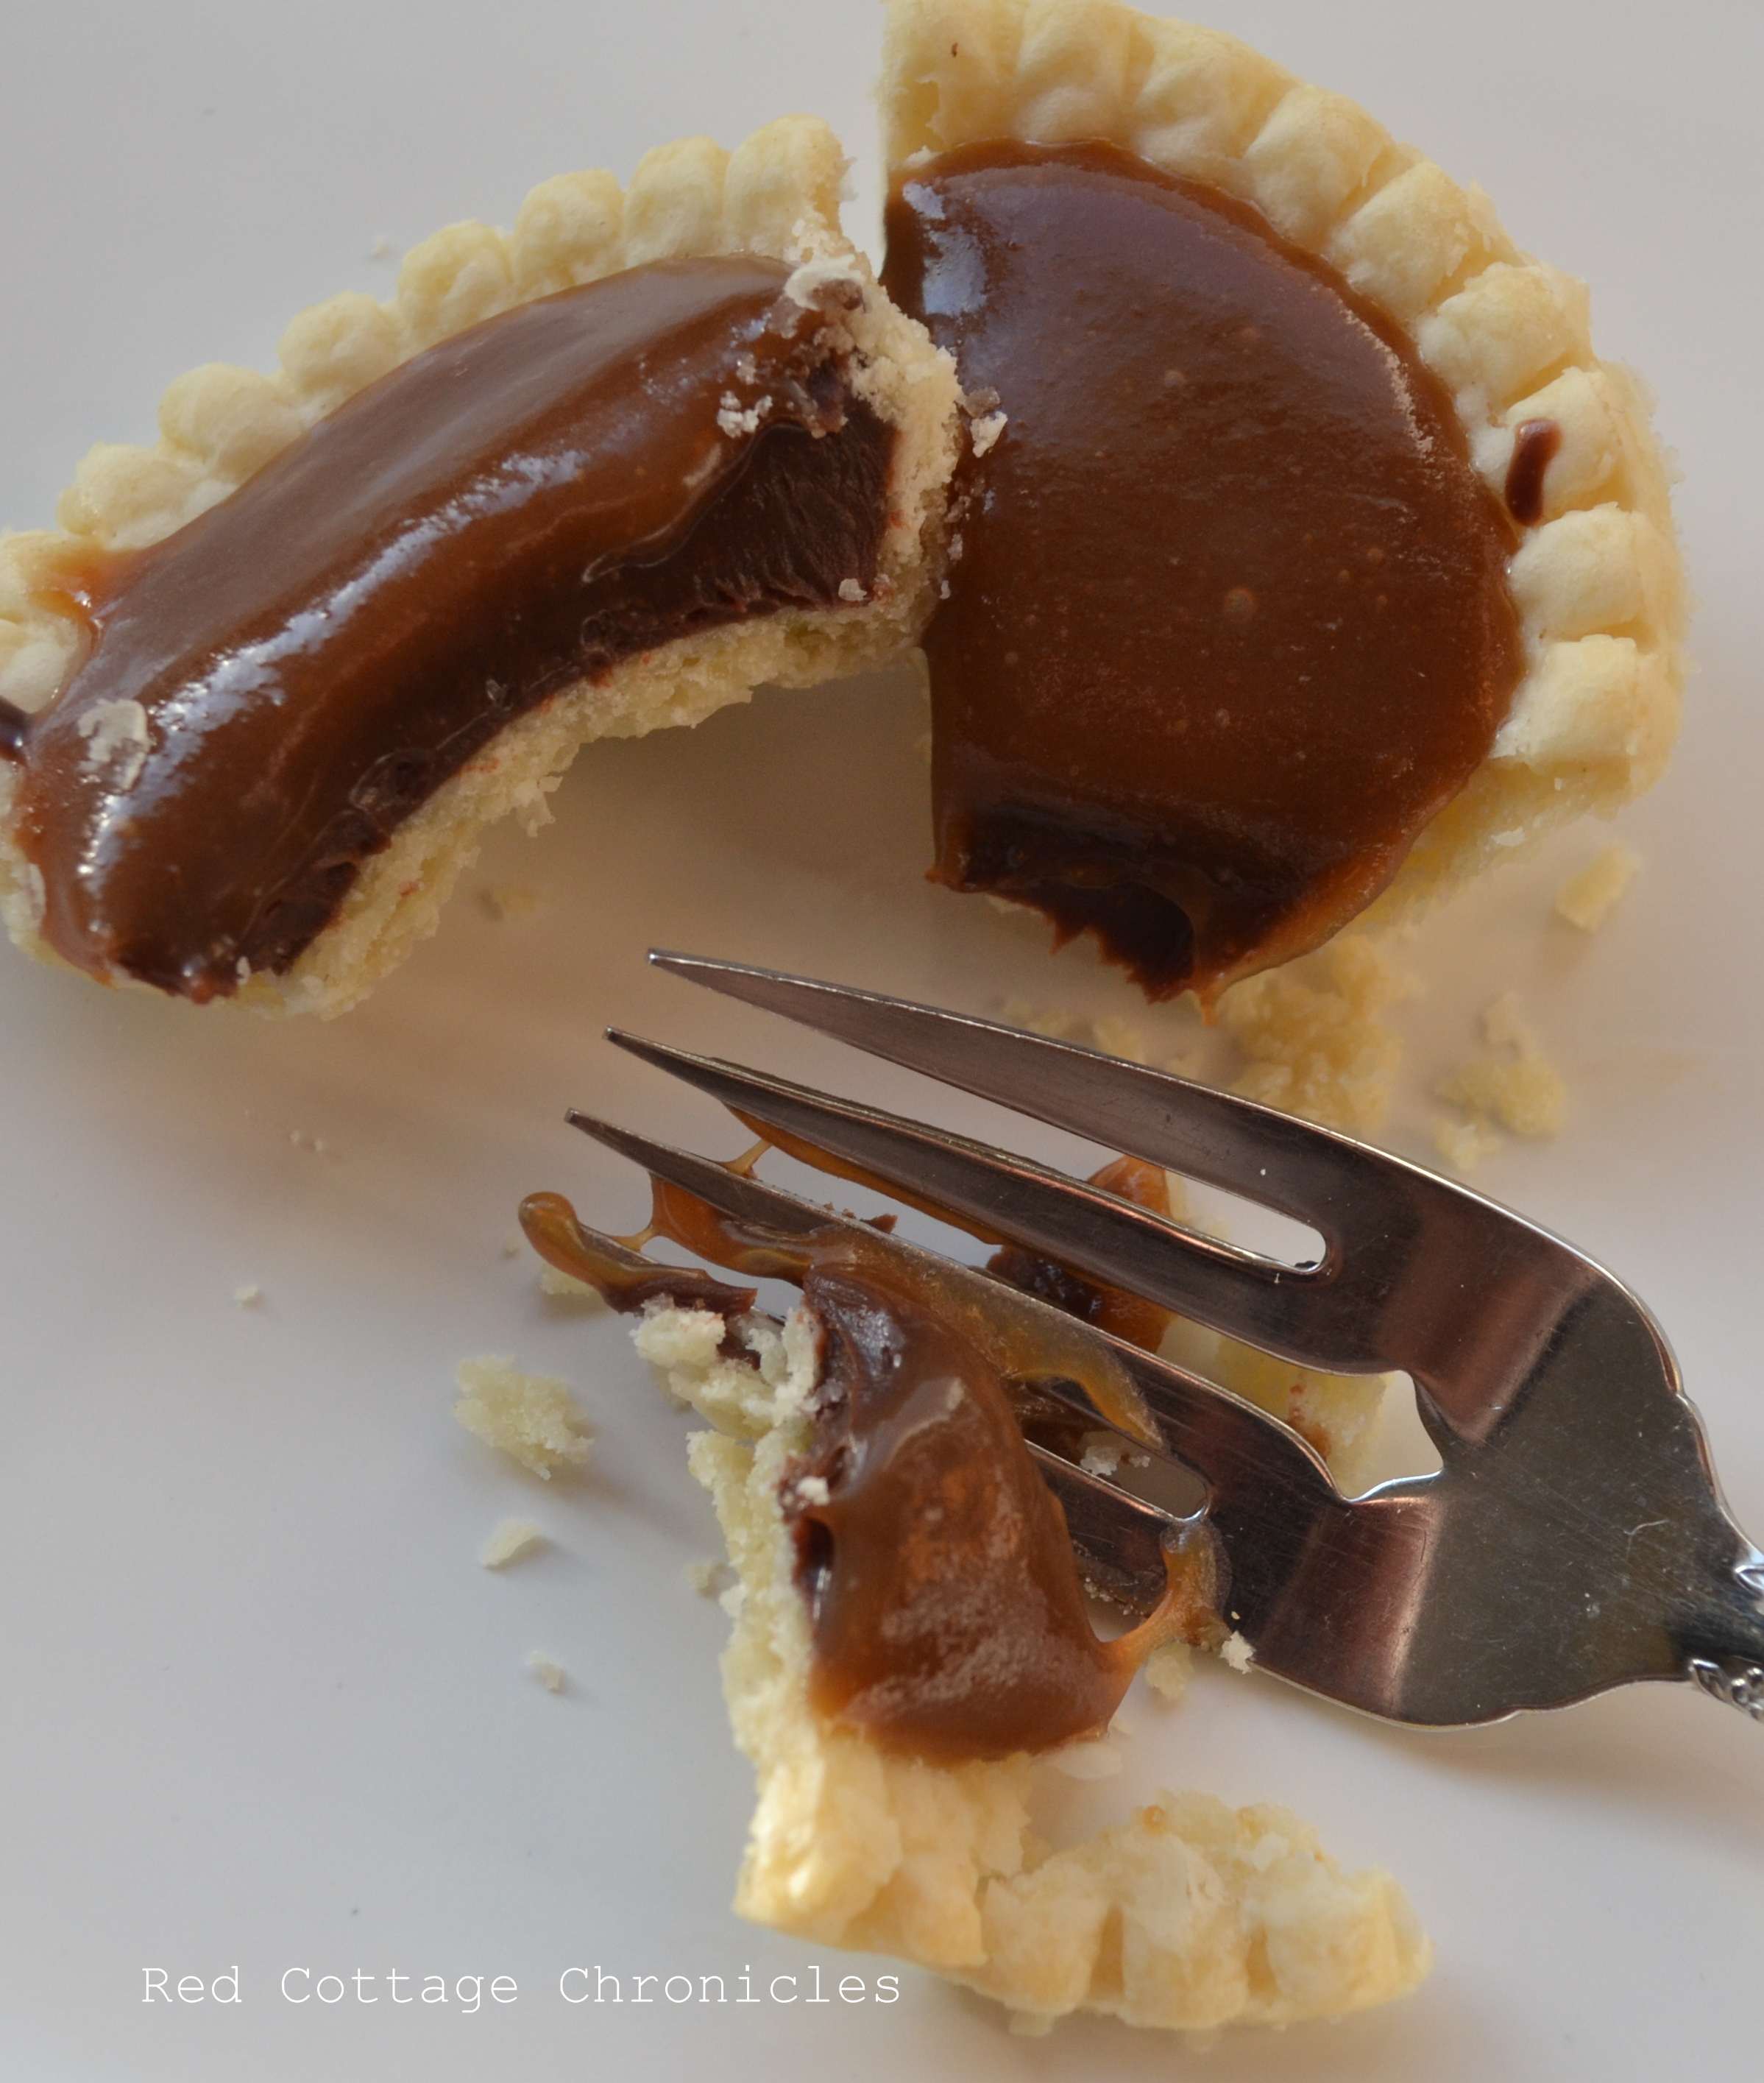
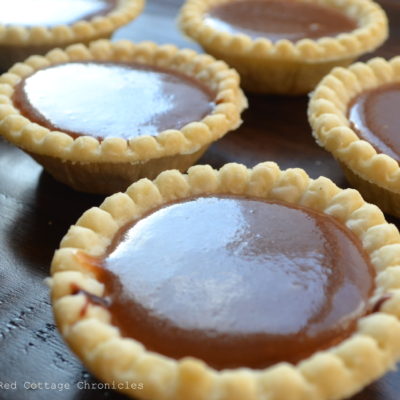
I was so excited to come across this recipe for Chocolate Truffle Tarts. Milk and dark chocolate blended and swirled together, poured into a flakey tart shell and topped with homemade caramel!
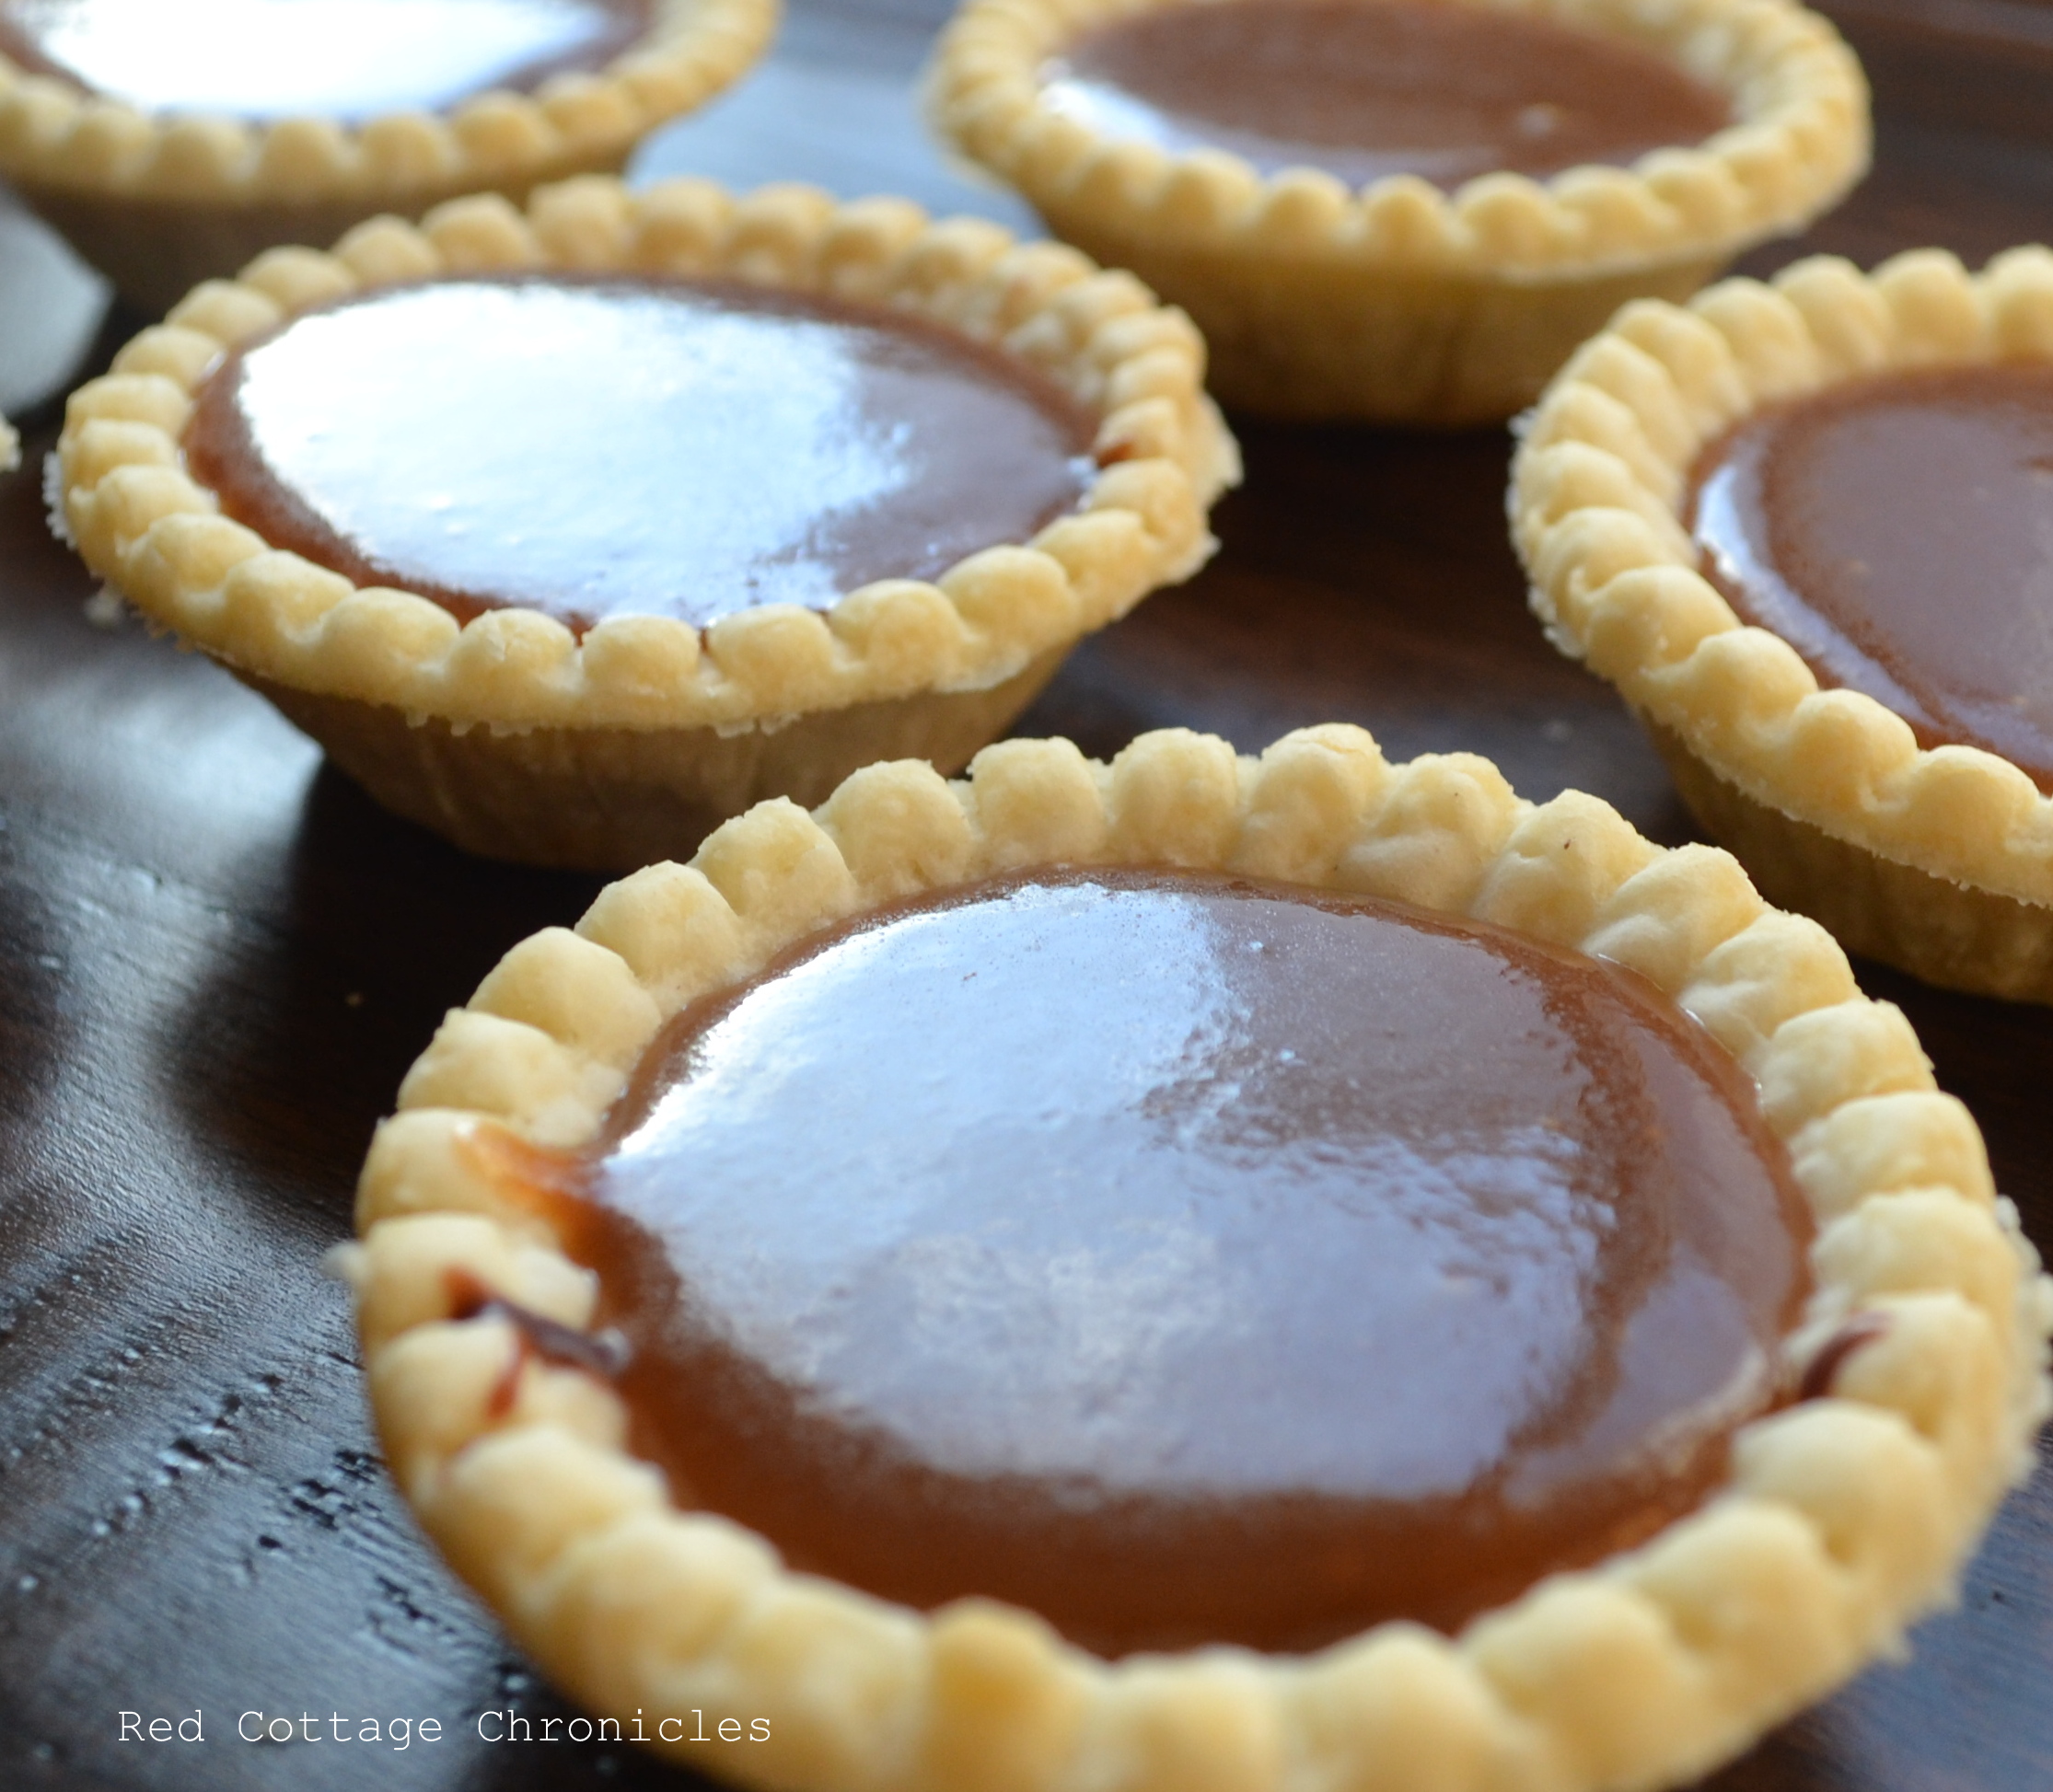
One of my favorite indulgences is to pick up one or two chocolate truffles from a fancy chocolate shop. I couldn’t believe how decadent and smooth these tarts were. The caramel topping sealed the deal.
Now that I have tried the recipe once I have lots of ideas for next time I make them. Although they are perfect just the way they are, I am thinking a mini version with some Bailey`s Irish Crème or some orange liquer blended into the chocolate. What a delightful addition to my Christmas cookie trays.
You can easily use a good quality caramel sauce if you don’t want to make your own. But making your own is really super easy, can be made with or without a candy thermometer and is WAY cheaper than buying a good quality caramel sauce.
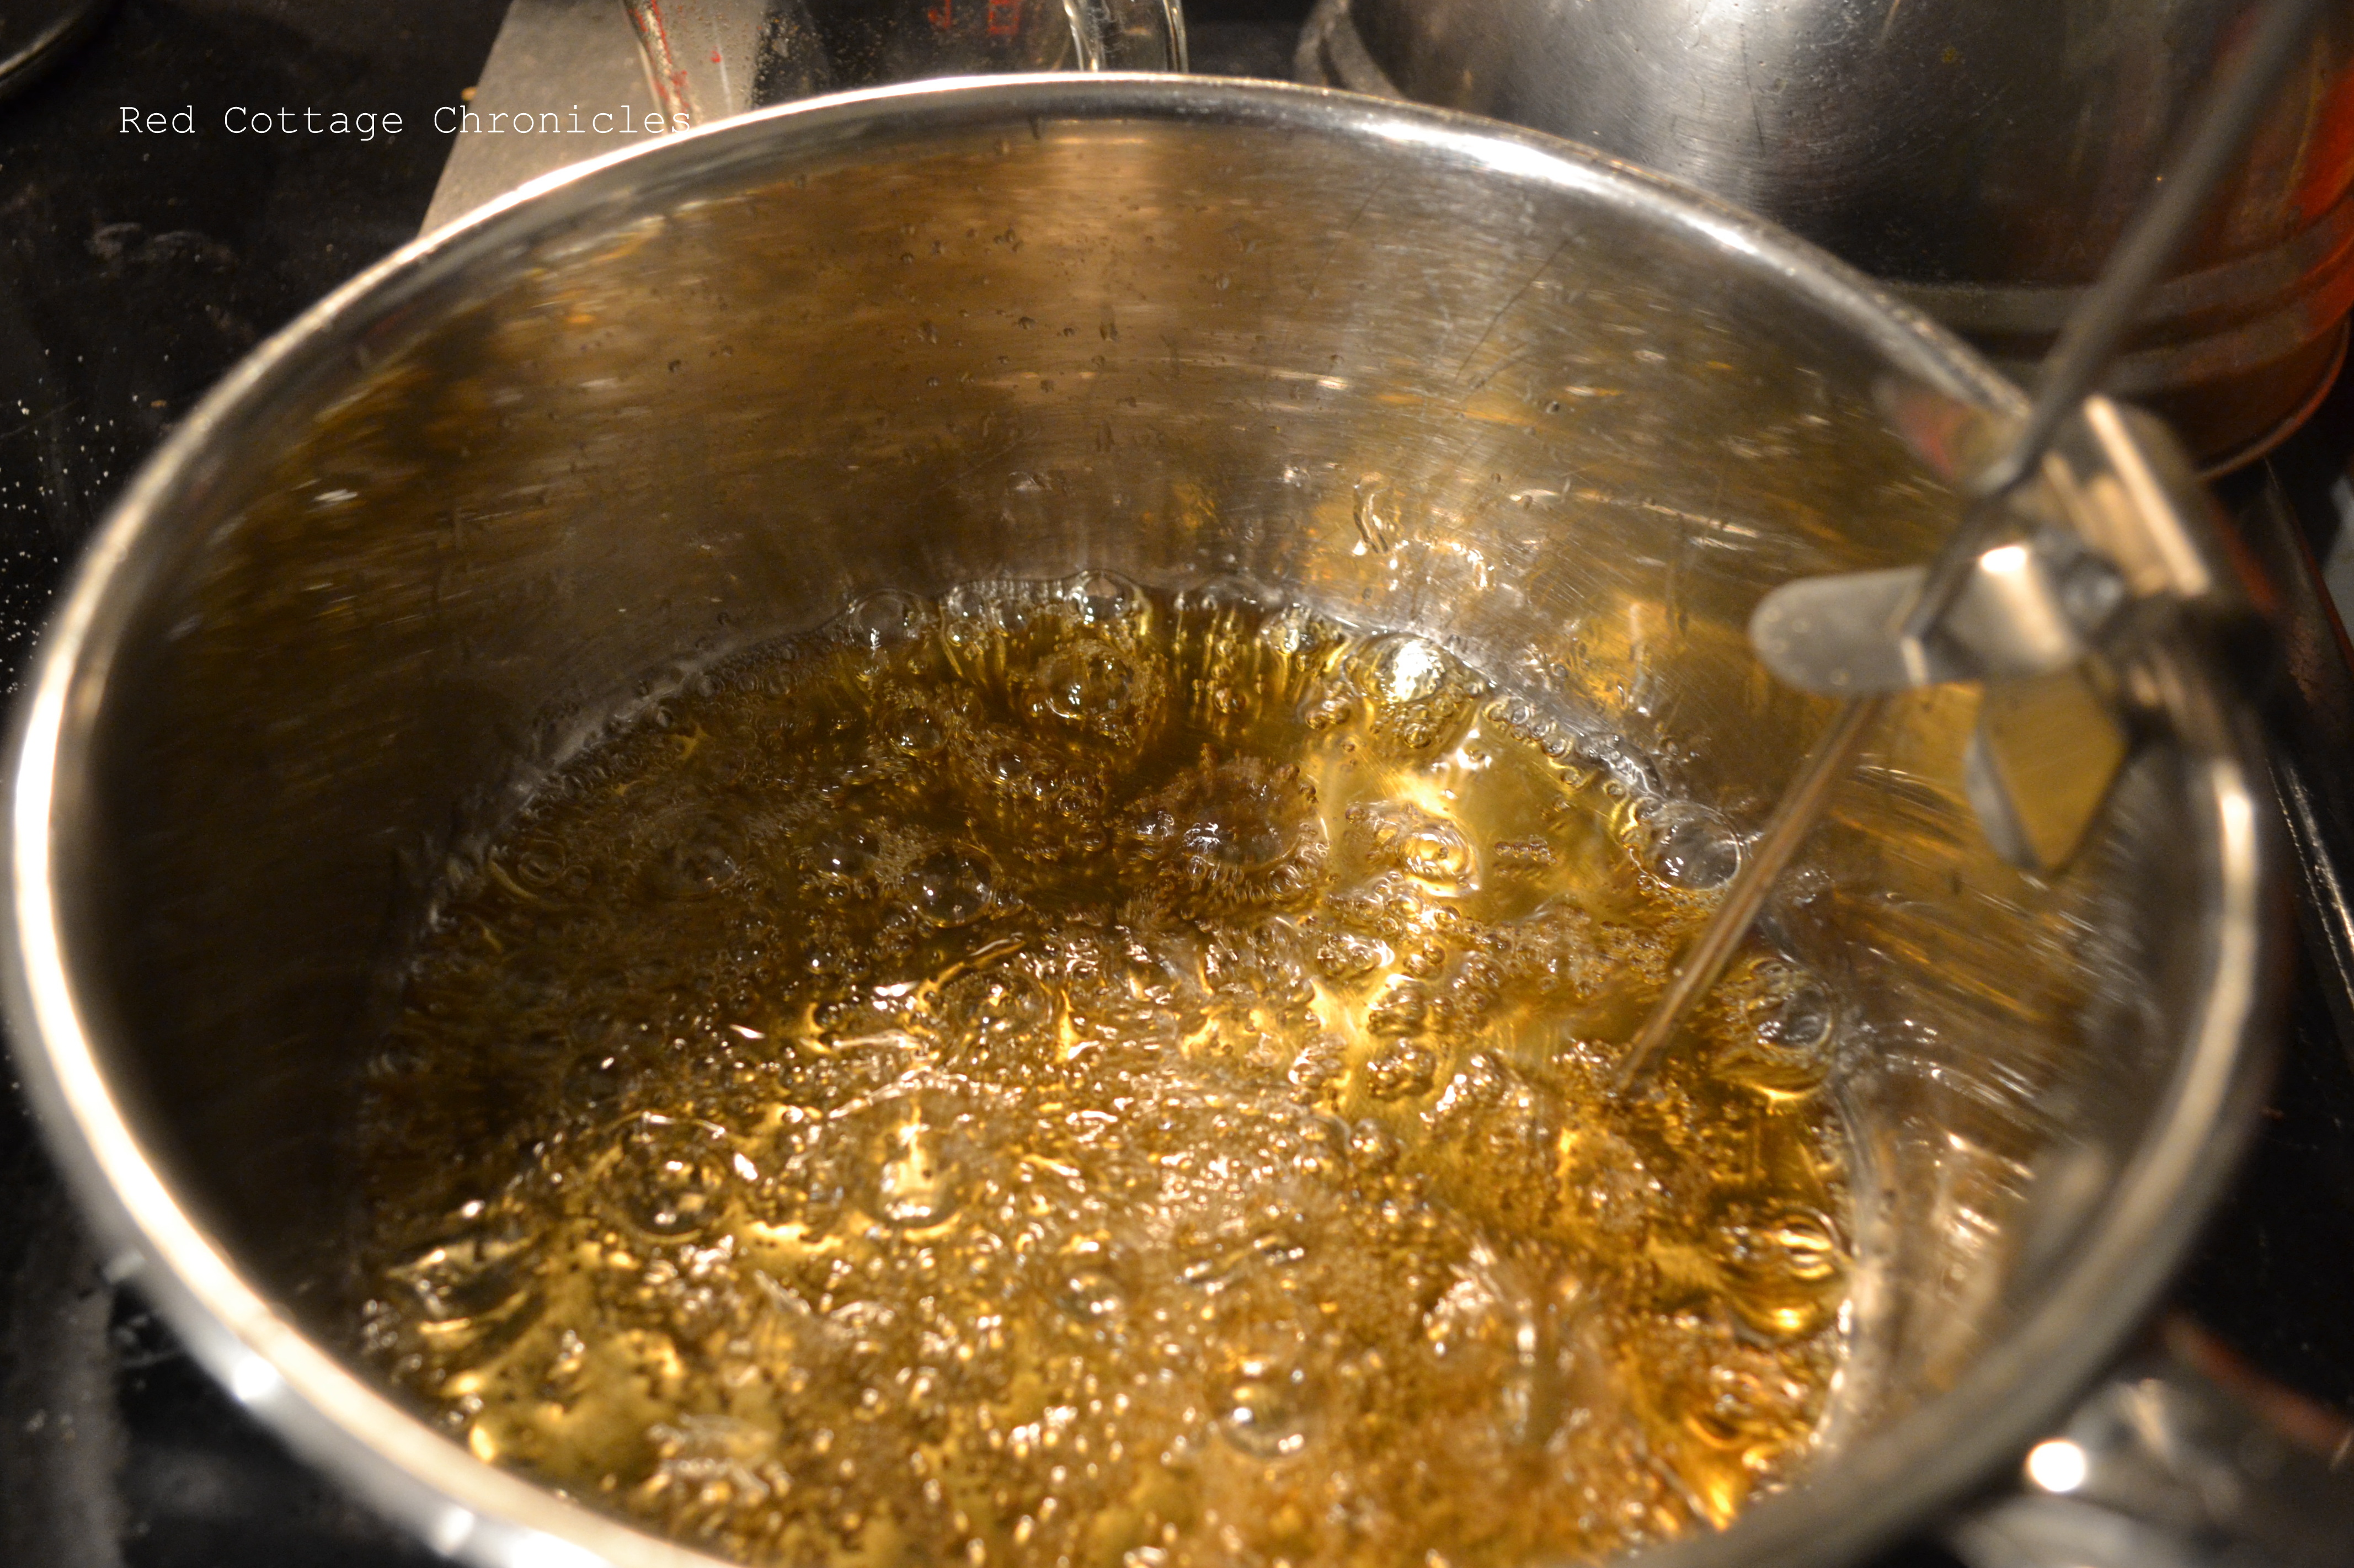
Water/sugar mixture at the caramel stage (340 degrees). Note the dark amber color. If you let it get too dark it will take on a burnt taste.
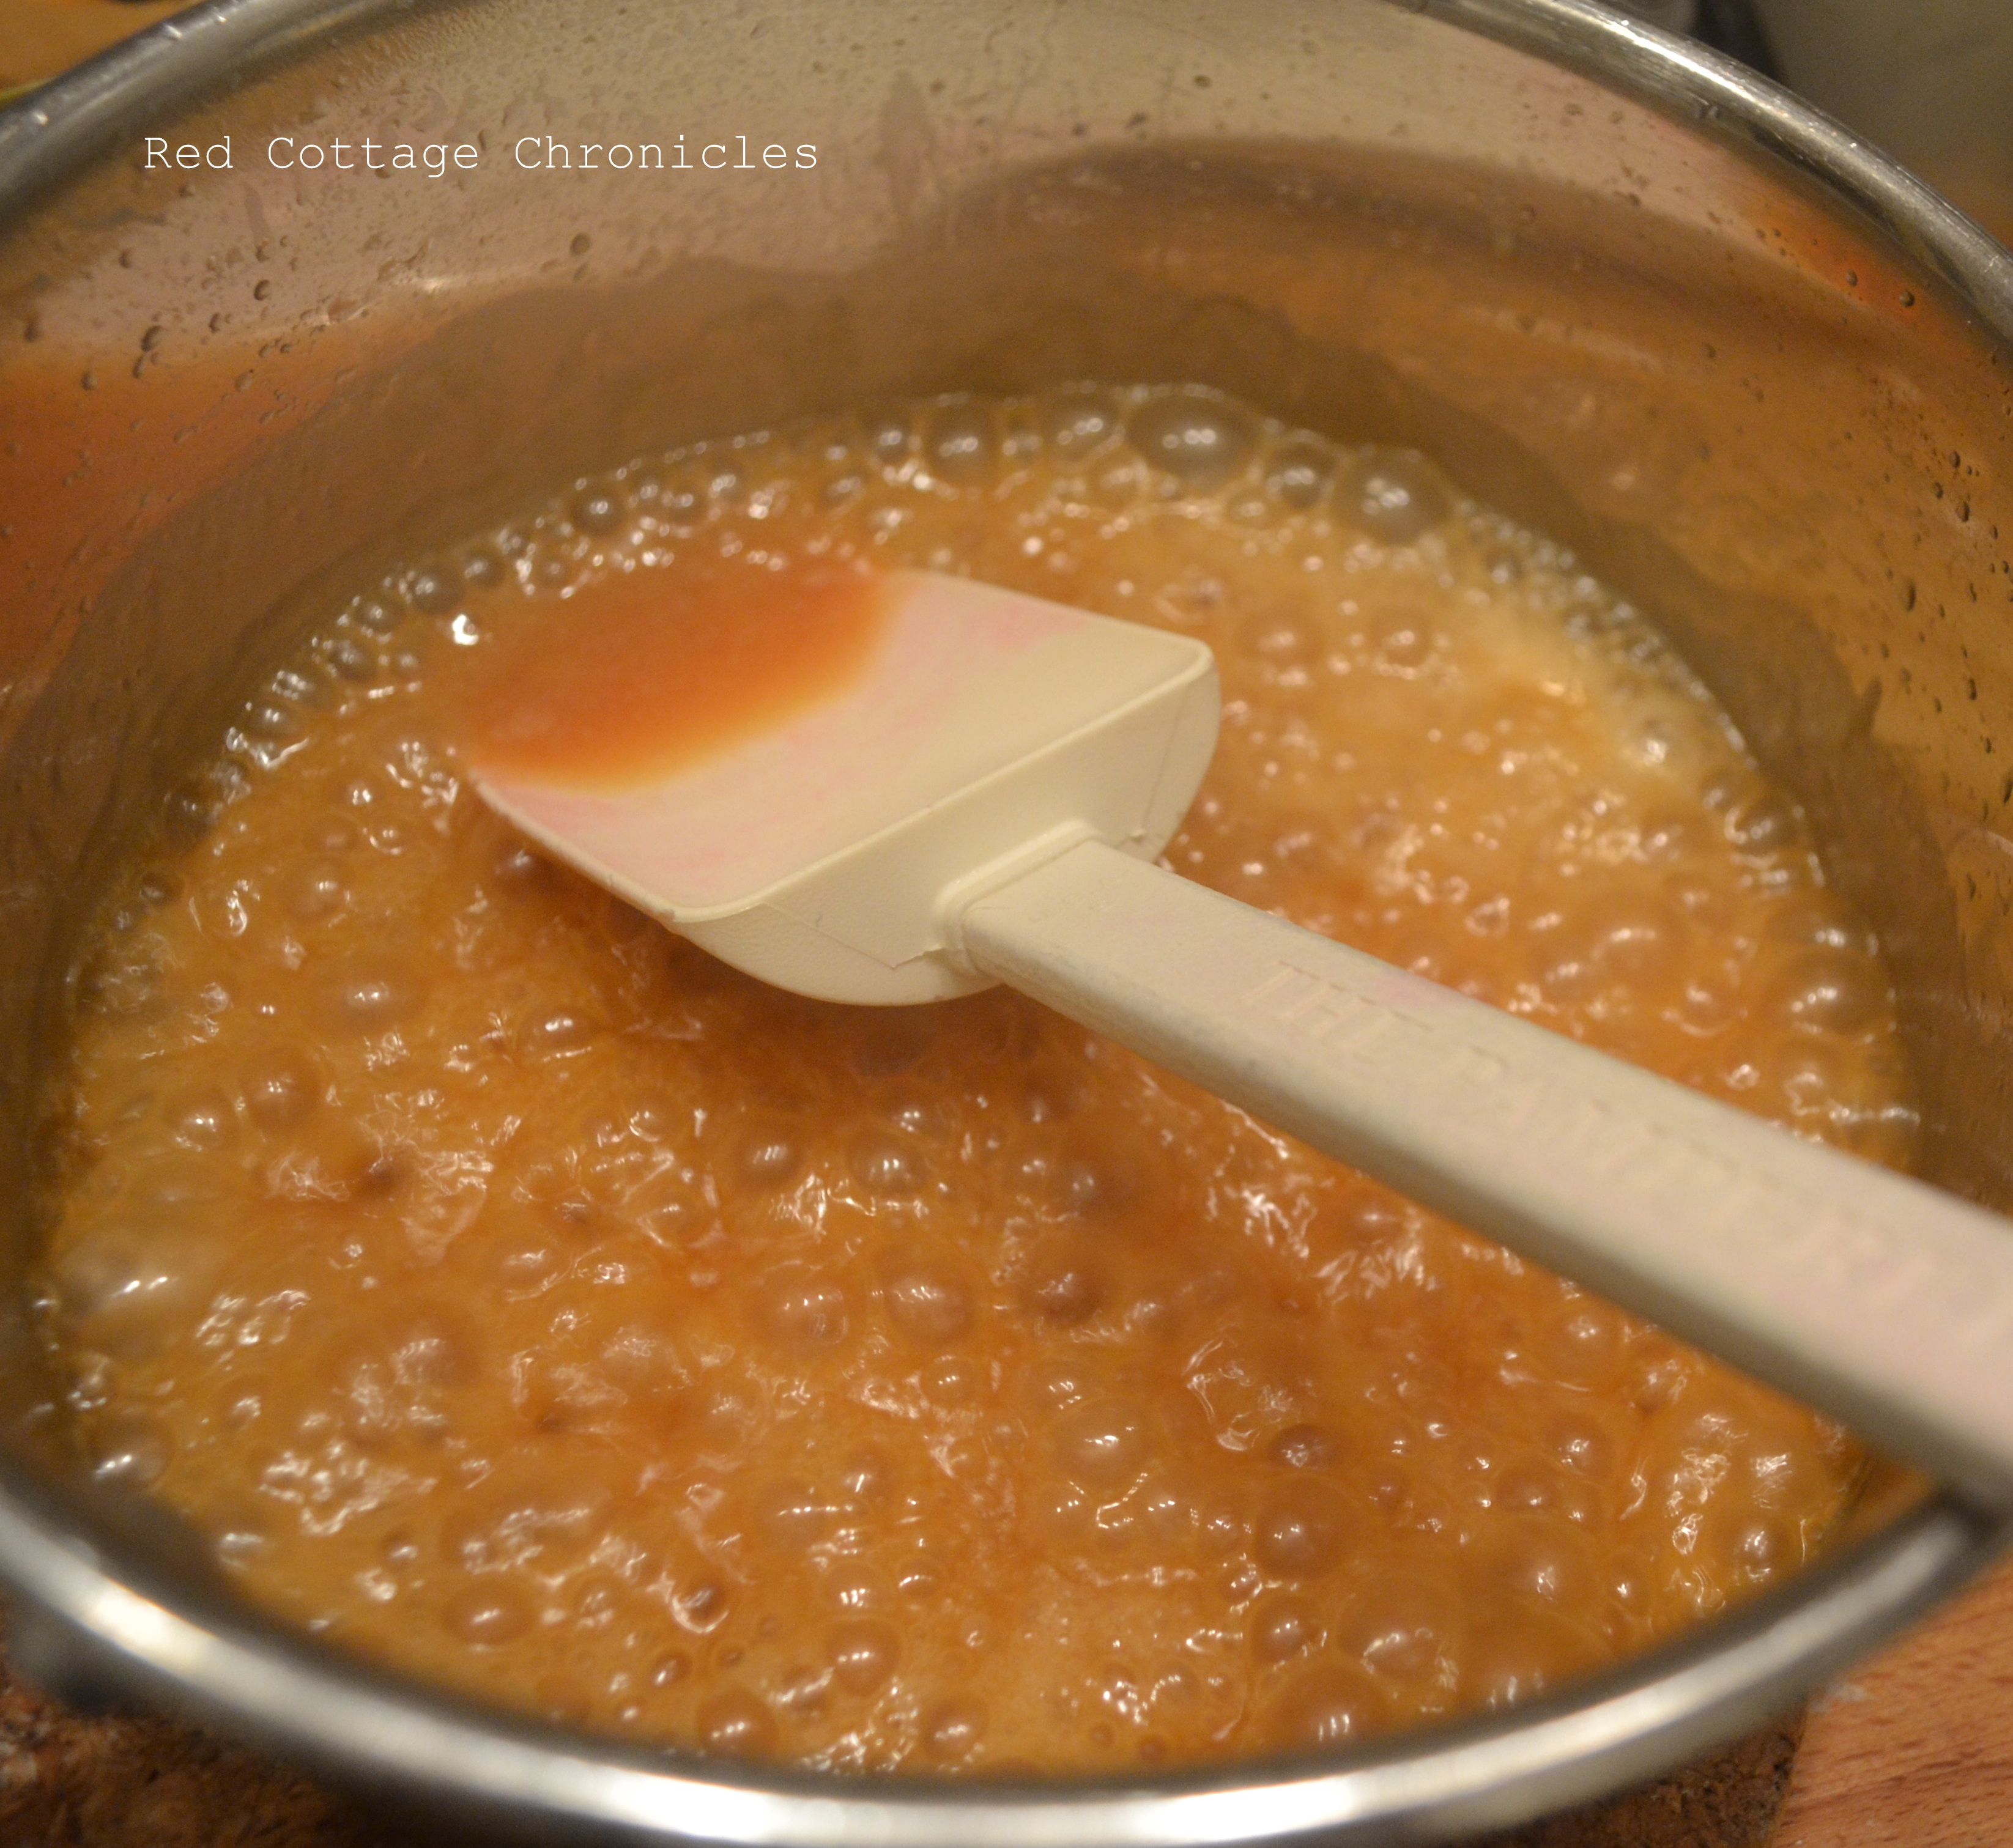
This is how it will look right after adding the cream.

And this is the final caramel after blending the butter and vanilla in! At this point, step away from the bowl and let it cool for about 20 minutes. It would be easy to eat the whole batch with only a spoon!
These tarts were gone before I knew it. My husband refused to bring any to work to share with his co-workers. He was hoarding them for himself! I did manage to slip one to my mom before she headed off to Florida for a few weeks.

I savoured mine and took my time!
The booklet that this recipe comes from is called “Bake Fest” and came with both my November issue of Chatelaine and Canadian Living. Not only is it packed full of some really good sweet and savoury recipes, but also several coupons for butter, pastry shells, and several other kitchen staples!
ENJOY!
Want to stay on top of all the sweet treats from the Red Cottage kitchen. Follow on twitter or facebook!
Chocolate Truffle Tarts
Ingredients
- 12 tart shells either your own homemade pastry shells or store bought
- 1/3 cup heavy whipping cream
- 1/3 cup Belgian dark chocolate chips
- 1/3 cup Belgian milk chocolate chips
- 1 tablespoon salted butter
- For the Caramel
- 1/2 cup granulated sugar
- 1/4 cup water
- 1/4 cup heavy whipping cream
- 1 tablespoon butter
- 1 teaspoon pure vanilla extract
Instructions
- Preheat oven to 375 degrees and if using homemade pastry, form into 12 muffin tins; if using premade tarts arrange them on a baking sheet.
- Pierce the bottom of each tart shell a couple of times with a fork.
- Bake for 12 minutes, remove from oven and allow to cool.
- Meanwhile, for the chocolate filling, heat the cream in a medium sized microwave safe bowl for 1 minute. Remove from microwave and add the chocolate chips and butter. Stir until chocolate is melted and mixture is smooth.
- Pour into cooled tart shells, and chill in refrigerator until set.
- For the Caramel, pour the sugar in a mound in the centre of a heavy bottom saucepan.
- Add the water, cover and bring to a boil without stirring or disrupting the pan. This should take anywhere from 4 to 5 minutes using medium heat.
- Remove the lid and continue to cook, not stirring but swirling the pan often, until the mixture turns a deep amber colour.
- Using a candy thermometer set to caramel (340 to 350 degrees) is a handy helper.
- When you have achieved this stage immediately remove from heat, and wearing oven mitts slowing whisk in cream (it will really steam up - hence the reason for the oven mitts!).
- When you have a smooth mixture, add butter and vanilla and stir until combined.
- Allow the caramel to cool for about 20 minutes.
- Spoon over set chocolate tarts.
- Return to the refrigerator to set caramel.


These look divine Maureen – I will DEFINITELY make them this weekend! AND I love your creamy lemon squares which I also can’t wait to try… BTW I’m stopping over from Anyonita’s “Tasty Tuesdays 35” link party – I’m no 14!
Hi Corinna! Thanks for stopping by. I would love to know how you enjoy the tarts! The creamy lemon squares are one of my favorites. I am very partial to anything lemon.
Maureen,
I’m visiting from Tasty Tuesdays. Your tarts look delicious. I can’t wait to try them. Pinned. Following on Twitter.
Annamaria
Thank you Annamaria (love that name!). I would love to know how they turn out for you.
These could be dangerous since they’re so small! LOL 🙂
Thanks for joining the Link Up this week!
You are so right Jess!! I had to step away. It would be so easy to eat the whole batch without a second thought 🙂
I agree with Corinna. These look DIVINE! But then, your desserts always do. 🙂 I just saw this picture on our link party and thought it looked like a dessert you would make. And it is! So funny. I might make these when I’m with my mom for Thanksgiving. She would enjoy it.
Thank you Lori! It is funny you had my dessert pegged!! The are so easy to make. Let me know how they turn out if you get a chance to try them.
Excuse me while I drool over the computer! These look scrumptious! I’d love for you to share this recipe with the Life Created link party! This week’s party is live, and now I’m off for more inspiration from your blog!
Erin
http://www.theviewfromfiveten.com
Thank you Erin! I have gone on over and linked up!
Yes, divine is the perfect word to describe these! Amazing photos, as always! I just may have to make these!
Thank you Jeanie!
These look absolutely delicious. Thanks for linking up to the Ducks ‘N A Row blog hop. I’m co-hosting this month. Hope to see you link up something good next week too.
Thank you Christa! I will be back next week to link up for sure.
I have made a very similar recipe but I but the caramel in the centre and topped it with chocolate. Oh and it used a chocolate dough for the crust. These look so good too!
Chocolate crust! I will have to try that. Thanks for the tip 🙂
Oh wow. These tarts look so rich and decadent! I love the smooth, rich chocolate paired with that buttery caramel, and I bet the crumbly pastry is such a great contrast! What a treat; thanks so much for sharing!
Thank you Allie! Love linking up and checking out all the other amazing links 🙂
Oh, yummy. These look SO amazing and I think adding Bailey`s Irish Crème to them is such a great idea. I can’t wait to try this recipe. Thank you for sharing and for linking up to Thrifty Thursday.
OH! my gosh! really? seriously? these look amazing! top 15 from foodtastic Friday!!
Looks SOOOO yummy! PINNED! Do you think this can be done with pumpkin?
Mandy
Small Fine Print
If you are thinking of adding some pumpkin in with the chocolate, I am sure it can be done, however you might have to increase the chocolate a wee bit. The pumpkin will make the chocolate centre a bit softer, but it might be worth a try. I would just start with a small amount of pumpkin and keeping adding until you get the pumpkin flavor you are hoping to achieve. Let me know if you give it a try.