
DIY Wood Screen Door Tutorial
I remember the first time I saw this wood screen door. I was flipping through a favorite magazine and saw it in an ad. I quickly checked out the vendors website only to be faced with a price tag north of $500.
Yeah. Not going to happen.
Then it hit me.
I don’t even think Tim noticed me looking lovingly in his direction while he was engrossed in watching golf. The wheels were turning in my mind. I just knew he could build this for me for a fraction of the cost. I just had to convince him that he could! After all he has already built me this harvest table and this outdoor sofa!
We have had many wood screen doors in our past, but always found they needed replacing after just a couple of years. The stock ones found at most home improvement stores are just not made to last and we decided to go with an aluminum screen door last time it needed replacing. I have been wishing for another wood door ever since.
When I approached him with the photo and told him I thought he should build this for me, I was pleasantly surprised when he agreed to give it a go!
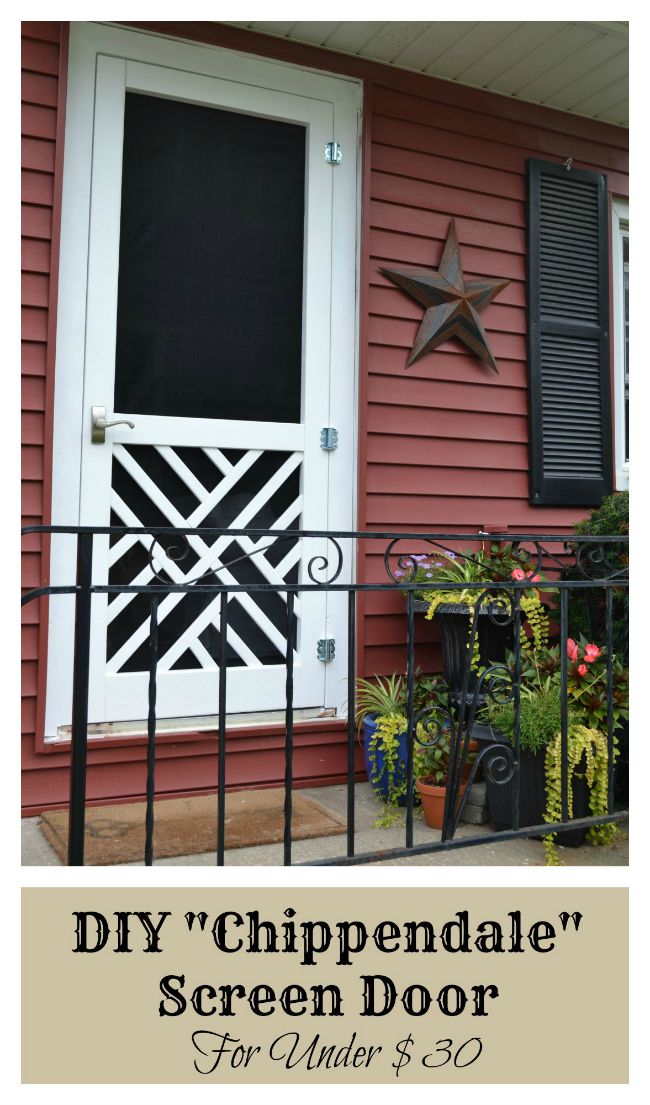
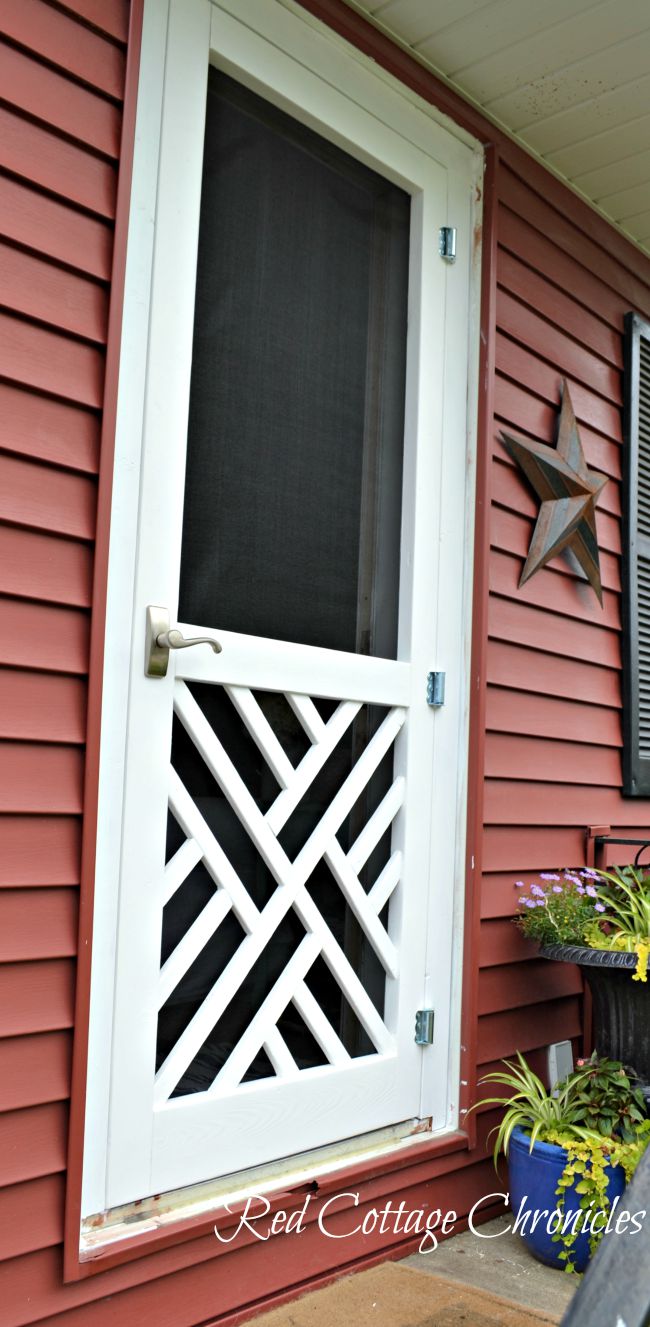
I should mention, they style is called Chippendale! Now, what girl would not want a Chippendale greeting them every time they came home!
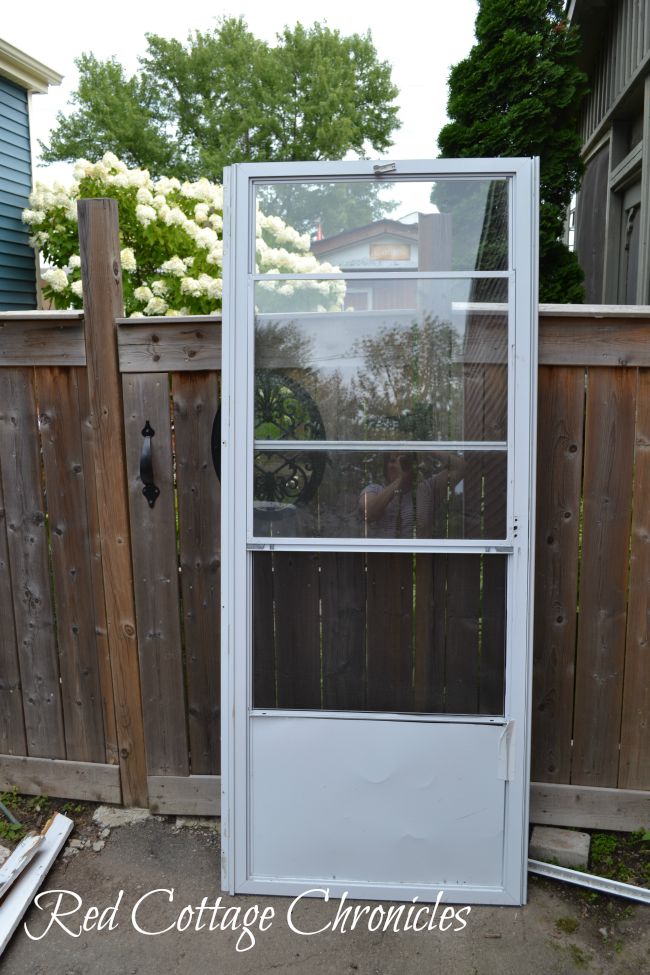
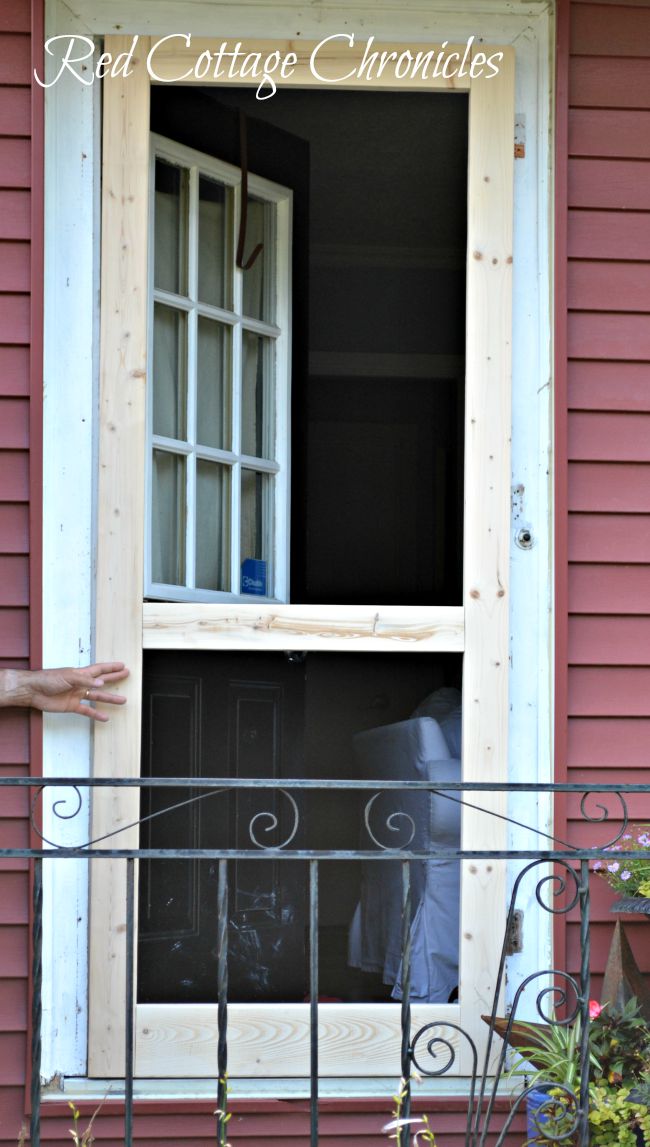
Here is a look at the old door. Tim took it off before I could take a proper before photo!
The new door is really built to last.
I have done my best to document the process as he went along, just in case you might find yourself wanting a new wood screen door like this one.
Our door is 30 x 79, so this is the supply list for a door this size:
3 – 2 x 4 @ 8 feet
1 – 2 x 6 @ 8 feet
2 – 1 x 2 @ 8 feet
3 inch wood screws (we used 14)
Paint
Roll of screen
narrow decorative molding
Countersink drill bit
Power Drill
Sander
Mitre Saw
“No More Nails” (or any other strong wood adhesive)
Spring hinges x 3
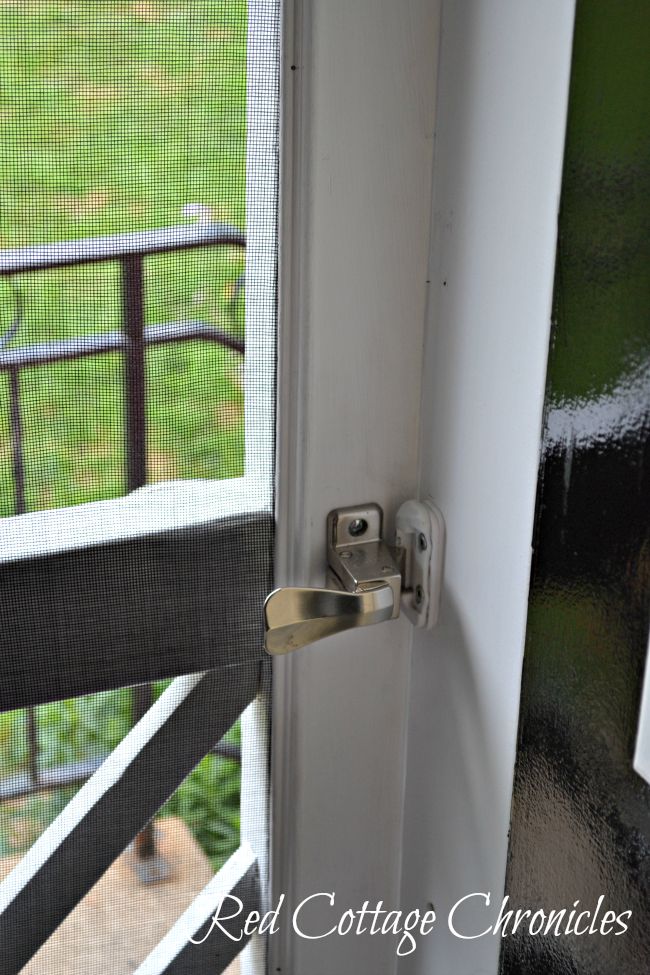
Door handle and latch
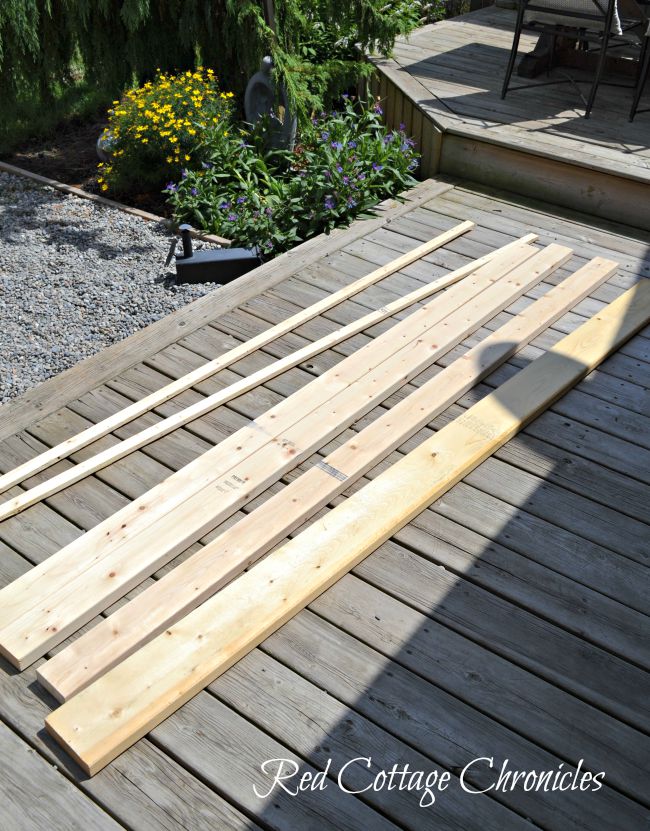
One major tip! Make sure you choose really straight lumber for the frame. It is essential the door frame is perfectly square. We got ours at Rona and had no problem finding really straight pieces of spruce for our project.
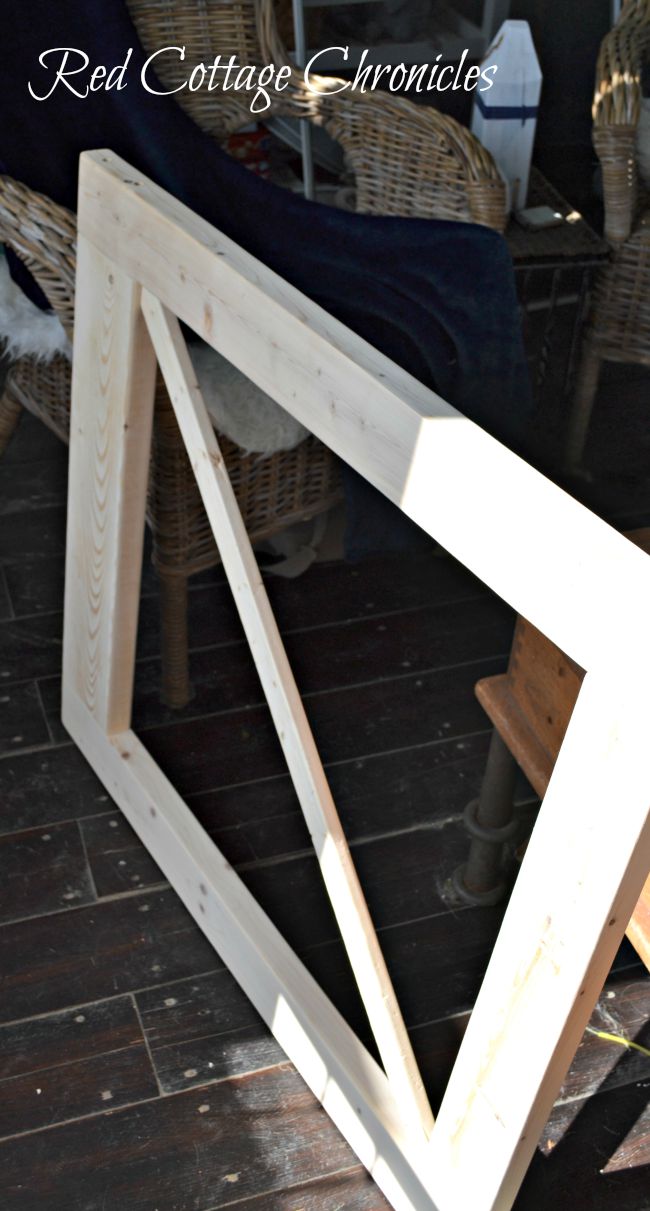
Beginning with the 2 x 4’s, cut 2 at 79″ (or whatever your door height is) and 2 at 24 3/4″. Cut the 2 x 6 @ 24 3/4″. Lay the frame out before assembling, using a square at the corners.
We used the 24 3/4 inch 2 x 4’s for the top and middle bridging, and the 2 x 6 for the bottom bridging.
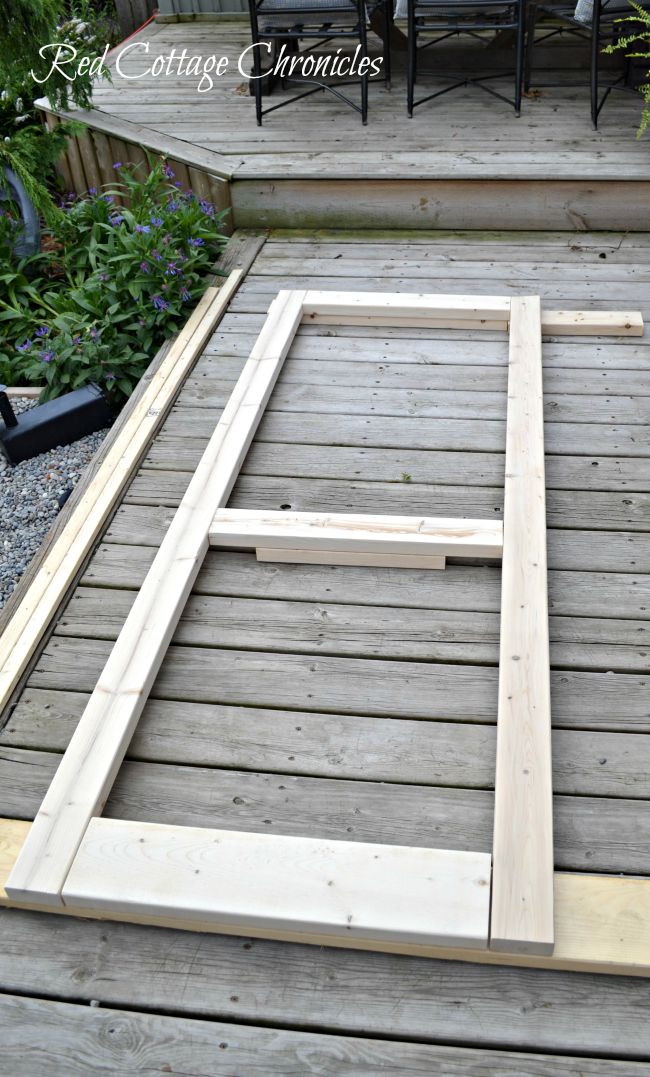

Drill 2 pocket holes using a countersink drill bit into the side of each 79″ 2 x 4 to attach top, middle and bottom bridging.
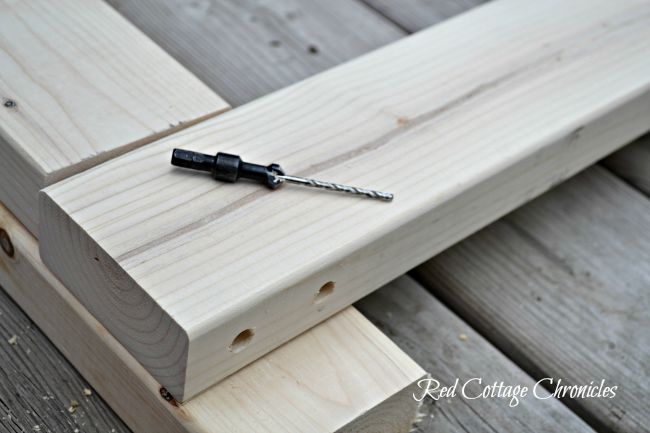
The above photo shows the first two holes drilled were we attached the top bridging.
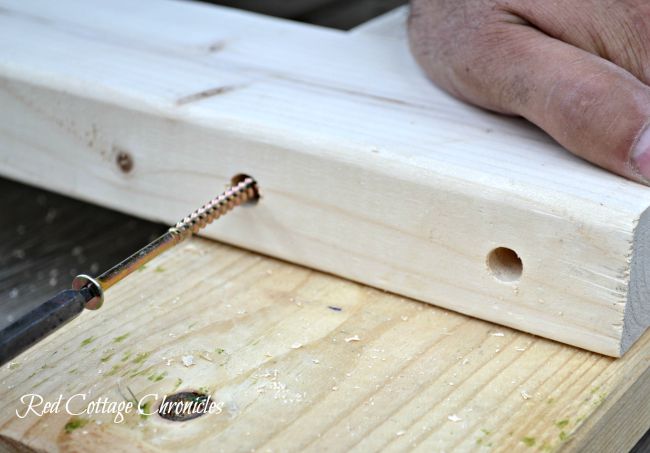
We checked for square again before screwing in the 3″ screws.
Once the frame was assembled, we dry fit the door to the door frame to ensure it fit!
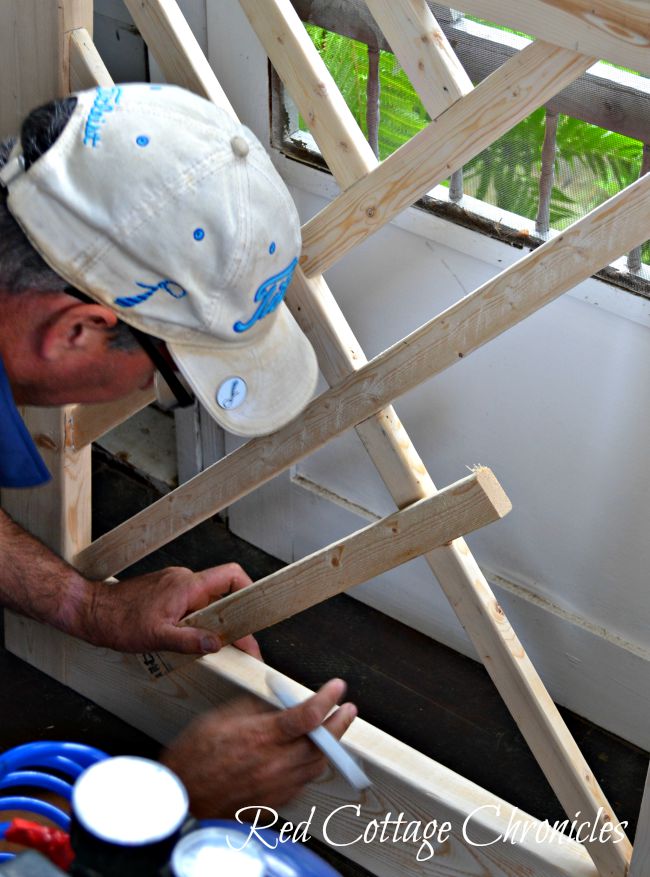
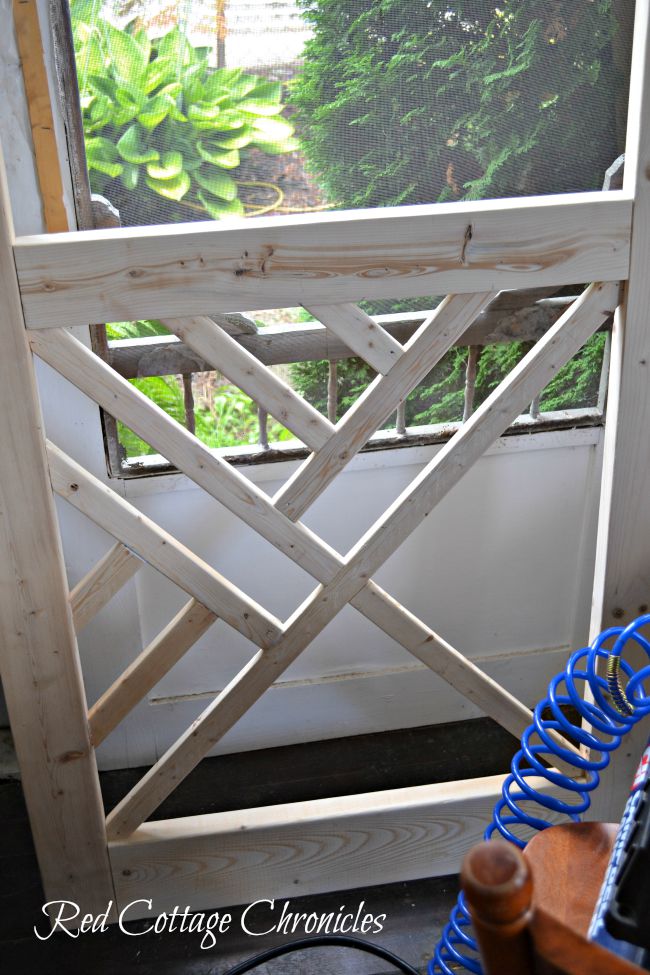
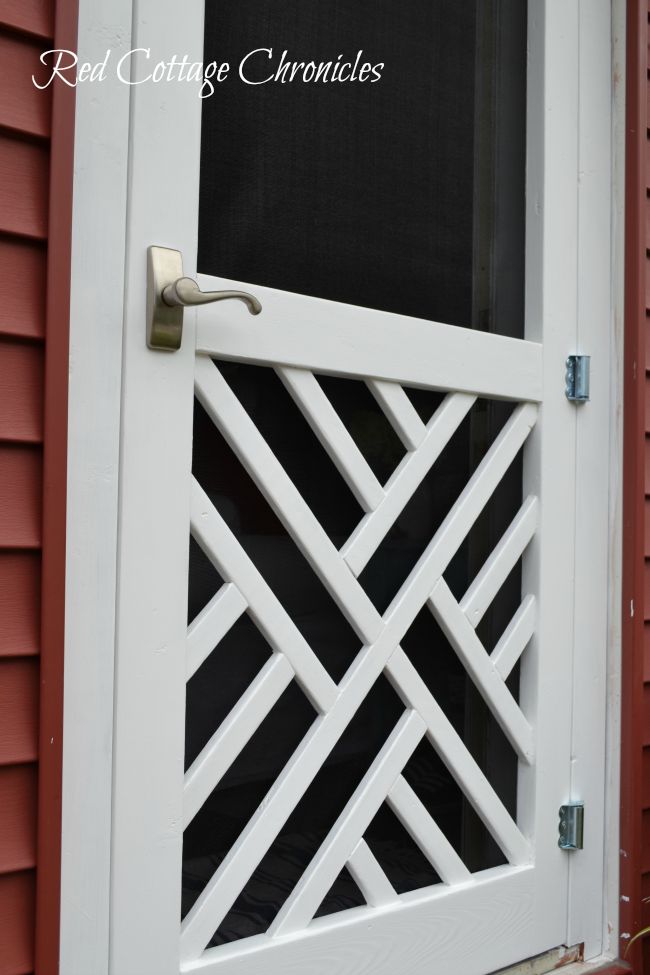
Now came the tedious part. Building the Chippendale pattern. Although at first glance it might look complicated, if you take your time and be patient, it really was not that difficult.
Start by assembling an X across the middle of the lower half of the door frame.
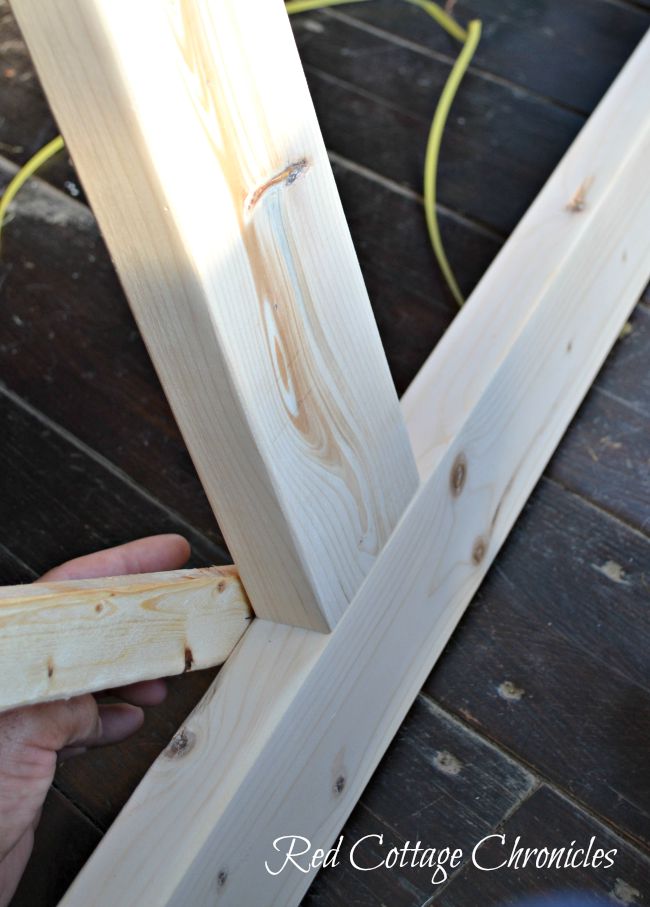
We found the easiest way to get the proper angles was to hold a length of 1 x 2 behind the door frame and mark the angle with a pencil.
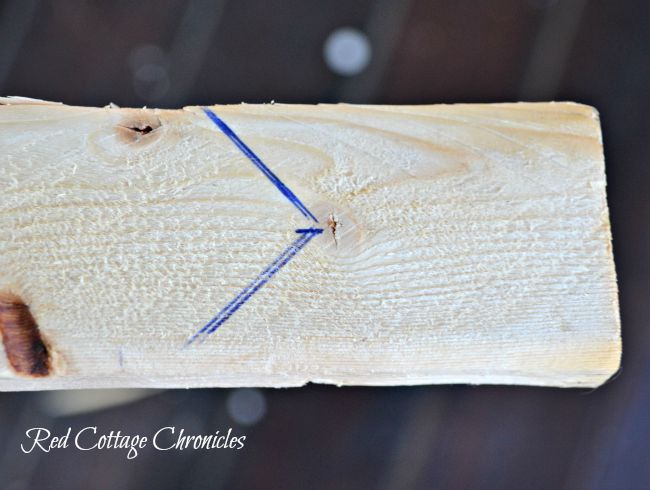
The first 1 x 2 will be approximately 37 inches. We cut a piece of 1 x 2 slightly longer and then marked the angles at each end as in the photo above.
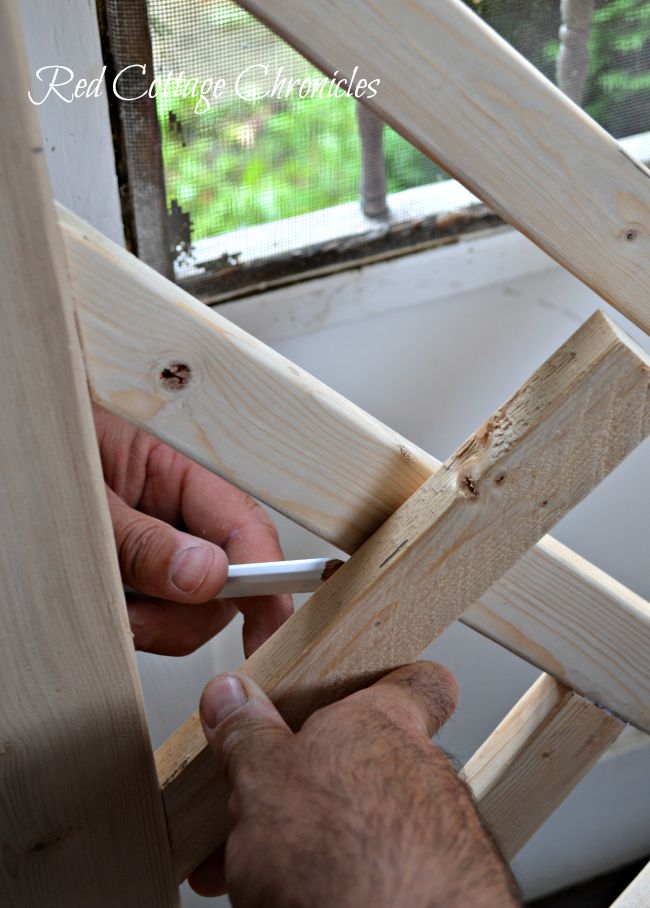
Cut the angles, check to ensure a good fit, and using No More Nails on each angle, fasten to the door frame.
Now cut 2 pieces of 1 x 2 to form the opposite part of the X. Cutting each piece a little longer than necessary and marking the angle cuts as mentioned above. After the angles are marked, cut each angle and adhere to corners and at the centre.
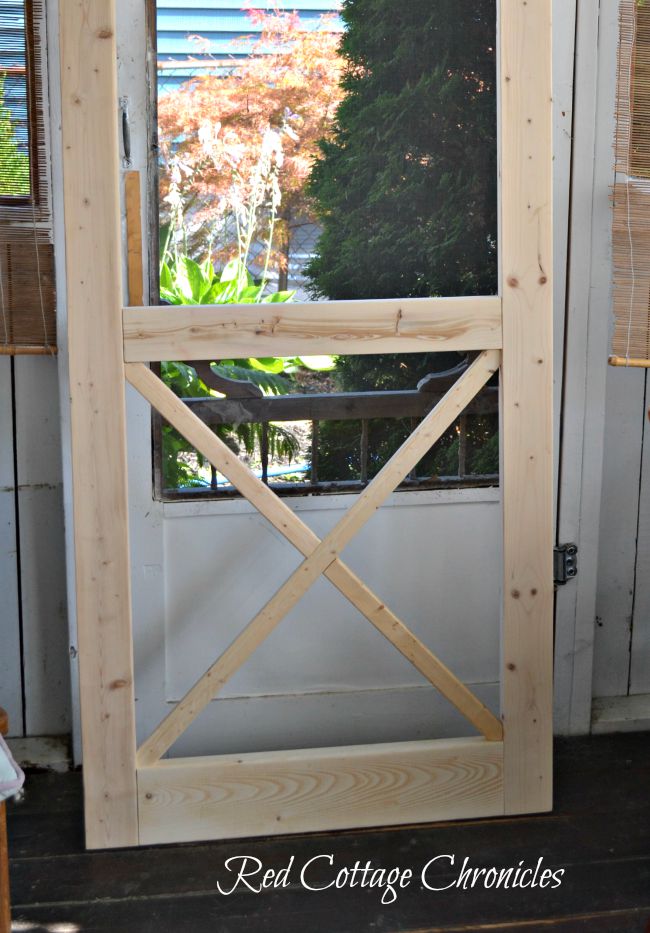
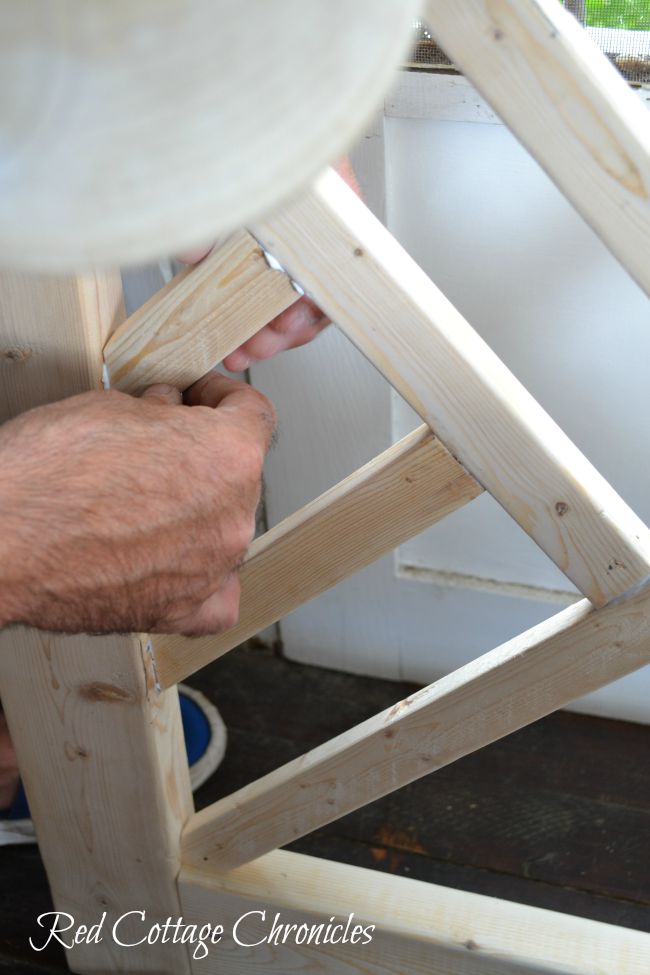
You should have a frame that looks like this.
Now you have 4 quadrants to build the repeating pattern in each one.
We completed one quadrant at a time, using the same method of cutting each piece of 1 x 2 slightly longer than required and marking the angles with a pencil before cutting to fit.
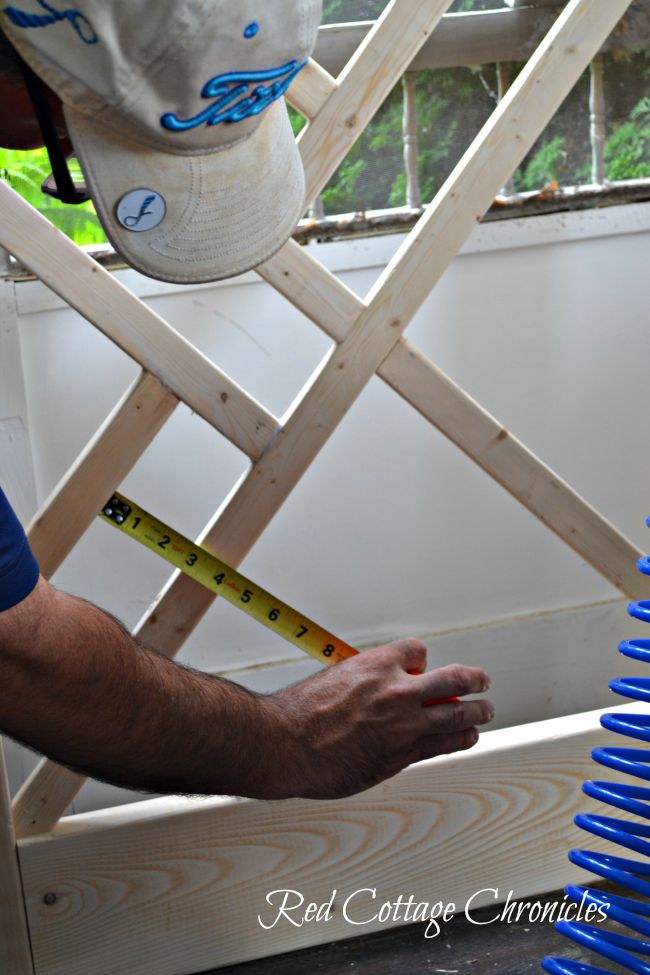
There is a 3 inch gap between each 1 x 2 as pictured below.
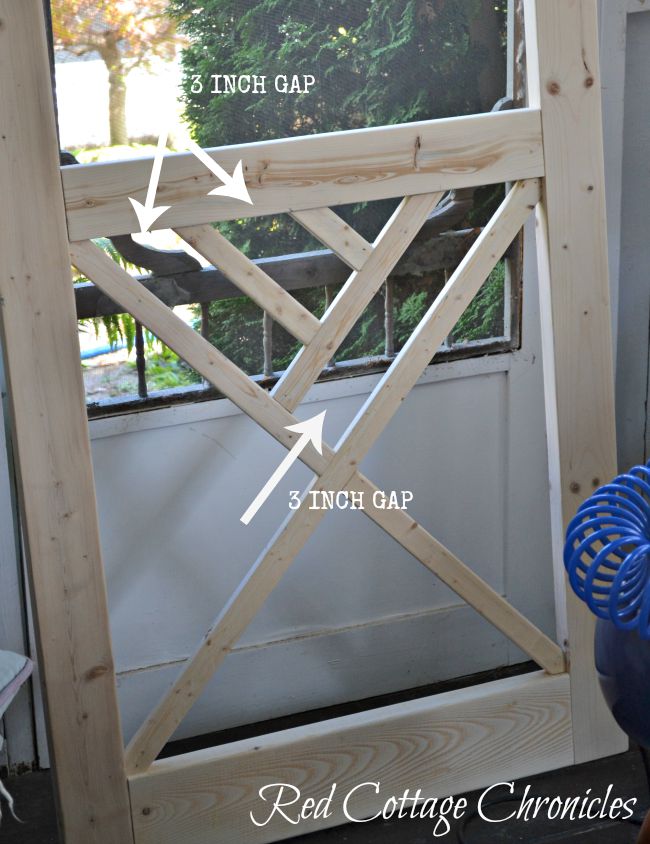
As you can see you will have 1 of the 1 x 2’s running parallel to the centre X and 2 running perpendicular.
One the door frame measure 3 inches above the centre X at both the top and the bottom and mark with a pencil. Line up your 1 x 2 (which has been cut slightly longer than required) at your markings, and trace the angle as described above.
Oh, gosh! I hope this makes sense.
Here is a closer look…
Measuring and marking 3 inches from centre X on the door frame.
Holding the piece of 1 x 2 directly behind frame at 3 inch markings and then marking angles with a pencil before cutting the angle.
Adhering in place using No More Nails (or other wood adhesive)
Double checking the gap is 3 inches all way from top to bottom!
Here is 2 quadrants complete.
And here is all 4 quadrants completed. After completing the 2nd quadrant, the third and fourth were really quite easy! Same pattern, 4 times!
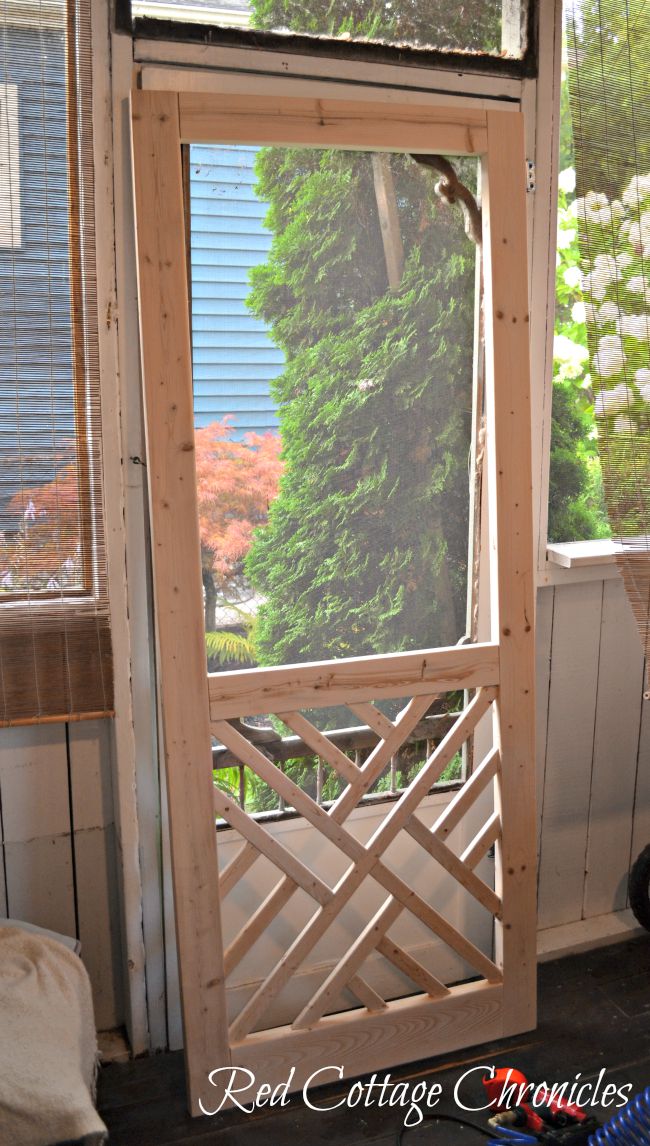
Now that the door was completely assembled, it was time to dry fit it into the door frame one more time.

Fit like a glove! Time for sanding filling screw holes and sanding some more.
I didn’t take a picture of this because I find sanding extremely boring and went about doing something else while Tim used a palm sander to give the entire door a good sand using a stripping sandpaper (80 grit) to get it smoothed out, and then a quick finishing sand with a finer grit.
We decided to paint our door white after deliberating whether or not to just stain it. We tried a few stain samples on leftover 2 x 6 and held it up against the house, but it just didn’t look right.
After painting and allowing to dry overnight, we cut the screen a bit larger than the opening and using a staple gun attached it to the inside of the door. We then using a brad nailer we attached a thin molding around the edges of the screen to finish it off.
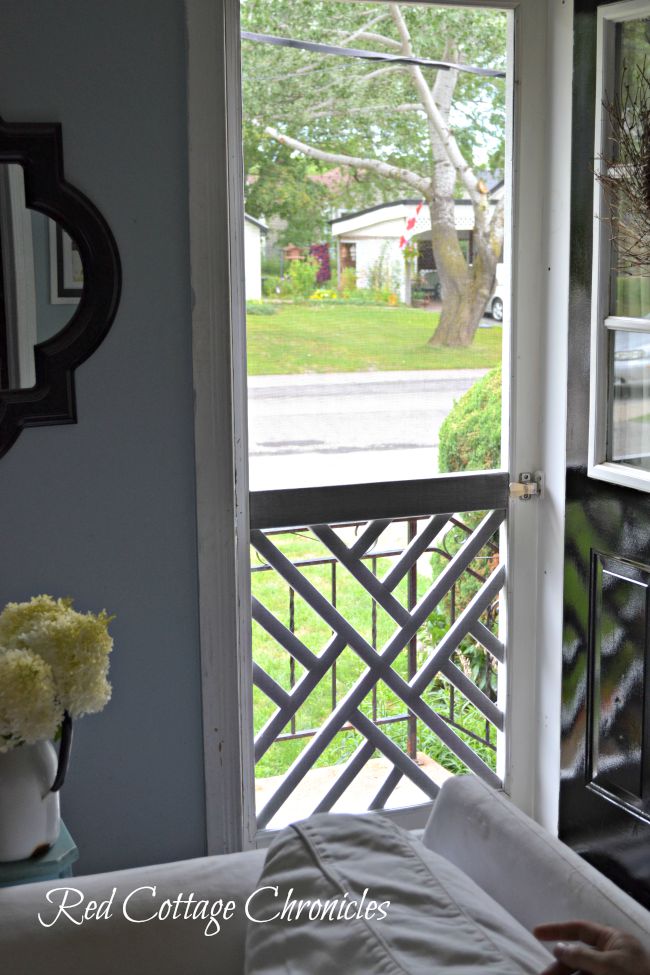
I may change the paint colour in the future, but for now we are super pleased with the outcome!
Since our front door opens up directly into our living room, it was important that it look good from the inside too!
The plan is to replace the cracked threshold the siding company used at the bottom of the door with a wood threshold and paint to match the house. And a new vinyl casing will be installed in white around the edges, which will cover up any stain mishaps!
I am very pleased with how the “Chippendale” pattern turned out, and I think Tim has even impressed himself having never built a door before. Especially one with such a pattern!
Our total cost to build the door was just the cost of the lumber and the hinges. We reused the door handle and latch from the old aluminum screen door, we already had a roll of screen and some white paint, so we are all in for about $30 out of pocket.
I think if you had to purchase the screen and all the hardware you are likely going to be closer to $50 or $60, depending on your choices. Still significantly cheaper than a custom built door! But if you are going to replace a screen door you already have, but sure to try and salvage what you can before disposing of it.
Using 2 x 4’s and 2 x 6’s has made this one very sturdy door and I can’t see it requiring replacement for many years to come.
I hope you found this wood screen door tutorial helpful, and if you have any questions please don’t hesitate to ask in the comments! We would be happy to help.
Until next time….
Maureen


So beautiful! Love that door and what a great tutorial.
Thank-you Angie:)
What do you use as a storm door in winter>? Do oyu switch doors?
Hi Jennifer! Since the inside door is an insulated steel door, we just keep this door up all year round. It would be pretty easy to build a simple frame with clear plastic, or even thin plexiglass, to attach to the inside of the screen door if that was a concern. I should mention that we are in Canada and the door is going into its third winter with no problems at all. We did use a good exterior paint too! Hope this helps!
I am inspired to build the screen doors I need instead of buying them for $300 each!!
If you decide to give it a go, let us know if you have any questions!
Absolutely LOVE this idea! Gonna have to “share” this with my dh…looks like a fun fall project 😉
Pinned it, too!!
Thanks a bunch!
Thank you! My cats are certainly enjoying the breeze coming through right down to the floor!
I need new screen doors front and back and now I’ve found the ones I want!!! Thank you for the super clear instructions!!!
Thank you Susan! I was hooked on this design as soon as I saw it too!
What a great idea and tutorial. I’m going to give this a try so my cats can sit and enjoy the breeze too. I just haven’t seen any that I like better than this. I also think it would be fun to double the Chippendale section twice to make a headboard! Thanks!
I think your cats will love it! I know our Golden does! And, I love the headboard idea:)
This is fantastic! Its so good to see everyone seems to be leaning back toward the old wood screen doors like our grandparents used to have. I made one using a big old window screen here at our farm for a door to our “wood closet” under our stairs and painted it red. Eventually I plan on stenciling “Wood Shed” on the screen. Yours is just lovely!
Beautiful door Maureen (and Tim!). I may have to try this – my daughter’s house is in need of a screen door and this would look fabulous!
This is a great idea. Will have to do this for my front door. My cats will love me for it!
As a fellow cat owner (and lover) I know just how important it is to keep our cats happy 🙂
Hi there!
Not sure if you will see this comment as you built your screen door a long time ago now, but I am attempting to build it and I’m a little unclear about how you fastened the upright members (2x4s) to the horizontal cross pieces. You say to use a countersink bit to predrill holes and then attach with 3 inch screws. My question is: What size and length bit do you use and what diameter screws? It seems I will need a very long bit attachment to get through The 2×4 and into the cross piece. Then did you put a dowel or plug in the hole behind the screw, or what? Thanks for any pointers! As I said, I’m scratching my head and eager to get going on the project.
Hi Nell! Thanks for the comment! If I am not mistaken, my husband used a Woodboring drill bit similar to this one https://www.lowes.ca/product/woodboring-drill-bits/irwin-964-in-woodboring-drill-bit-671412 to create the pocket hole. I hope that helps. I will also check with him as to the diameter of screws, although I suspect he used standard wood screws!
Hi Maureen!
Thanks for your reply. We ended up using a Kreg jig and drilled the holes that way, which worked great. We then plugged the holes with wooden Kreg plugs and sanded before painting. Thanks again,
Nell
Hi Maureen!
Thanks so much for your reply. We ended up using a Kreg jig to drill the holes, which worked great. We then plugged the holes with wooden Kreg plugs and sanded before painting. Thanks again!
Nell
I know this tutorial is 5 years old but I just wanted to thank you for sharing it! Your instructions were excellent, and I was inspired to make one myself! Mine ended up a little different because it is a larger size (36” door) and I used a Kreg jig to assemble the frame like another commenter mentioned as that’s what we had on hand – and I’m so proud of the results!
Thanks so much for this post!
So happy to hear!! Those Kreg jigs are a great tool!