
One Room Challenge Kitchen Reveal
![]()
Put down the hammers, drills, and paint brushes! This challenge is over…….well almost!
I am so happy and proud to be sharing our One Room Challenge Kitchen Reveal with you all today. But, I have to admit there are still a few finishing touches that need to be done.
After almost coming completely unhinged this weekend trying to make sure every last detail was complete I took a step back and reminded myself that this is real life. There are only so many hours in a day and just because the challenge is officially over, doesn’t mean by the weekend all those details won’t be completed too!
Lets have a quick look at where all this madness started, shall we…..

If you are just visiting for the first time you can check out all the crazy weeks leading up to today by clicking the links below.
Week One | Week Two | Week Three | Week Four | Week 5
And finally, here we are today…..
I have to say I could not have done this without the help of my ever-so patient and adventurous husband! I am so proud of him for all the hard work he has put in over the last 6 weeks. He took on projects that neither of us had ever undertaken before, all with a quiet confidence that somehow we would make it work.
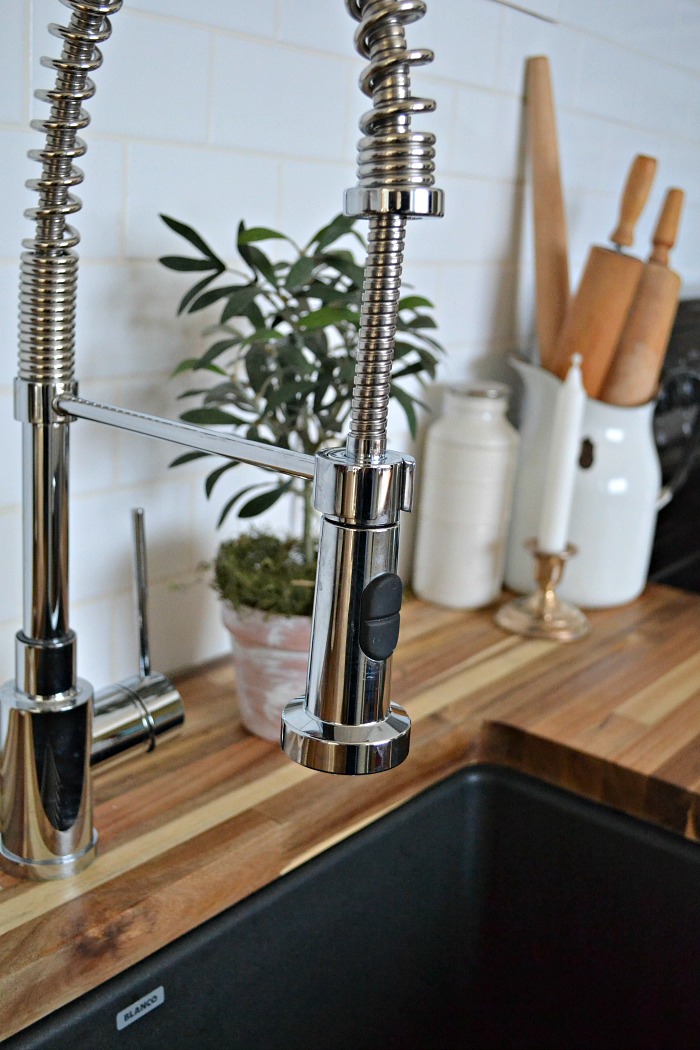
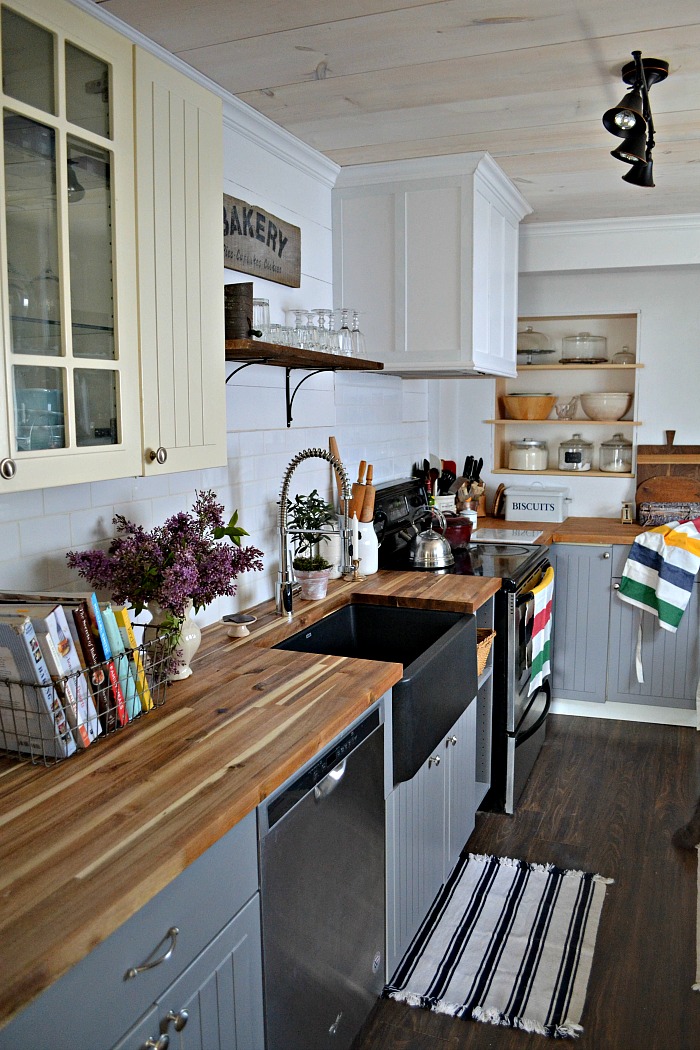
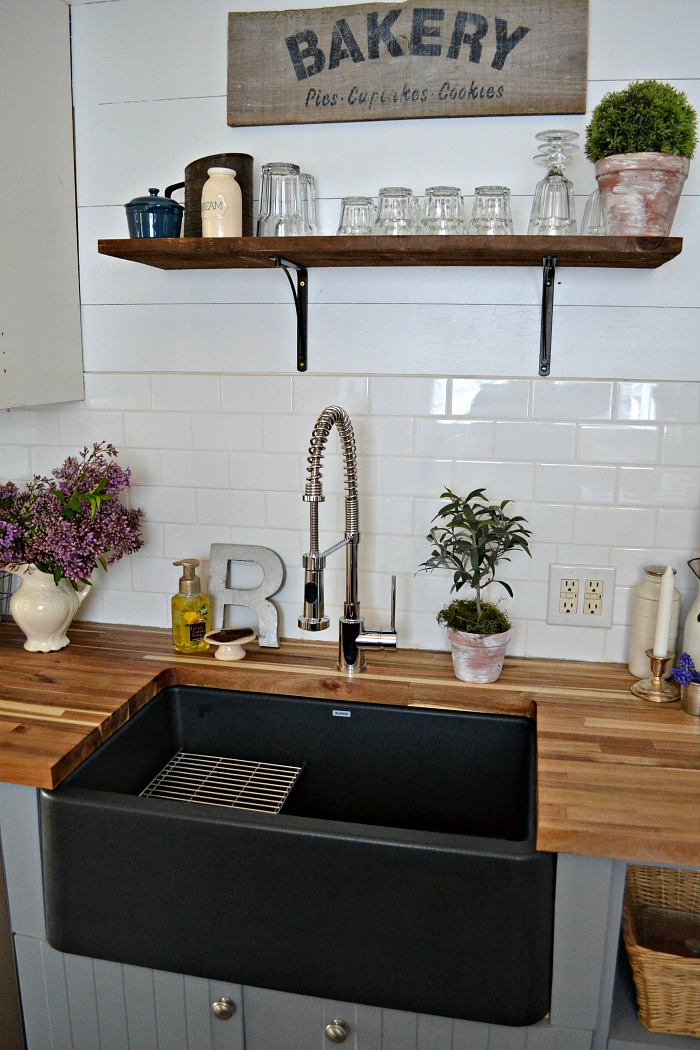
He could not have done a better job at installing the sink and countertop that leaves me breathless every time I come into the room. I have finally had the chance to use the sink over the last week and I am amazed at how much it fits. Even my half sheet baking pans can fit with room left over. No more soaking one end and then turning it around to soak the other!
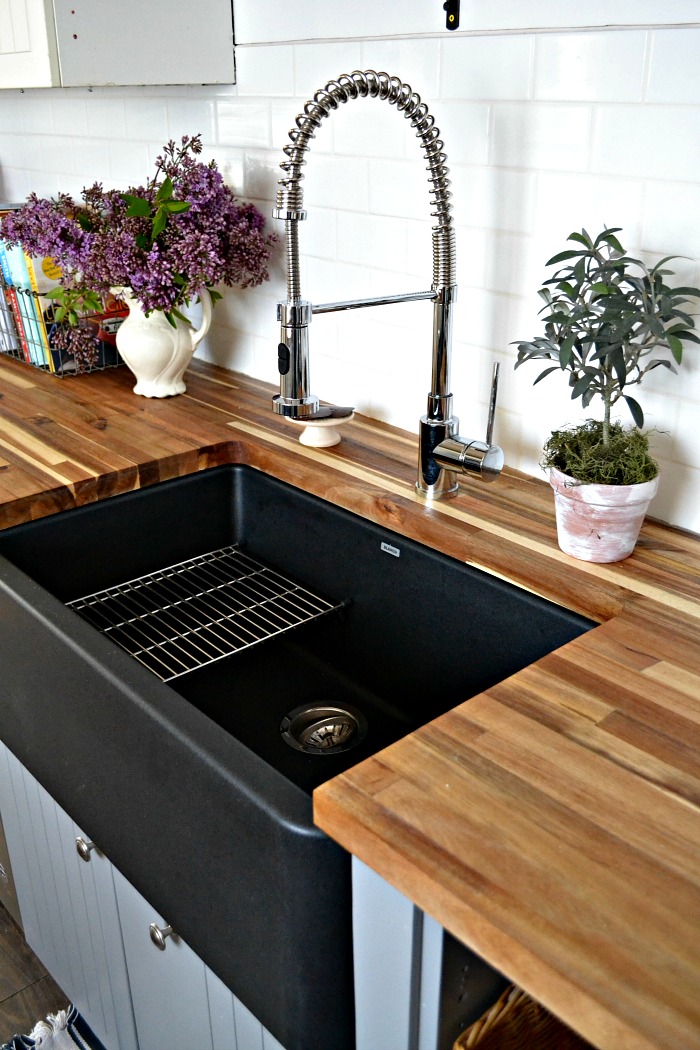
The new butcher block is acacia wood. The rich deep tones and variations of colour really are striking. We will soon be replacing the old Ikea butcher block on the other side of the stove with this same acacia wood butcher block, but stock availability was not on our side to get it done before the reveal.
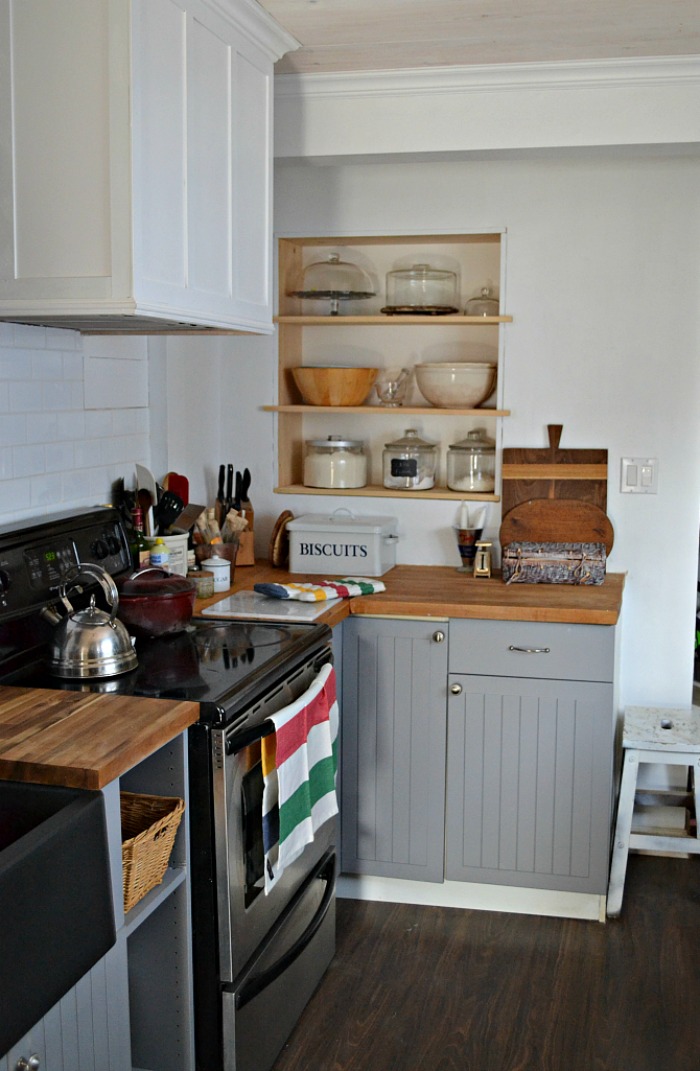
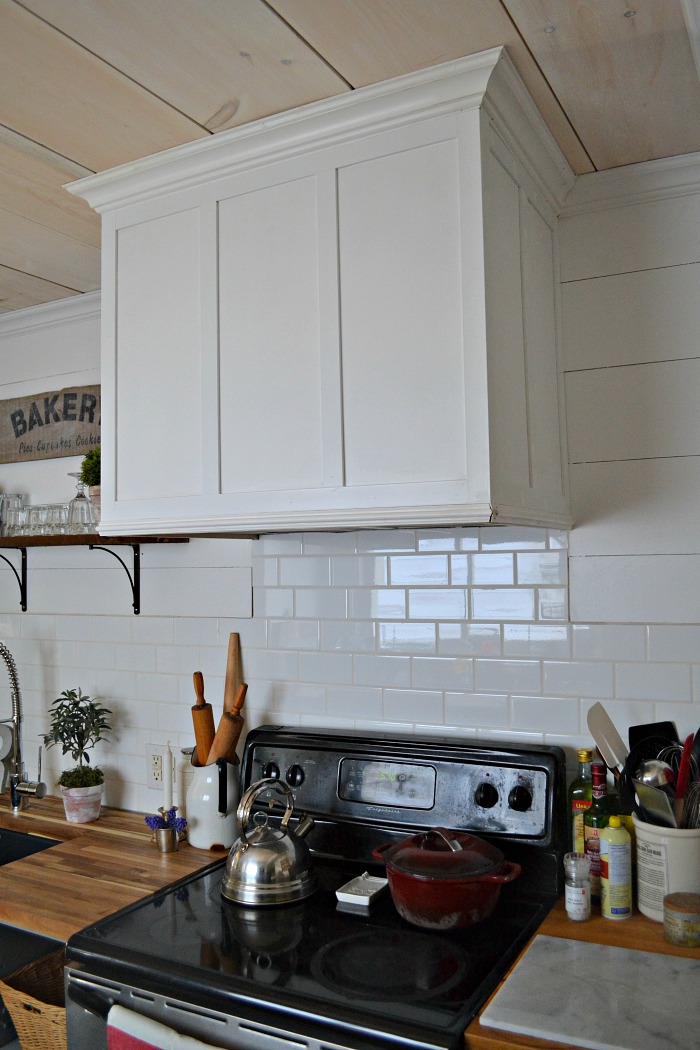
The subway tile backsplash is classic and it really brightens up and gives the space a crisp fresh look.
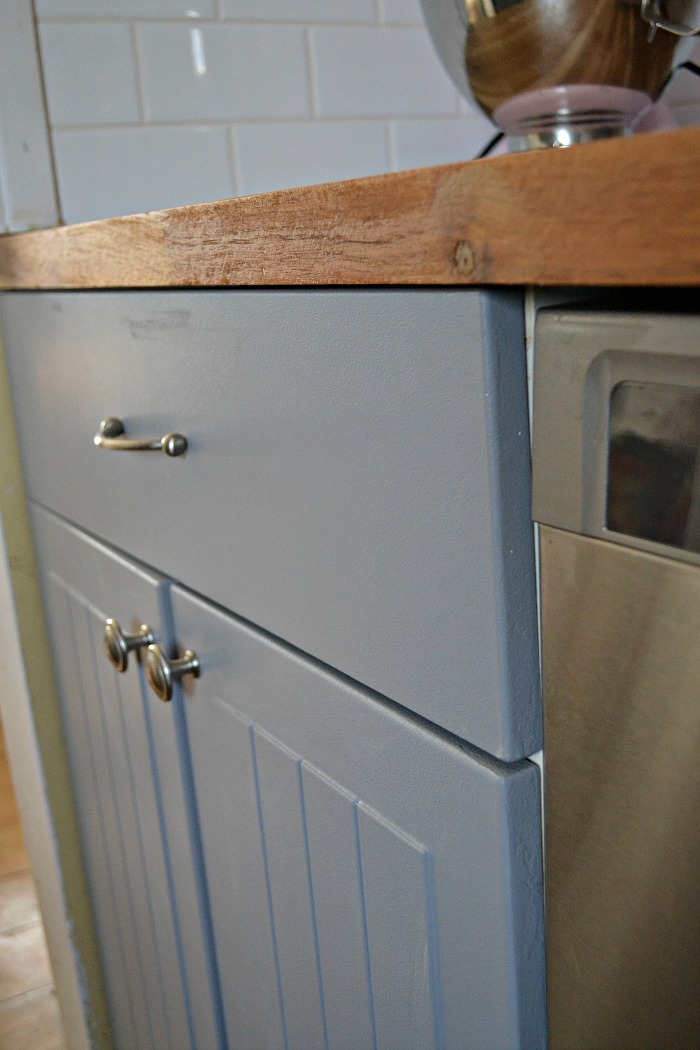
I was very worried about painting thermofoil cabinets, but the paint I choose from PARA did not let me down. The lower cabinets are Fort Garry Gray. I will be sharing the full tutorial on painting the cabinets next week.
The walls are Cryslar Hall White and all except for the shiplap wall, still need one more coat.
I really disliked the open cabinets that used to be on the window side of the room. They were such dust and dirt collectors and I would literally have to empty them completely to wash them down properly, which was required often.
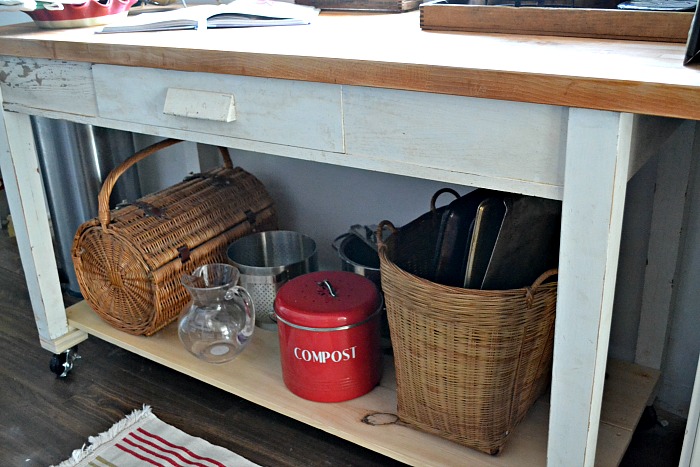
We had planned on purchasing a desk frame from Ikea and topping it with the existing butcher block, but instead I choose to re-purpose an old desk that came from my grandmothers house. We had used this huge desk as our dining table until Tim built me our farmhouse dining room table.
It was built in 1956 and is super solid, but the top was just too big for our little kitchen. Thankfully Tim was able to remove the original top and the existing butcher block fit the frame perfectly. Tim added industrial casters to raise it up closer to counter height, as well as a shelf to store a few of my bigger stock pots and such. A coat of paint is one of those little details we will be working to complete in the next few days.
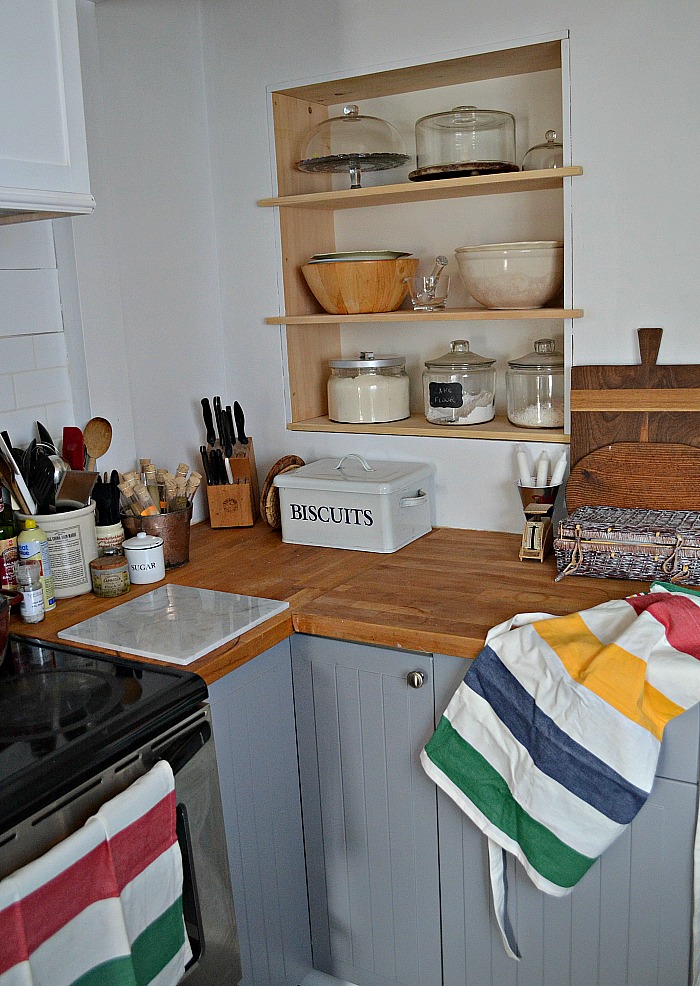
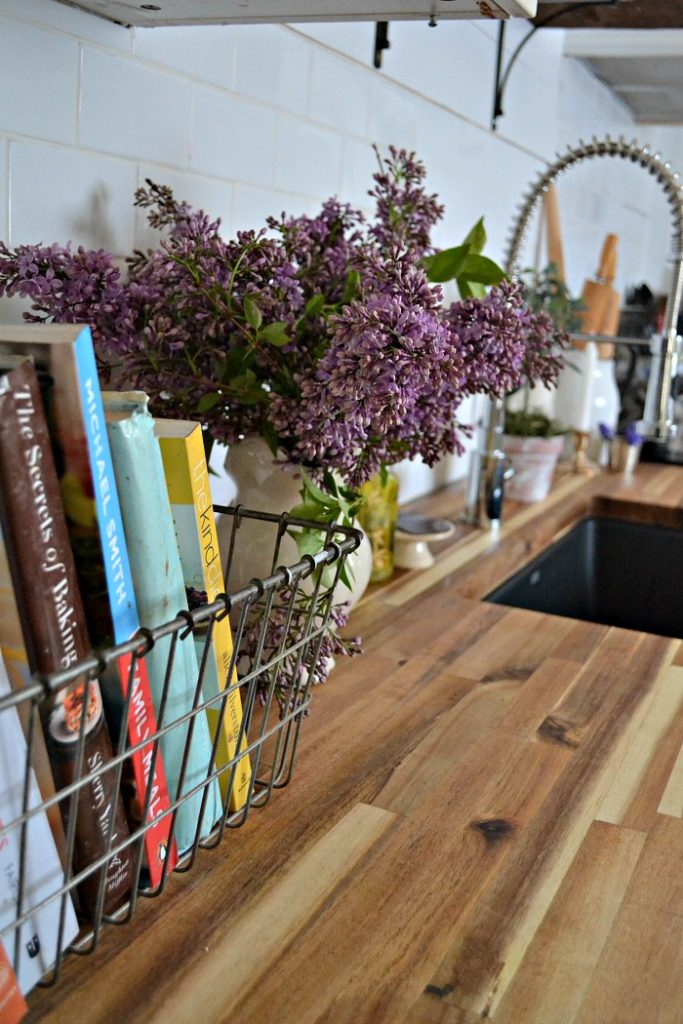
I was worried I would be doing away with too much storage when I removed most of the upper cabinets, but it really forced me to purge a whole lot of stuff I was holding on to but really hadn’t used in years. The built in open shelf is another one of my favourite things about the room.
Everything on this shelf I use regularly and it is all at my fingertips. I will be staining to shelves to match the one above the sink, and Tim will be adding trim to hide the seams.
As for the cabinets we removed, you will have to stay tuned as we move our makeover project into the adjoining hallway to see how we will re-purpose those! Nothing goes to waste when you need storage space and are on a tight budget.
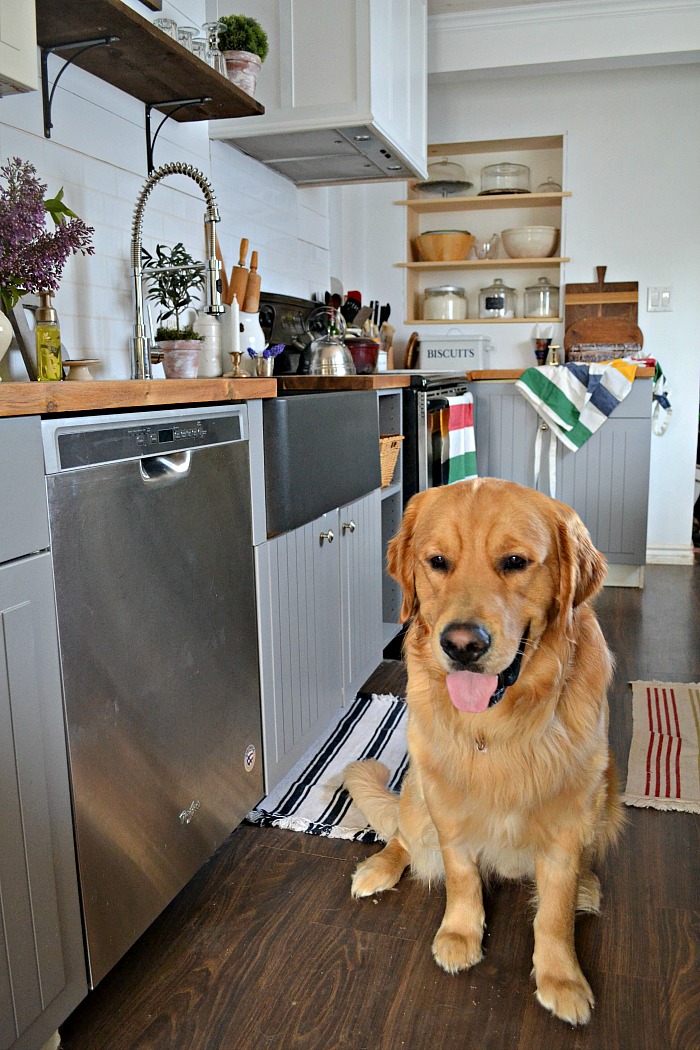
The kitchen floor was on our to-do list, but we made the decision to forgo that for now. Truth be told I cannot decided between wood floors and the gray tile that I am still leaning towards. Given we have two Golden Retrievers I want to make sure I pick something I love, but is also durable enough to stand up to their muddy feet!
The one thing I really appreciate about not having upper cabinets is being able to lift my cooking utensils out with ease. Because of that darn support beam that runs the width of the kitchen the cabinets had to be hung lower than usual which meant pulling utensils out of the crocks I keep them in meant moving everything out of the way to pull out the entire crock out into the open. Small thing, but frustrating just the same.
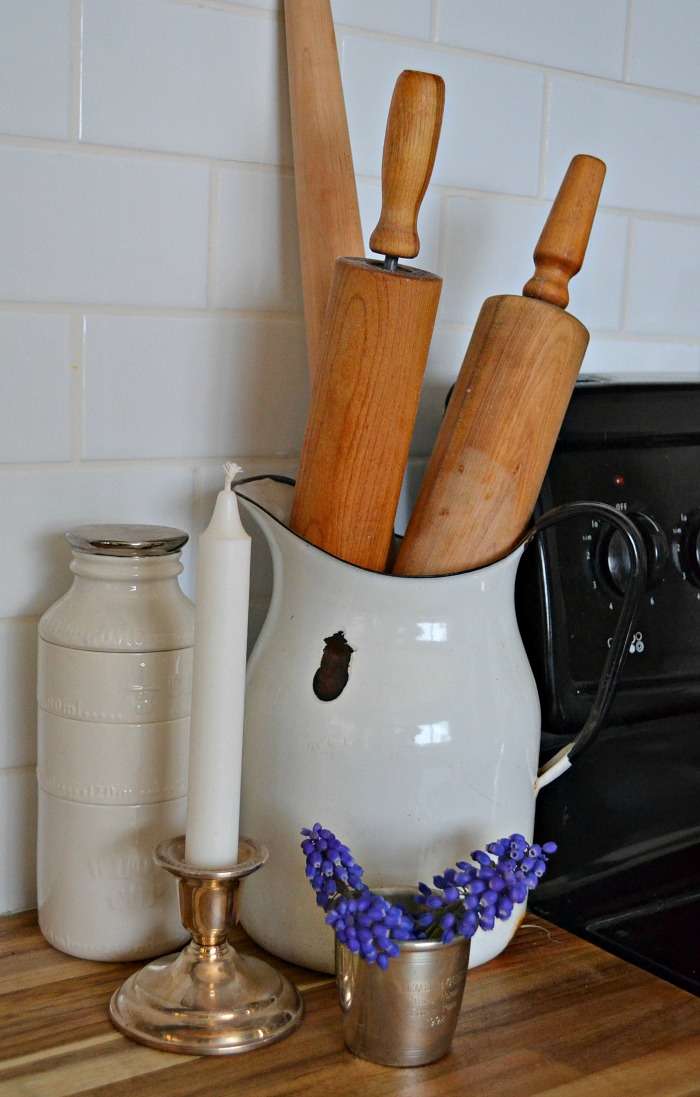
I spend a lot of time baking and cooking and like everything at my fingertips, and as you can see even with all the oils, spices and utensils I keep beside the stove it still feels open and not too cluttered.
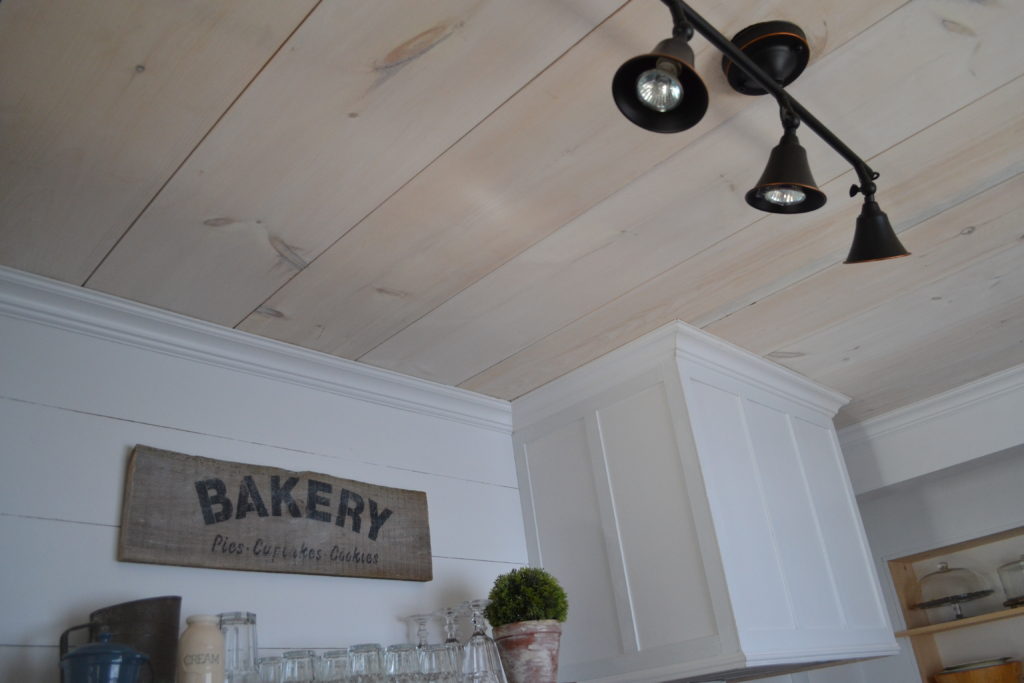
In order to solve our extremely uneven ceiling, we resorted to a DIY plywood plank ceiling treatment. I whitewashed the boards before installing them. Now not only is our ceiling level, but it looks really good too!
Before I share a few more pretty pictures, I really want to thank Linda from Calling It Home for hosting this challenge each spring and fall. It was just the fire I needed under my behind to finally get my kitchen done. Also, to all the other Guest Bloggers participating in the One Room Challenge (TM) who have inspired me each week when I sometimes felt like throwing in the towel.
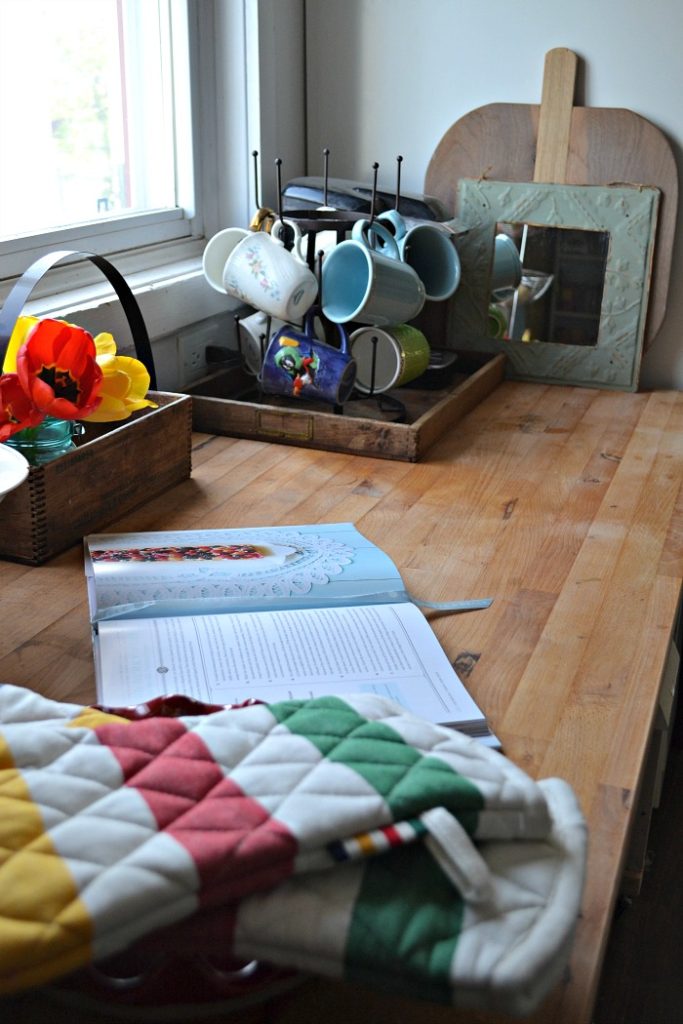
I got rid of a bunch of coffee mugs that were stuck away in a cupboard. The ones I decided to keep are now neatly in reach right beside the coffee maker.
Now that the kitchen is all done I am excited to get back in there and start baking and creating again!
Thank goodness the new Roman shades I am making will get hung up this weekend. I think our neighbor will be too!
So, there you have it! One Room, Six Weeks and a very tiny budget has resulted in one really fun kitchen reveal!
Thank you to all of you who have followed along since the beginning. Your comments and encouragement have been a saving grace!
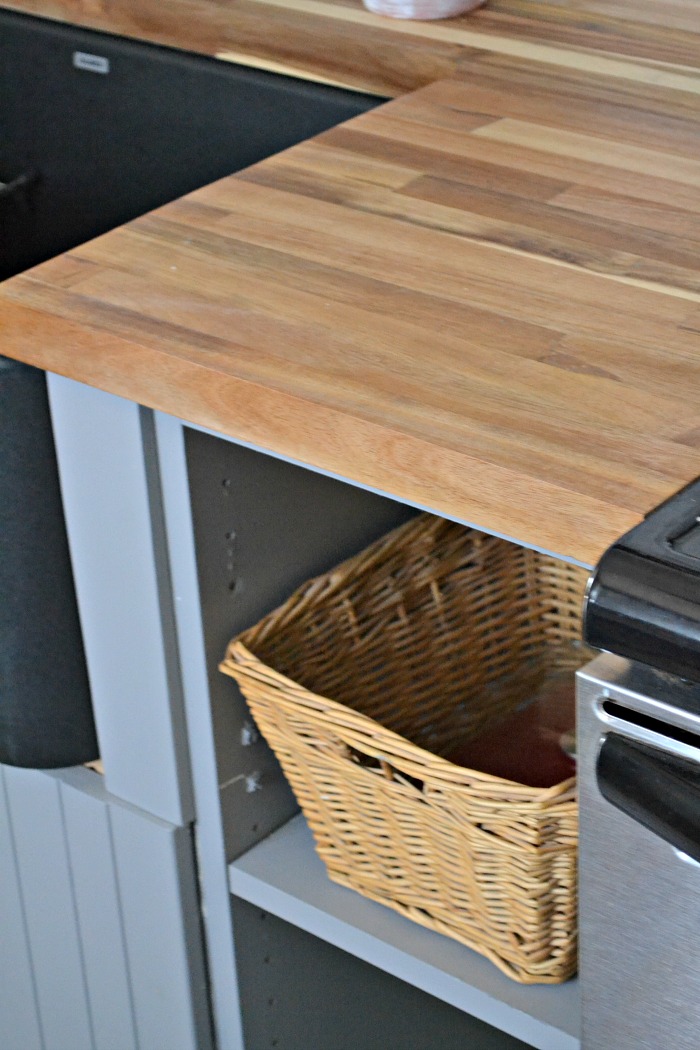
Over the next couple of weeks I will share some of the tutorials for our DIY projects, as well as update you when the finishing touches have all been made! I still need to find a 10″ wide tall wicker basket for the open lower cabinet beside the stove, as well as find some fun art and accessories to dress up the walls!
My brain is now screaming for some rest, so I promise a source list this weekend!

![]()
Until next time…..

I am so grateful to the sponsors of our renovation. Without them I am not sure it would have turned out as beautiful as it did.
And also the media sponsor for the One Room Challenge:


AHHHHHHmazing! Love that black sink and butcher block more every time I see it. And that ceiling! Swoon. And oh good grief…your pup! How sweet! We used to have a golden. They are THE best! Anyway! Your kitchen doesn’t even look like the same room. Now it’s fab! Congrats on a great makeover! Susie from The Chelsea Project
Great makeover! I love the countertop, and have been leaning towards butcher block for ours when we have the budget 🙂
Thank you Kristen! You definitely won’t be disappointed with butcher block!
I love the whole space but I am going to be DREAMING about that sink. so swoon worthy!!!
I just shared my ORC reveal, check it out here: http://www.charlestoncrafted.com/2017/05/10/orc-reveal-fully-diy-remodeled-walk-master-closet/
Thanks Morgan! I will definitely be paying your reveal a visit. I just love all the inspiration I can gather for so many talented bloggers 🙂
You and Tim did a beautiful job. Congrats for sticking to it and getting it done. I’m sure there’s going to be a whole lot of yumminess coming out of that gorgeous space! BTW, that sink!!!!
Thanks Jeanie! It was a rough go of it that last week, but I had my eye on the finish line!!
Your kitchen is absolutely gorgeous! I salute your use of incorporating Canadiana into your kitchen renovation, especially this special year (150!). I’ve been bouncing around using gray on my lower cabinets and I really like how yours have turned out. And Fort Garry gray by Para? Wow! I grew up in Winnipeg and went to both the forts. Lower Fort Garry just outside the city and Upper Fort Garry in the heart if downtown where the Red and Assiniboine Rivers meet! (Upper only has the gates remaining, Lower is the complete rock-walled compound complete with all buildings. A must-see!)
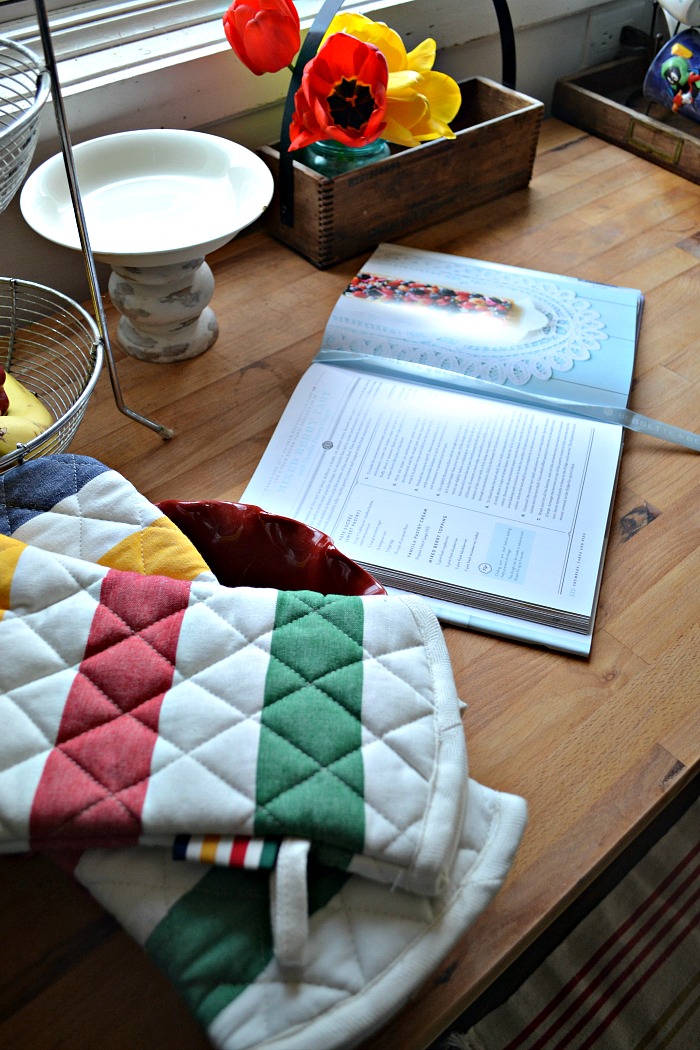
I also love your Hudson Bay Co. oven mitts. The HBC was the life blood of all who lived on the Canadian Shield with their huge fur-trading industry. As you can see, you’ve taken me on a walk through memory lane. I love Canada’s history and am proud to be able to call myself Canadian.
Again ,what a fabulous kitchen! Congratulations on your makeover!
Thanks so much Jan! Love hearing about your experience at Fort Garry! That is so neat! Did you apply for your free Canada Parks pass??!! I hope to use my lots this summer 🙂 We have Fort George right here near us and always take it for granted, so it is time I took another look! They actually have ghost tours at night too 🙂
this looks fabulous, maureen! i love the neutrals with pops of color from the hudson bay style textiles!
Thank you Cassie! Would you believe I have had those Hudson Bay textiles for two years but didn’t want to use them until I just the right kitchen!! Silly, but true 🙂
YAY! This kitchen looks amazing! The counter tops are just gorgeous… Going to have to pin those because I SO want to do something like that on our kitchen island. Thanks for some beautiful inspiration!
Thank you Erin!
Love it Momo!! I know how hard you and Tim worked on this and it looks so beautiful. I love my white subway tile backsplash with my butcher block counter top too … Its one of my favourite things in my house. Yours looks amazing! Love the ceiling!!! 🙂 GREAT JOB !!
Awww! Thanks pal 🙂
This looks amazing!! I love the black sink and your new faucet! the butcher block counters are gorgeous. Great Job!!
Thank you Julie!
I literally just pulled my husband over to show him the black sink and butcher block combo. We’re smitten! Fabulous transformation! Congrats on a very successful ORC. And if you’re anything like me, now I’ll go take a long overdue nap!
Thanks a bunch! And, a very long nap is definitely on the agenda!
The sink, the shiplap, the ceiling and the built-on shelves…. this kitchen has so many wonderful details in it, I couldn’t pick just one! So beautiful, and surely a space you love so much more now!!
Thank you Thalita! Have to admit I don’t mind doing dishes anymore 🙂
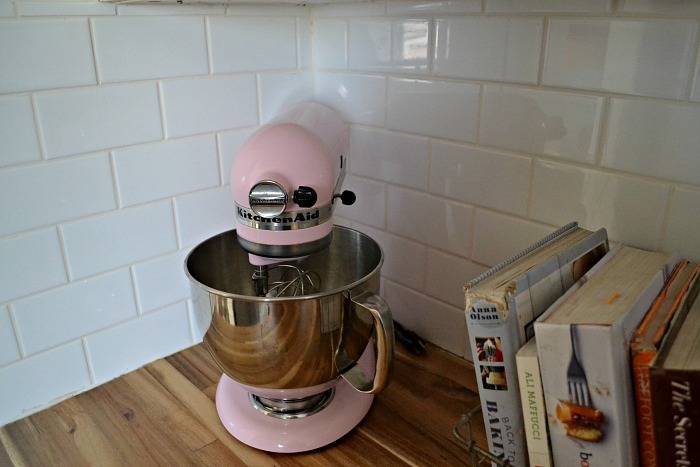
Maureen, your kitchen turned out beautifully! I know I left a reply I think somewhere {can’t remember where, at present… maybe your other post, that must be it. 🙂 } that I really love your inset cabinet for holding your mixing bowl and cake stand, etc. Did I mention I spent about an hour over on the Blanco site? I had fun just looking at all their goodies… wishing I had a house and kitchen at present so I could work on a remodel!!! 😉
Happily awaiting your final touches when that’s all done. Oh, and a Happy Mother’s Day to you!
Barb 🙂
Thanks so much Barbara! Can you imagine I had to choose just one of Blanco’s sinks and faucet! I couldn’t be happier with my choices!
Woohoo! The transformations you did throughout the space were great – ha I never would have noticed the counters didn’t match unless you told me 🙂
You and your husband did a great job on your kitchen. Your countertops are awesome, and I really love your new ceiling. We have a Blanco sink, too, and I know how great they are! Enjoy your new room!
Your kitchen looks beautiful! I love the warm wood countertops with the cool gray cabinets! It works so well together!
Picking my mouth off the ground! This is ah-mazing. You should be proud!
You kitchen looks amazing! I am in love with the black sink!
I LOVE your kitchen! It looks stunning!
How do your “Sponsors” contribute? Just wondering because you said you couldn’t have done it without them.
Hi Cynthia! My sponsors with this project provided me with products including the sink, faucet, paint, and table saw!
Hello there! I’m planning a kitchen remodel and leaning towards butcher block for the countertops. We’ve also chosen a black Blanco sink! We love the look of the undermount butcher block but we’ve read mixed reviews that it gets pretty gross after it’s been used. What are your thoughts on the undermount with butcher block? Did y’all DIY the cutting and mounting of that? Also, how are you liking your black Blanco sink? I’d love any insights you have! Thanks so much!
Hi Rebecca! We are just about a year in with our butcher block and sink. I can honestly say I wouldn’t change a thing. I have had no problem with the undermount sink, as I made sure to treat all the exposed butcher block very well, and re-treat it every four to six months. Maybe a bit of overkill, but it takes just a few minutes and keep the Watco right under the sink! I am (almost!) always to dry the area were the counter meets the sink well after use. We did do all the cutting and mounting on our own. It was a nail biter I will admit, just because I was terrified we measured wrong! It all went very well. As for the sink itself, I absolutely love it. It is easy to keep clean, and I have no problems with water spots. Hope that helps 🙂
We are in the process of changing out our counters, sink and backsplash. This is one of the sinks we are considering. How has it held up to use? What do you think so far. Do you have hard water in your area? We do so I’m a bit concerned about going with a dark sink.
Hi Hilary! Thanks for stopping by! I really love the sink almost two years later! We don’t have hard water, but I never have a problem with water spots. It really is quite easy to keep up and I don’t use anything other than dish soap! I have recently written a post about how it is holding up. Here is the link if you would like to take a look…. https://www.redcottagechronicles.com/home-decor/black-farmhouse-sink-update/