
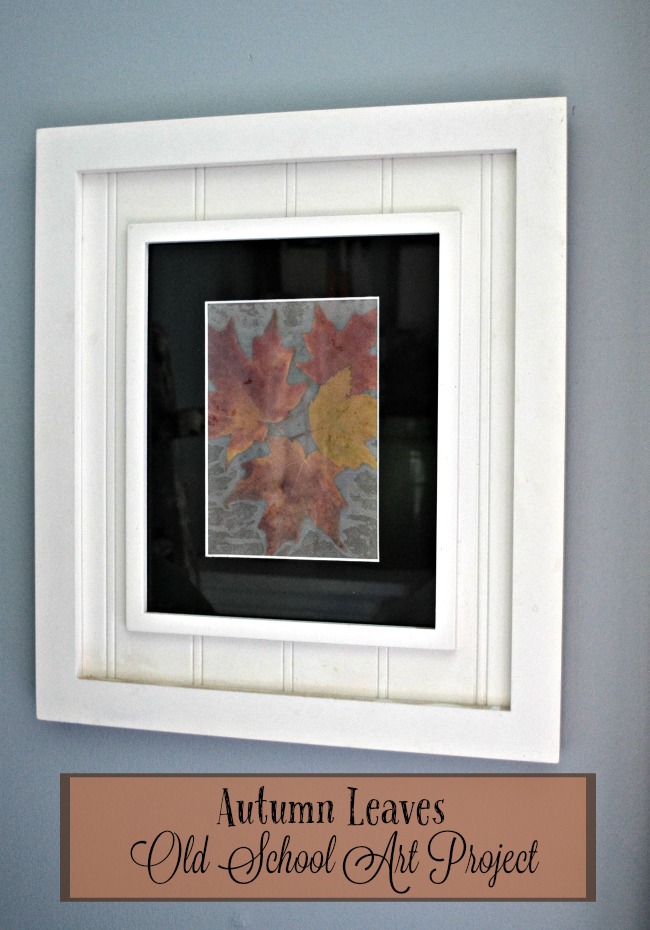
DIY Free Old School Autumn Leaf Art
Raise your hand if you remember pressing autumn leaves between wax paper! I hadn’t thought about it for years, but as we were on a walk with Tripper this weekend was admiring all the beautiful leaves that had fallen, and couldn’t resist picking some of them up.
I had no idea what I was going to do with my fist full of pretty leaves then I suddenly remembered my mom letting us help iron the leaves between sheets of wax paper and then putting them on the fridge to display our pretty “art”.
I love how the mottled shades of the leaves look against the mottled look of the wax paper.
Follow these easy steps to achieve your own free autumn leaf art.
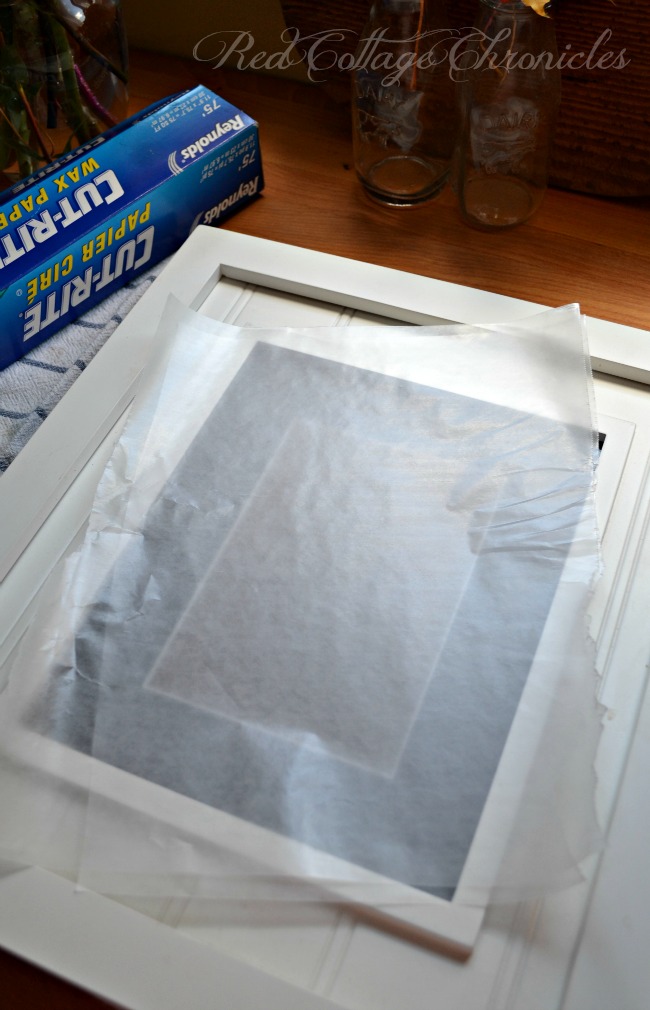
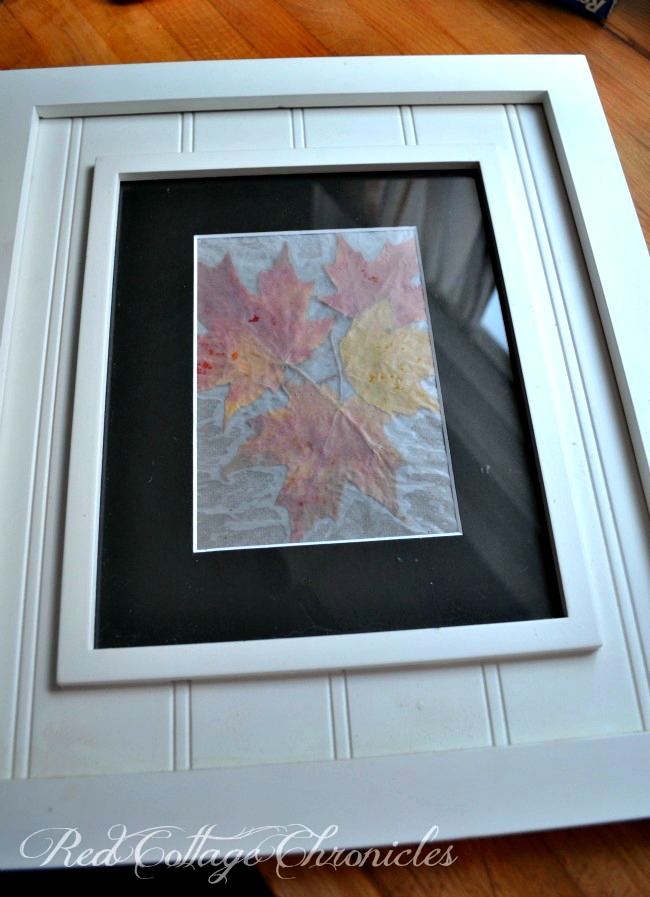
To keep this project free, I just repurposed a frame I already had.
Begin by simply tearing off two pieces of wax paper a bit larger than the opening of your picture frame. Don’t worry about being neat, you will trim them later.
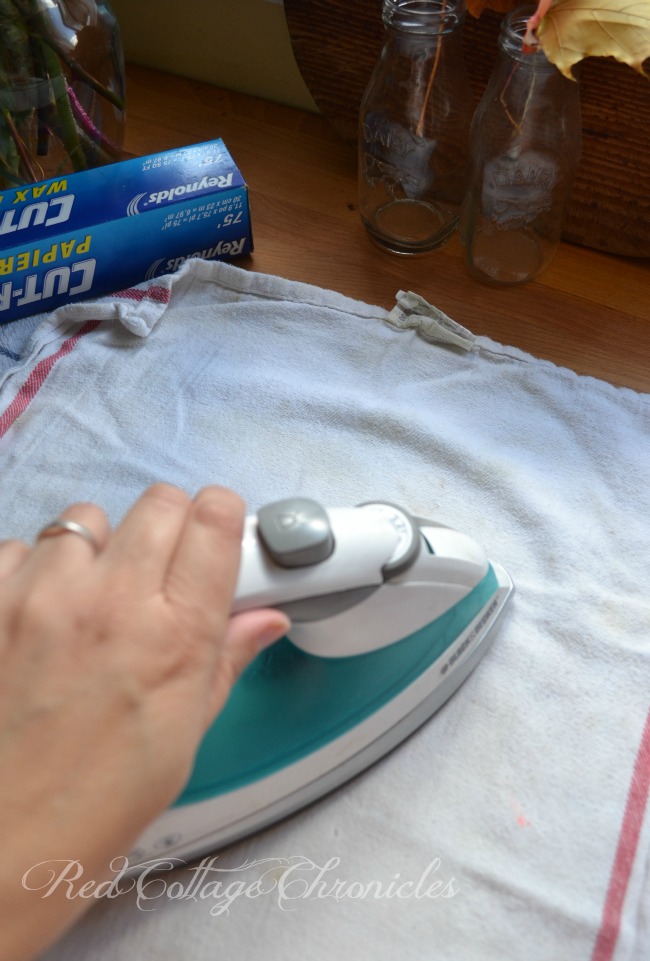
Heat your iron to a low setting that will not produce steam. You want a dry iron for this project.

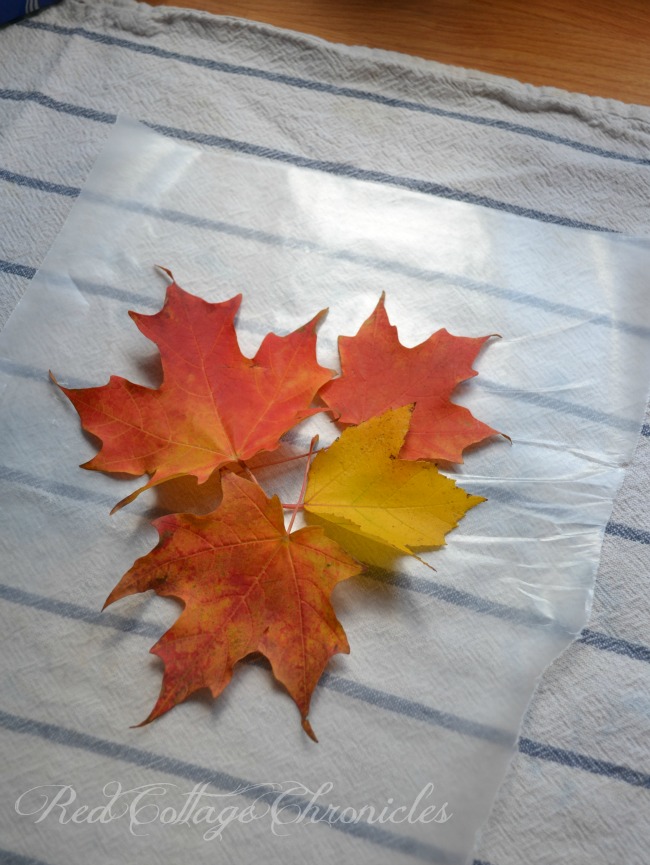
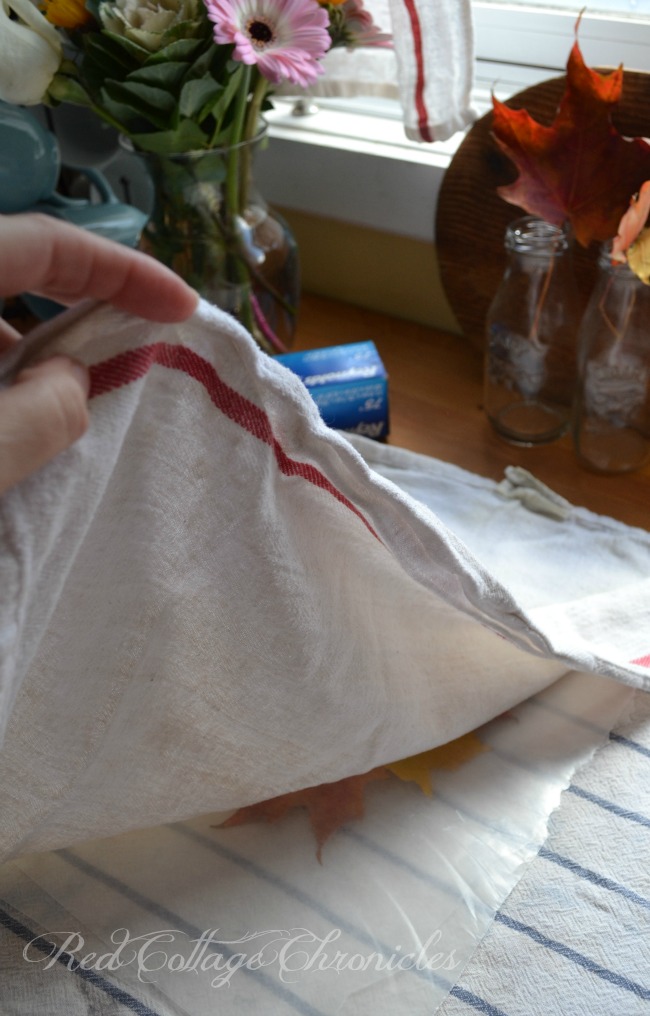
Lay a tea towel on the counter to protect the surface. If you have a large enough cutting board, you can place this under the tea towel. Place one sheet of wax paper on top of the tea towel and arrange the leaves on top.
Lay the second piece of wax paper over the top, being careful that the leaves are laying perfectly flat between the layers.
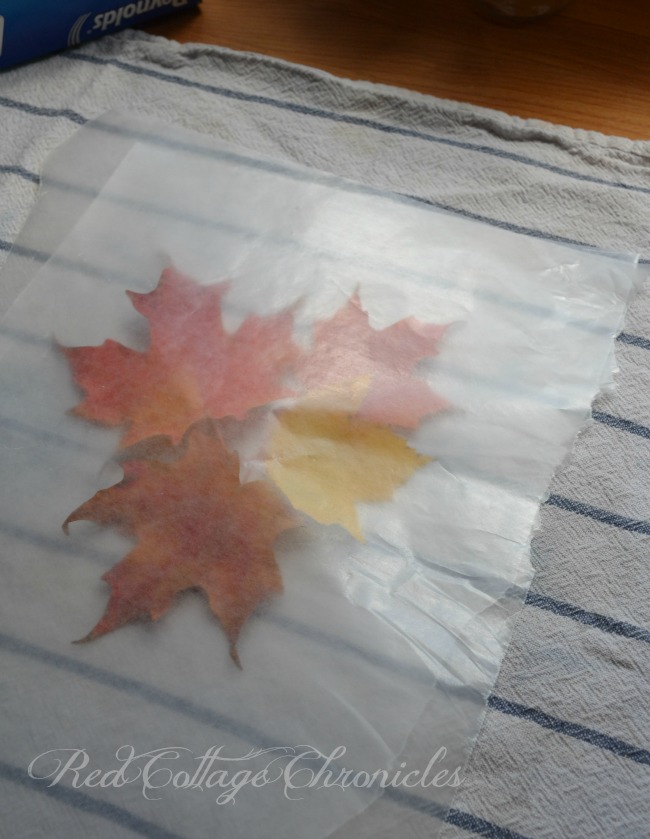
Lay a second tea towel over top of the wax paper, again being careful everything is sitting flat with no wrinkles.
Carefully press with the warm iron, slowly moving it over the tea towel for several minutes. It is okay to hold it in one spot for about 30 seconds at a time before moving it to another spot. The idea is for the heat of the iron to melt the wax, hence “sealing” the wax paper together around the leaves.
After several minutes carefully peel back the top tea towel and check to see if the wax paper is sealed. It took me about 5 minutes to be happy that it was sealed to my liking.
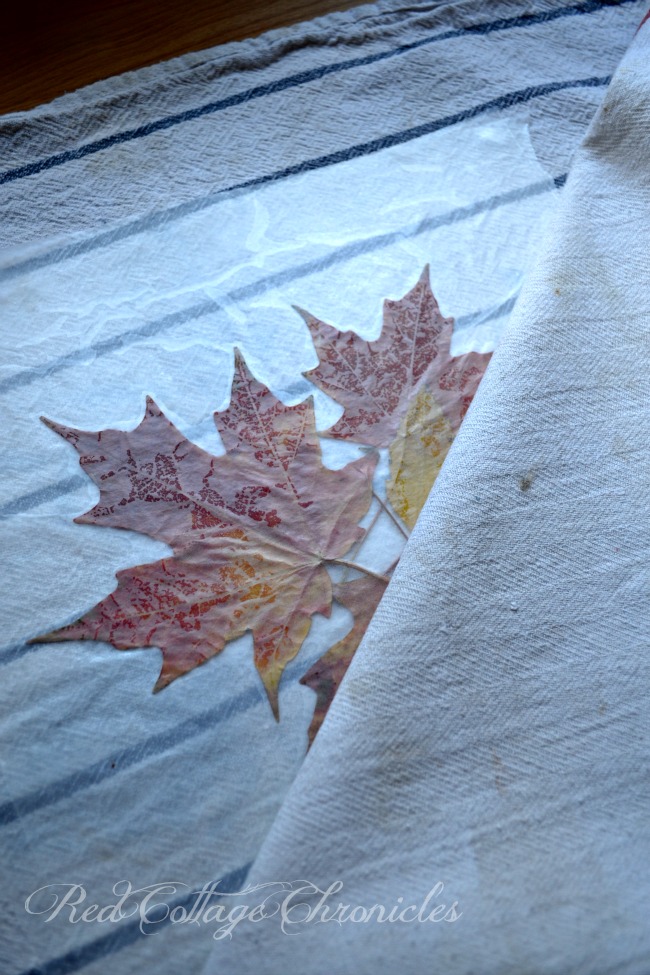
Remove the wax paper from between the towels and trim as needed.
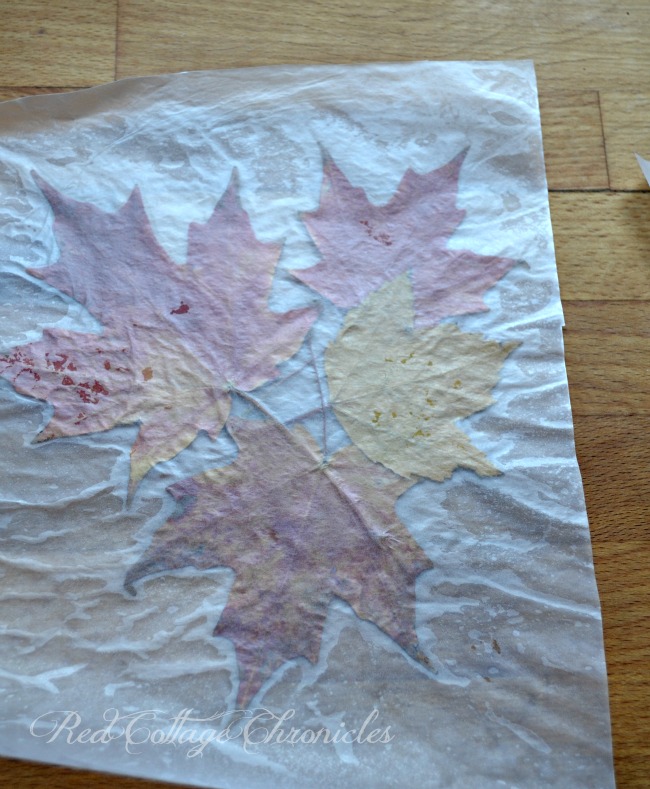
That’s it. Now just fit it into your frame and display it for all to admire!
Three of the leaves I used for this project came from our walk on the Parkway, but the yellow one came from the memorial tree in the park behind our yard that was planted in honor of my dad after he passed away. This week will mark eleven years since he has been gone. I can hardly believe it has been that long.
That tree just makes me feel like my dad is right there watching over me, and I am so glad I thought to grab a leaf from that tree to use in my autumn leaf art project. One more reason it makes me smile!
Until next time…
Maureen


Oh my gosh, we were JUST talking about this yesterday when my grandson came back from a walk with a fist full of beautiful leaves! I just love your wall art – Jordan and I now know what we’re going to do with those leaves!
I love doing this still! At my last house, I did a neighbourhood walk and collected a variety of different fall leaves but I just ‘pressed and dried’ them. Then I put them in a frame and hung them up. It looked beautiful and I had some art work for my naked new home walls.
I’ve had it in my mind to do this again but I’m struggling to find the time to get even the essentials done around here.
Maybe next year.