
How to make a 3D Snowflake Ornament with Cricut
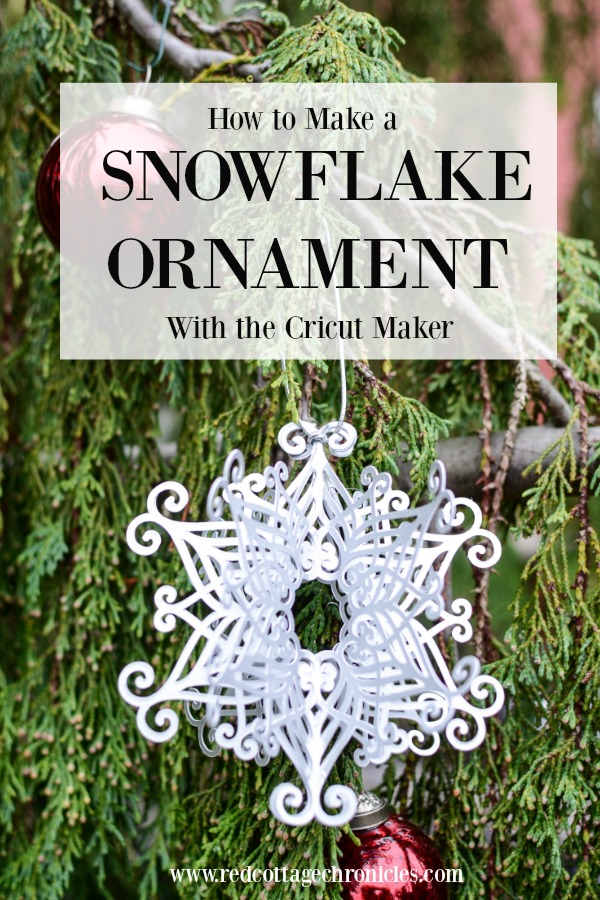
The Christmas crafting is in full swing, and today I am showing you how to make a 3D snowflake ornament using the Cricut Maker.
I made this ornament as part of our annual blogger ornament exchange.
This year I am delighted to be paired with Beverly from Across The Boulevard. Her style is traditional, and she has a coastal Christmas tree as well.
Since I am a traditional gal myself, I decided to make a gorgeous 3D snowflake Christmas ornament for her using my Cricut Maker. It was so incredibly easy, yet yielding a stunning result.
Today I am going to show you step by step how I made it.
How to make a 3D snowflake ornament using a Cricut Maker
You will need:
- Cricut Design Space
- Cricut Maker
- Cricut double scoring wheel tool
- Cricut Premium fine point blade
- Metallic poster board
- standard grip cutting mat
- glue gun
- silver string
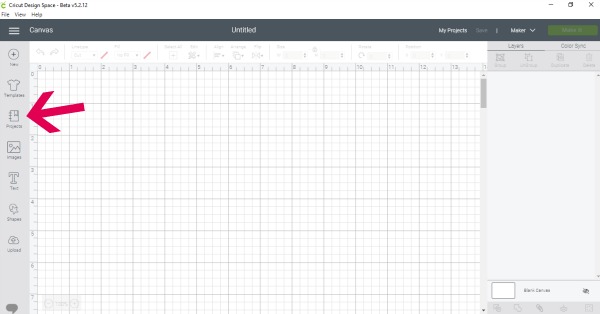
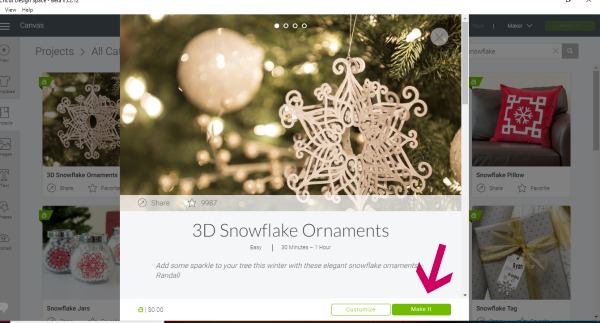
Open design space, select new project and search for 3D snowflake ornament
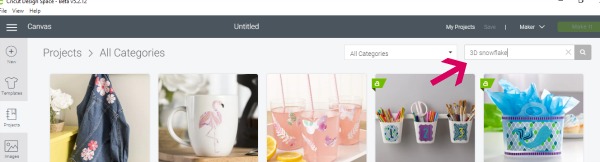

Click on the 3D snowflake image and click “make it” when the pop up appears.
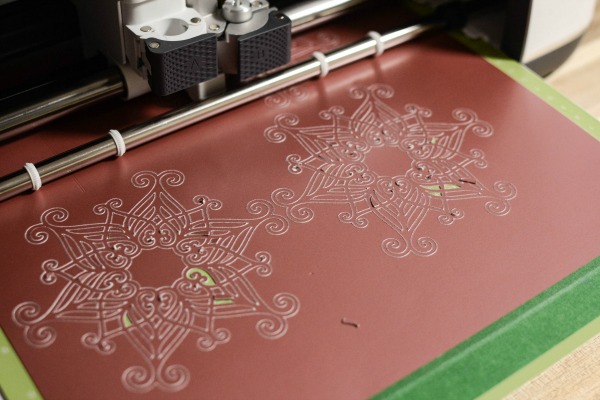
Prepare your poster board on the cutting mat. I used metallic poster board, which makes a nice sturdy ornament.
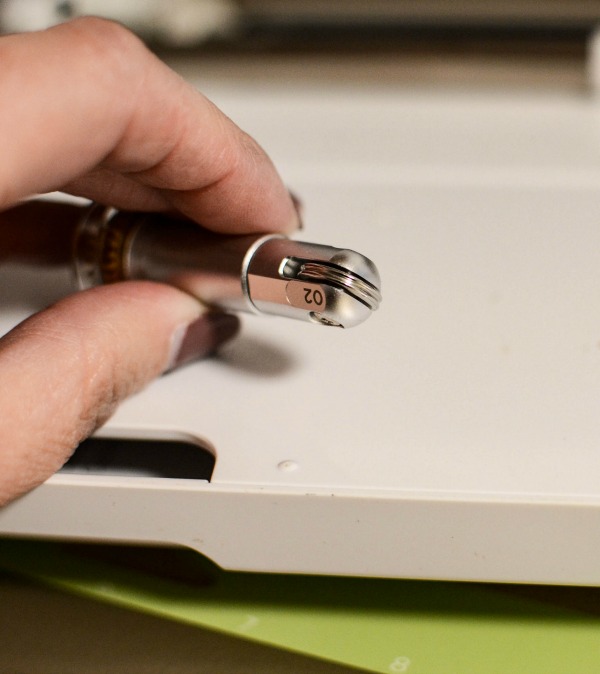
You will first prompt you to insert the double scoring wheel tool into the machine. Insert it into the tool housing B.
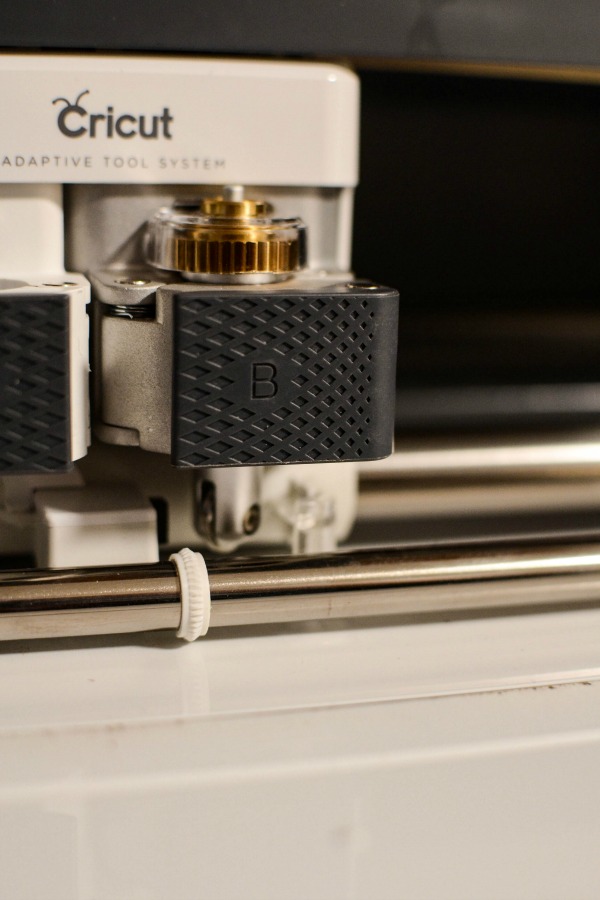
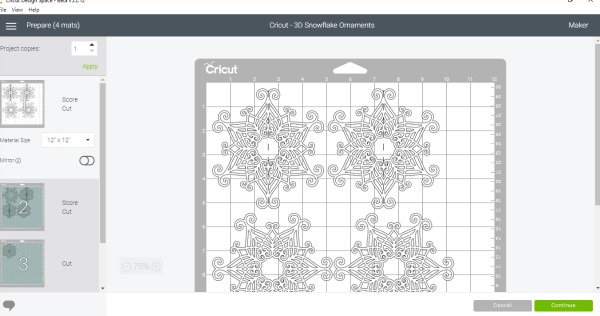
Place the mat into the machine and press start. The scoring process takes just a few seconds. After the scoring process is complete, Design Space will prompt you to switch to the premium fine point blade.

The cutting process includes cutting four of the exact same snowflake shapes. It can take up to 10 minutes to cut. Do not leave your machine unattended during this time.
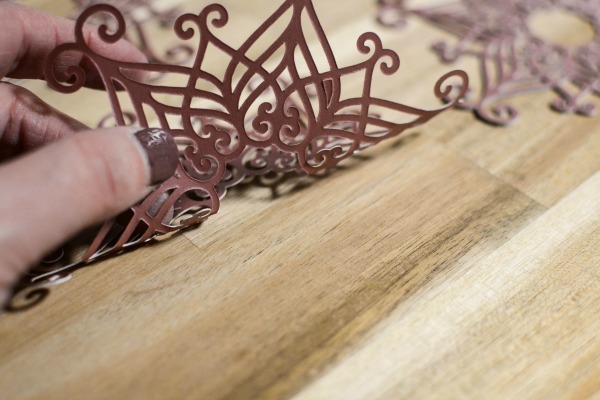
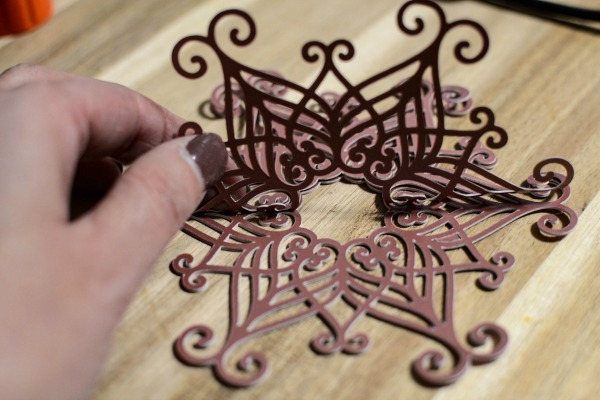
When all four ornaments have been cut, remove the mat from the machine and carefully remove the snowflake shapes from the mat. They come away very easily, but be sure not to bend them.
I stopped at just the first mat, but this design as a total of 4 mats that can be cut to create different snowflakes as well. If you want to cut all of them, just continue the above process for each mat to be cut.
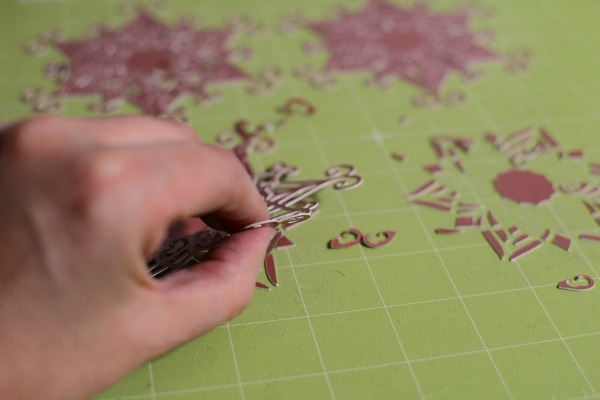
You will have two with scoring lines down the centre and two without.
Glue the two snowflakes WITHOUT scoring lines together, shiny sides out. (I like the Cricut metallic poster board sheets because they are the same one both sides!).

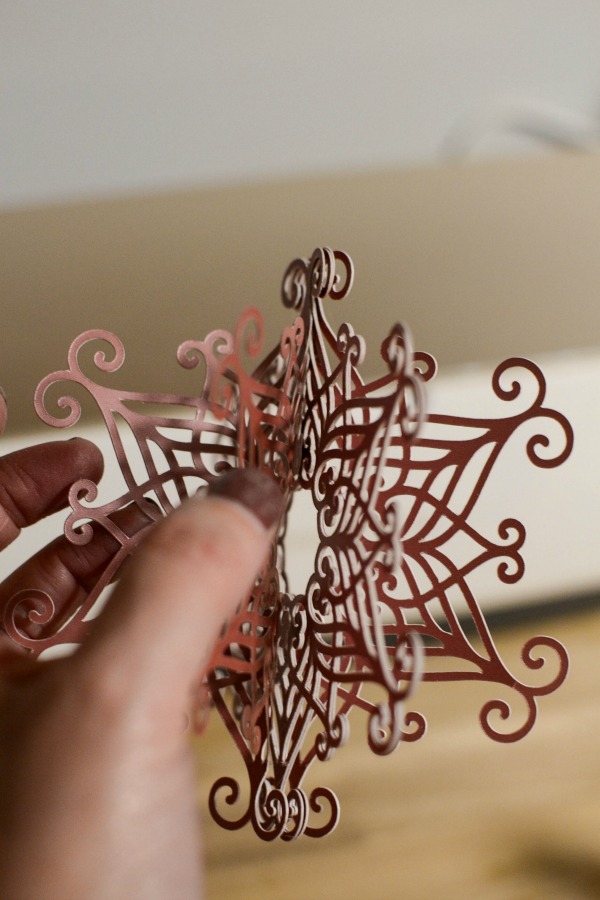
Carefully fold the two scored ornaments along the score lines.
Carefully apply glue to the back of the fold on each scored ornament.
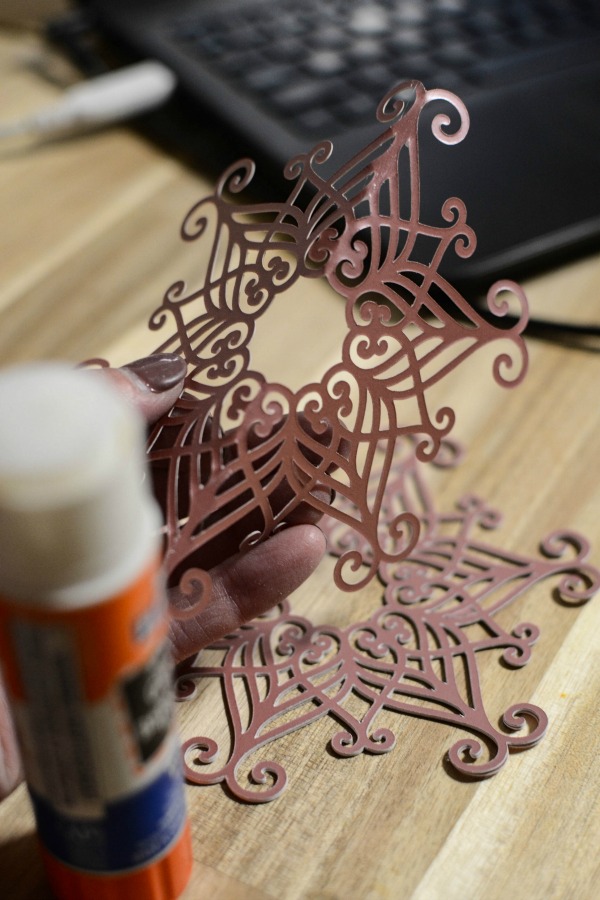
Starting with one folded ornament, line up with one side of the flat ornament and press into place. Turn it over and repeat by lining up the second folded ornament with the other side of the flat ornament.
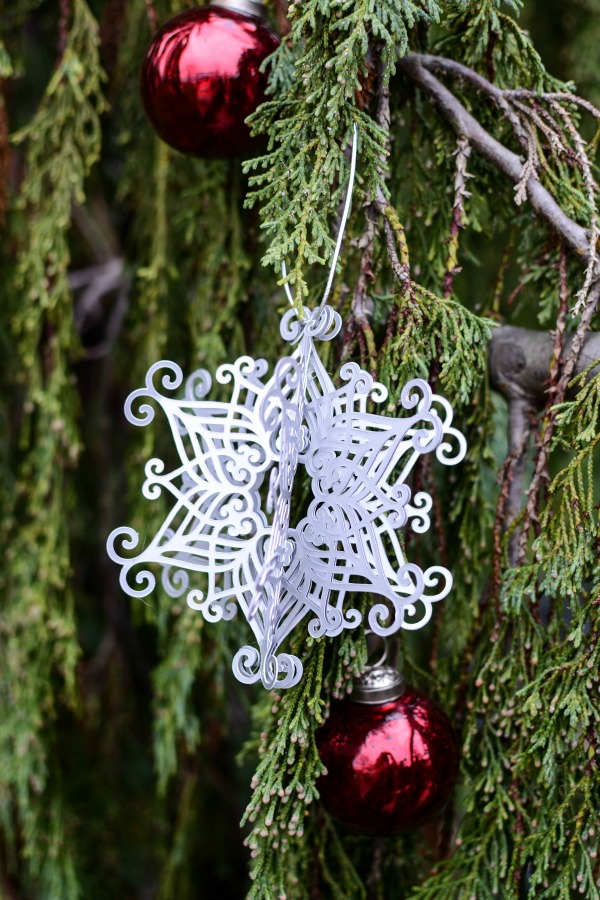
Fan out the folded sides to created a symmetrical 3D snowflake.
Add a length of silver cord to create a loop so your snowflake ornament can be hung on a Christmas tree.
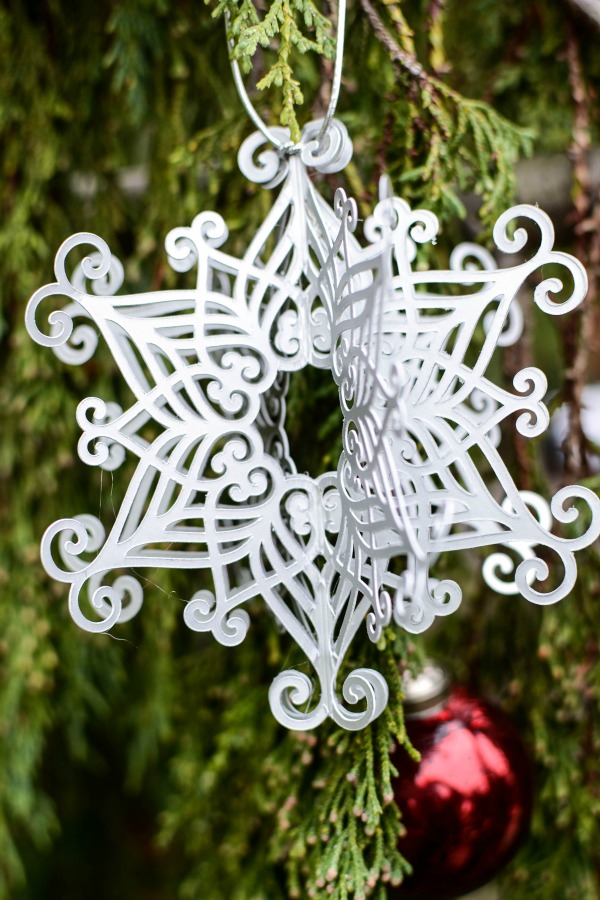
How pretty is that?!
While it seems like there are a lot steps to create this 3D snowflake ornament, the actual hands on time was only about 20 minutes at most.

I really hope that Beverly loves this ornament as much as I do! I couldn’t resist making myself a few!
I hope you have enjoyed this tutorial for how to make a 3D snowflake ornament. If you have always wanted a Cricut Maker this is a great time of year to get one. There are so many creative ideas for gifts and décor for the holidays.
Check out the tutorial for the buffalo check ornament I made last year.
Until next time….


How pretty, Maureen! I can’t wait for it to arrive! I love having snowflakes on my tree and this will look beautiful along with the others. Thank you!
Thank you Beverly! I am excited for you to receive it too!
That is beautiful! I really must try more Cricut projects as I am always so amazed at what that little machine can do. Pinned.
Thank you! It never ceases to amaze me what the Cricut can do!!
You had me at Cricut! I just turned my brand new Cricut Maker on for the first time last week and learning the ropes. Thanks to your awesome tutorial, I think I can do this! Bev is going to love her beautiful snowflake ornament! Pinned 🙂
These are beautiful! I don’t have the scoring tool yet but this makes me want to get one!
A Cricut is on my wish list, and I love seeing all of the different unique things you can make with them. This turned out spectacular!
I don’t know why I’ve never tried making an ornament with my cut machine. This turned out so well! Pinned.
Thank you Erlene!
It’s beautiful! I saw this in Design Space and thought about making one too. It looks so pretty on the tree. Great tutorial to follow.
Thank you Jenny! It was so easy to make!
That is so pretty. I have never used a Cricut, I didn’t know you can do such nice things with it. Thanks for sharing.