
No Sew Roman Shades
Raise your hand if your Pinterest boards are full of projects you pinned with every intent to try someday! Well, my friends, that someday is here! Welcome to the March Pinterest Challenge, hosted by My Pinterventures. The purpose of this Pinterest Challenge is to motivate all the participants of this hop (and you too) to not just pin, but to make it happen! So this month, I chose to make No Sew Roman Shades for our kitchen.
I have intended to make these for so long, perusing Pinterest and checking out the many pins offering inspiration and tutorials. The very first time came across the concept of no sew Roman shades was on the blog Domestically Speaking. I immediately pinned it and thought I would get it done in no time. Fast forward a couple of years and this Pinterest Challenge was just the kick in the behind I needed to actually tackle the project.
It has been a year since we did our kitchen renovation and sadly it was still lacking window coverings. This challenge couldn’t have come at a better time.
In this post I will share my experience making the shades, a link to the post that inspired me, and a few things I “learned” from the project. I will definitely be making them again for other windows in our home.
DISCLAIMER: I apologize in advance for the photo’s I took while working on the shades. I should have taken more, step by step photos, but I was so engrossed in the project, I often forgot to snap a picture. And, since I was working in a basement with one tiny window BEFORE the clocks went ahead the overhead lighting is not all that flattering!
To make no sew Roman shades you will need:
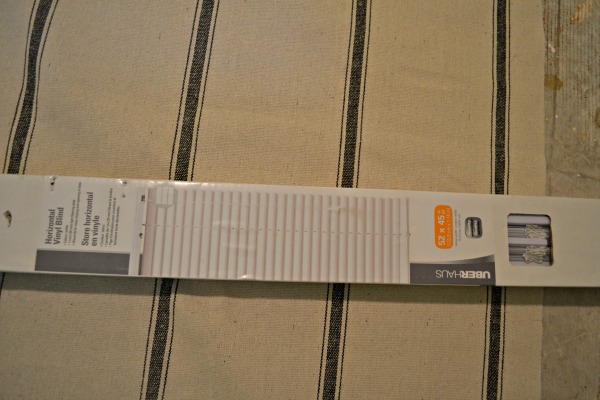
- inexpensive vinyl mini blind in the correct size for your window
- fabric glue (I used this kind)
- hot glue gun and glue stick
- fabric of your choice that measures approximately 2″ larger on all sides than your blind
- fabric scissors
- tape measure
Before you begin, calculate how many mini blind slats you will require. In my case, the total length is 40 inches and I spaced them out 8″ apart, including the bottom rail I needed
Lay your fabric out on a large surface and iron out any creases before proceeding, if required. Open your mini blind fully and lay it on your fabric with the open/close mechanism facing up, about an inch down from the edge of the fabric.
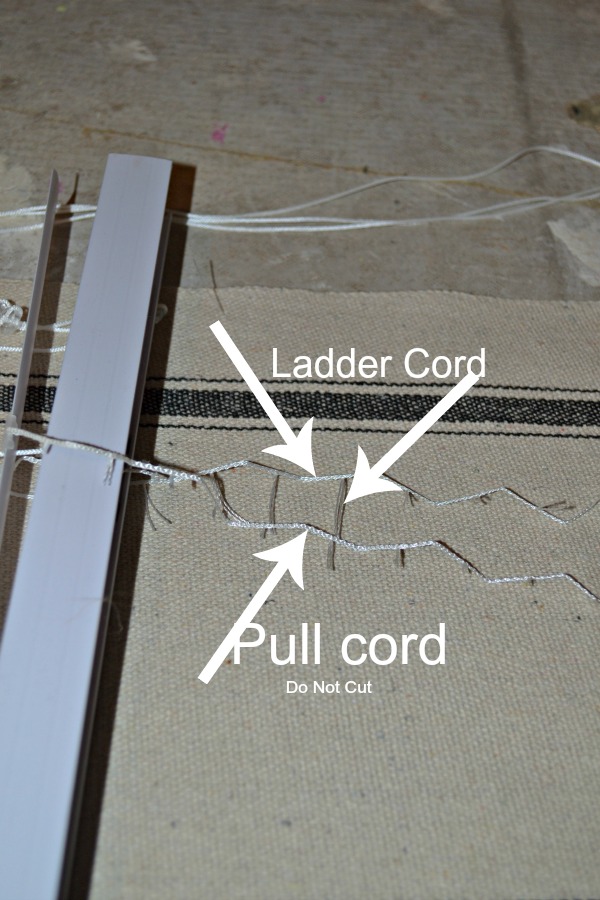
Carefully cut the ladder strings and remove them. BE VERY CAREFUL NOT TO CUT THE PULL STRING. It is usually slightly thicker than the ladder string.
Pop plugs out of the bottom rail and undo the pull string knots. Pull off the bottom rail and all but the required number of slats.
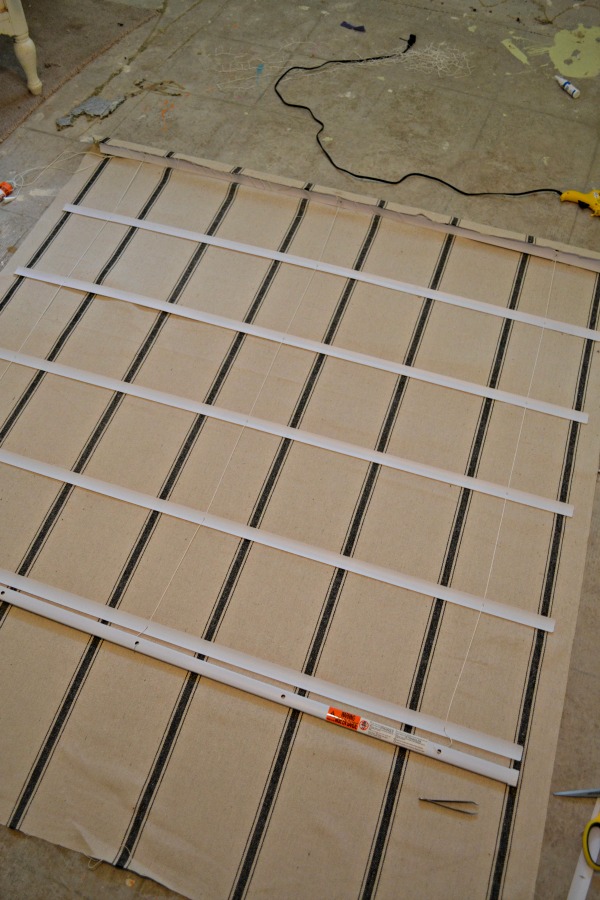
Wrap the top inch of fabric around the top rail and glue in place with a glue gun. I tried using fabric glue for this step, but I just could not get it to stick. I applied the hot glue sparingly so it wouldn’t seep through the fabric.
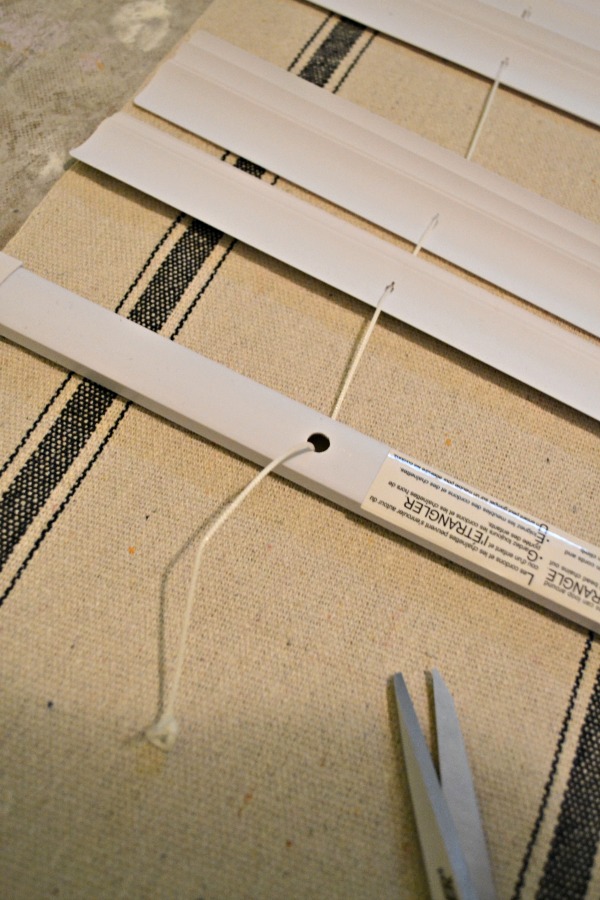
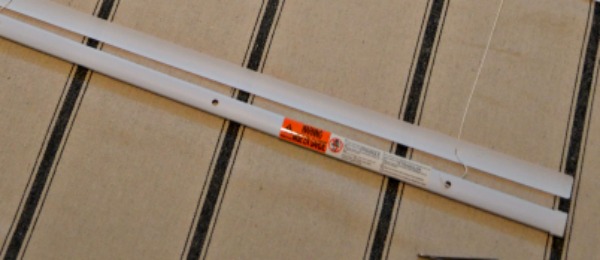
Position the rungs the desired distance apart. The measurement starts from the top row. Since I wanted the folds to be 8 inches apart, the first slat was positioned 8 inches down from the top rail, and every 8 inches after that. Make sure the slats are level all the way across.
Using fabric glue on the slats into place, convex side down. Be sure not to get any glue on the pull cords!
Leave the glue to set for a couple of hours.
When the glue has set, thread the pull cords back through the holes in the bottom rail and re-tie the knots. Snap the plugs back into the holes.
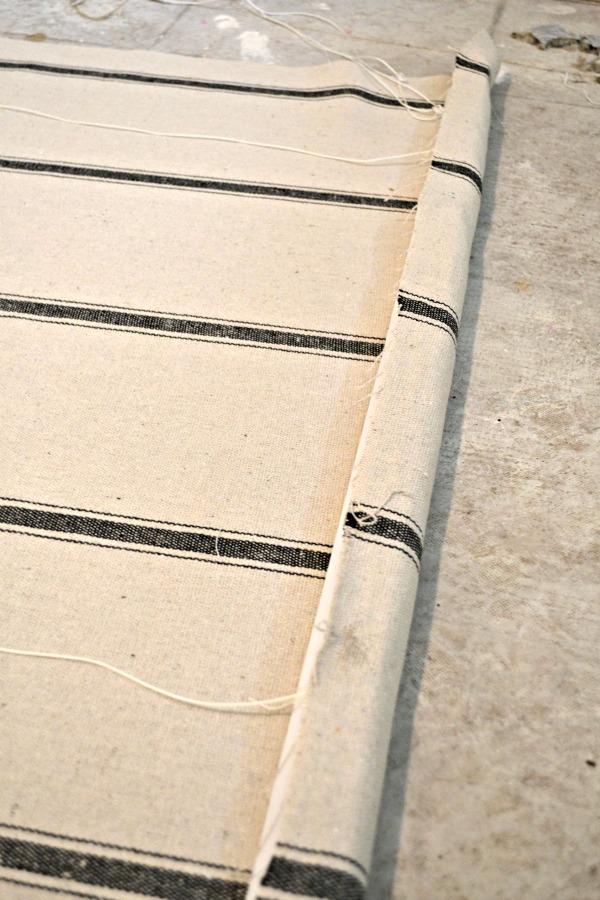
Trim the fabric about one inch from the bottom rail, and pull fabric up and glue in place. Again, I used hot glue sparingly for this, avoiding the pull cords. You can certain fold the edge to finish it before gluing in place, but since it won’t be seen, I didn’t think it was necessary.
Hang blinds as you would any mini blind and they should open and close smoothly.
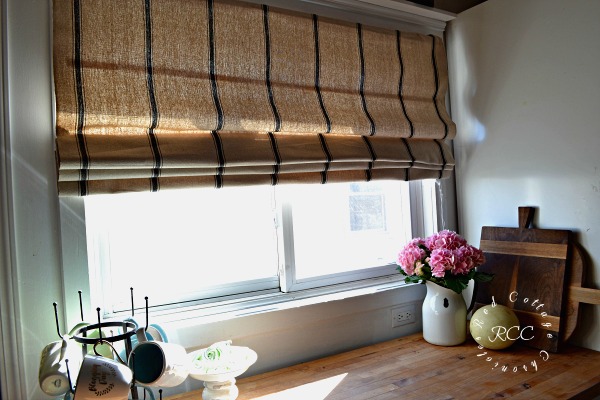
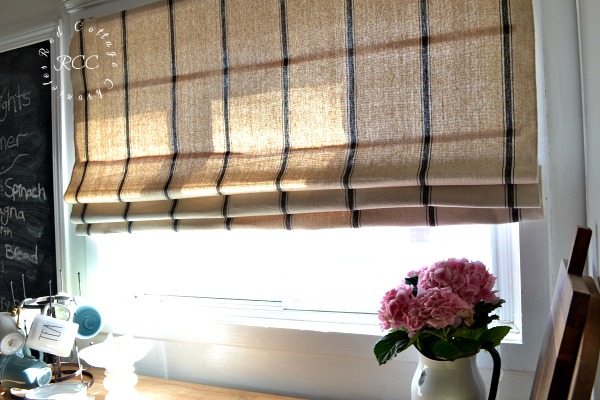
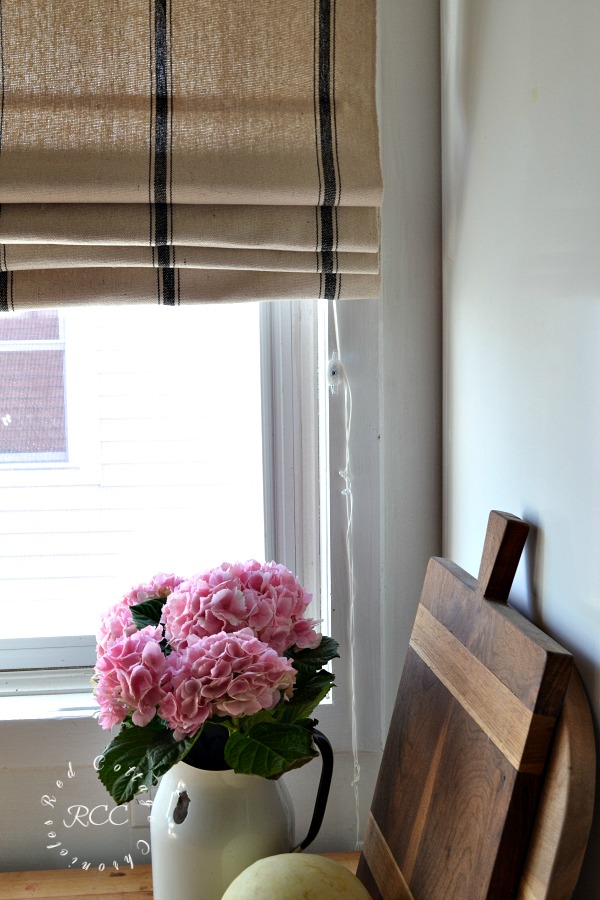
I am super happy with how they turned out. I had chosen a dense cotton twill striped fabric, which block out almost all the light when closed, so I did not feel the need to line them.
During the day I pull them right open to allow all the gorgeous sunshine in!

A few things I am taking away from my first attempt at making my no sew roman shades:
I actually don’t mind that they are mounted on the outside of the window frame. Almost all of the tutorials I cam across showed the shades mounted inside the window frame and I really like that look. Because our window is a bit of an odd size, I couldn’t find the correct size to hang the shades on the inside of the window frame, but in the end I actually like them better on the outside.
I also was very lucky because the fabric I purchased was the exact width I wanted, and had a finished edge. I didn’t need to finish the actually dodges by folding in the edges and gluing in place. Given all the other windows in our home are much narrower than this kitchen window, I have to be prepared for this extra step.
Although most of the tutorials stressed the fact that you should not use hot glue for this project, I really could not get the the fabric to stick to the top or bottom rails with the fabric glue. I was careful to apply the hot glue sparingly and it turned out fine. I do agree though, to only use fabric glue when gluing the slats in place.
If at all possible do not work on the floor!! Oh, my aching back.
And finally, next time I really need to relax!! I was so afraid of missing a step or cutting the wrong string or gluing it on upside down, that I was tense the entire time. Although this is an inexpensive option to real roman shades, the cost of fabric made me cringe that I might make a mistake and waste it!
Now that I have actually created my first Pinterest project, there is no telling what I will make next! What I now for sure, is that it feels good to actually start picking away at all the projects have inspired me!
There are man tutorials on how to make these shades, and I encourage you to explore different options, but here is a link to the post that inspired me, with a full step by step tutorial!
Now, scroll down to see what other’s are being inspired to try and then go get started on your own project!
Until next time…..

To join next month’s challenge, click here to sign-up ⇒ April Pinterest Challenge
Now let’s see what other things Pinterest inspired! Head over and visit the other hosts to see what they crafted, cooked, built, or tried!

Erlene – My Pinterventures • Shirley – Intelligent Domestications
• Jenny – Cookies Coffee and Crafts
Joanne – Our Unschooling Journey •
Roseann – This Autoimmune Life • Kelli – The Olympic Nest• Lynne – My Family Thyme • Beverly – Across the Blvd.
Debra – Shoppe No. 5 • Pili – My Sweet Things
Laurie – My Husband Has Top Many Hobbies • Kristie – Teadoddles
Julie – Sum of their Stories • Gwen – Geez, Gwen!
Marie – The Inspiration Vault • Candice – Fearlessly Creative Mammas •
T’onna – Sew Crafty Crochet • Kenyatta – My Design Rules
• Magen – The Kusi Life
Cherryl – Farm Girl Reformed •
Leslie – Once Upon a Time & Happily Ever After
Micah – Home Faith Family • Kelley – Simply Inspired Meal
Lauren – Mom Home Guide • Deborah – Salvage Sister & Mister
Gail – Purple Hues and Me • Terri – Our Good Life • Lisa – Blogghetti
Lauren – Wonderfully Made • Sue – A Purdy Little House
Toni – Red Cottage Chronicles
Marci – Stone Cottage Adventures • Michelle – Our Crafty Mom


I have always been quite intimidated by projects like this too. Your shades came out beautifully though and I love the fabric you chose too. Pinned.
This is a project that has been on my list for a long time too! Love how yours turned out! I’m inspired to give it a try!
Thank you Laurie!
When I saw the title of this post I immediately thought of Jerry McGuire and “You had me at hello.” See, “You had me at No Sew!” I can’t sew. But I can glue like nobody’s business! I love how these came out! Your fabric choice is something I would have picked myself! Really beautiful! Great job! Thanks for sharing!
Thank you Gwen! The sewing gene missed me in our family, so it all about the glue projects for me too
This roman shade came out great. I’ve pinned these to and I’ve always been to nervous about ruining the fabric to give it a try. Roman shades are great though. Pinning!
Thanks Jenny! I will definitely be more relaxed when I make the next one!
Your custom shade is perfect! You did a great job.
Great project, I need these for my backyard cottage. I will pin to save for later. Thanks for sharing.
I’ve had this one pinned for a long time but every time I think about making the shades, I get a bit intimidated by the whole thing. I love your tutorial and just may give it a go! Pinned
Lisa, do give it a try! Biggest lesson for me was to just relax and not over think the process!
Not gonna lie, I’m a bit jealous. I, too, have many pins on DIY Roman Shades and even tried making one from old blinds. Epic fail. Not sure what I did wrong. Yours are beautiful. May just have to give it another go.
Thanks Kelli! Admittedly, I was so nervous about messing it up, I could probably do better next time, but I do love the look of this one and it operates perfectly fine!
Those turned out so great.
This is something I have pinned as well! I bought a whole roll of material for $3 at a yard sale that will be perfect for this. Your fabric choice is wonderful!
I’ve done this project for our bathroom before too. I was scared that it wouldn’t turn out, but it did and was easier than it looks. Although, I like yours better because your fabric is gorgeous and looks like a heavier weight than mine was.
The shade looks fabulous. I love the material you chose. The tutorial is great and easy to follow. I want to redo the den and something like this may work out.
I love the fabric you selected and how nice that it was the perfect fit with finished edges. I too have gotten caught up in a project and forgot to snap pictures. You have plenty to understand the process though.
I love roman shades and your tutorial seems easy to follow. Pinned!
Maureen these came out fantastic!