
Spooky Halloween Table with Cheesecloth Ghosts
Who doesn’t love a good ghost story at Halloween?! These fun DIY cheesecloth ghosts are the perfect centrepiece for a spooky Halloween tablescape and set the stage for some ghostly tales to be told!
Welcome to our annual Halloween Tablescape blog-hop hosted by the lovely Rita from Panoply! This time we have 12 table decor enthusiasts in addition to myself, so there is plenty of Halloween table inspiration to go around!
A Ghostly Halloween Table
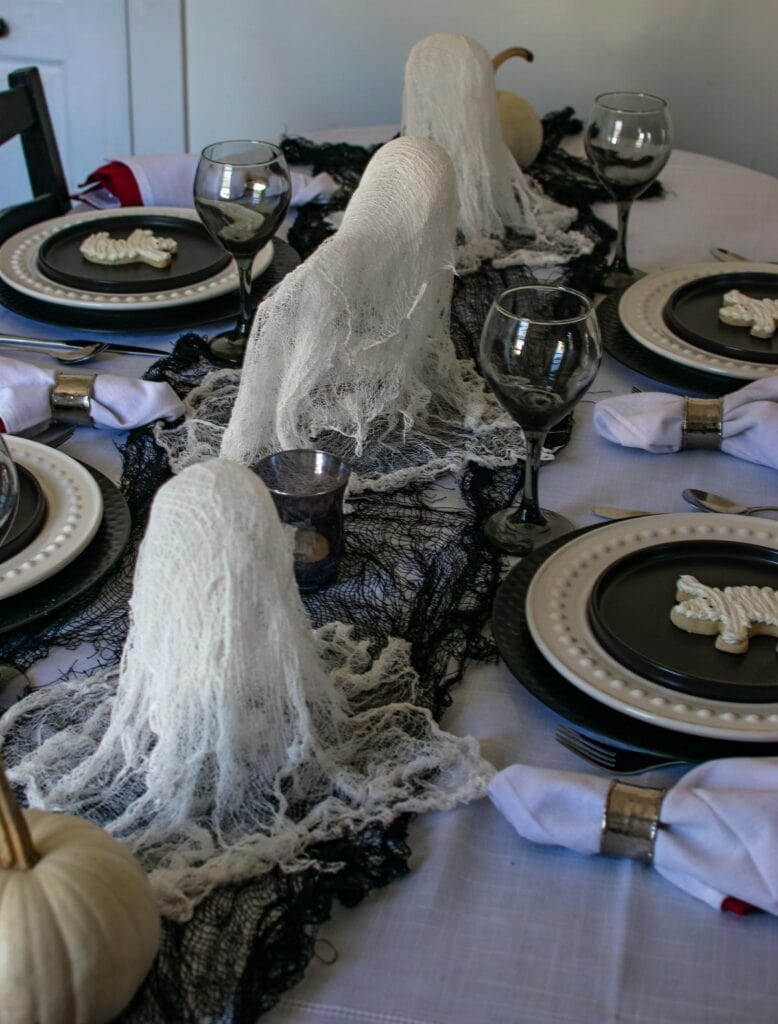
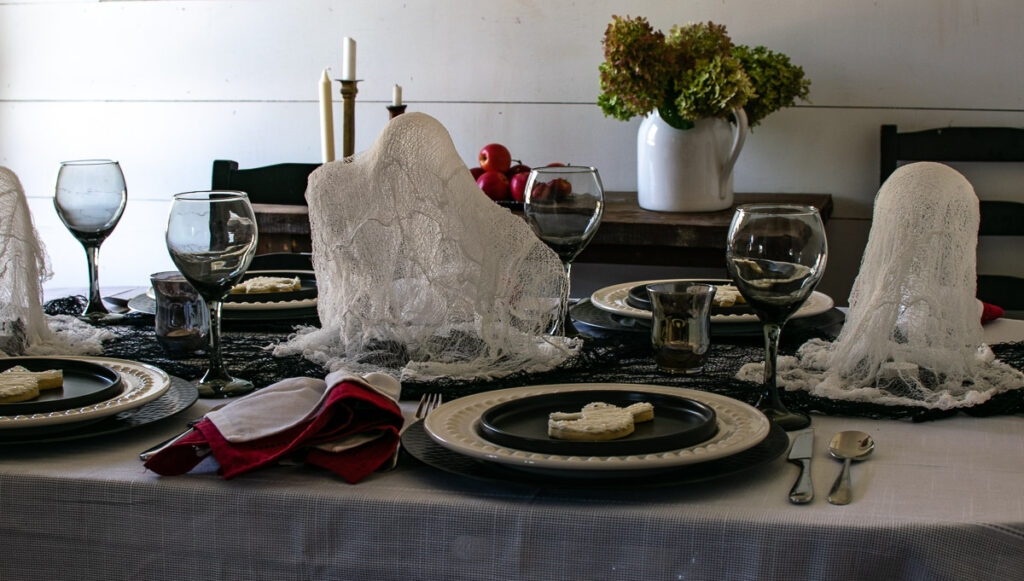
The star of my table is a trio of floating cheesecloth ghosts that add a spooky, but playful touch as a centrepiece. They’re whimsical, a little mysterious, and so easy to make! I love how they seem to drift down the table over the black fabric netting. A couple of white pumpkins anchor each end, keeping things soft and neutral.
I’ve included step by step photos below so you can try your hand at making a ghost or two!
As always, I shopped my house for things to use for my tablescape. I wanted to keep it very simple using only black and white elements so that the ghosts would be the star of the table.
I purposely left the lights low to create that spooky, ghostly, yet cozy atmosphere! No point in telling ghost stories with the lights on!
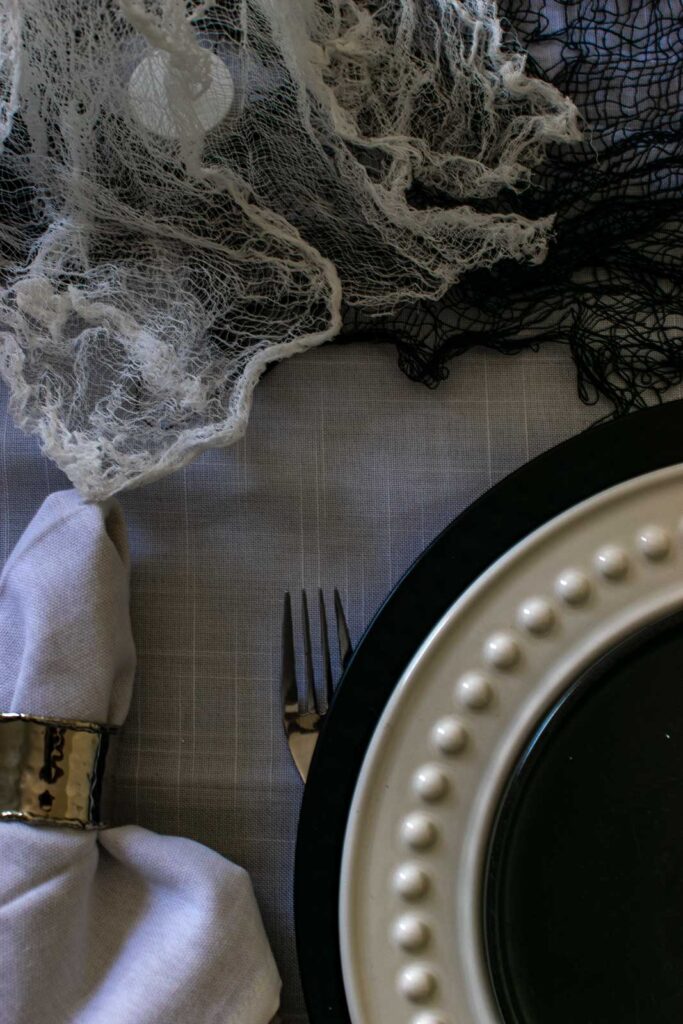
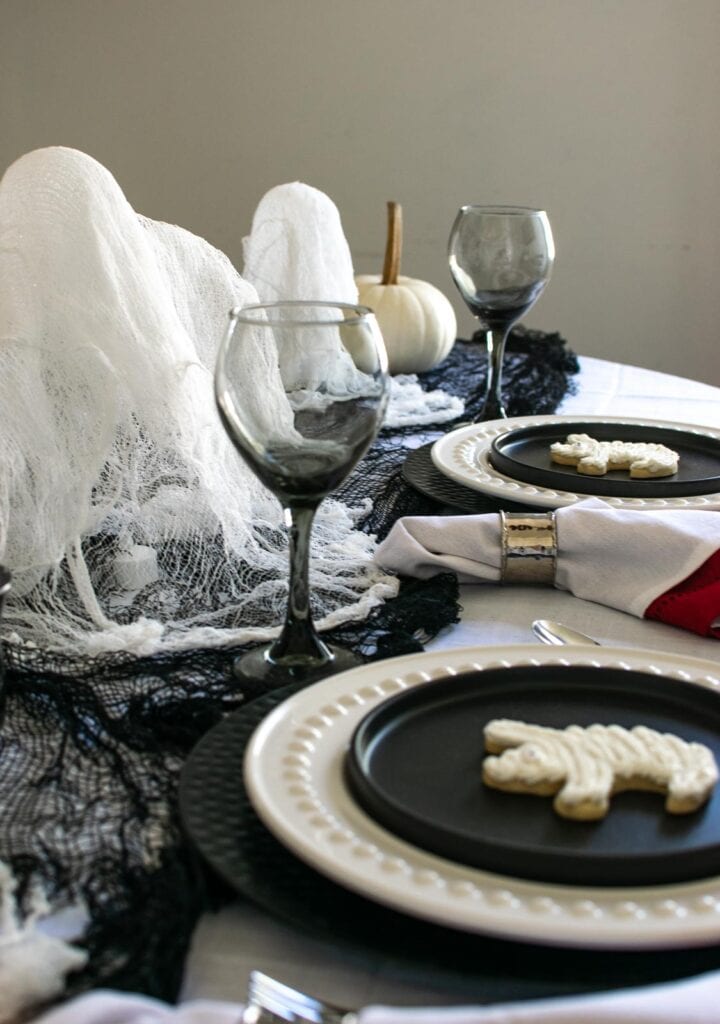
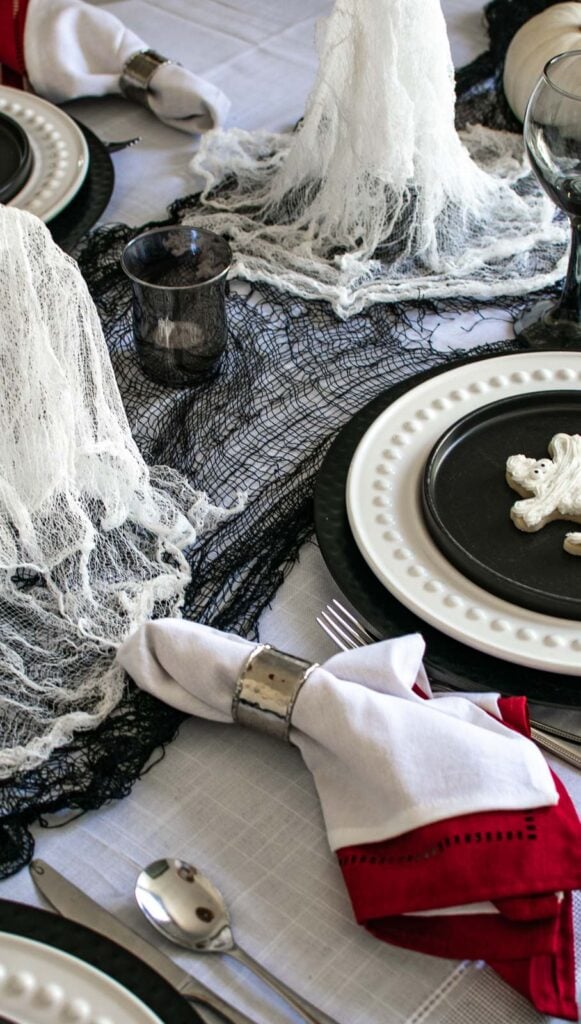
Each place setting follows the same classic theme – a black charger plate topped with a white beaded dinner plate and black salad plate. I thought it needed a tiny bit of colour so I have layered red napkins under white ones and slipped them through silvery black napkin rings, leaving just a hint of red peaking out the bottom.
My everyday flatware and simple black wine glasses finish off the place settings.
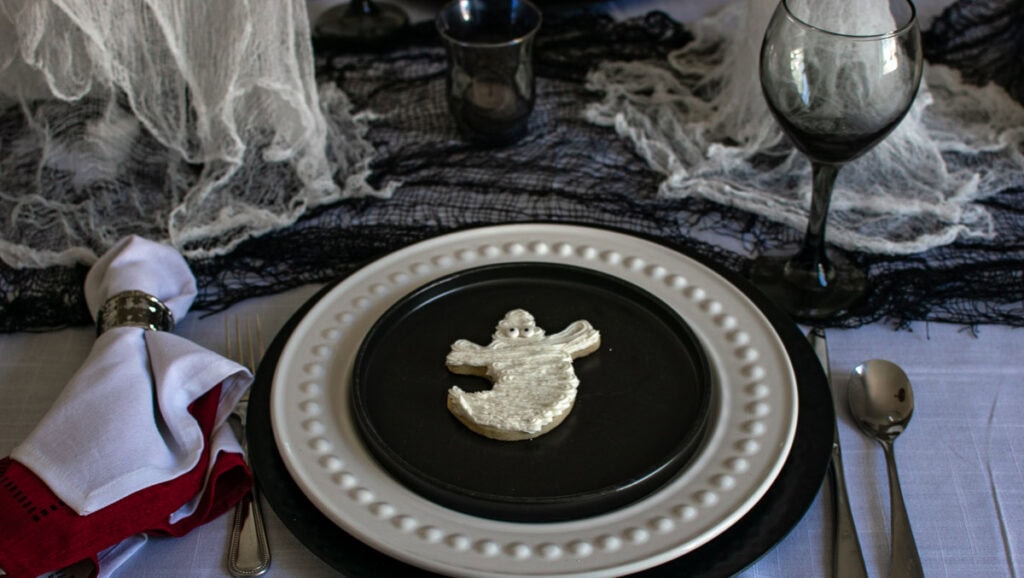
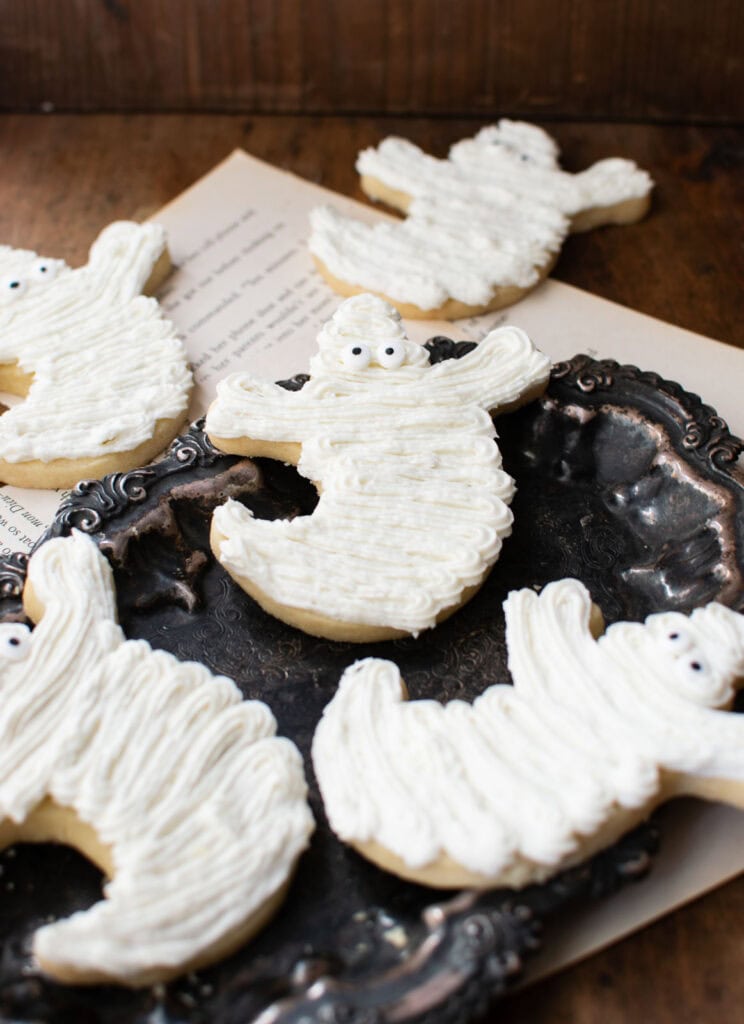
A little bit of Halloween fun in the shape of these adorable frosted shortbread ghost cookies sits atop each salad plate. I think it’s festive, but still perfectly at home in my little cozy cottage dining room.
Creating the Centrepiece of Ghosts
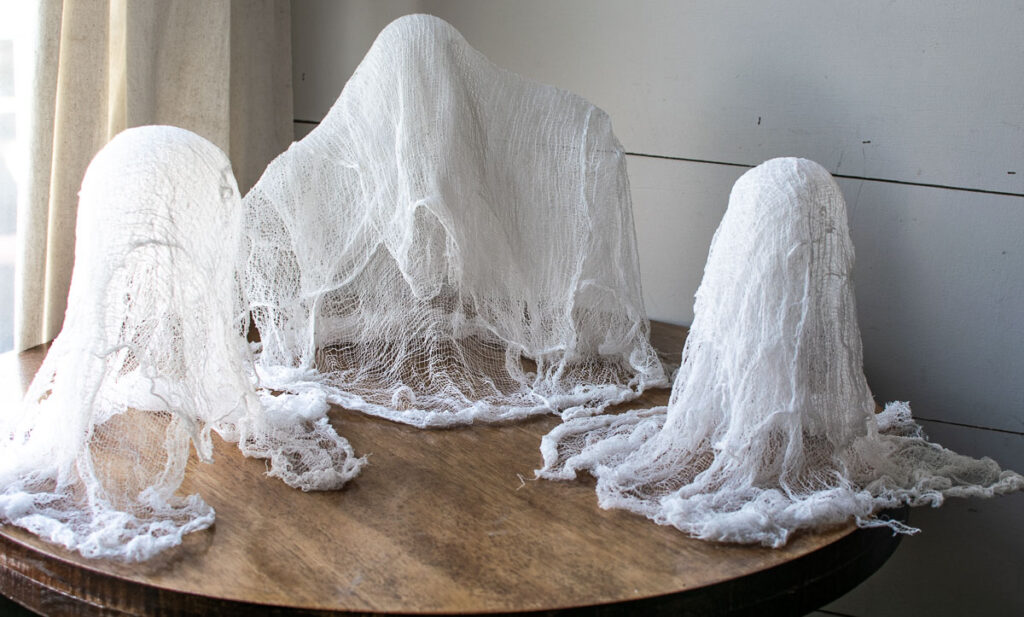
I made three ghosts for the centrepiece. One larger one with his arms extended, like he (or she) is floating down the hall after you! Two smaller cohorts float along on either side.
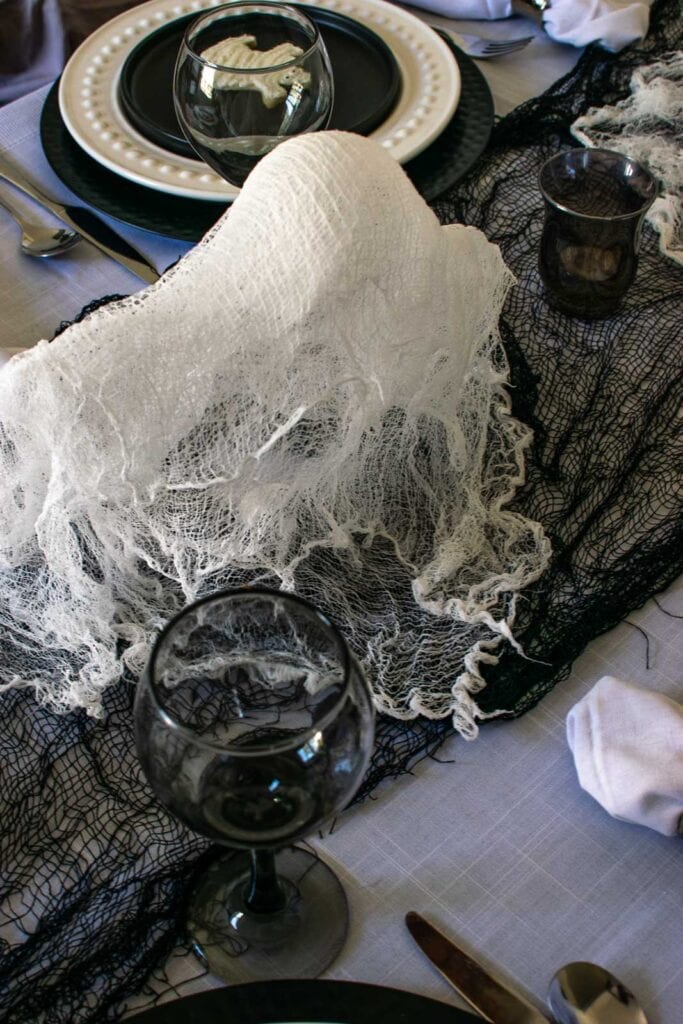
I used old black cobweb fabric I purchased from the dollar store a few years ago as a table runner on top of a simple white tablecloth. Cute little white pumpkins finish off the centrepiece at either end of the table.
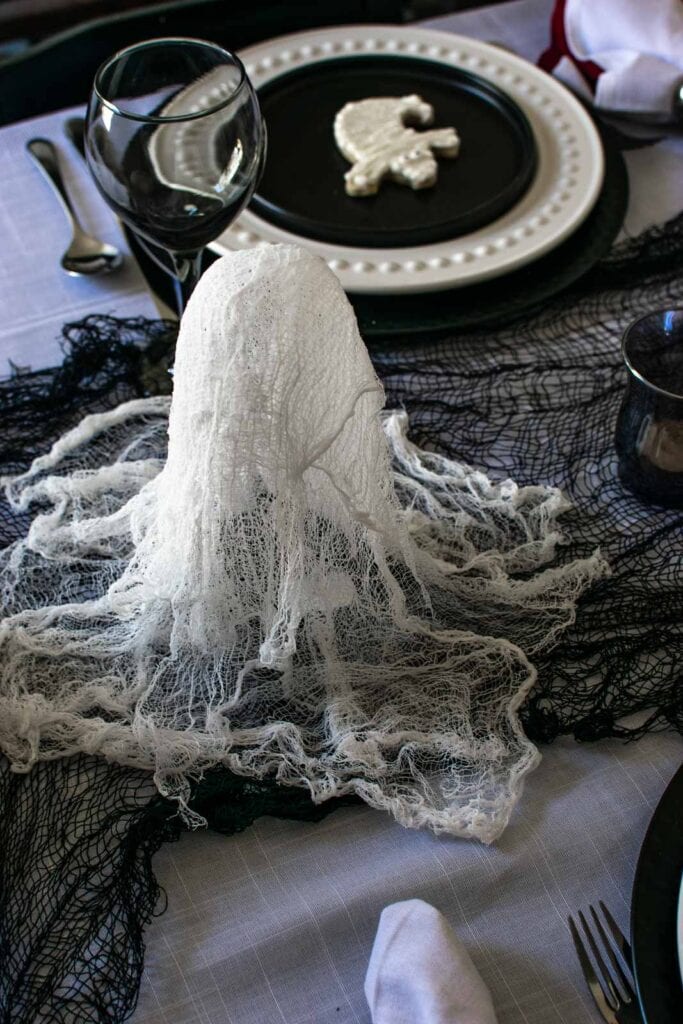
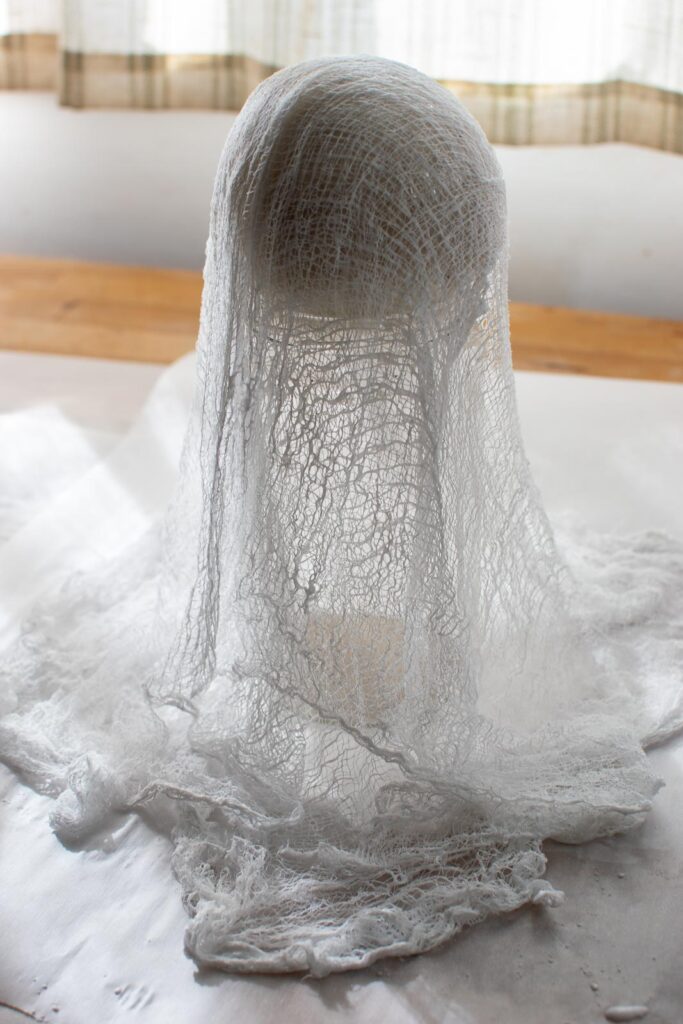
I love how the layers of cheesecloth add texture and interest to the ghosts, and how it drapes onto the table. It’s reminiscent of those ghosts in old movies that float down the hallway with all their fabric blowing in the breeze!
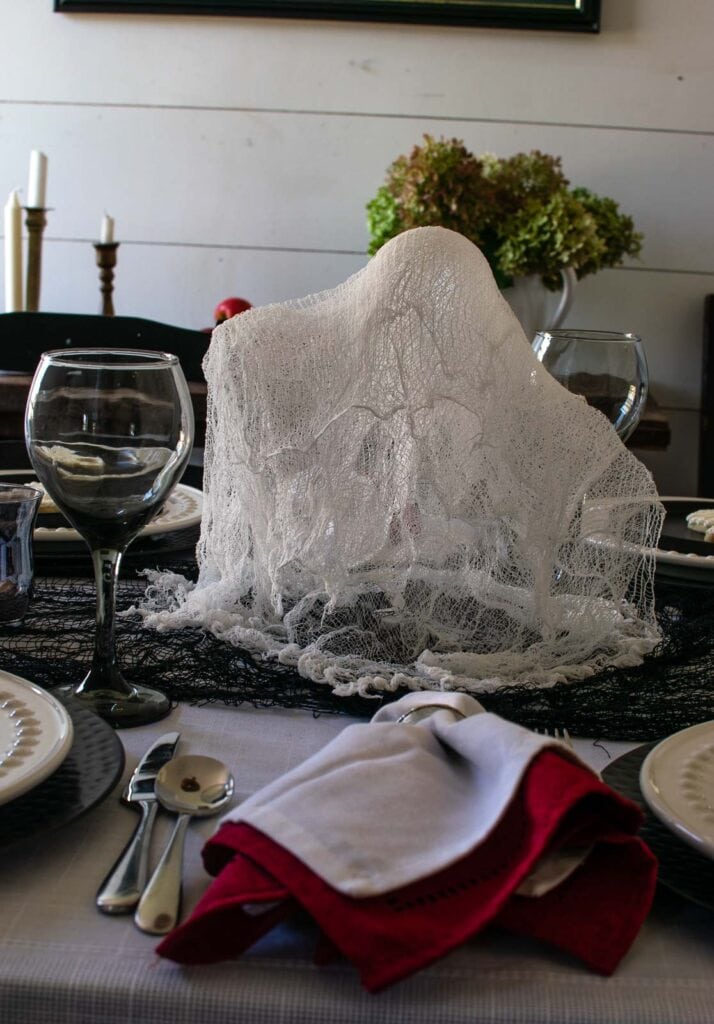
A battery operated tea light candle sits underneath each ghost. As the evening draws on, with the flick of a switch the ghosts will cast an eerie glow!

How to make Cheesecloth Ghosts
These ghosts couldn’t be easier to make. A nice project for a quiet afternoon, or get the kids in on it for extra fun!
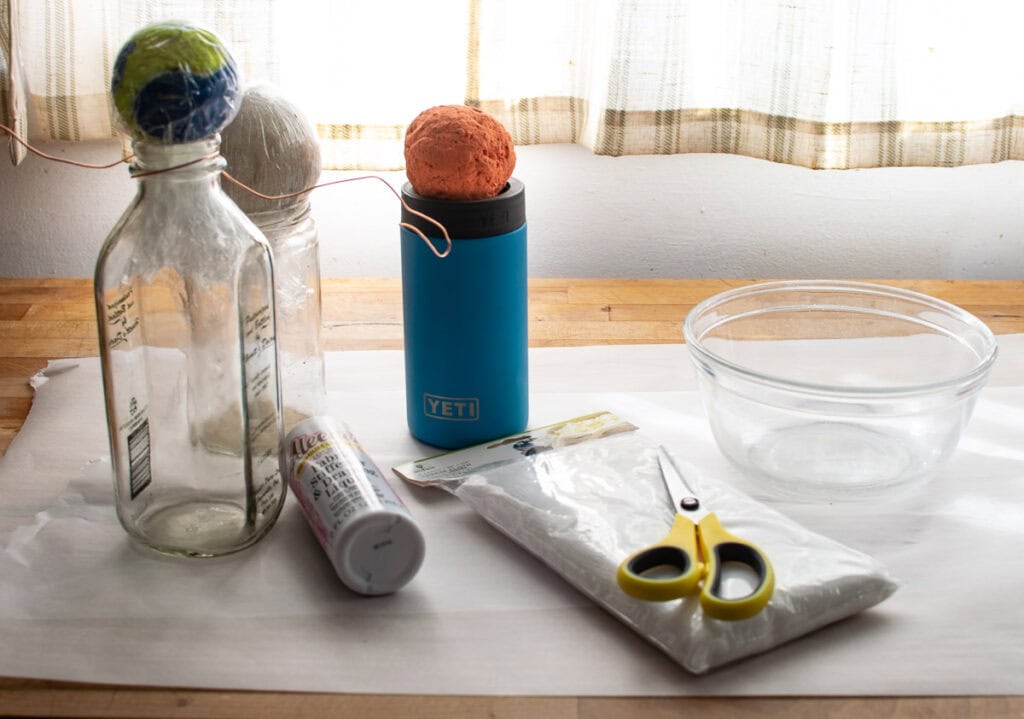

Create your ghost form – place round balls wrapped in plastic wrap on top of jars and bottles. To make arms, cut a length of wire, wrap it around the neck of the jar or bottle and turn the ends under so they don’t catch on the cheesecloth. Cut cheesecloth in lengths to fall fully over the bottle for the first layer. Be sure to cover your work surface with parchment or wax paper.

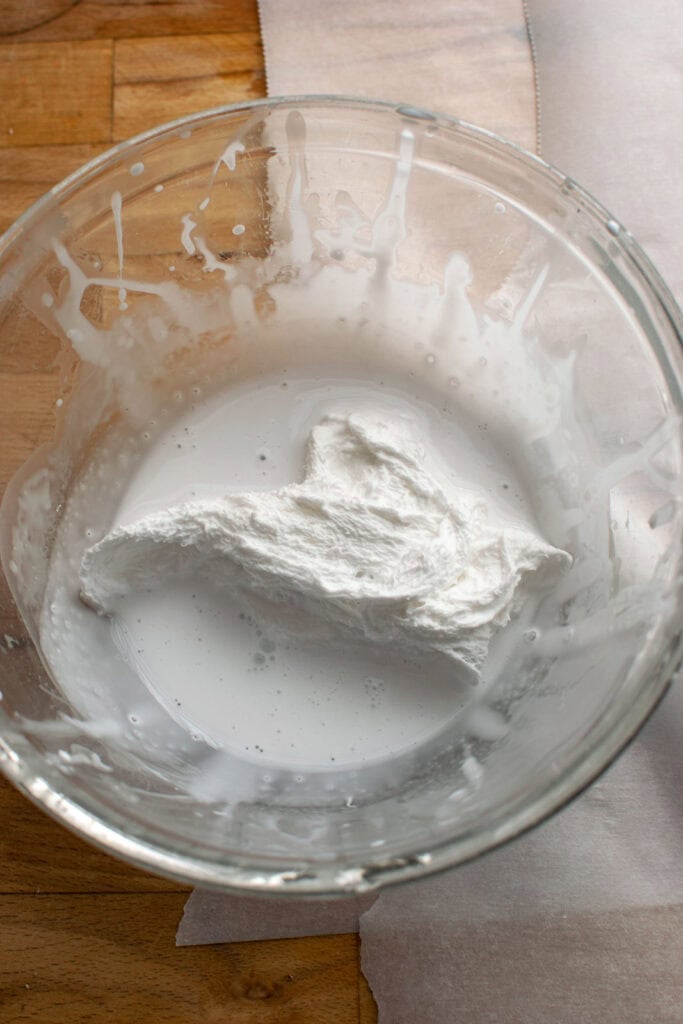
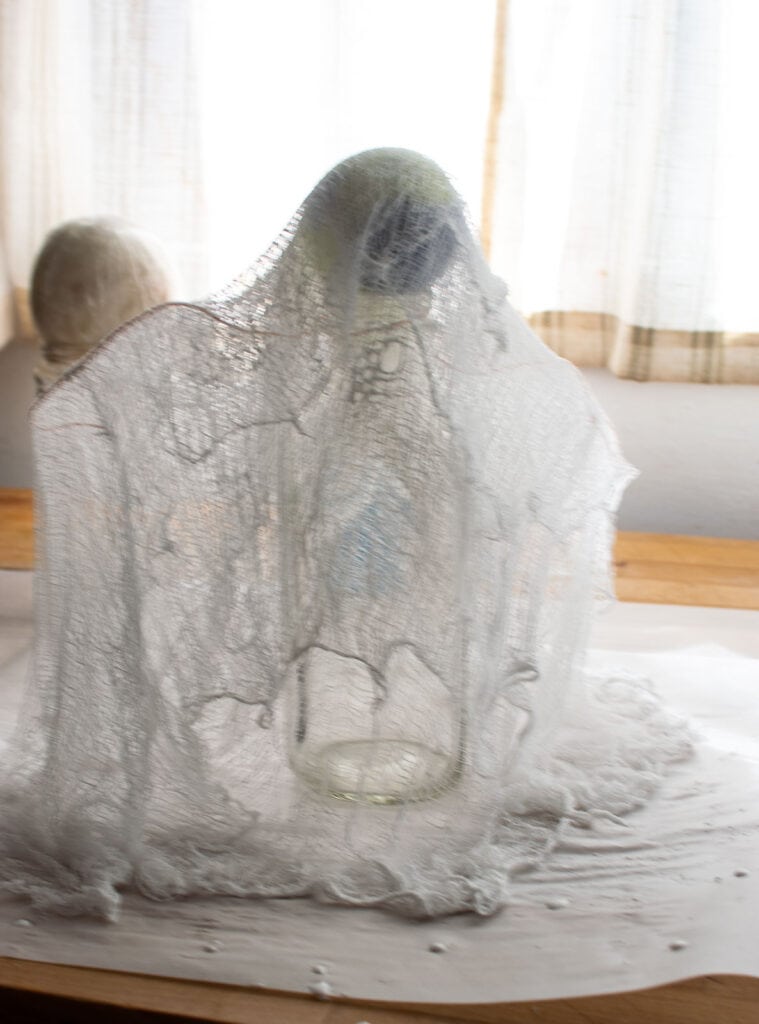
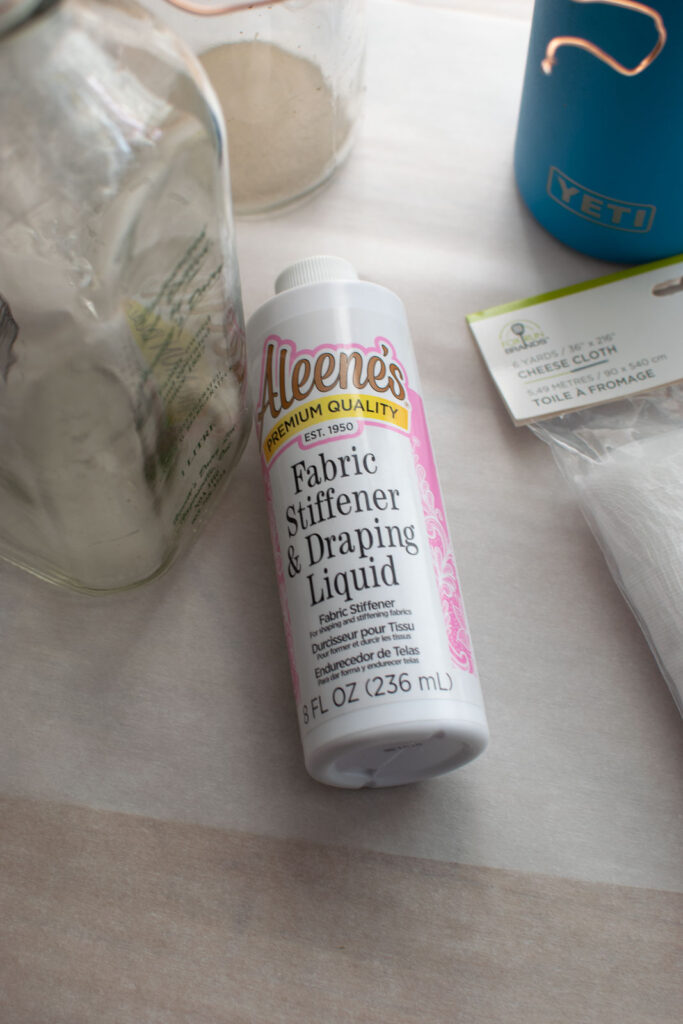
Stiffen the fabric – place the piece cheesecloth into a bowl of liquid fabric stiffener that has been diluted 25 percent water/75 percent stiffener. Be sure it is thoroughly saturated before ringing it out.
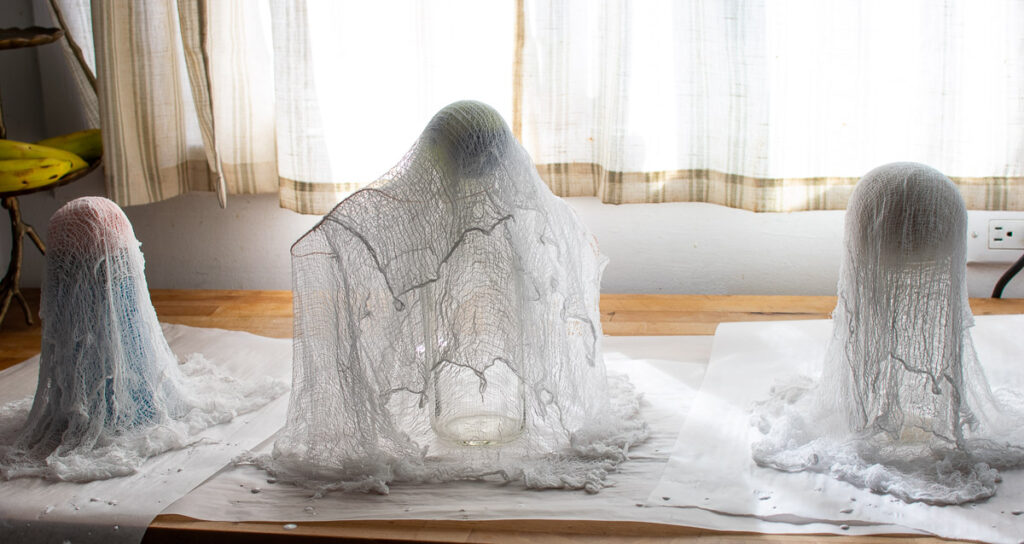
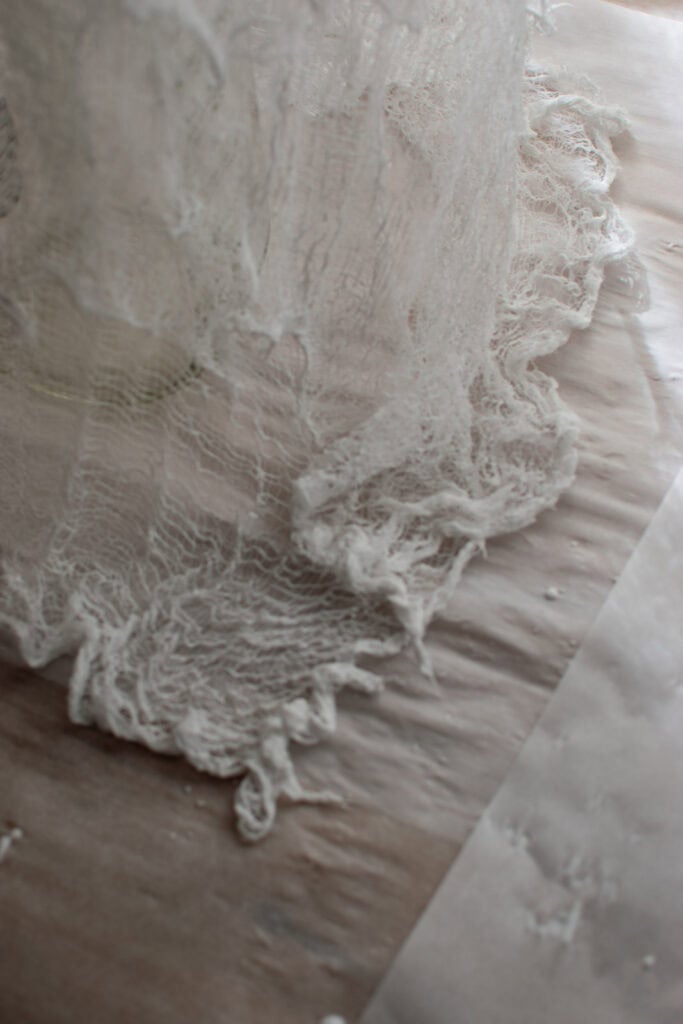
Drape and shape – Stretch fabric out, draping it over the bottles, repeating with longer and shorter layers for a total of 3 to 4 layers. Create folds and texture to your liking as you go. Make sure you allow the cheesecloth to pool around the bottom. This not only completes the look of the ghost, but also allows it to stand up when it is fully dry. Repeat the process using smaller canning jars topped with a ball, creating short and long layers.
Let dry completely – allow them to dry on the bottles for about 24 hours.
Once completely dry, carefully remove the bottle and the ball and they will be able to stand on their own!
Add eyes if you like – If you want to keep it silly and fun for the kids? Give the ghosts funny faces simply by cutting out some eye and mouth shapes from black felt!
TIP: When you wrap the balls in plastic wrap, leave excess at the bottom, twist it and push it down into the jar. This makes it easy to pull the ball out of the ghost when it is dry. You can also use balloons in place of balls to shape the heads.
Once your ghosts are ready, arrange them down the centre of your table on top of a black gauze fabric. Place battery operated tea lights underneath, and nestle candles and pumpkins amongst the ghosts if you wish.
I love how this table turned out! Spooky enough for a Halloween dinner party, but still perfectly suited for anyone who prefers charming over chilling! Sometimes a few floating ghosts and ghostly cookies are all you need!
More Halloween Table Inspiration
While I don’t always love Halloween, I do love the challenge of creating fun Halloween tablescapes! Some of my favourites from the past are this Black Magic Halloween Tablescape and this Simple Halloween Table which is more traditional and fun for the youngsters!
Now it’s time to explore all the bloggers joining in on this Halloween table tour, starting with our gracious host, Rita:
Panoply – Spellbound Halloween Tablescape
Home is Where the Boat Is – Stay for a Spell
Everyday Living – Fo(u)r the Love of Treats
Hyacinths for the Soul – “Caw, Caw” ~ Spread Your Wings for Halloween
Me and My Captain – Harvest Moon? We Have A Ghost Of A Chance To See It Tonight!
Life and Linda – Haunted Manor of Dark Secrets
The LIttle Yellow Corner Store – A Witch’s Brew Tablescape
My Thrift Store Addiction – Frightfully FAN-tastic Wine and Cheese Buffet
The Cat’s Whizkerz – We’re All Batty Here
Corner of Plaid and Paisley – A Little Bit of Ghoulish Glamour
Olla-Podrida – A Hauntingly Charming Halloween Tablescape for Two
The Bookish Dilettante – Happy Pinktober Tablescape
HAPPY HALLOWEEN


I followed the link to those Halloween shortbread cookies. They are super cute and I’ll bet they taste fantastic! I also admire your cheesecloth ghosts. I have tried to make those in the past, and mine just looked like blobs.
Maureen, your cheesecloth ghosts create such an eerily elegant table setting! Thanks for sharing how to make them! Blessings, Cecilia @ My Thrift Store Addiction
Maureen, your cheesecloth ghosts are so cute. A great DIY project and creative. A fun table in black and white. Your ghost cookies are darling. Thanks for sharing the recipe. I shall be making these sweet babies. Always a pleasure joining you.
Maureen what a lovely ghostly table in black and white….and the plus is your recipe for shortbread cookies….yummy! I like how you made the frosting look a bit gauzy, so cool.
Always a pleasure to blog hop with you. Happy October. Kari @ Me and My Captain
I love your table so much! The cheesecloth ghosties are precious, and I appreciate the tutorial. I would love to try and make a few for our home! I think it would be fun to put them in our foyer on Halloween for the trick-or-treaters. 😀 Your ghostie cookies are so cute, too. Happy Halloween!
Maureen, your cheesecloth ghosts are so cute and a great DIY project! They definitely are the star of your black and white table! I love shortbread cookies and these ghosts ones are perfect for Halloween! Thanks for sharing the recipe. It is a pleasure to join you at the table!
Maureen, what a clever table. Your ghost theme is one of the cutest I’ve seen. Looks like you had a lot of fun planning and creating this one. Your cookies are adorable. I used to make decorated cookies for every holiday. I should bake soon!
Happy Halloween!
Maureen, what clever creations you’ve made with the ghosts! The one with arms really does look like it’s floating down a hallway, very clever. I haven’t ever seen this craft, but you sure made it look easy. The cookies on the black & white plate stack make for the perfect accent, as do the red napkins peeking out from the white at each place setting. Thanks so much for bringing the friendly ghost parade to our blog hop, and for participating so close to your Thanksgiving!
Maureen, Your cheesecloth ghosts came out great!! Perfect for a fun black and white theme ghostly table!! I might have to try making these with my grandsons!! Thanks for the inspiration! The ghost cookies are like the cherry on top- nothing better than an iced sugar cookie, yum!! I hope you have a fun Halloween
Maureen, your ghost table is so pretty and the ghosts look fantastic arranged down the table. The candlelight picture is wonderfully spooky. I love the black and white theme with the pop from the red napkin peeking out and the ghost shortbread cookies are the perfect accent on the black salad plates. I love how your table turned out too! Wishing you a very happy Halloween!
Oh my gosh Maureen the ghosts are wonderful. Love everything about this. The cookies are ADORABLE!!
Adorable cheesecloth ghosts Maureen! Your ghost cookies are too cute to spook (and to eat)!! Love the simplicity of your ghostly black and white table and netting. As always, it’s a treat to join you at the table and hop with you. Wishing you a Happy Halloween!