
DIY Pearls and Plaid Christmas Ornament
One of my favorite things about being a blogger is the connections we make with other bloggers all over the world. This time each year we are invited to participate in an ornament exchange and we are paired with another blogger. This year I was paired with the lovely Leanna of Faeries and Fauna.
We connected via email and shared our Christmas styles, likes and dislikes. I was happy to learn that our styles are actually quite similar.
I really hope she loves the ornament I made for her! I received the ornament she made for me yesterday and it is so adorable! You will have to click over to the Christmas Exchange Link Party to see what it is!
Leanna told me that her she plans to style her tree this year in a farmhouse buffalo check theme and that any white ornament would look great with her style.
Some buffalo plaid ribbon left over from my Christmas wreath was my inspiration for this Pearls and Plaid DIY Christmas Ornament.
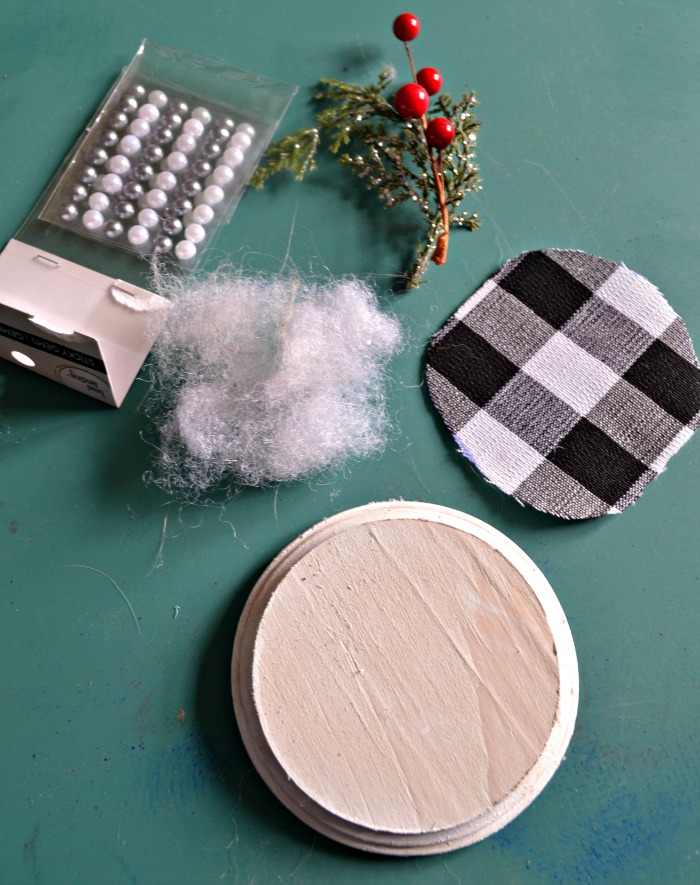
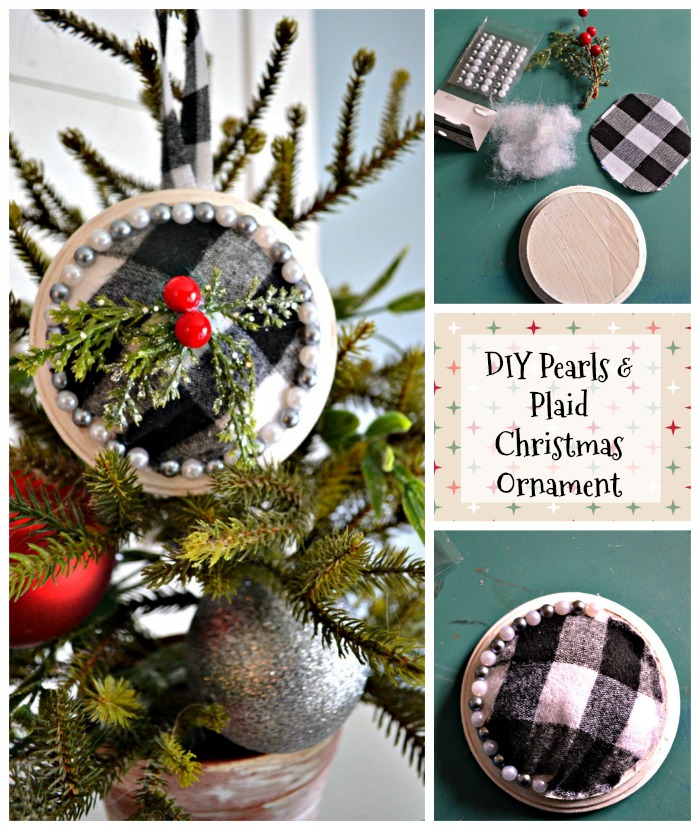
You will need:
- round wood plaque with bevelled edges (I purchased mine at Michael’s)
- white craft paint
- black and white buffalo plaid (I used a piece cut from a 3 inch wide ribbon)
- tiny sprigs of faux greenery
- small red berries
- hot glue gun
- stick on pearls (I purchased mine at Michaels)
- a palm sized piece of quilt batting
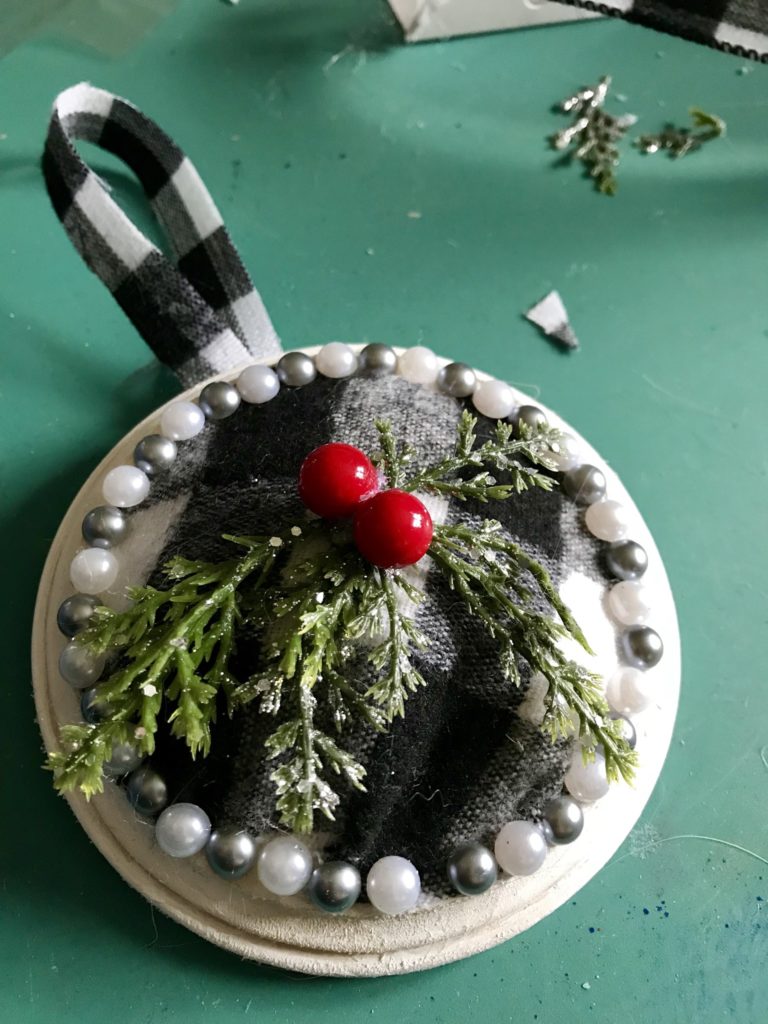
I used a bit of white craft paint and rubbed it onto the wood circle, wiping off the excess, to create a whitewashed affect.

Position the quilt batting in the centre of the round and secure with a bit of hot glue.
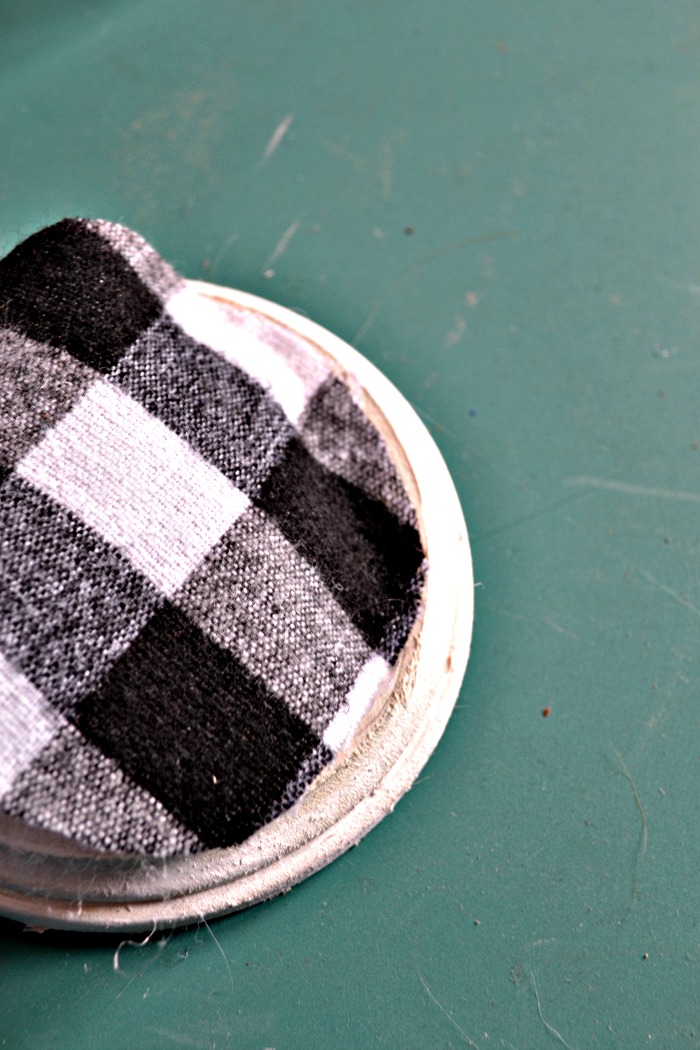
Place the fabric on top of the batting and hot glue the edges onto the wood. Use only a small bit of glue so as not to add bulk. You want the edges of the fabric to be as flat as possible. Work with small areas at a time to avoid puckering the fabric.
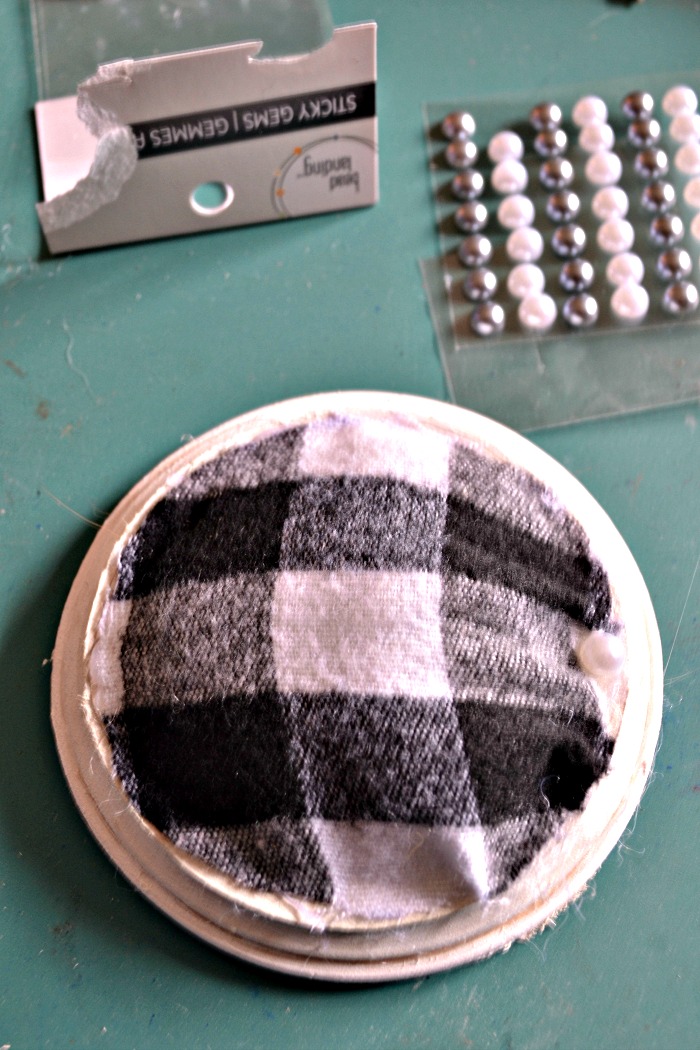
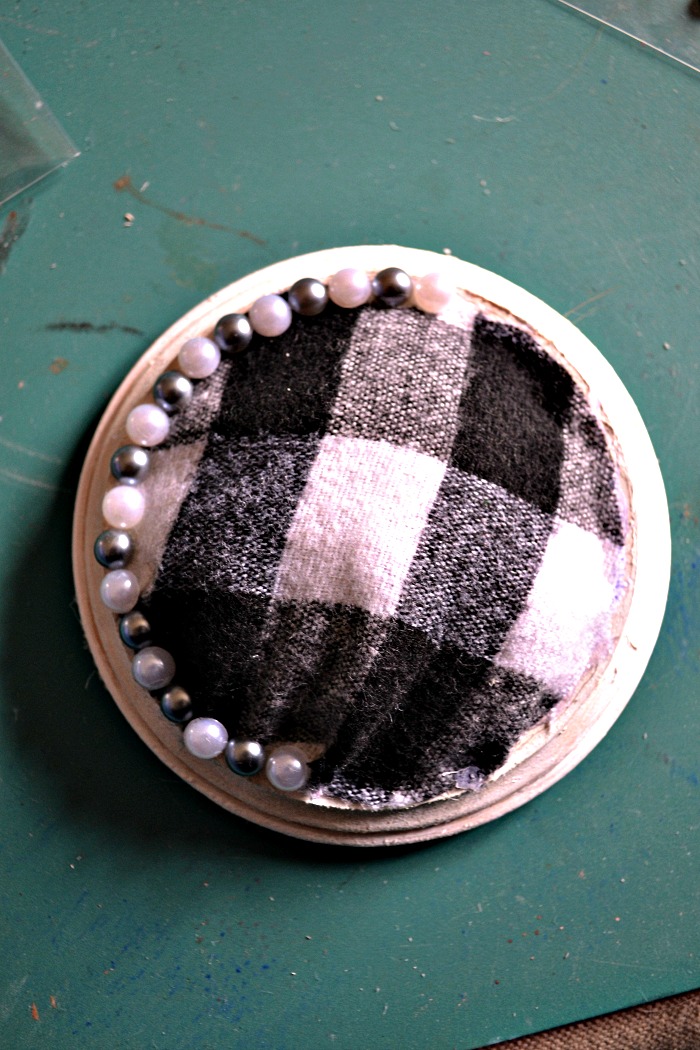
After the entire perimeter of the fabric is secured in place with hot glue, begin add the stick-on pearls.
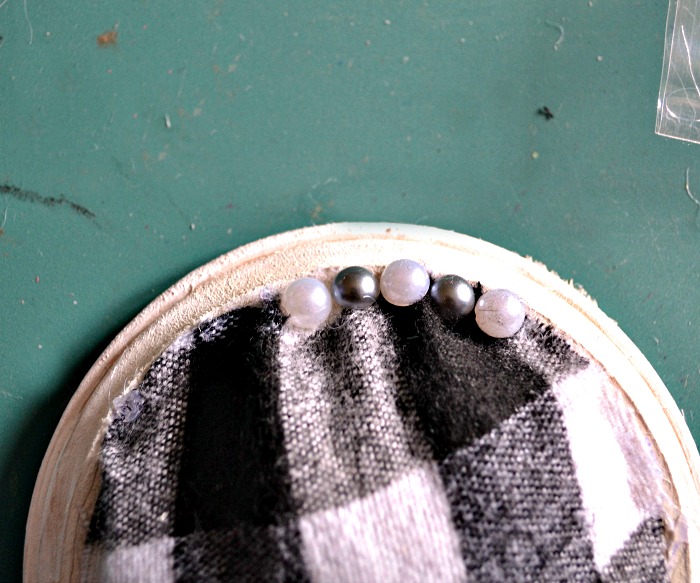
I alternated grey and white pearls in slightly different sizes. Continue working around the perimeter, pressing each pearl in place firmly as you go.
When all the pearls are in place, arrange 2 or three tiny springs of faux greenery to the centre of the plaid fabric and secure in place with a dot of hot glue.
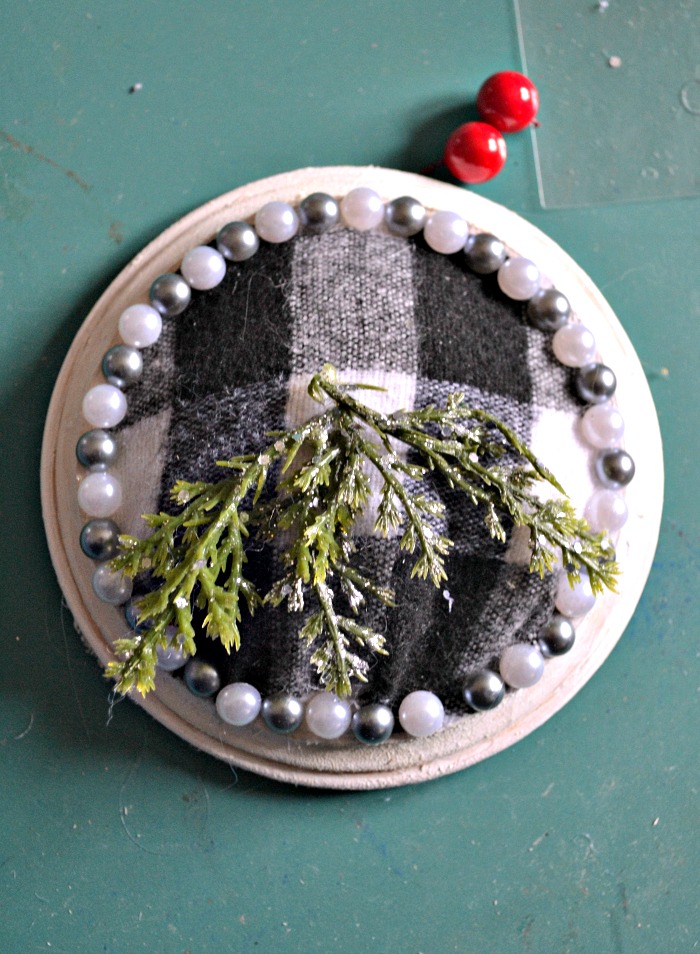
Arrange two red berries at the top of the greenery and secure in place with a dot of hot glue.

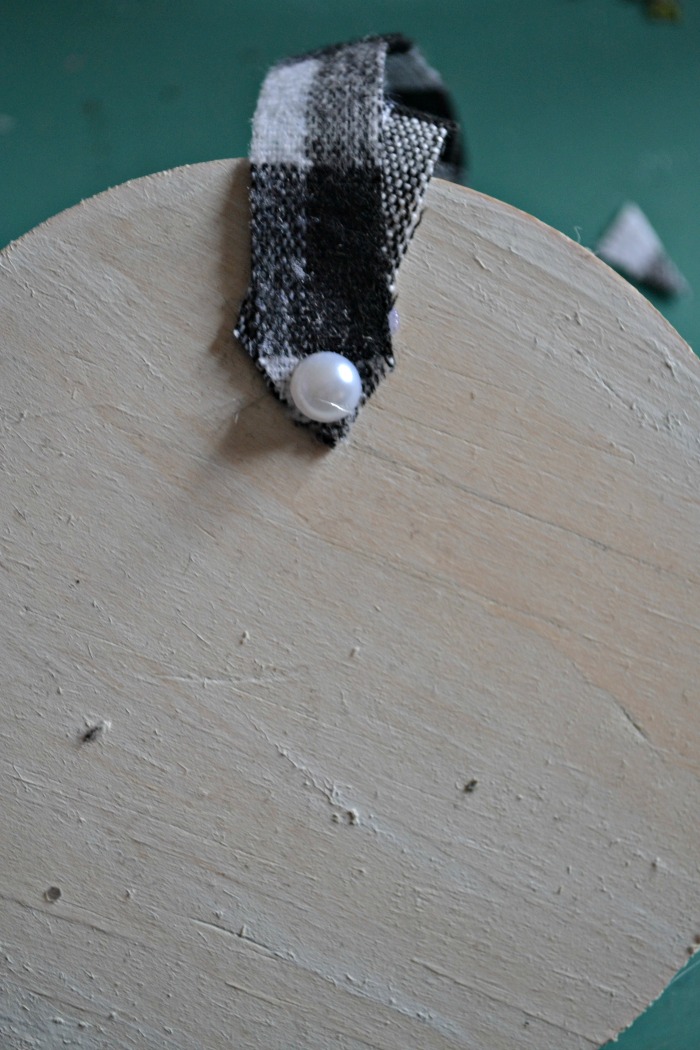
Cut a small strip of the buffalo plaid fabric, create a hanging loop at and secure in place to the back of the ornament. Finish it off with a white pearl.
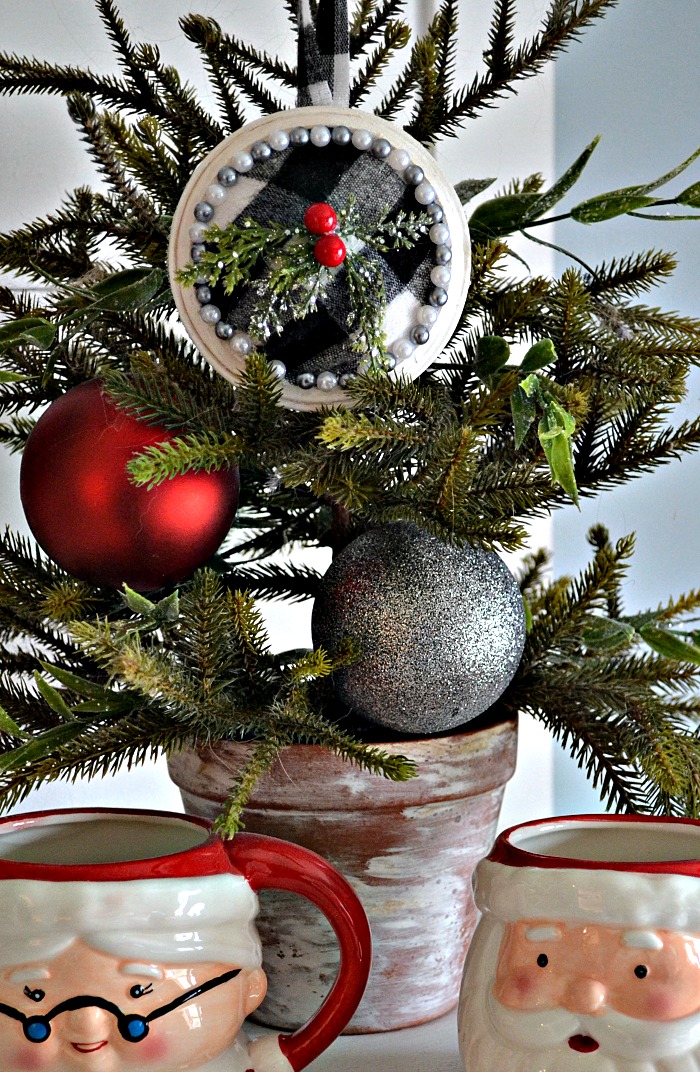
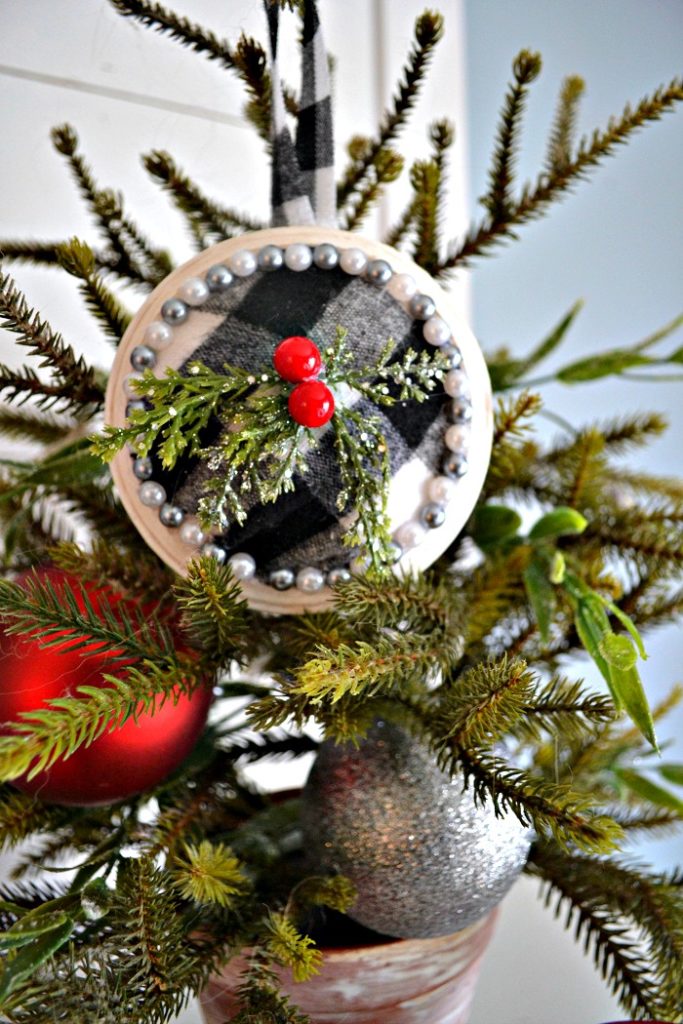
Stand back and admire your pearls and plaid Christmas ornament!
I wanted to see how it would look on a Christmas tree, and since we get a real tree every year my little faux tree had to suffice!
Now that I have shown you my DIY pearls and plaid Christmas ornament tutorial, swing on over to the full Link Up Page to see all the ornament tutorials from 50 bloggers from across North America! Keep an eye out for Leanna from Faeries and Fauna to see what landed in my mailbox!!

 `
`
Until next time…..


That is so pretty! I love the pearls with the Buffalo check plaid and that little bit of red really makes it pop. Pinned.
Very very pretty! I like the beaded border and the pop of the holly berries in the center. It’s going to look so pretty on the tree.
Pearls and plaid – the perfect combination!! This is absolutely beautiful well done!! #2018ornamentexchange
The plaid lined with pearls is perfect! Love it ! This is going to look awesome on your partner’s tree!
Kim
This is gorgeous. I just know Leanna will love it.
I love the fabric you chose! So cute!
Love the added stuffing in the center to give the ornament some depth. Pinned!
What a pretty ornament! I love the contrast in textures between the buffalo plaid and the pearls.
I love the look of this ornament, so pretty and festive!