
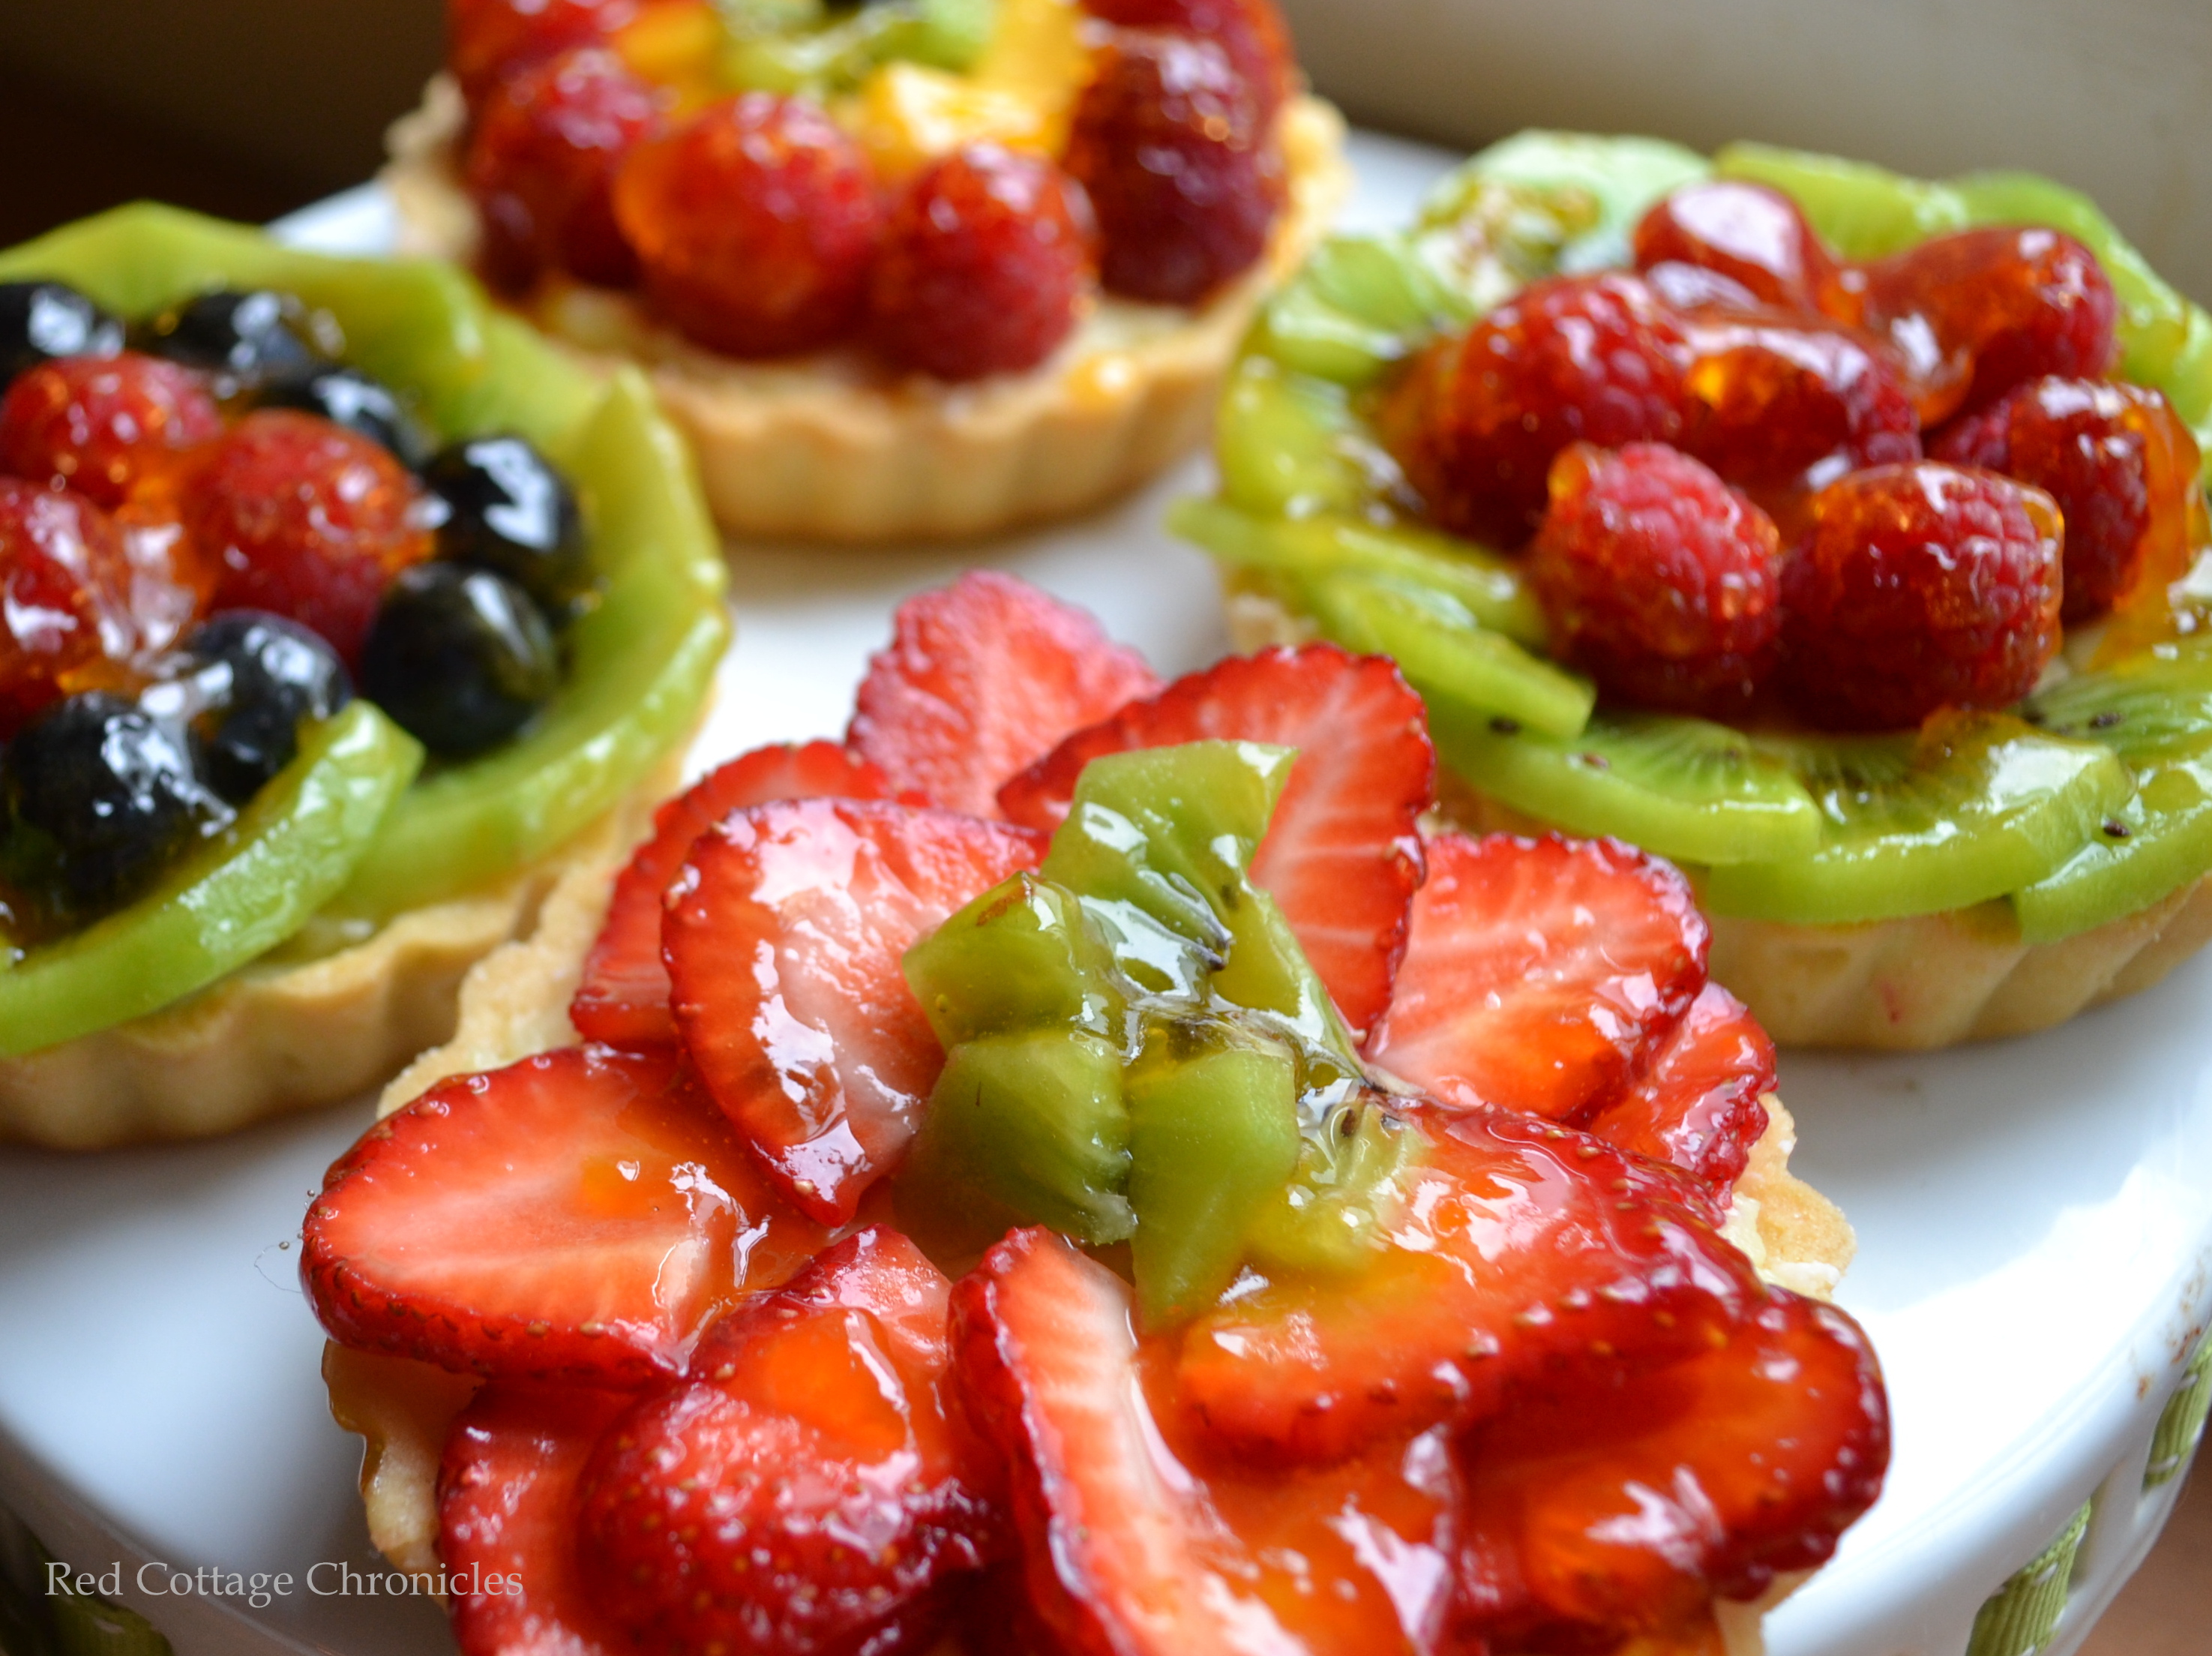
Summer Fruit Tartlets
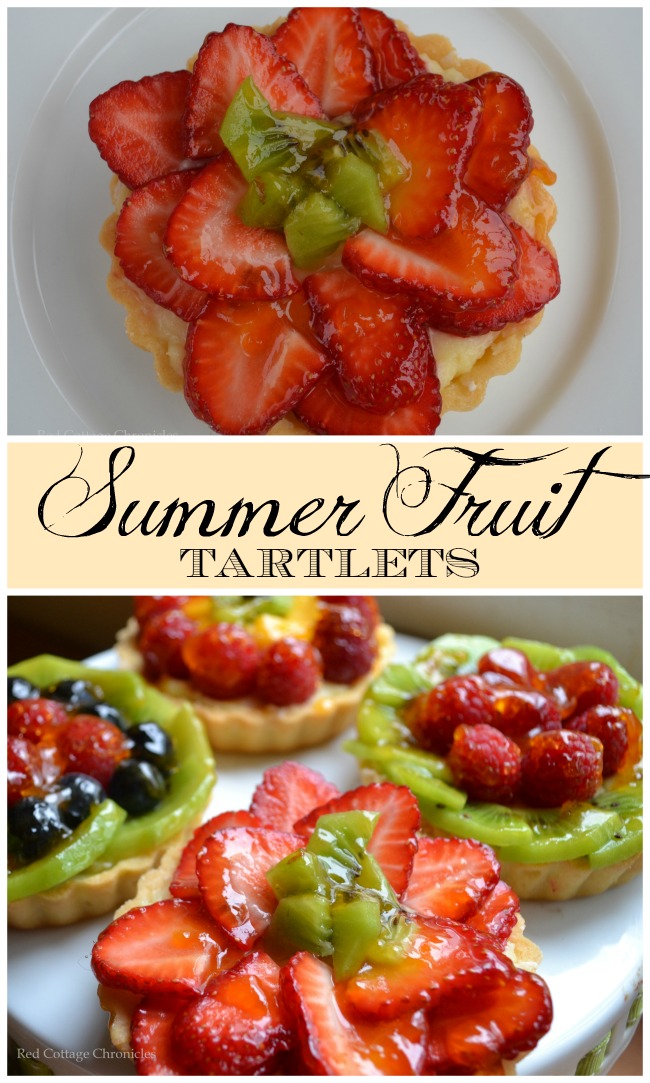
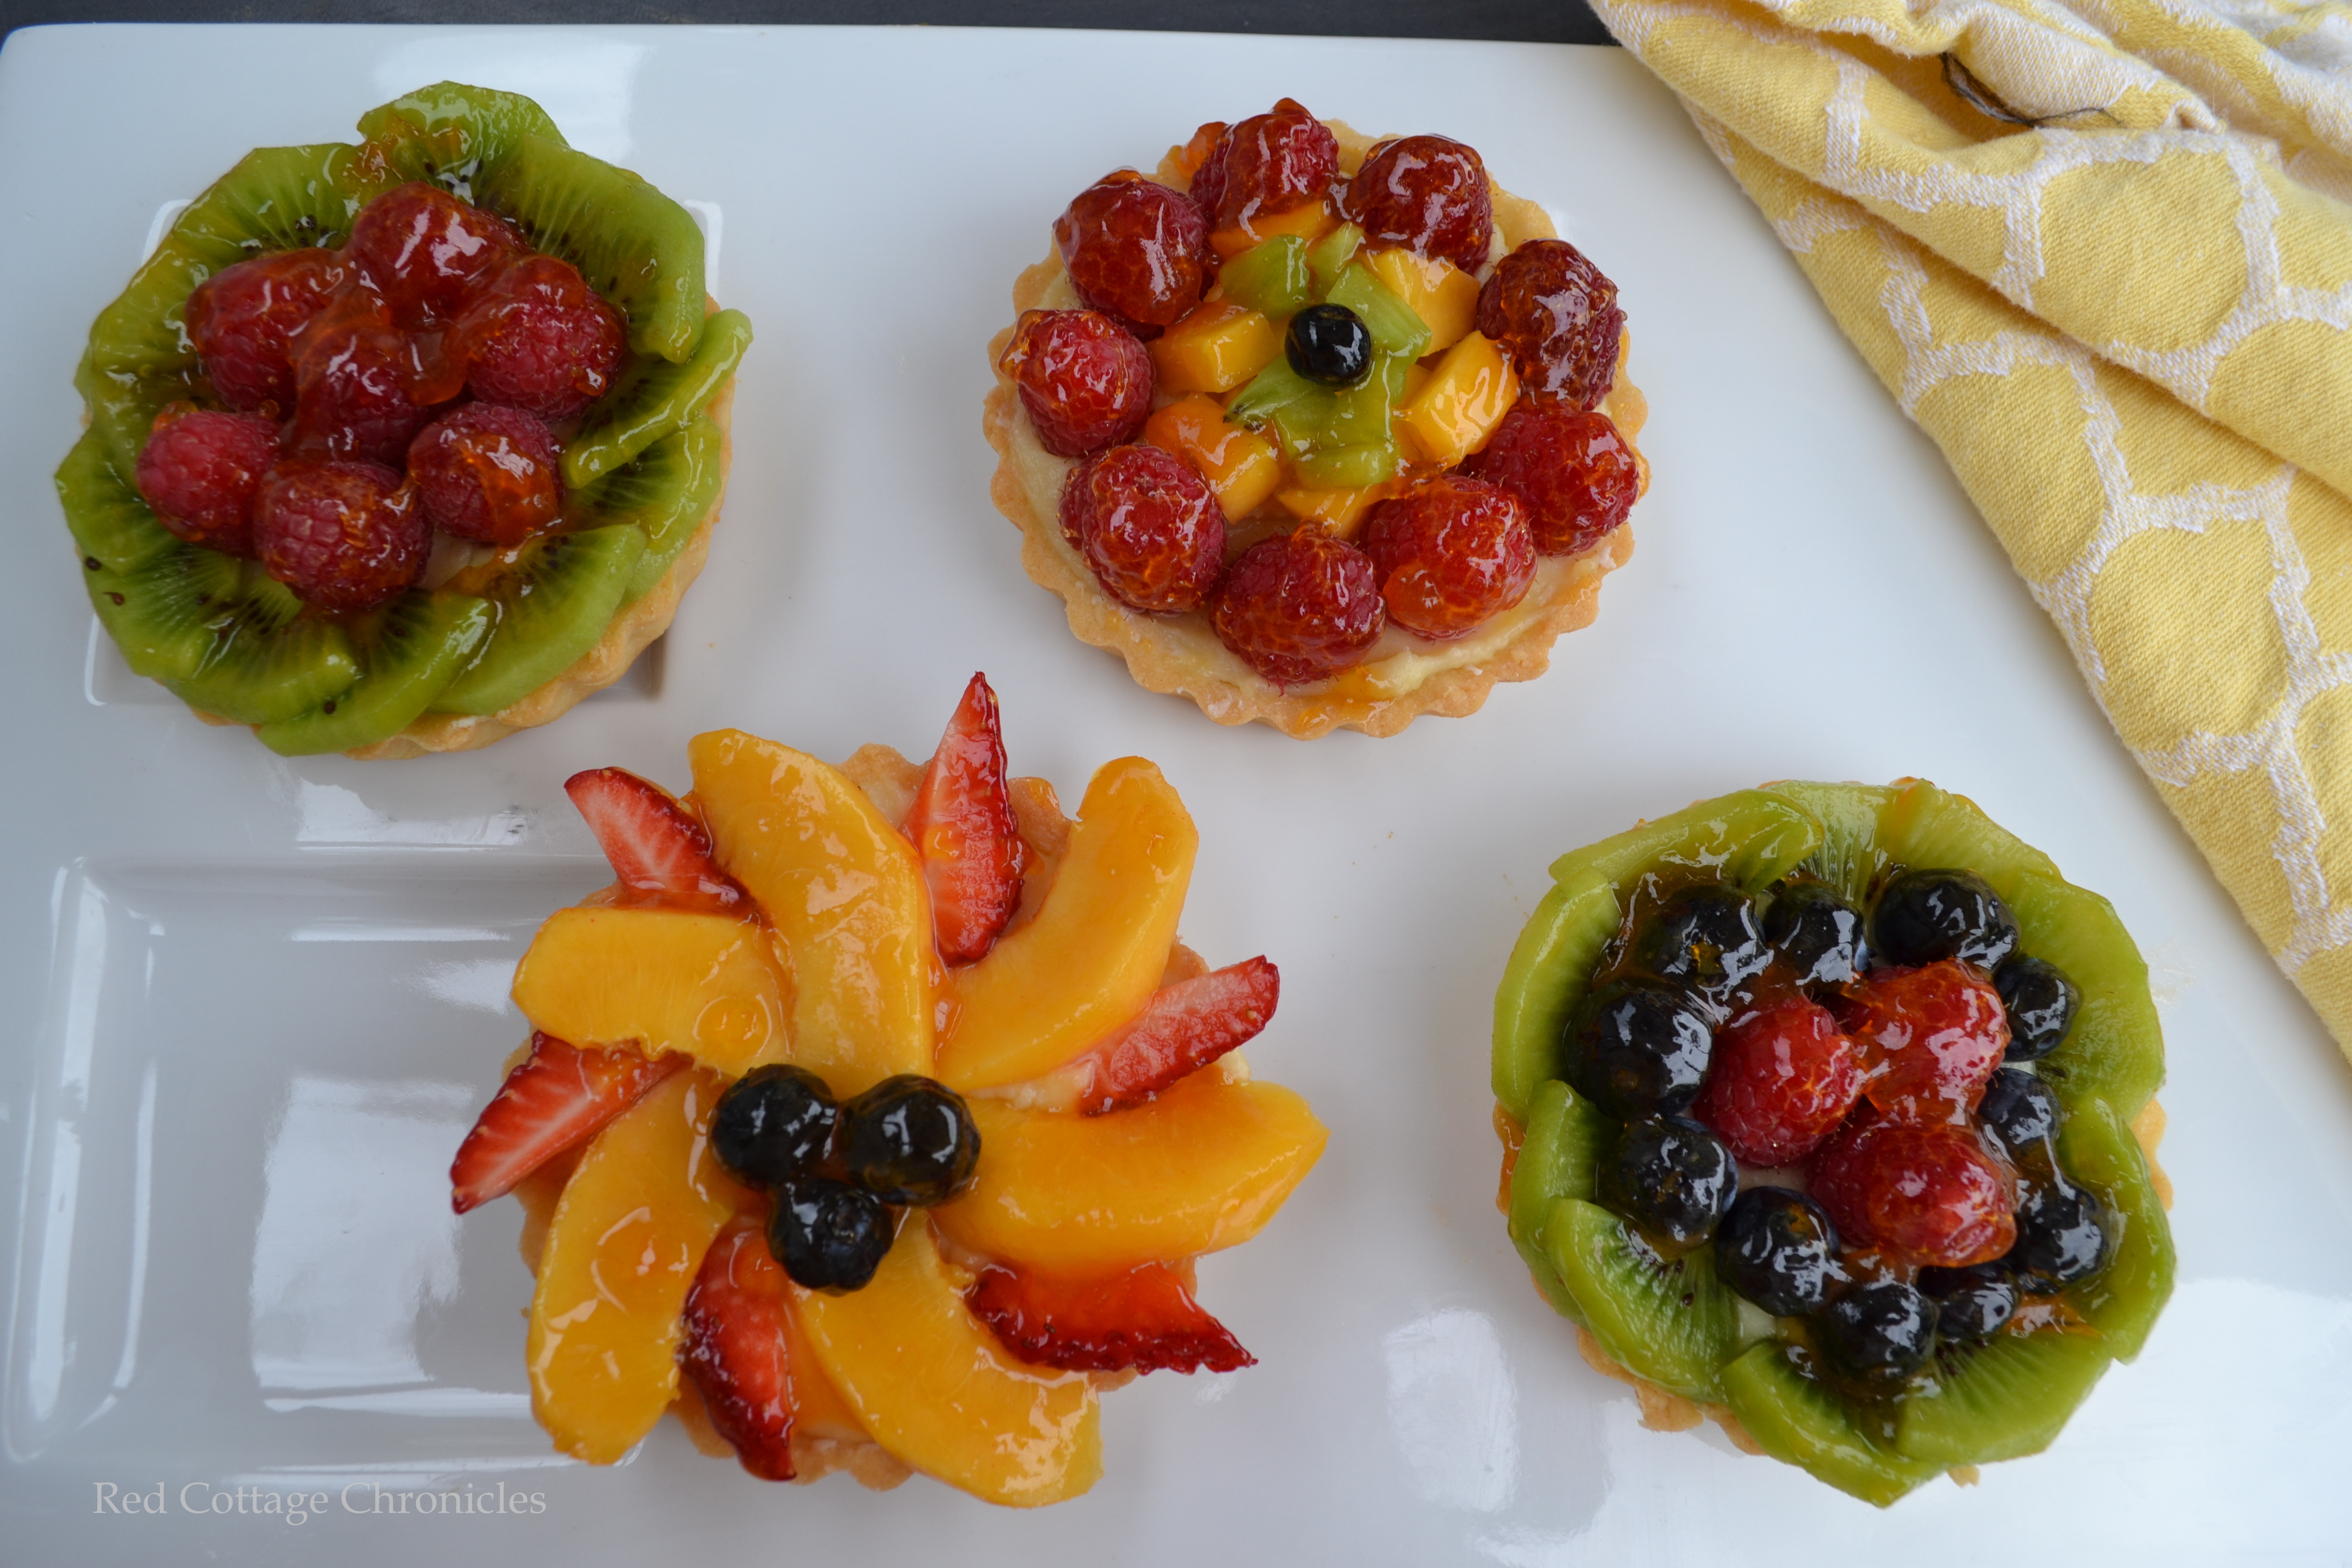
It is finally strawberry season. These summer fruit tartlets not only showcase fresh sweet strawberries, but several other fruits as well!
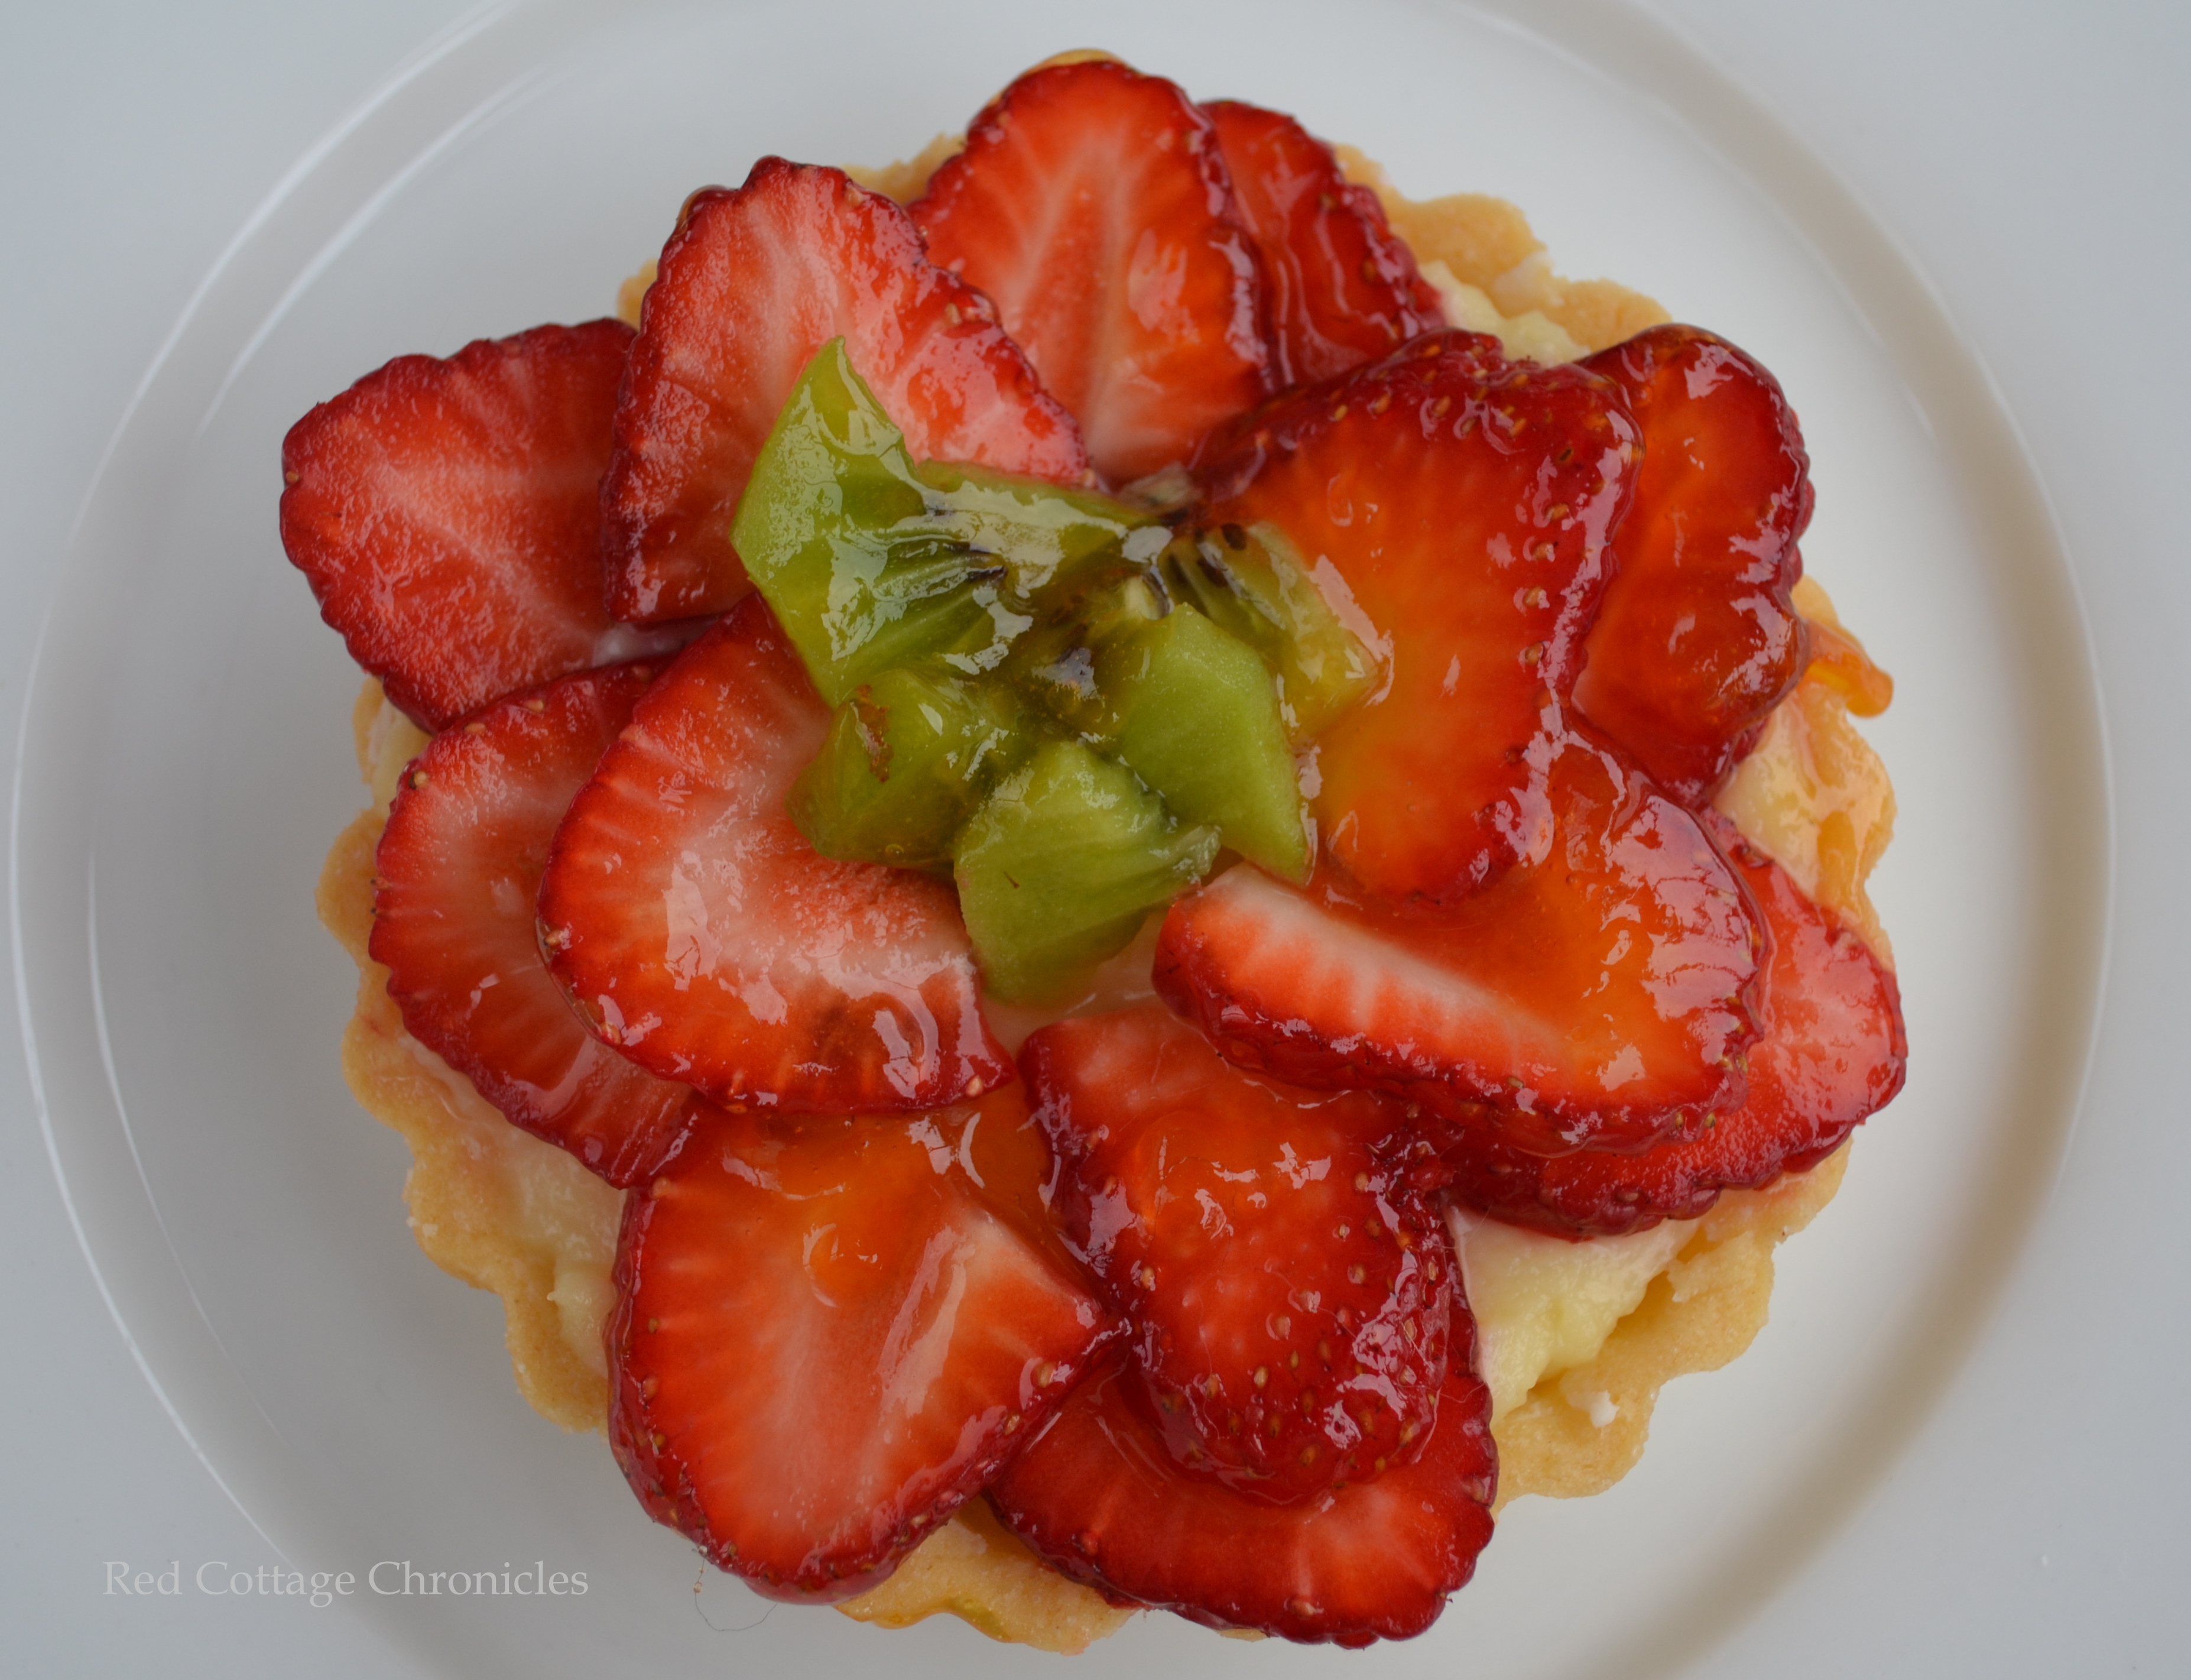
Strawberry and kiwi!
Nothing says summer like fresh berries. A while ago, pastry chef Anna Olson sponsored a contest on Food TV Canada. She provided the inspiration which we were to put our own spin on. The original inspiration was a large 9″ fruit tart.
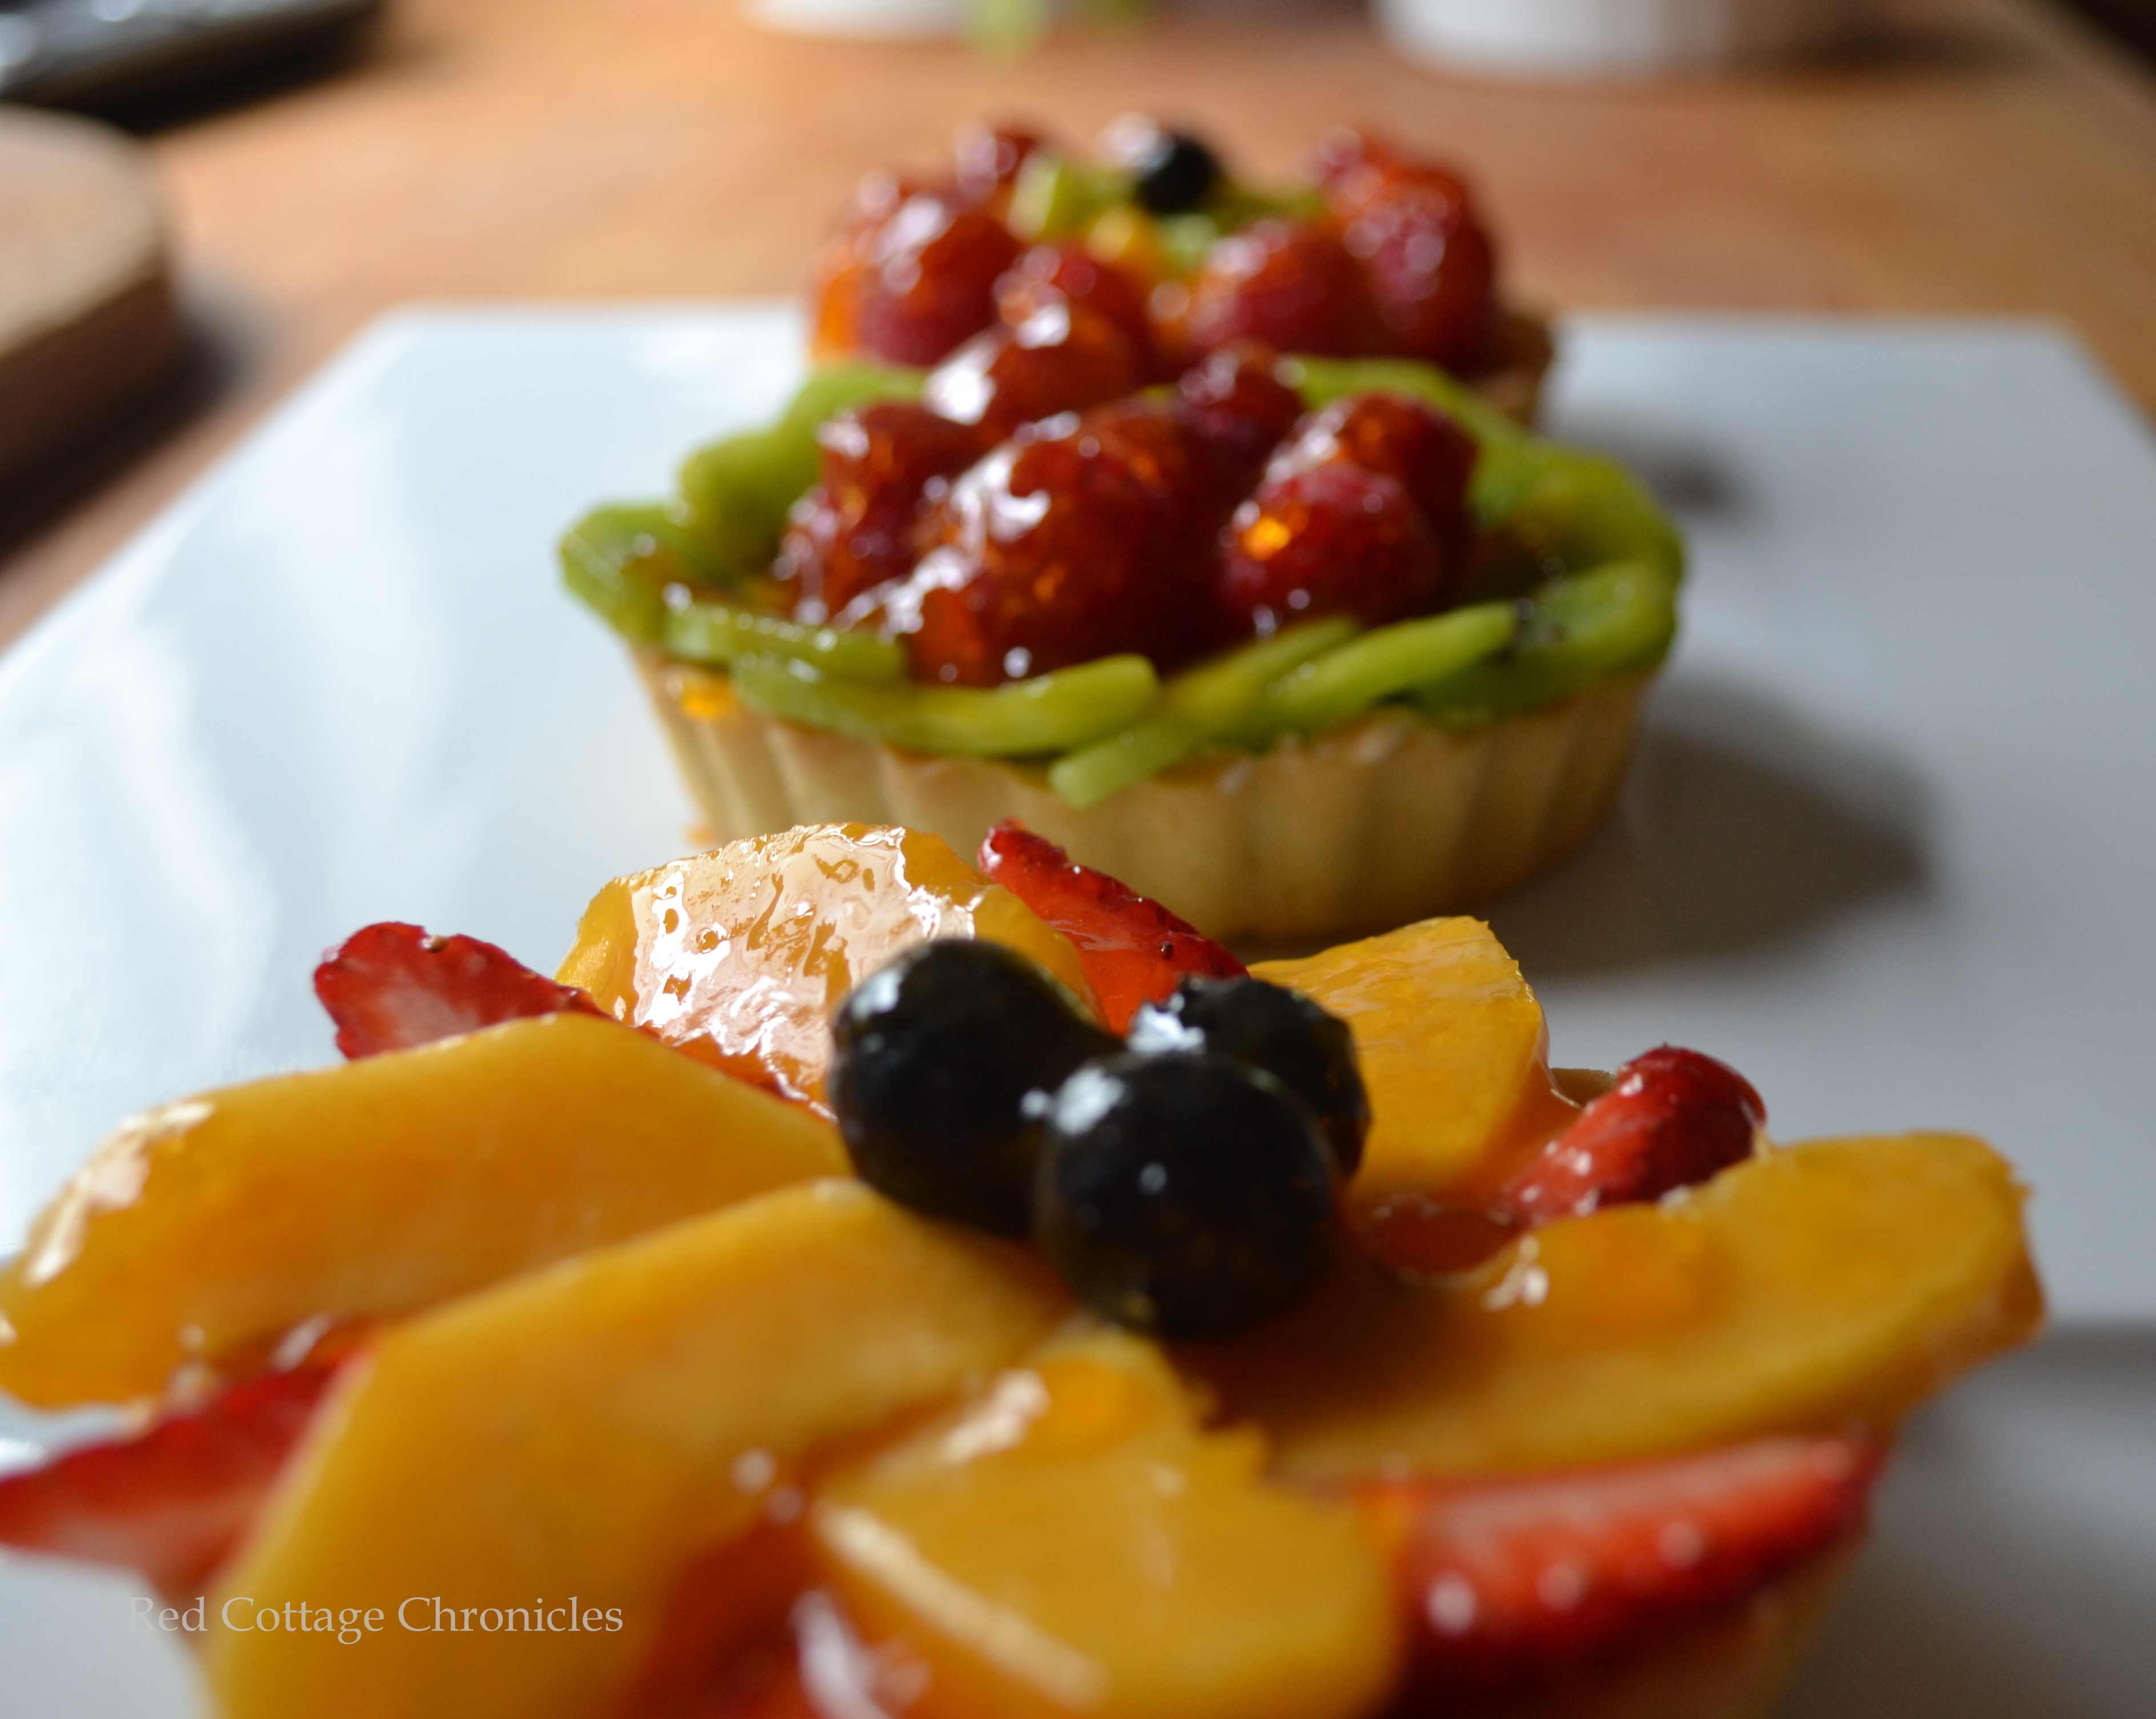
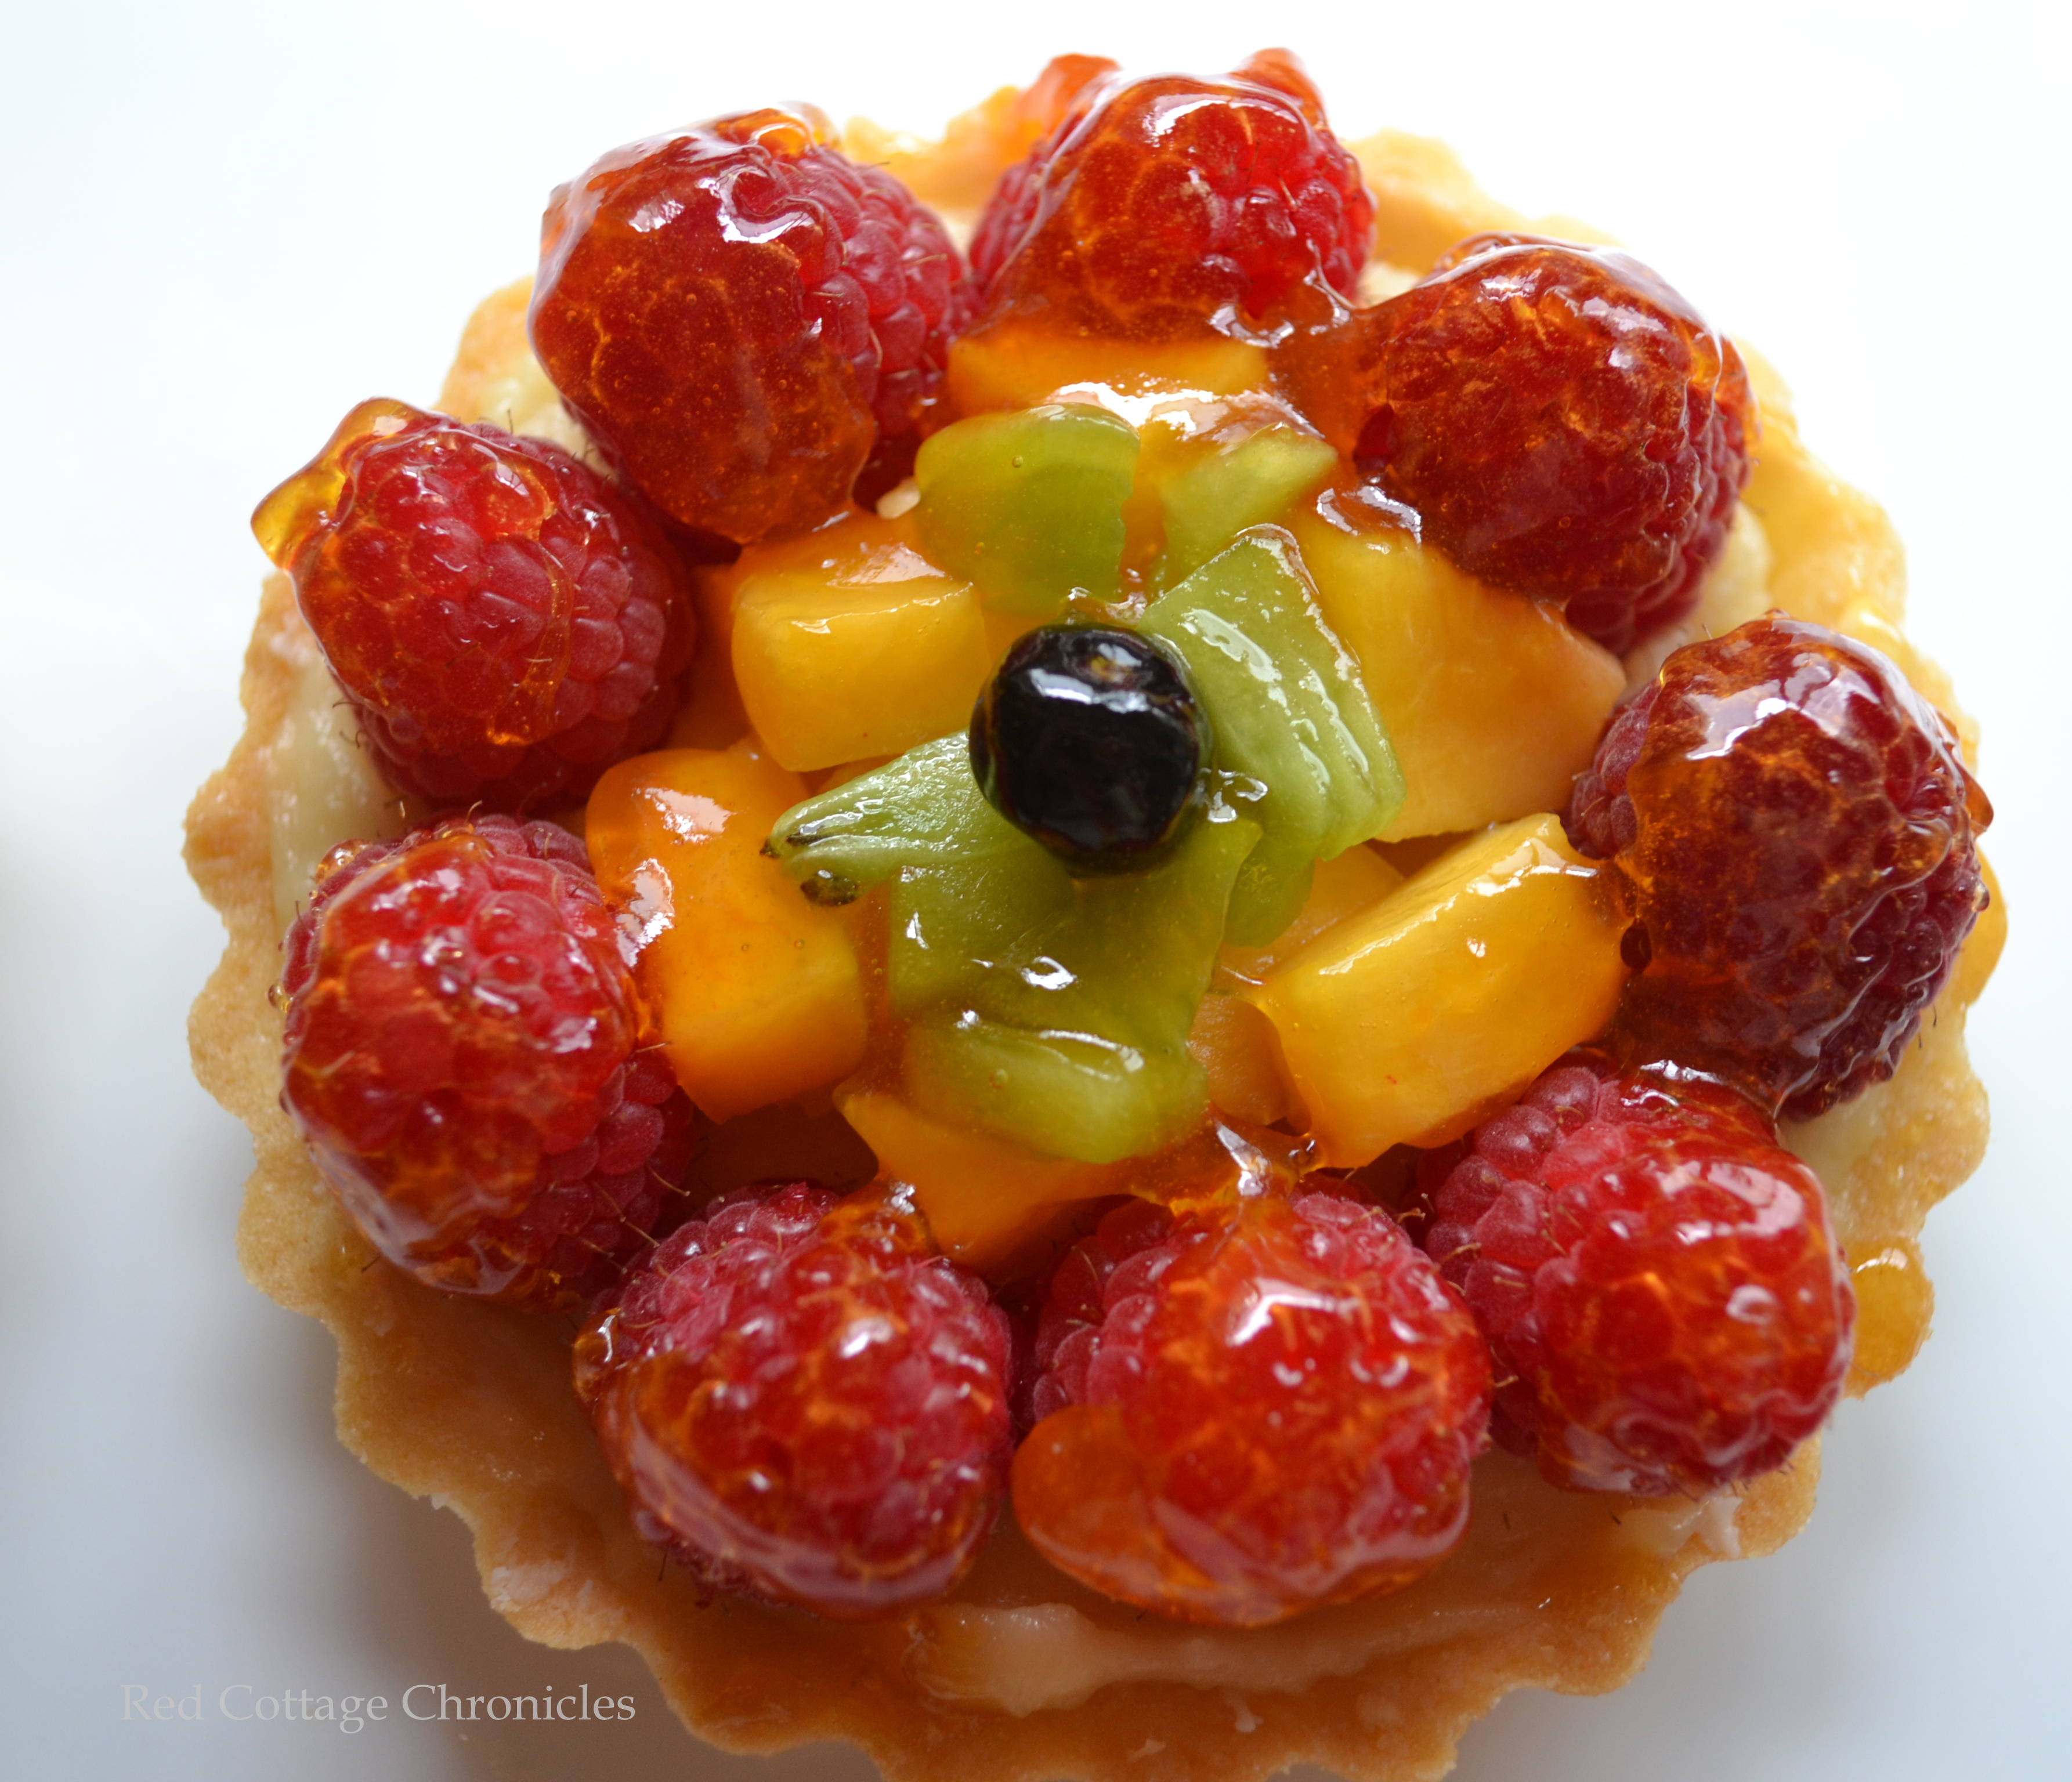
I decided to add my own creative flair and make tartlets instead of one large tart. These tarts showcased the strawberries beautifully, not to mention the complimenting kiwi, apricots, blueberries and raspberries. The tart is filled with a rich custard that is creamy and smooth, but not too sweet. This allowed the sweet flavor of the berries to be the star!
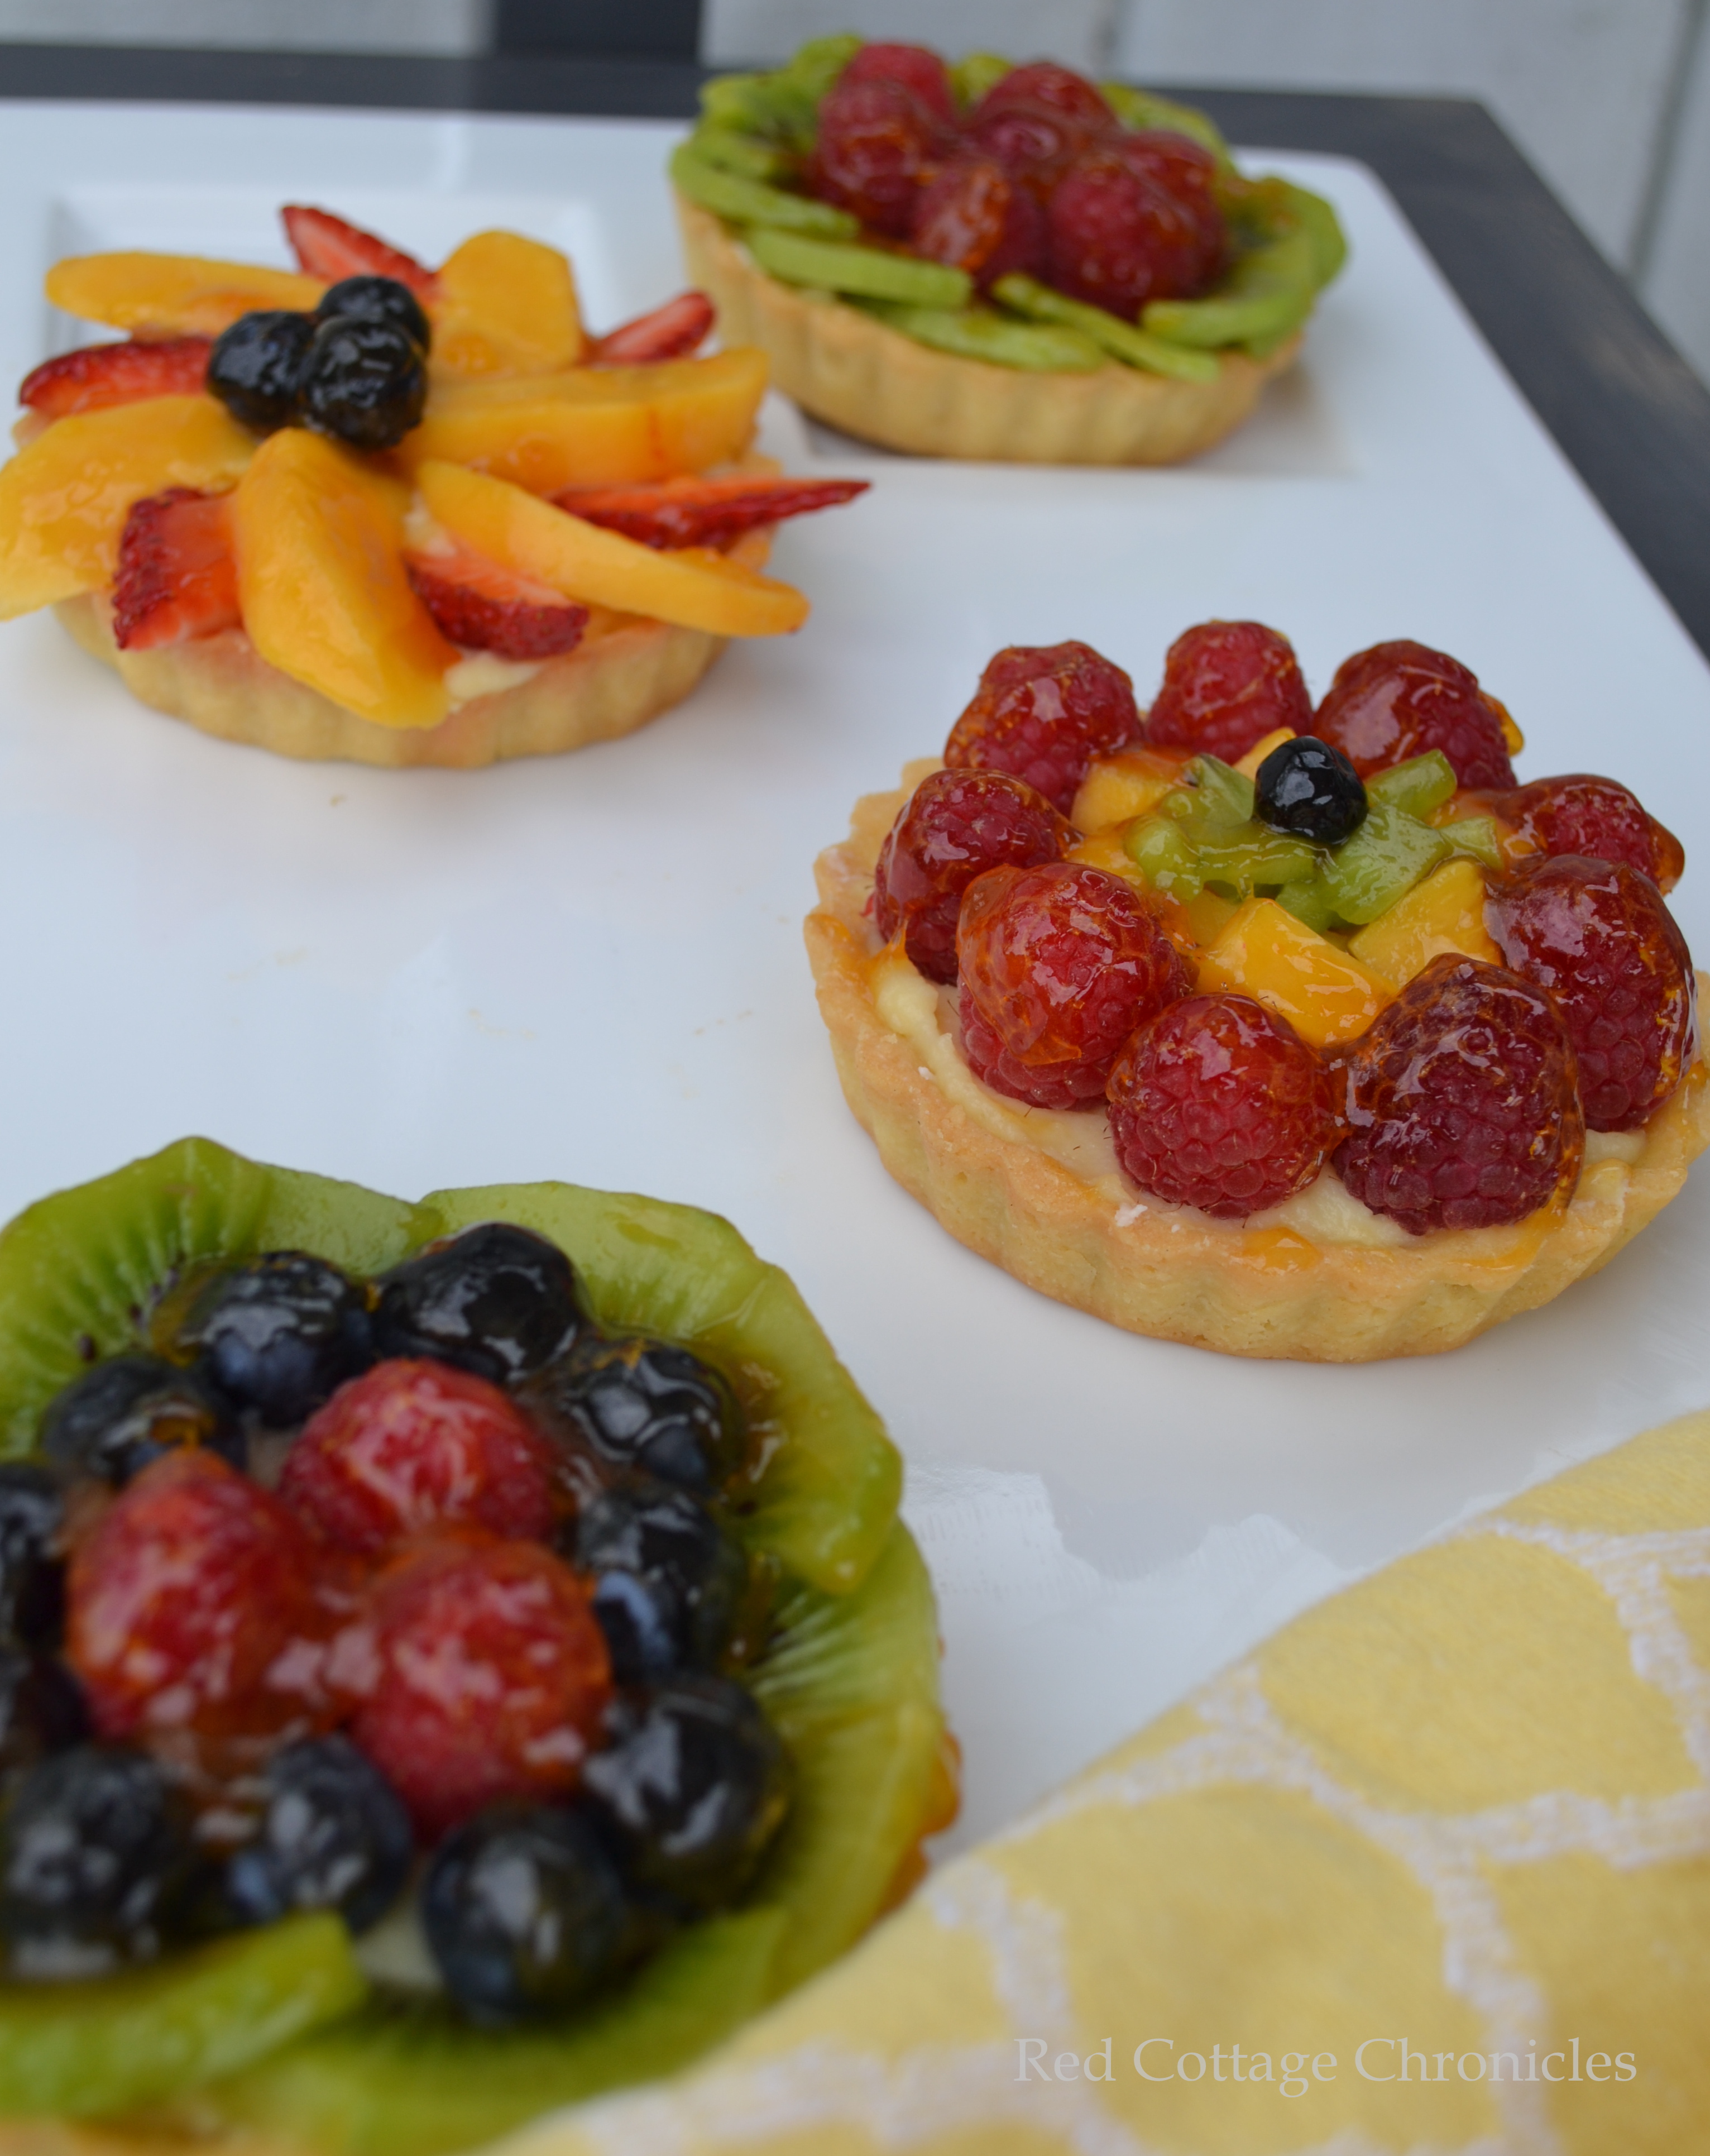
There are three parts to making these tartlets and the hardest step was the last one…….deciding how to assemble the berry patterns! This was way harder than making the crust or the custard filling. At least it was for me. I’m a Libra. Making decisions take me f.o.r.e.v.e.r.!
As I mentioned, the original recipe called for these tartlets to be one 9 inch fruit flan, however making tartlets instead gave me some creative freedom to try lots of berry designs.
They were almost too pretty to eat! But that creamy custard and white chocolate lined crust quickly changed my mind.
To Make the crust:
In the bowl of electric mixer cream together sugar and butter until light and fluffy. On low speed beat in egg yolks and vanilla. Stir in flour and salt just until dough comes together. Transfer dough to the counter top and gather into a disk. Wrap in plastic wrap and chill for at least 2 hours.

To Prepare the Custard:
Heat milk in a heavy bottom saucepan (not pictured) to just below a simmer. Whisk the eggs, sugar and cornstarch in a glass bowl. Slowly whisk half the hot milk into the egg mixture, then transfer this into the saucepan with remaining milk. Whisk continuously over medium heat until thickened. Strain custard through a fine sieve and add butter and grand marnier or vanilla extract. Transfer custard to a bowl and cover the surface with plastic wrap. Set aside to cool completely.

Preparing the tarts:
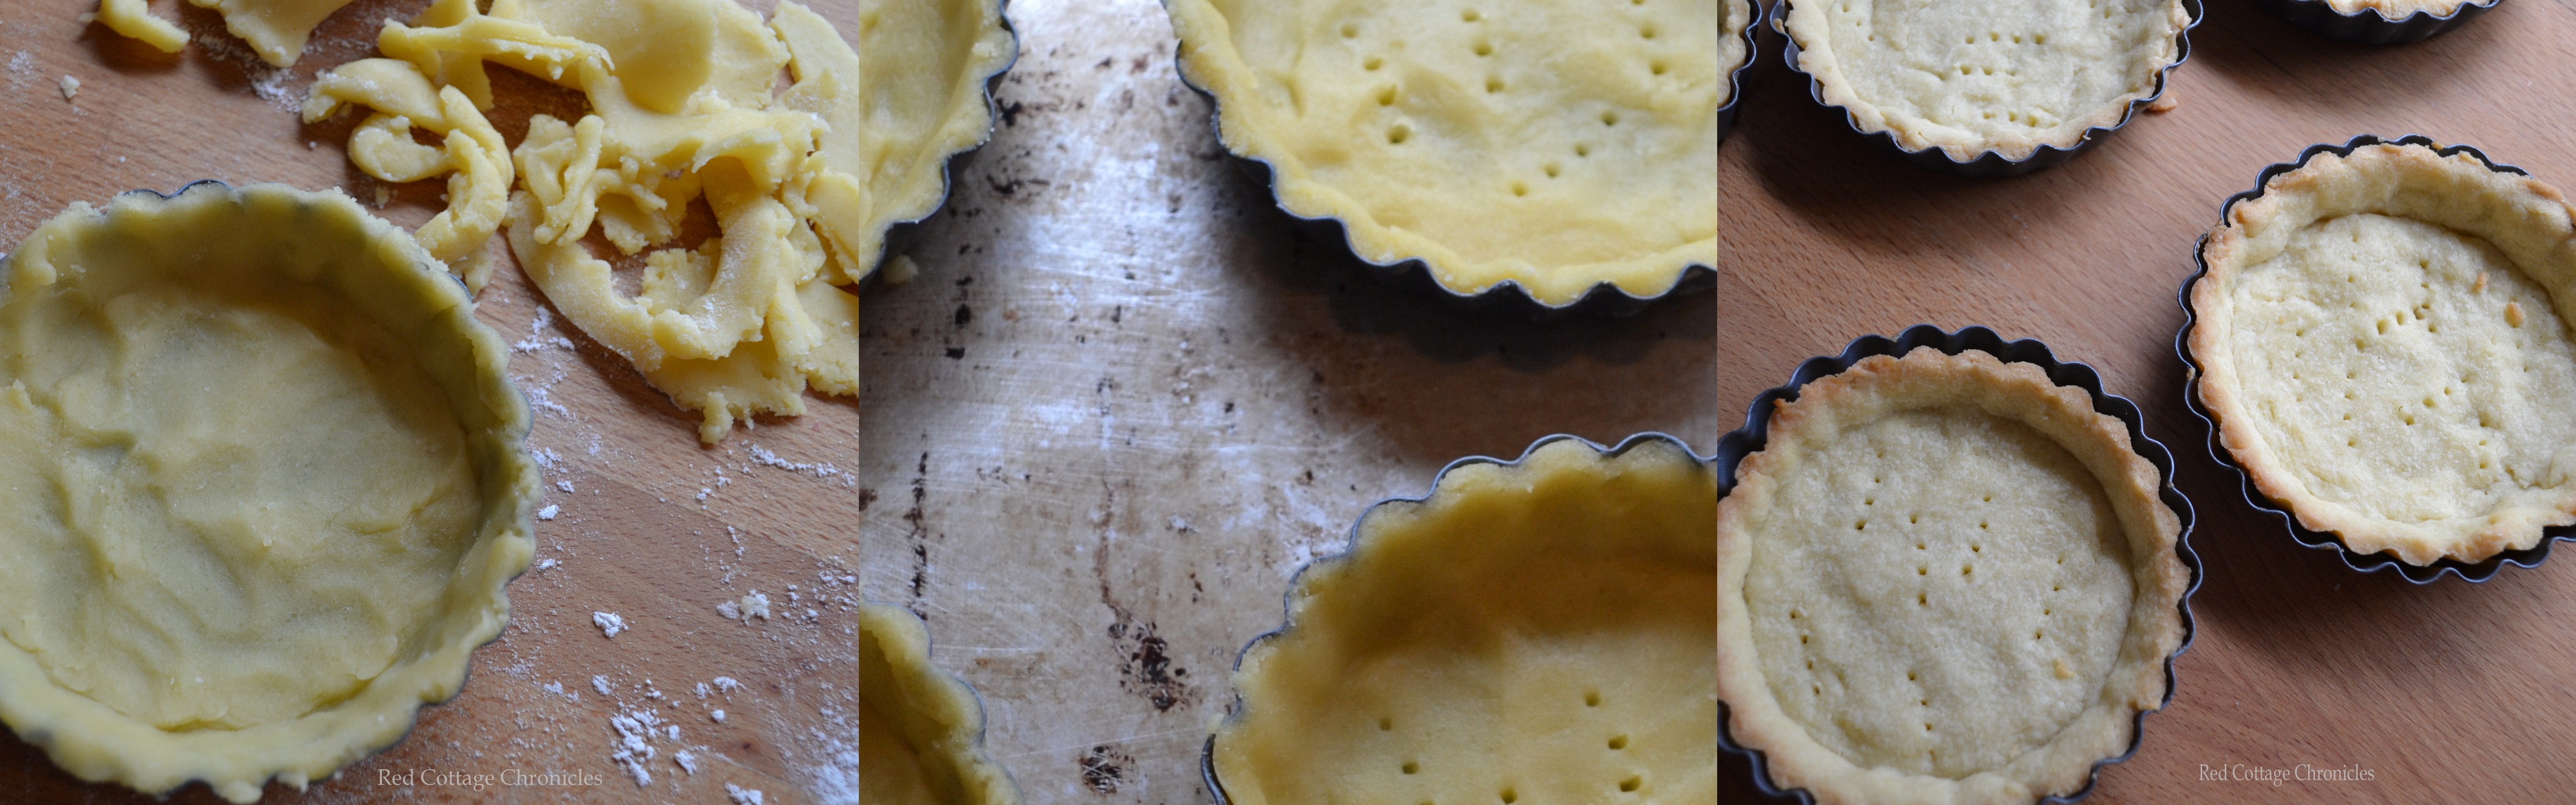
When the crust is sufficiently cooled, remove from fridge and knead a bit until it is easy to roll. Cut into rounds slightly larger than your tart tin, and press into tins. Gather up the dough and re-roll as necessary. Place the tart shells on a baking sheet. Dock the dough with a fork. Freeze for 10 minutes. Bake at 350 degrees for 16 to 20 minutes, until edges are brown and bottom is firm. Allow to cool before assembling.
Assembling the tarts:
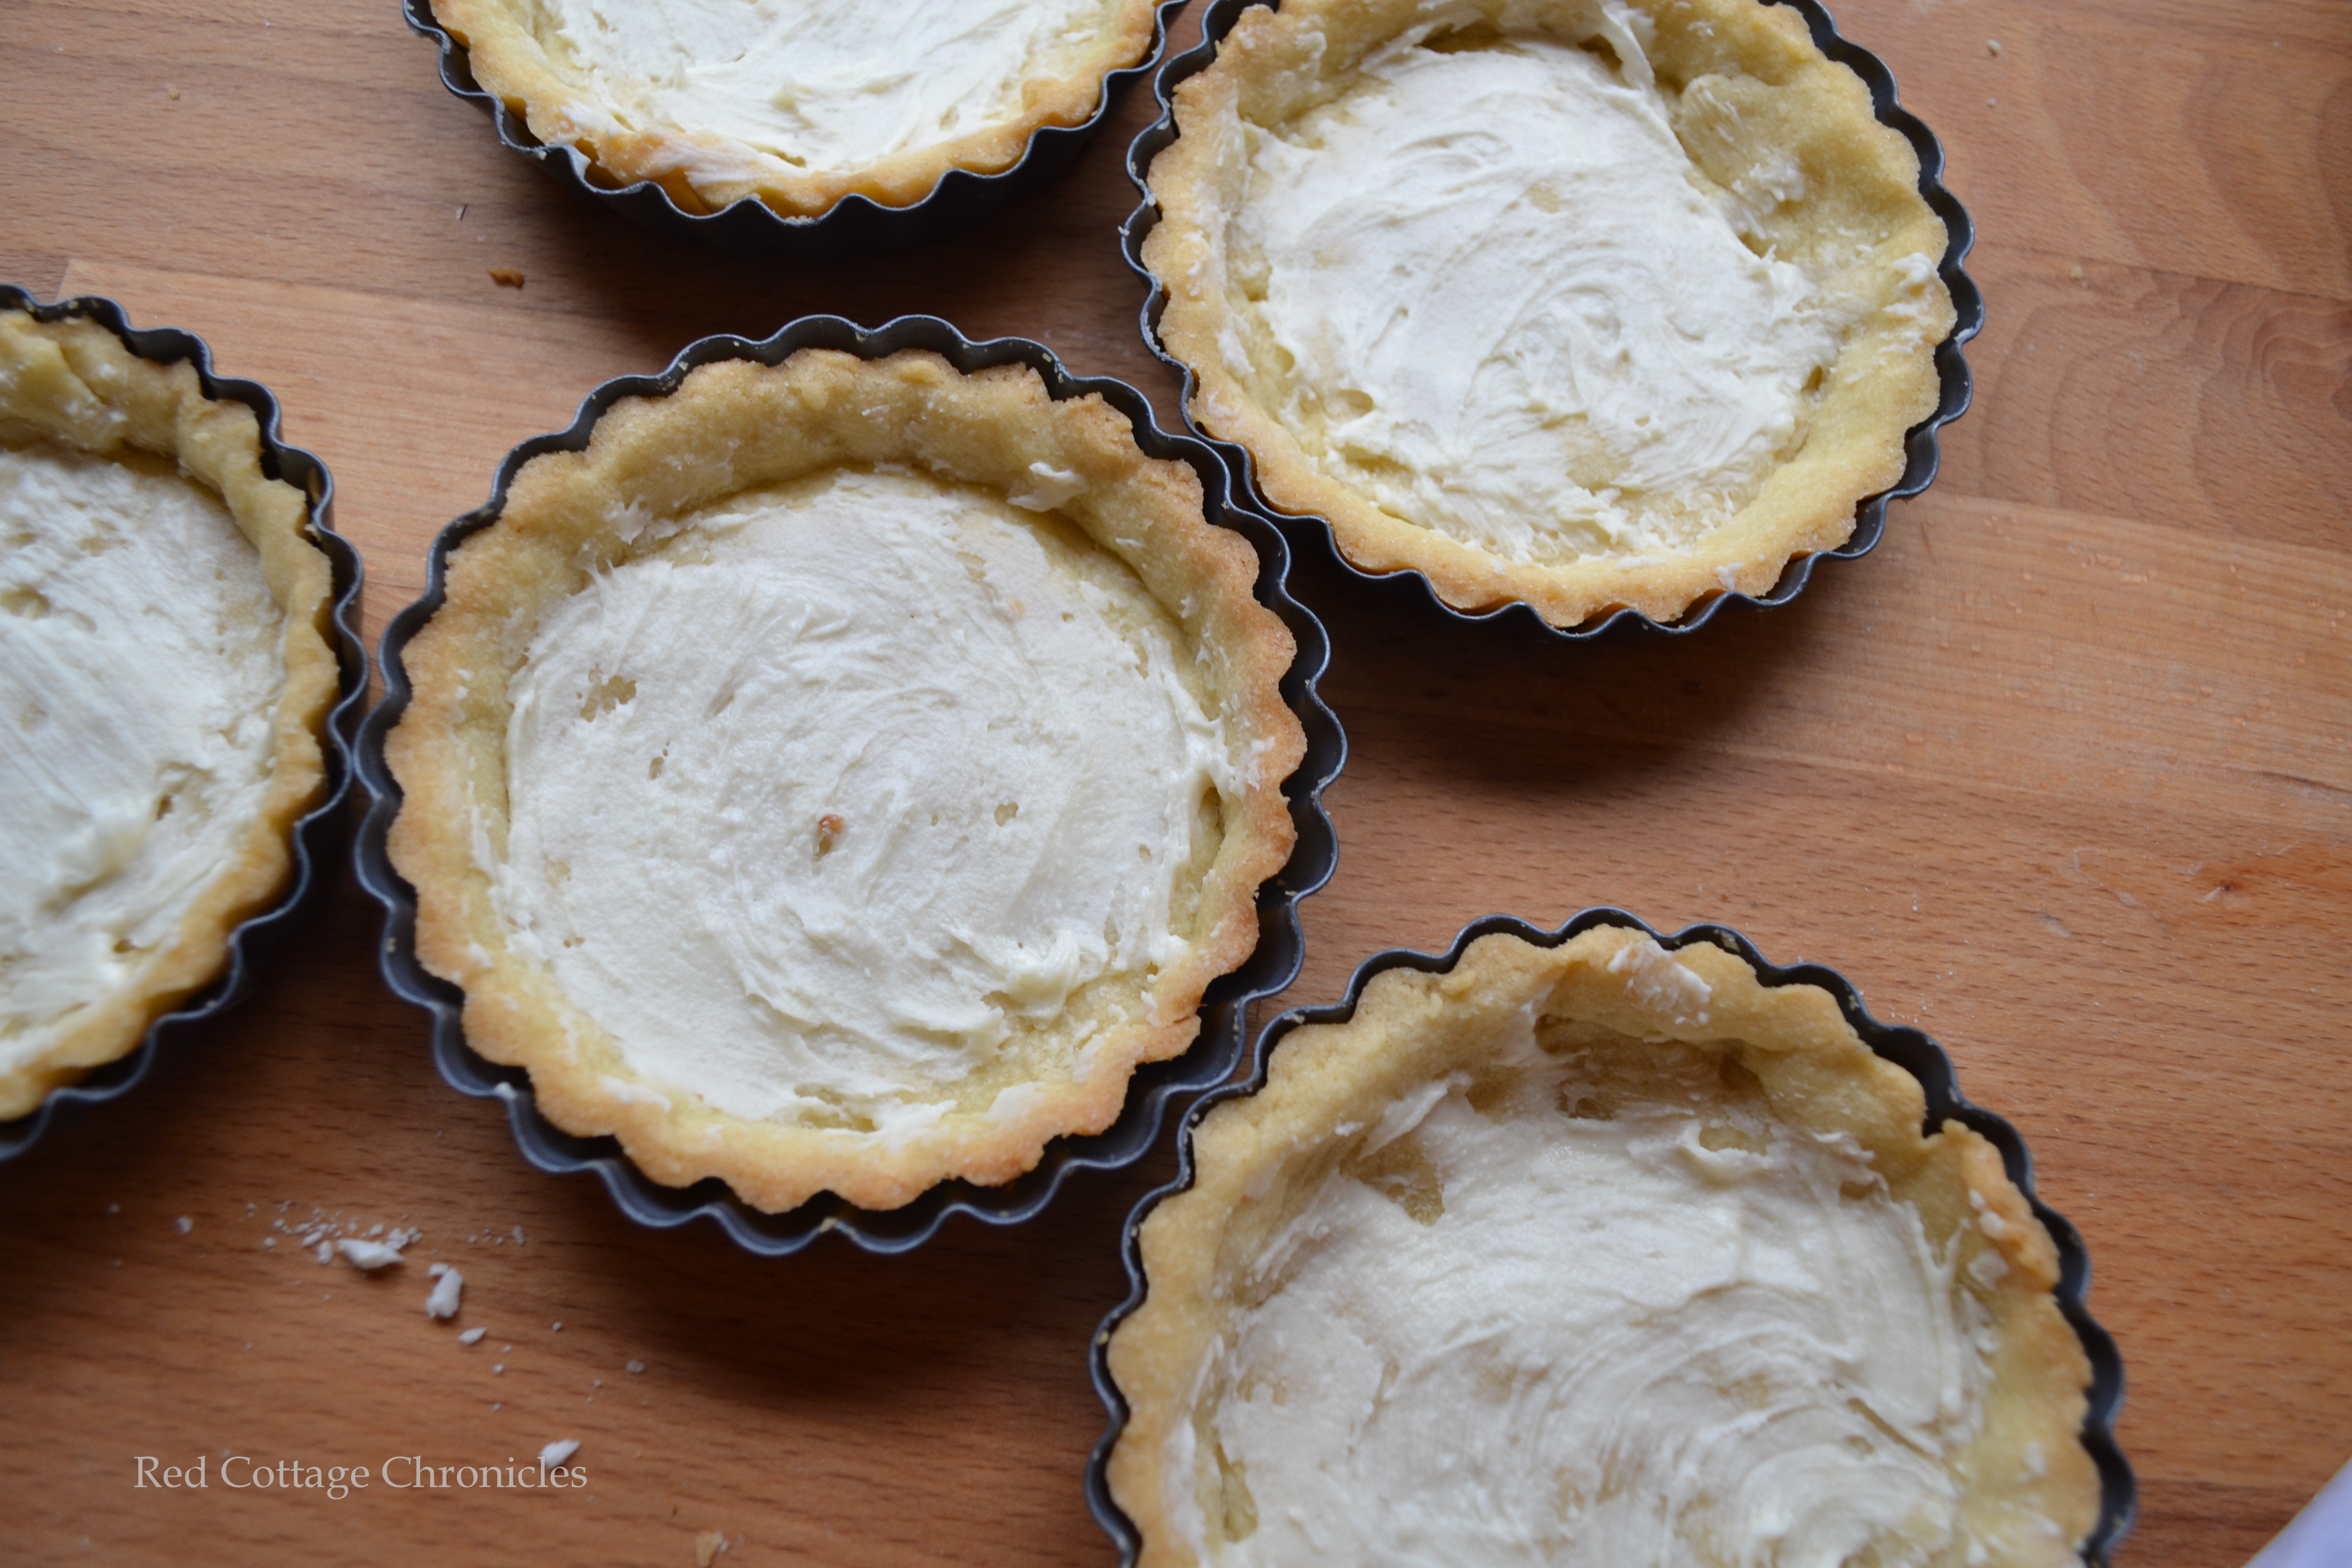
Brush cooled crusts with white Belgian chocolate before filling each tart with custard and arranging fruit. My thoughts had already moved on to arranging the berries so I forgot to take a picture of filling with custard! After fruit is arranged, melt some apricot jam and brush the tops of each tart to get a nice sweet shiny glaze.
Serve immediately or store chilled for up to one day.
Until next time…..

- Pastry
- 1/2 cup room temperature butter
- 1/4 cup sugar
- 2 egg yolks
- 1/2 tsp pure vanilla extract
- 1 cup all purpose flour
- 1/4 tsp salt
- 2 ounces Belgian white chocolate chopped into small pieces
- Pastry Cream
- 1 cup whole milk
- 2 large eggs
- 1/4 cup sugar
- 2 1/2 tablespoons cornstarch
- 2 teaspoons pure vanilla extract or Grand Marnier liqueur
- 2 tablespoons unsalted butter
- Fresh strawberries, raspberries, blueberries or other summer fruits.
- 1/4 cup apricot jam.
- Pastry method:
- In the bowl of electric mixer cream together butter and sugar until light and fluffy. Stir in the egg yolks and vanilla on low speed.
- Add the flour and salt and mix on low speed just until dough comes together.
- Transfer dough to work surface, mould into a disk and cover tightly in plastic wrap.
- Allow to chill in the fridge for at least 2 hours.
- After chilling, knead dough slightly to make for easier rolling.
- Roll out to just under 1/4 inch in thickness. Cut into circles 1 inch wider than your tart tins. You can gather up and re-roll dough as necessary.
- Transfer dough to tart tins (with removable bottoms) and press dough along bottom and sides. Place the tart tins on a baking sheet, dock dough with a fork and freeze for 10 minutes.
- Remove from freezer and bake at 350 degrees for 16 to 20 minutes.
- Set aside to cool.
- For pastry cream:
- Heat the milk in a heavy bottom sauce pan to just below a simmer.
- In a glass bowl whisk together eggs, sugar and cornstarch.
- Slowly add half of the hot milk into the egg mixture whisking constantly.
- Transfer the egg mixture into the saucepan with remaining milk.
- Continue to whisk constantly over medium heat until thickened. Remove from heat and press through a fine sieve into a glass bowl, add butter and grand marnier or vanilla extract.
- Place plastic wrap directly on surface and allow to cool completely before filling tart shells.
- Assembly:
- Melt 2 ounces white chocolate and brush onto bottom and sides of cooled tart shells.
- Fill each shell with a couple of heaping tablespoons of custard.
- Arrange berries on top of each tart.
- Heat apricot jam over low heat until thinned. Brush over fruit and allow to set.


Oh my! I need you to move to Texas so I can taste your amazing baking! These look wonderful!
Thank you Kim! I don’t know if I could survive in the Texas heat, but would love to visit some day!
I got to taste one of these beautiful tartlets and they were as delicious as they were beautiful.
Thank you Mom!
I haven’t had a decent fruit tart in a while, yours look beautiful. Fresh fruit desserts in the summer are the best 🙂
Thank you Foodie! I hope you get a chance to try this recipe!
I like that description! These are happy tarts!!
Your tarts are a work of art ~ absolutely gorgeous. You sure know how to arrange the fruit beautifully and then capture them gloriously on camera. Great job!!!
Thanks Lori! They are one of my favorite thing to make.
This look great! I am actually making them right now, however a lot of your photos are missing :O and my dough is really sticky, but I dont know what its supposed to look like.. oh boy hope this doesnt end up in disaster! (Its fathers day today 🙂 )
Thanks for the heads up on the pictures. That is very strange. I will see if I can rectify that ASAP.
Pictures are fixed. If your dough is a bit sticky, you can add in a bit more flour. It will firm up after cooling, but again you can always knead it a bit of flour at a time until it is less sticky. I hope it works out for you!
You are a fruit artist! These tarts are beautiful! How elegant they would be for a celebratory dessert!
These look delicious – and I’ve always wanted to try my hand at making them! Thanks for the inspiration, I might just make these this weekend!
Thanks for contributing your post to The Sunday Brunch Magazine!
All the best,
Eliza & Bel
Oh my, I am drooling over these and dreaming of summertime as well! They look delicious!