
One Room Challenge – Pine Plank ceiling

We are half way through the One Room Challenge TM) and this week we got a few things done including the whitewashed pine plank ceiling
How is it possible that we are half way through. Looking at my kitchen I would never believe it. While we did cross off a couple projects last week, there is still A LOT to finish.
Welcome to everyone stopping by today. If this is your first time visiting, I can imagine you might be wondering exactly what is this One Room Challenge. It is the brainchild of Linda from Calling It Home. Twice a year, spring and fall, she hosts this fabulous challenge where each Wednesday 20 featured designers give you an look inside the task of renovating one entire room in just six short weeks. Then on Thursdays Linda hosts a link up of guest bloggers who are working to renovate their own room over the same six weeks. I am one of those guest bloggers taking on the challenge!
We are updating our tiny kitchen and have a very small budget to get the job done. I have been very blessed to have Blanco Canada, Para Paints and RYOBI tools providing me with materials to help us complete this project.
You can catch up with week one here and week two here.
This post contains affiliate links. If you click on a link and decide to make a purchase I may receive a small commission without changing the cost to you!
I had an ambitious list to finish this week and while I didn’t get it all done, some of it is being worked on as we speak.
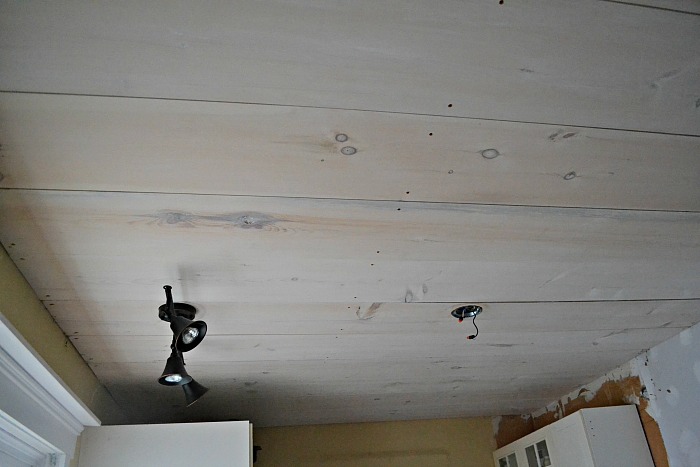
We did manage to complete the leveling of the ceiling, and install the pine plank ceiling. Believe me when I say if our marriage survived this, it will survive anything! Working with an older home where NOTHING is square, it makes what should be a quick job one that lasted 3 days.
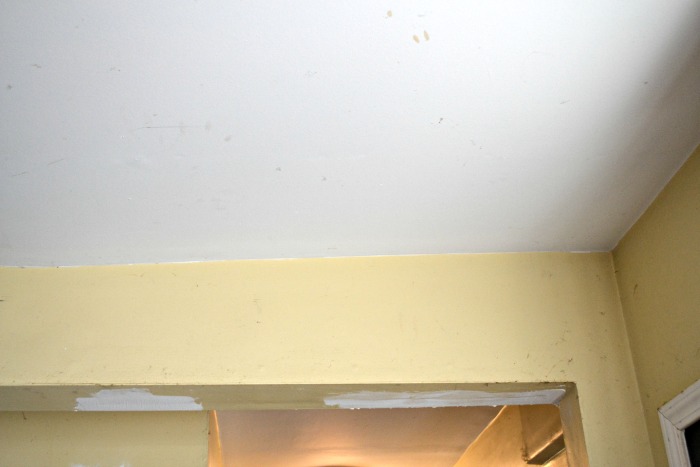
One side of our ceiling was about 1-1/2 inches lower than the other. This required strapping with 2 x 2 boards down one side and 1 x 2 down the middle of the ceiling in order to attach the whitewashed pine planks to go on level.
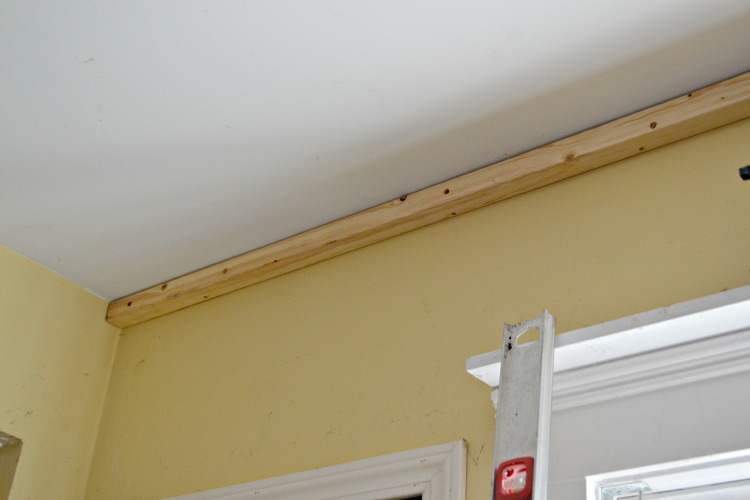
This also required the electrical boxes to be moved down. Thankfully Tim picked up some extension rings that just made the current boxes the depth we needed.
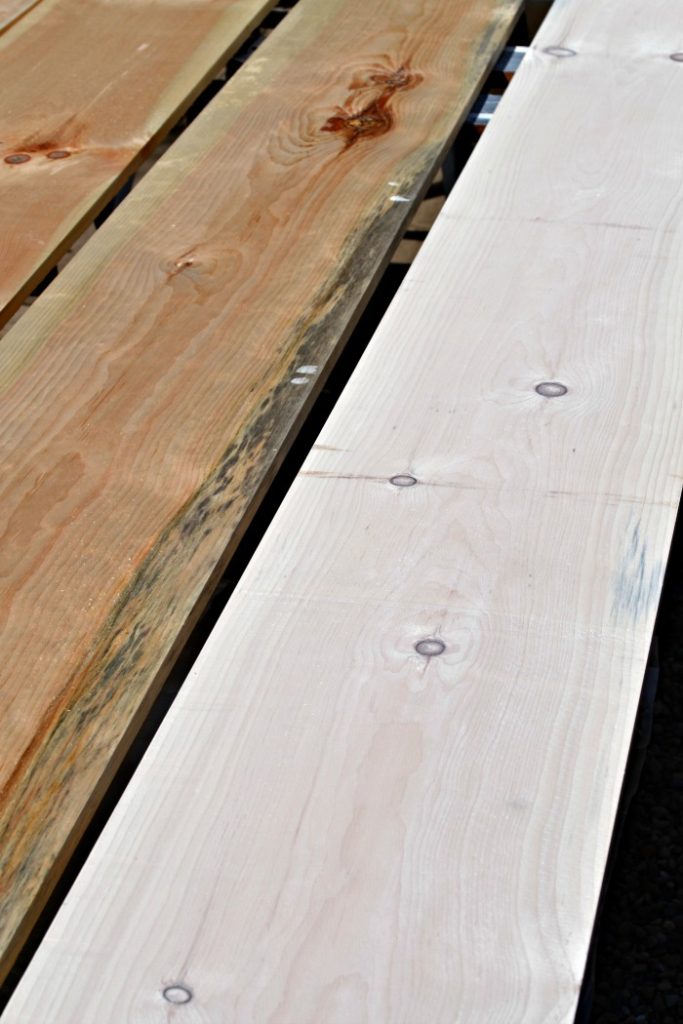
We used 1 x 12 pine planks, which I whitewashed before installing. Thank goodness we had a stellar day weather wise so I was able to get all 12 done quite quickly.
Overall we are really pleased with how the ceiling turned out. I am so happy I don’t have to look at that up slope anymore. To me it stuck out like a sore thumb.
If you have a ceiling that could use some cosmetic cover up I highly recommend a pine plank ceiling treatment. You can get tongue and grooved in boards, but since we are on a tight budget, we did the entire ceiling using the plain pine 1 x 12 planks for just about $128.
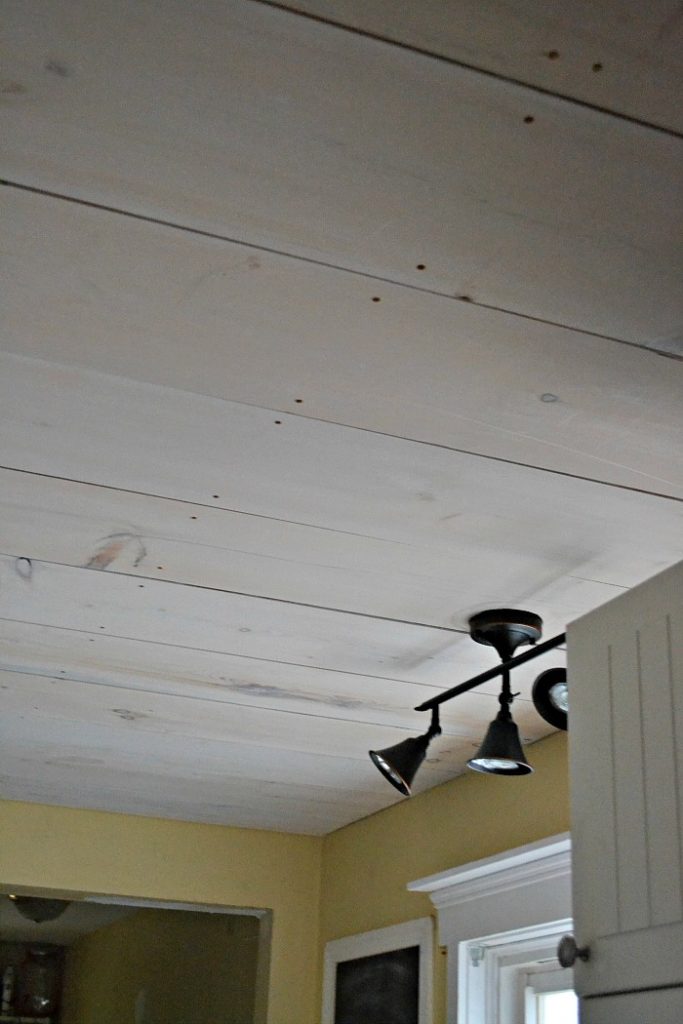
I decided to go with two track light fixtures in an oil rubbed bronze finish, similar to this one. I had thought about one track fixture and one pendant fixture, but the pendant fixture would not have been centred over the counter, and that I could not live with.
Of course one of the light fixtures had a part missing, which means I had to return it and the new one won’t be here for a week.
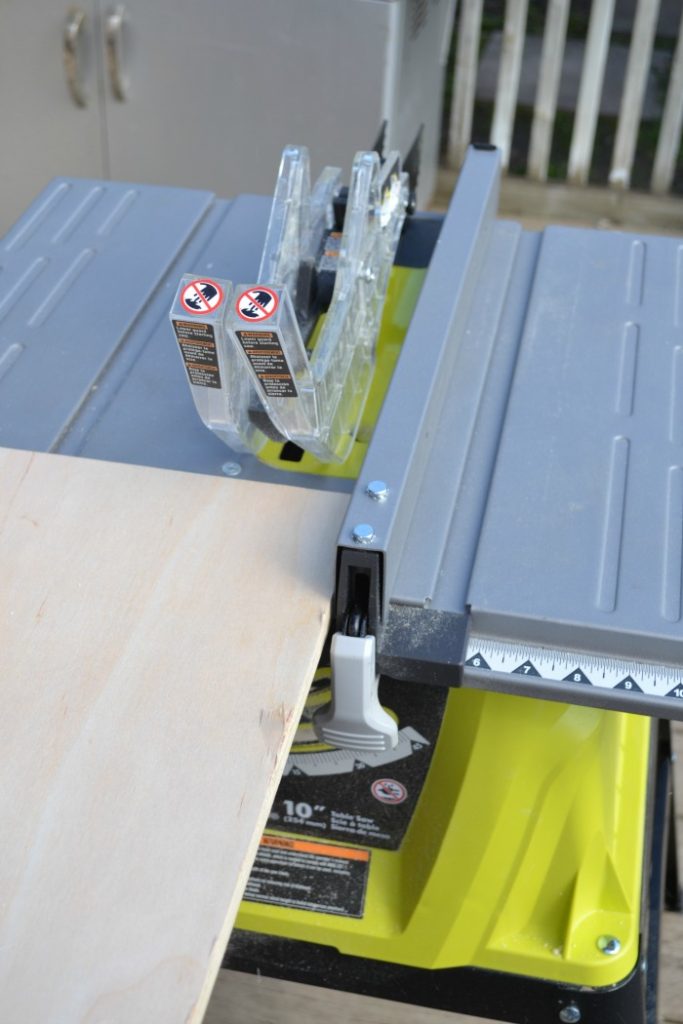
The second big job we finished was installing the rangehood and building a rangehood cover. These jobs were relatively easy. Our RYOBI table saw has been getting a real work out with this project. We needed the cuts for the rangehood cover to be perfectly straight, and using a table saw ensured we got the best straight cuts.
By the time this post goes live, the front panel will be attached and a little shelf will be added. I will paint it tomorrow.
Ours is a recirculating rangehood as it is on an inside wall and not able to be vented outside. It was important to find one that had the controls on the bottom of the hood instead of the front, making it easy to operate after it is enclosed. The one we chose is a Broan. You can find a similar one here.
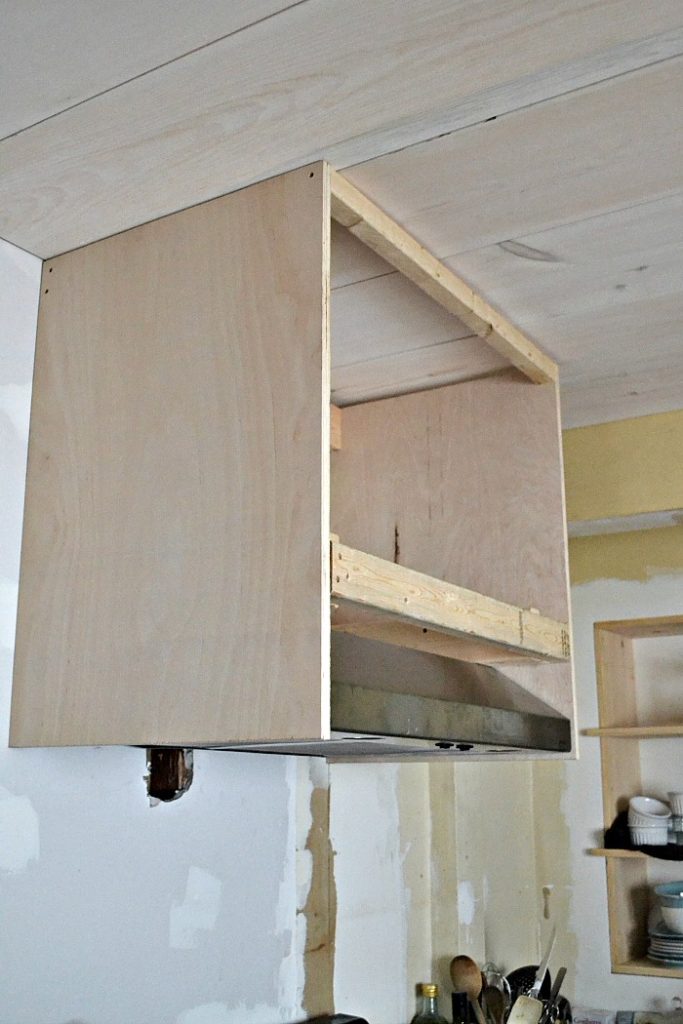
I have to admit it is way larger than my microwave/rangehood was, which is both good and bad. It is good because it actually covers the back burners and half of the front burners making it more efficient than the old one. The bad part, which is just going to take some getting use to, is that since it sticks out further I keep feeling like there is a cupboard door open and reach up to shut it.
I will post a complete tutorial on how to build a rangehood cover in the coming weeks.
So, not a whole lot of pretty stuff going on this week. Once the rangehood cover front panel is on we can install the crown molding all around the room. The screw holes will be puttied and touched up with whitewash. This will go a long way to make me feel like things are actually coming together.
I am really looking forward to next week when the new Blanco Silgranit Ikon apron front sink is installed with our new out of this world faucet.
Lets have a look at what we have accomplished so far….
Kitchen Renovation Checklist:
Remove most upper cabinets including above the range microwaveCreate built in shelving in an old recessed space behind upper cabinets (similar to the photo in my mood board below)- Build new sink cabinet to accommodate apron front sink (underway)
- Paint all lowers
Install new rangehood and custom rangehood coverLevel the ceiling- Change the flooring
- Remove cabinets below the window and replace with a custom moveable island
- Install backsplash & shiplap
- Paint the entire room
- Install open shelving above sink
- New countertops
New lighting
Tim is working this weekend (at his real job!!) so I will have lots of time to paint the cabinet doors and get them re-hung. I may even have time to get one wall painted! In any event, we are down to 3 weeks and I still have a lot of big jobs to cross of my list.
And, since I am trying to get over my fear of Facebook Live, I might even post a quick live video of our progress early next week.
Wish me luck!
Until next time….


Oh ! Love the new ceiling and totally love your choice for the trac lighting. I couldn’t live with the pendant in the wrong place either. I’m doing a kitchen nook refresh right now and was just thinking over what to do because I’d have to move the sockets (3 of them) and repair the drywall in the ceiling. You’ve given me an idea and hope that a kitchen can survive without a pendant or a chandelier. Keep on keeping on, Maureen. Soon your ugly duckling will be a beautiful swan. Can’t wait to see! Susie from The Chelsea Project
Wow! You have been busy. The ceiling is amazing! I love the wide planks and the white wash on it is so gorgeous. I can’t wait to see the whole room!
Nancy
Ceiling looks fantastic!!!
That ceiling!!!! I absolutely love it. It gives the space such a cozy and homey feel. Can’t wait to see more.
The ceiling is looking great – what an easy solution (adding the strapping pieces) to level it off. You have lots of painting, good luck!
The ceiling looks incredible Maureen! You guys are doing great!
Wow the ceilings look amazing Maureen. I have been on the look out for this post since you told me your were doing it. On pins and needles to see the final reveal!
Thanks Michelle! It was such an easy way and inexpensive way to level the ceiling. I am so glad it turned out well!
Seriously!!! I’m coming over ..