
(Dessert) Buffet
I have been patiently waiting for my husband to build me a buffet for my dining room.
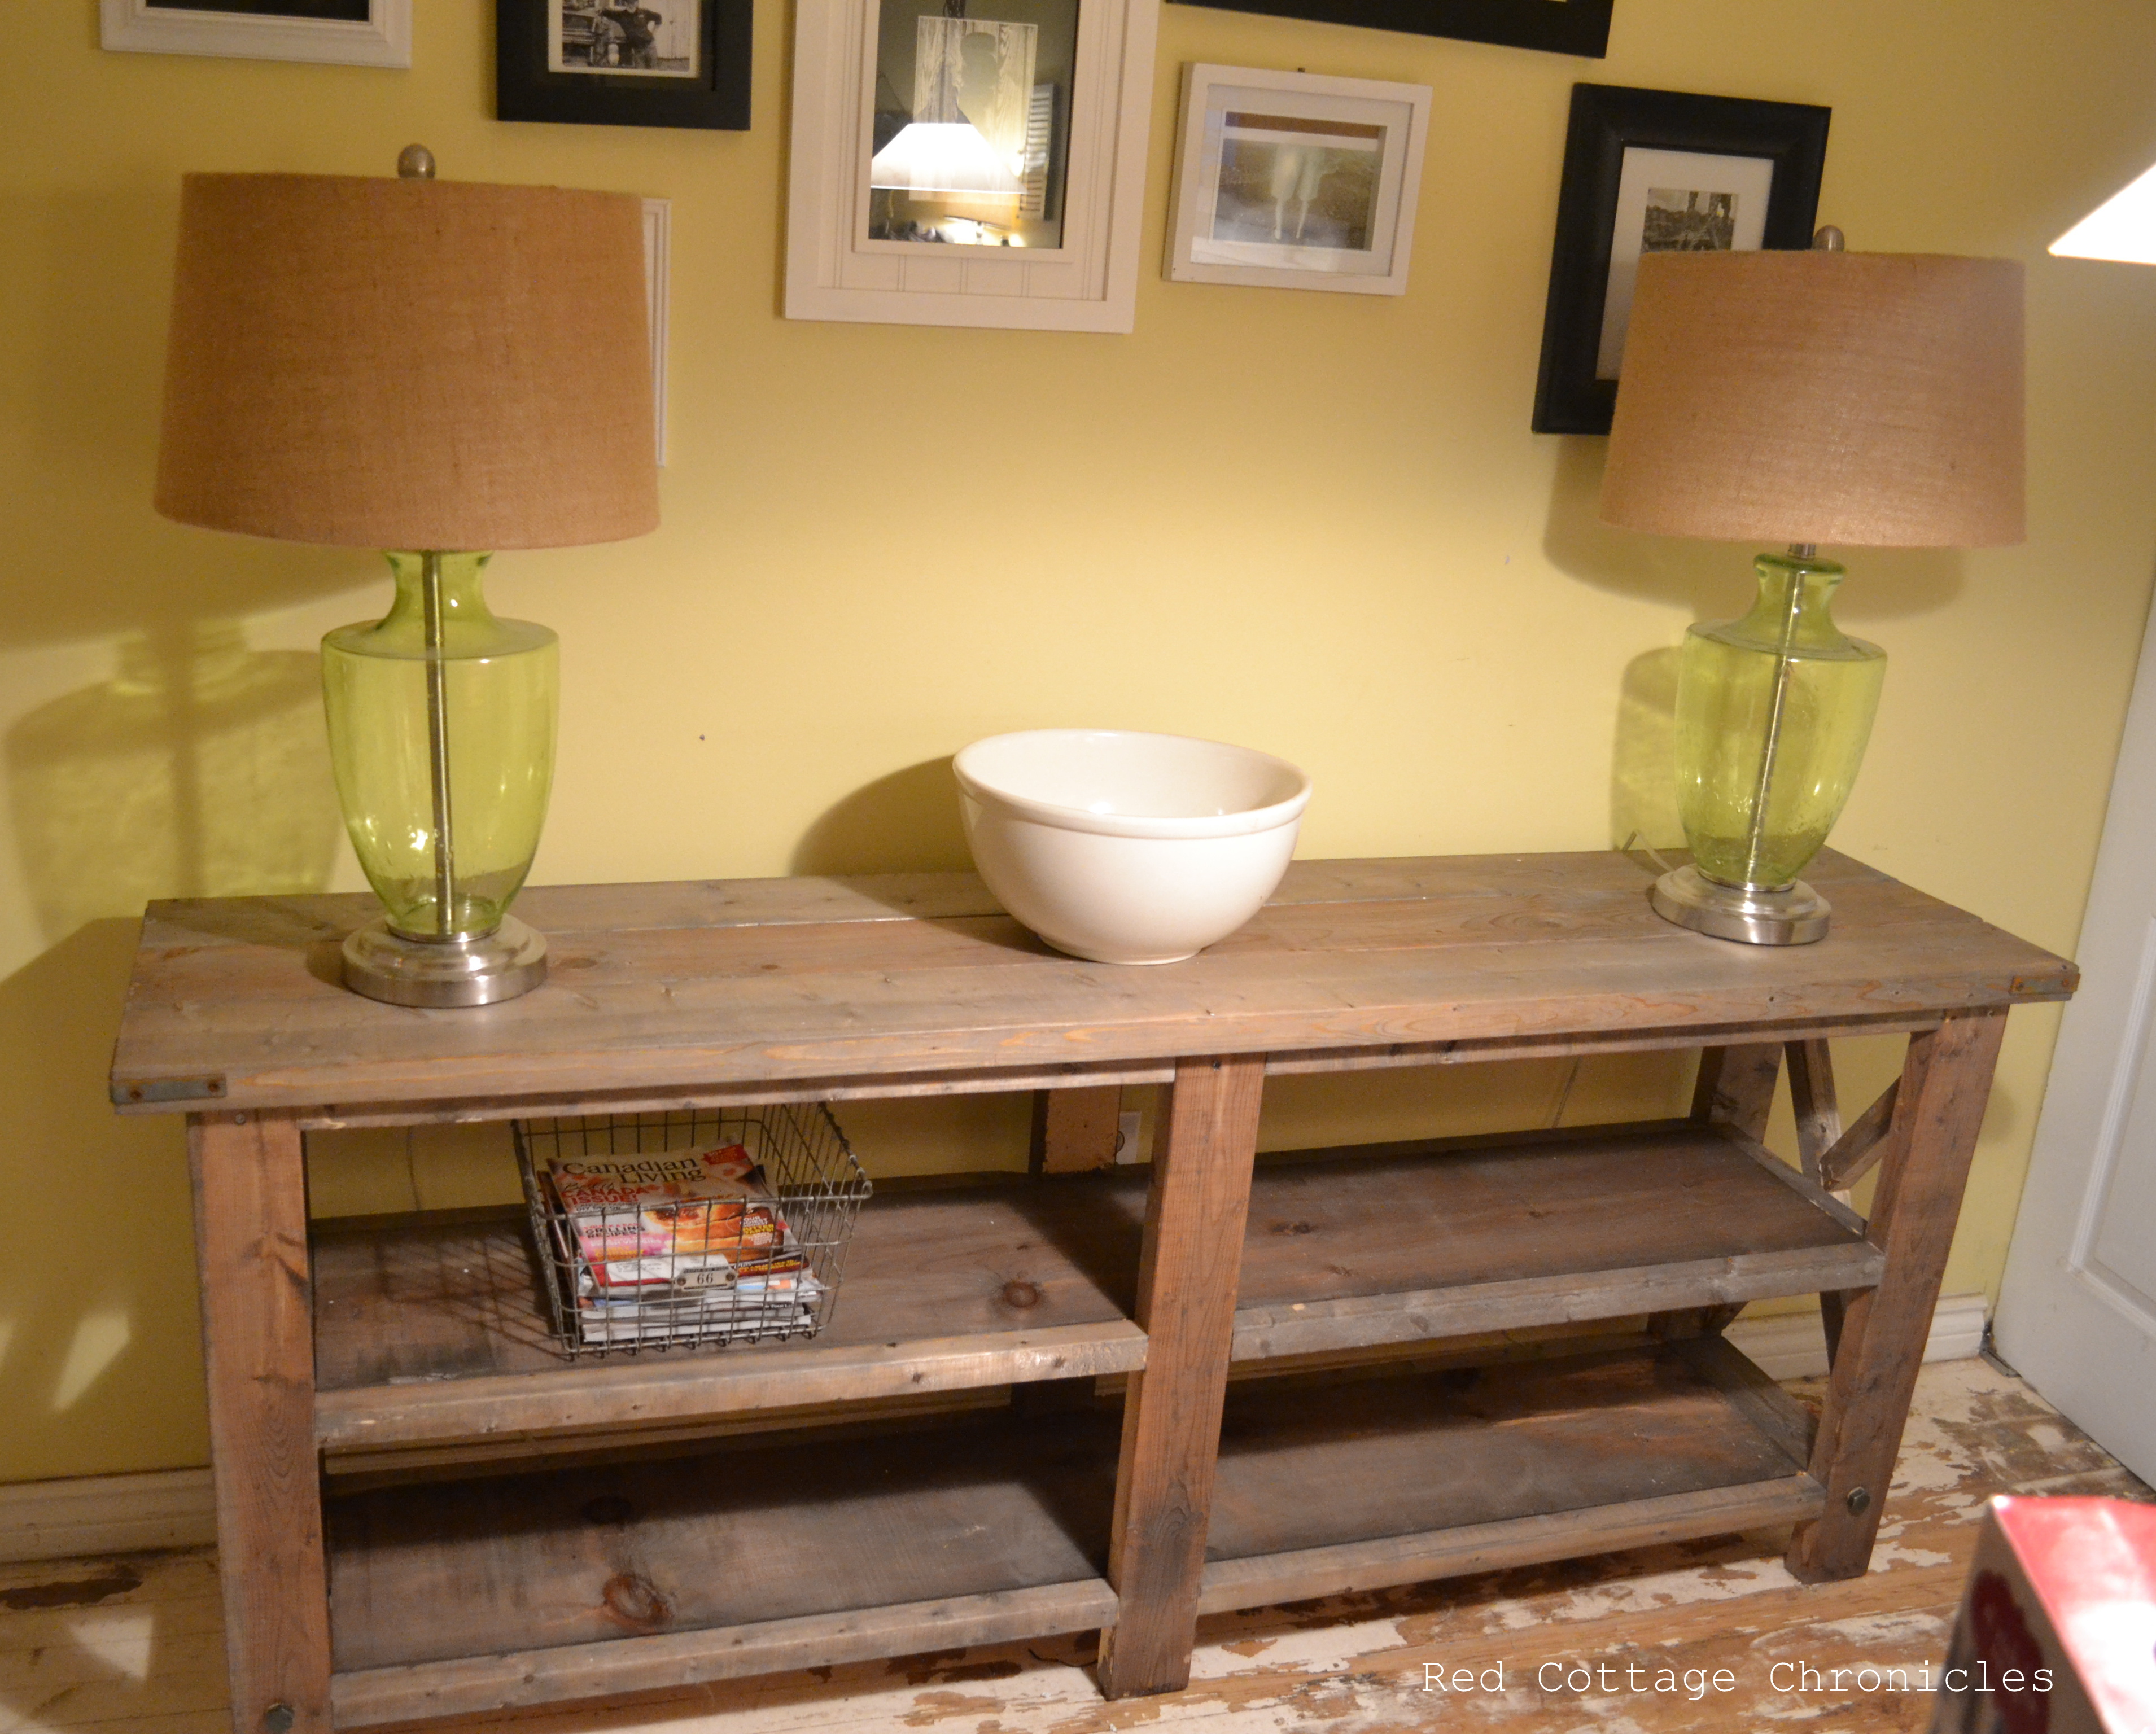
I found this on picture on Pinterest, and was drawn to it right from the start. It is long and not too wide so I knew it would fit in my narrow dining room and be ample room to set up even the biggest of dessert buffet’s, and the extra shelving would provide much needed storage for this room.

Photo via Pinterest. Source Anna-White.com
So after several months Tim finally was ready to begin the build. We referred to the plans at Anna-White.com. It is made up of regular 2 x 4’s, some 2 x 2’s, and rough pine planks all purchased at our local Rona store. We had to modify the construction a bit because we did not have a Kreg Jig, but I think ours turned out pretty darn close.
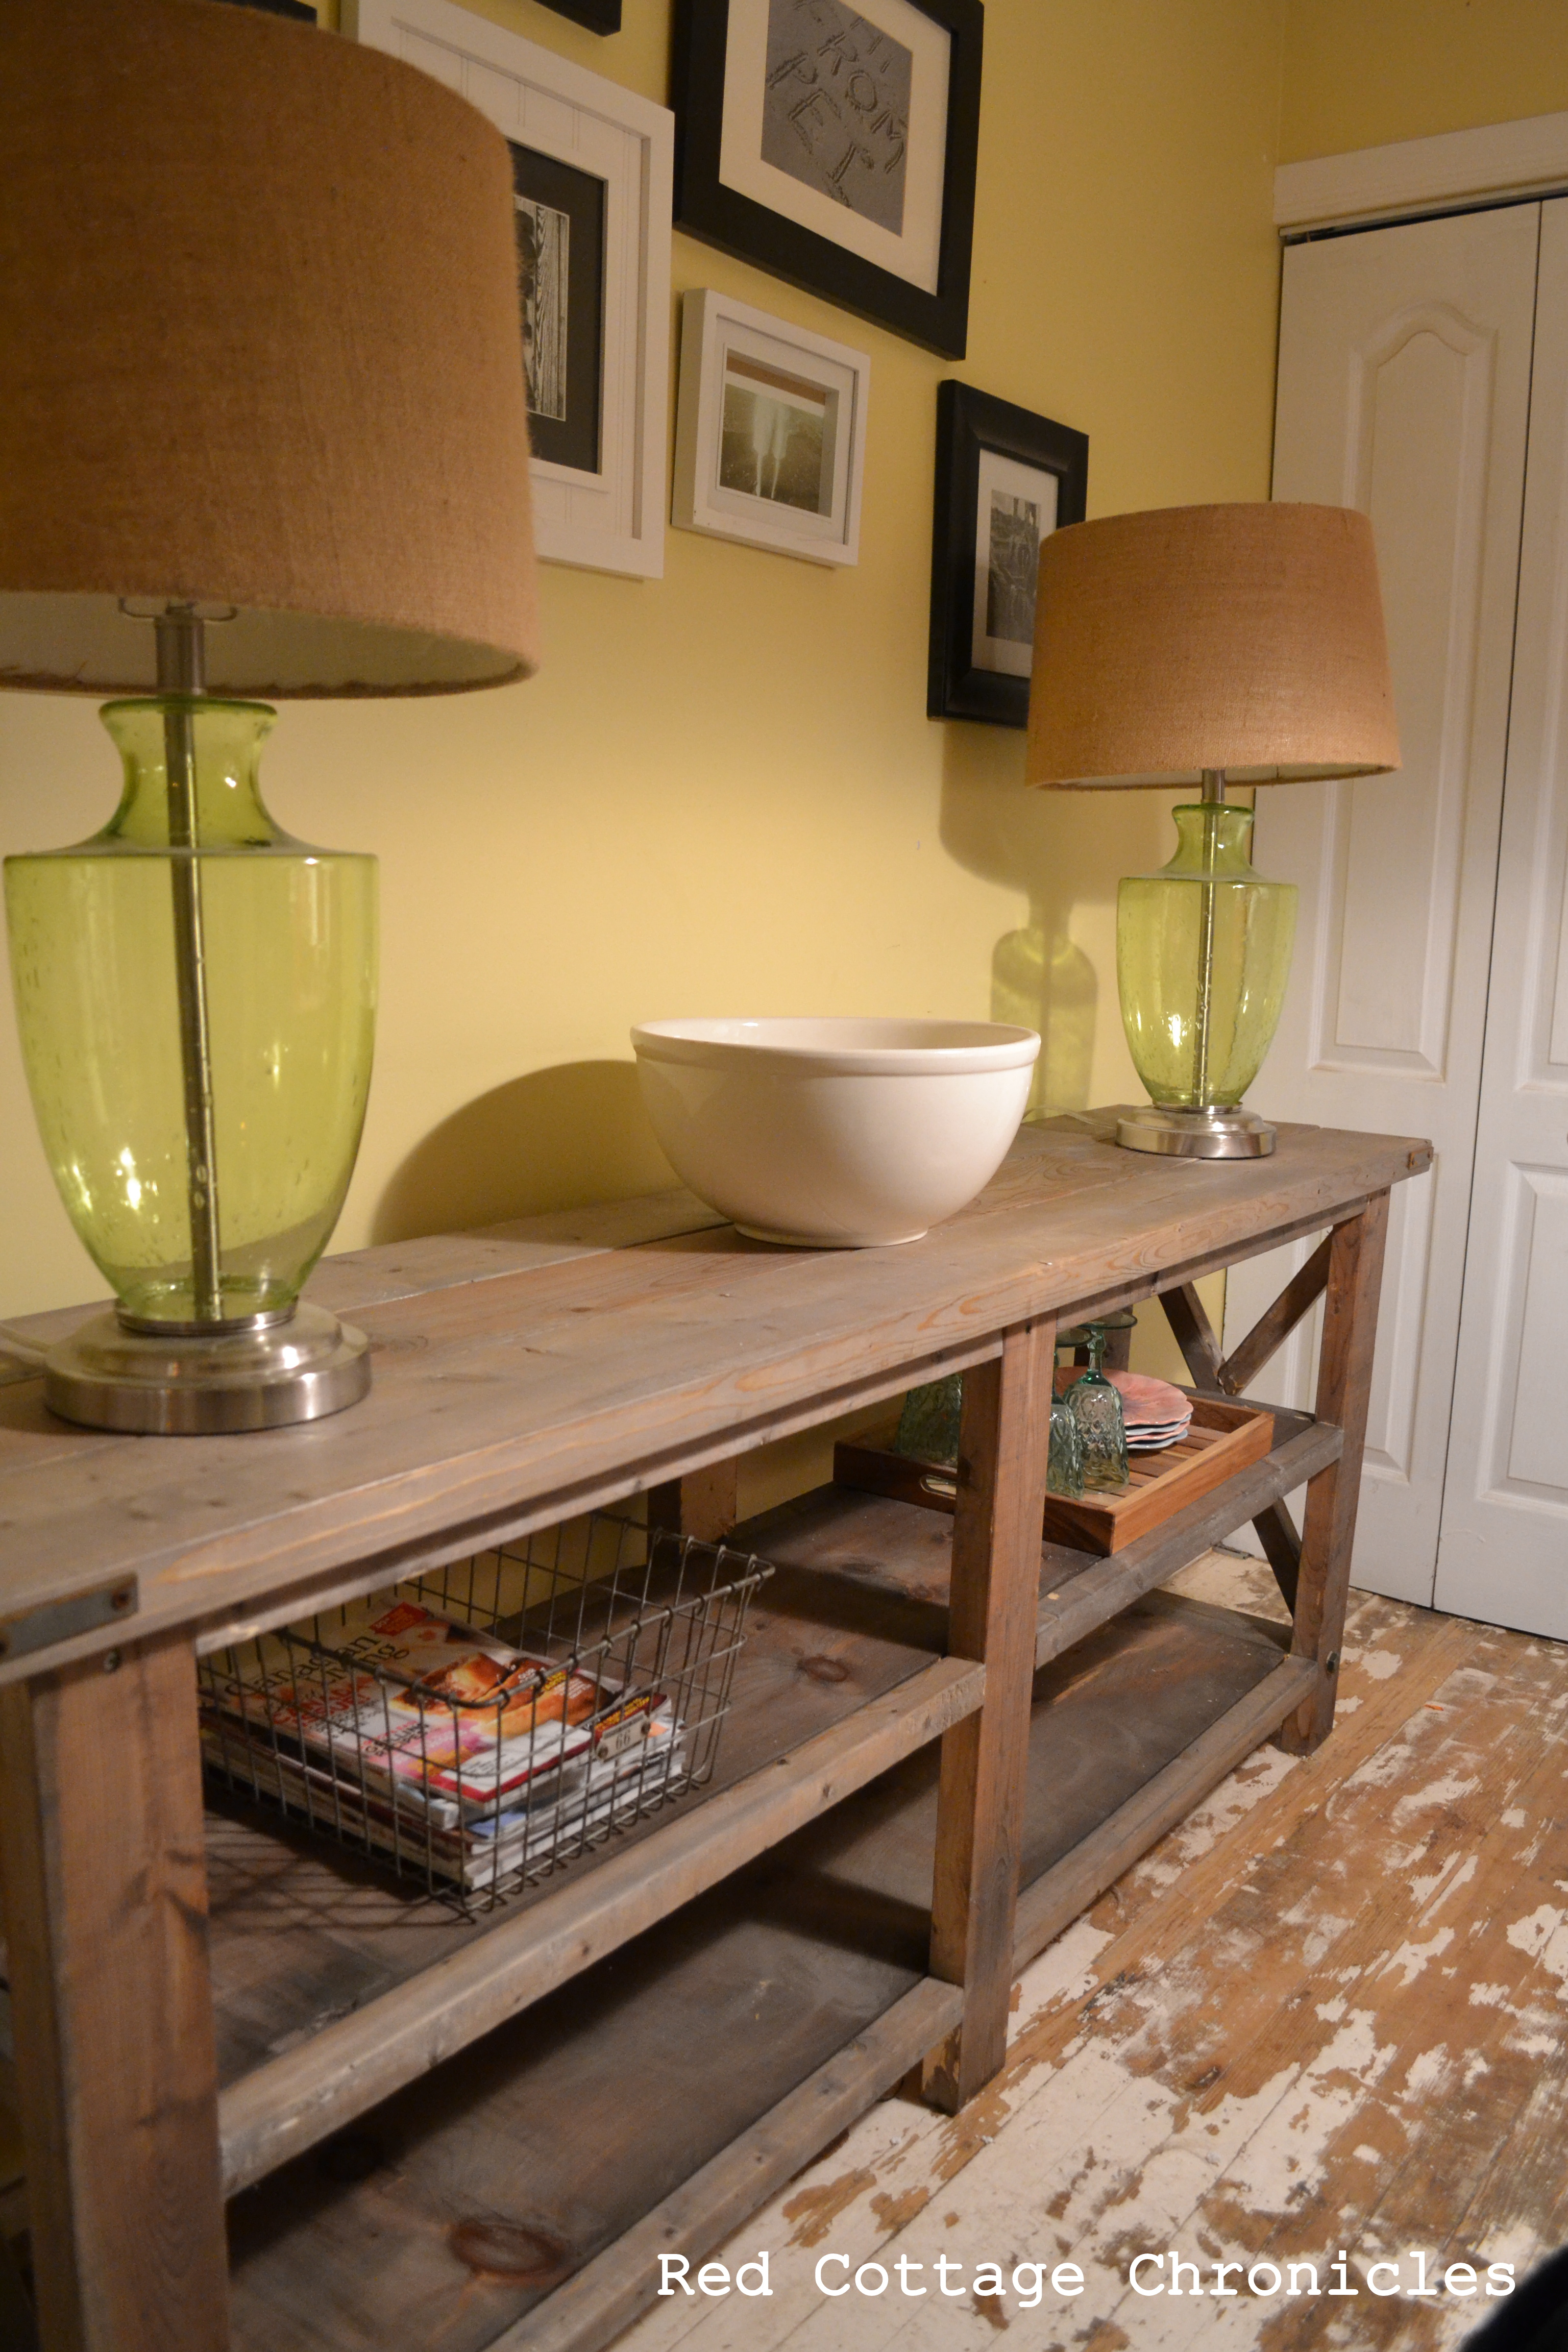
You will have to pardon the lighting, but since it is dark at 4:45 in the afternoon, I had to use overhead lighting!
It took Tim about 4 hours total build time. Since we didn’t have the Kreg jig to pre-drill pocket holes, he used a special drill bit to create them. He used tiny angle brackets underneath the pine shelving to attach this. You cannot see them at all, and they will support quite a bit of weight.
I love the crossed end brackets. They are mostly decorative, but did add some stability.
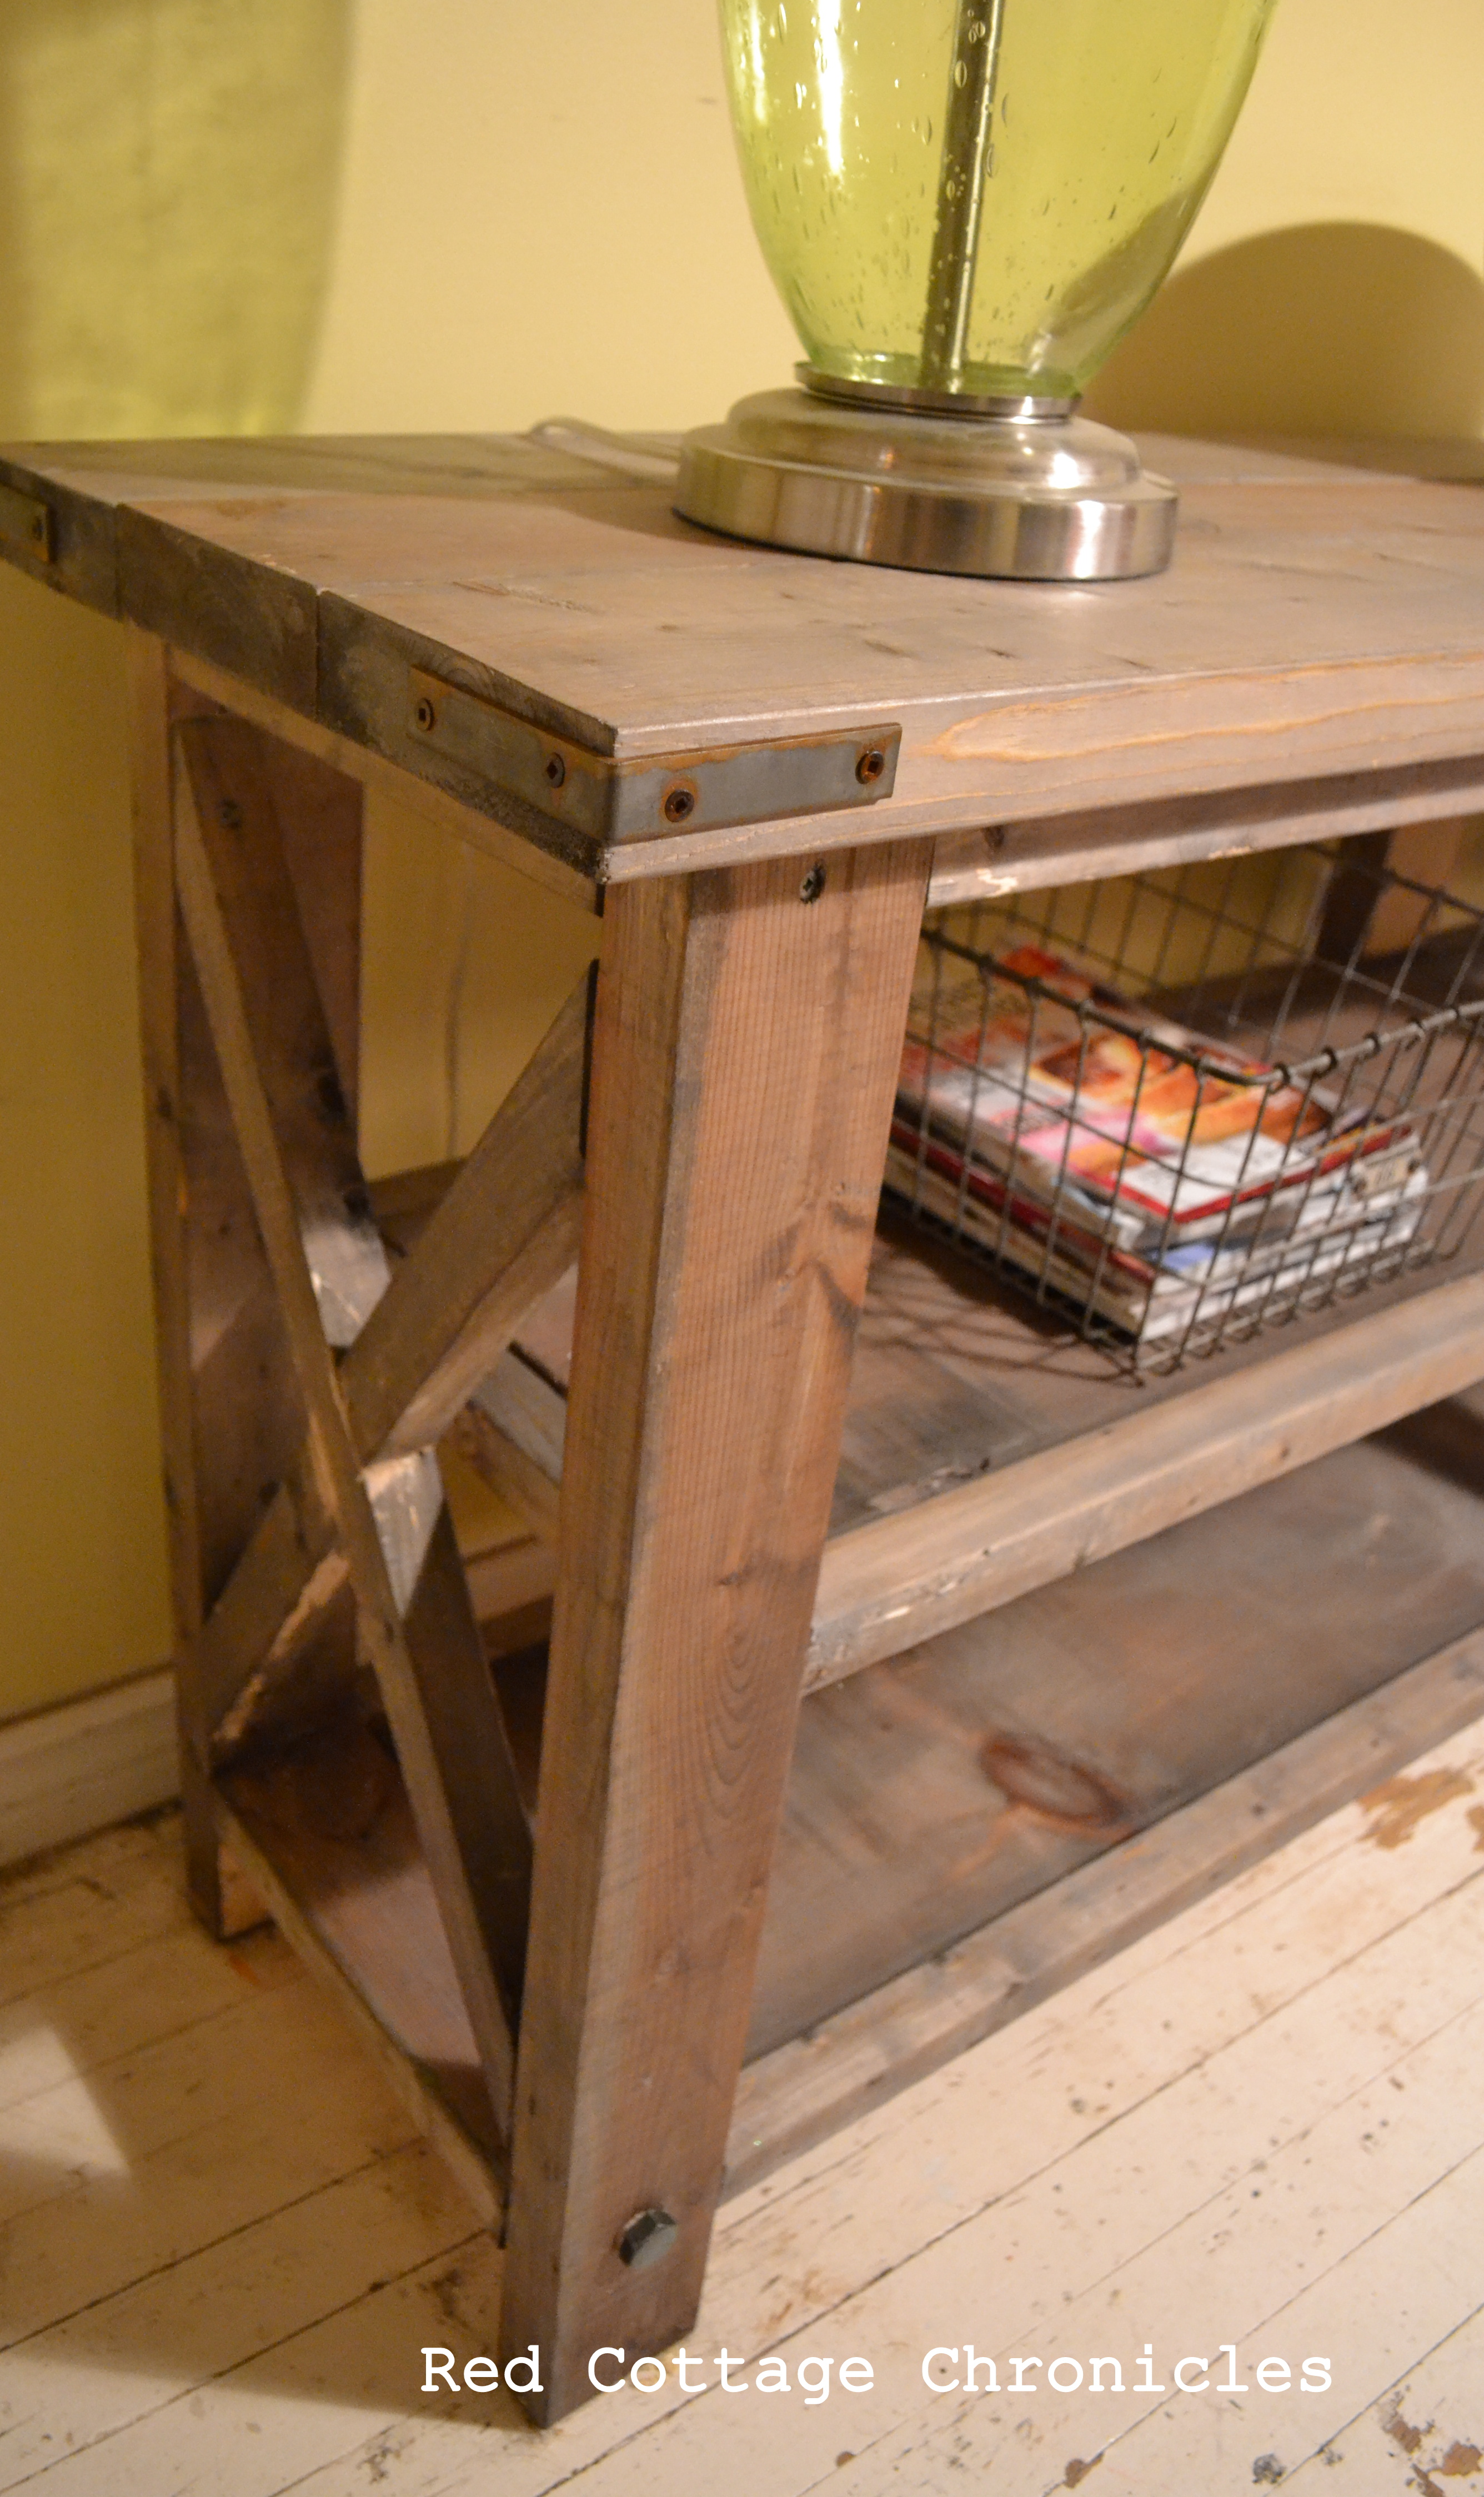
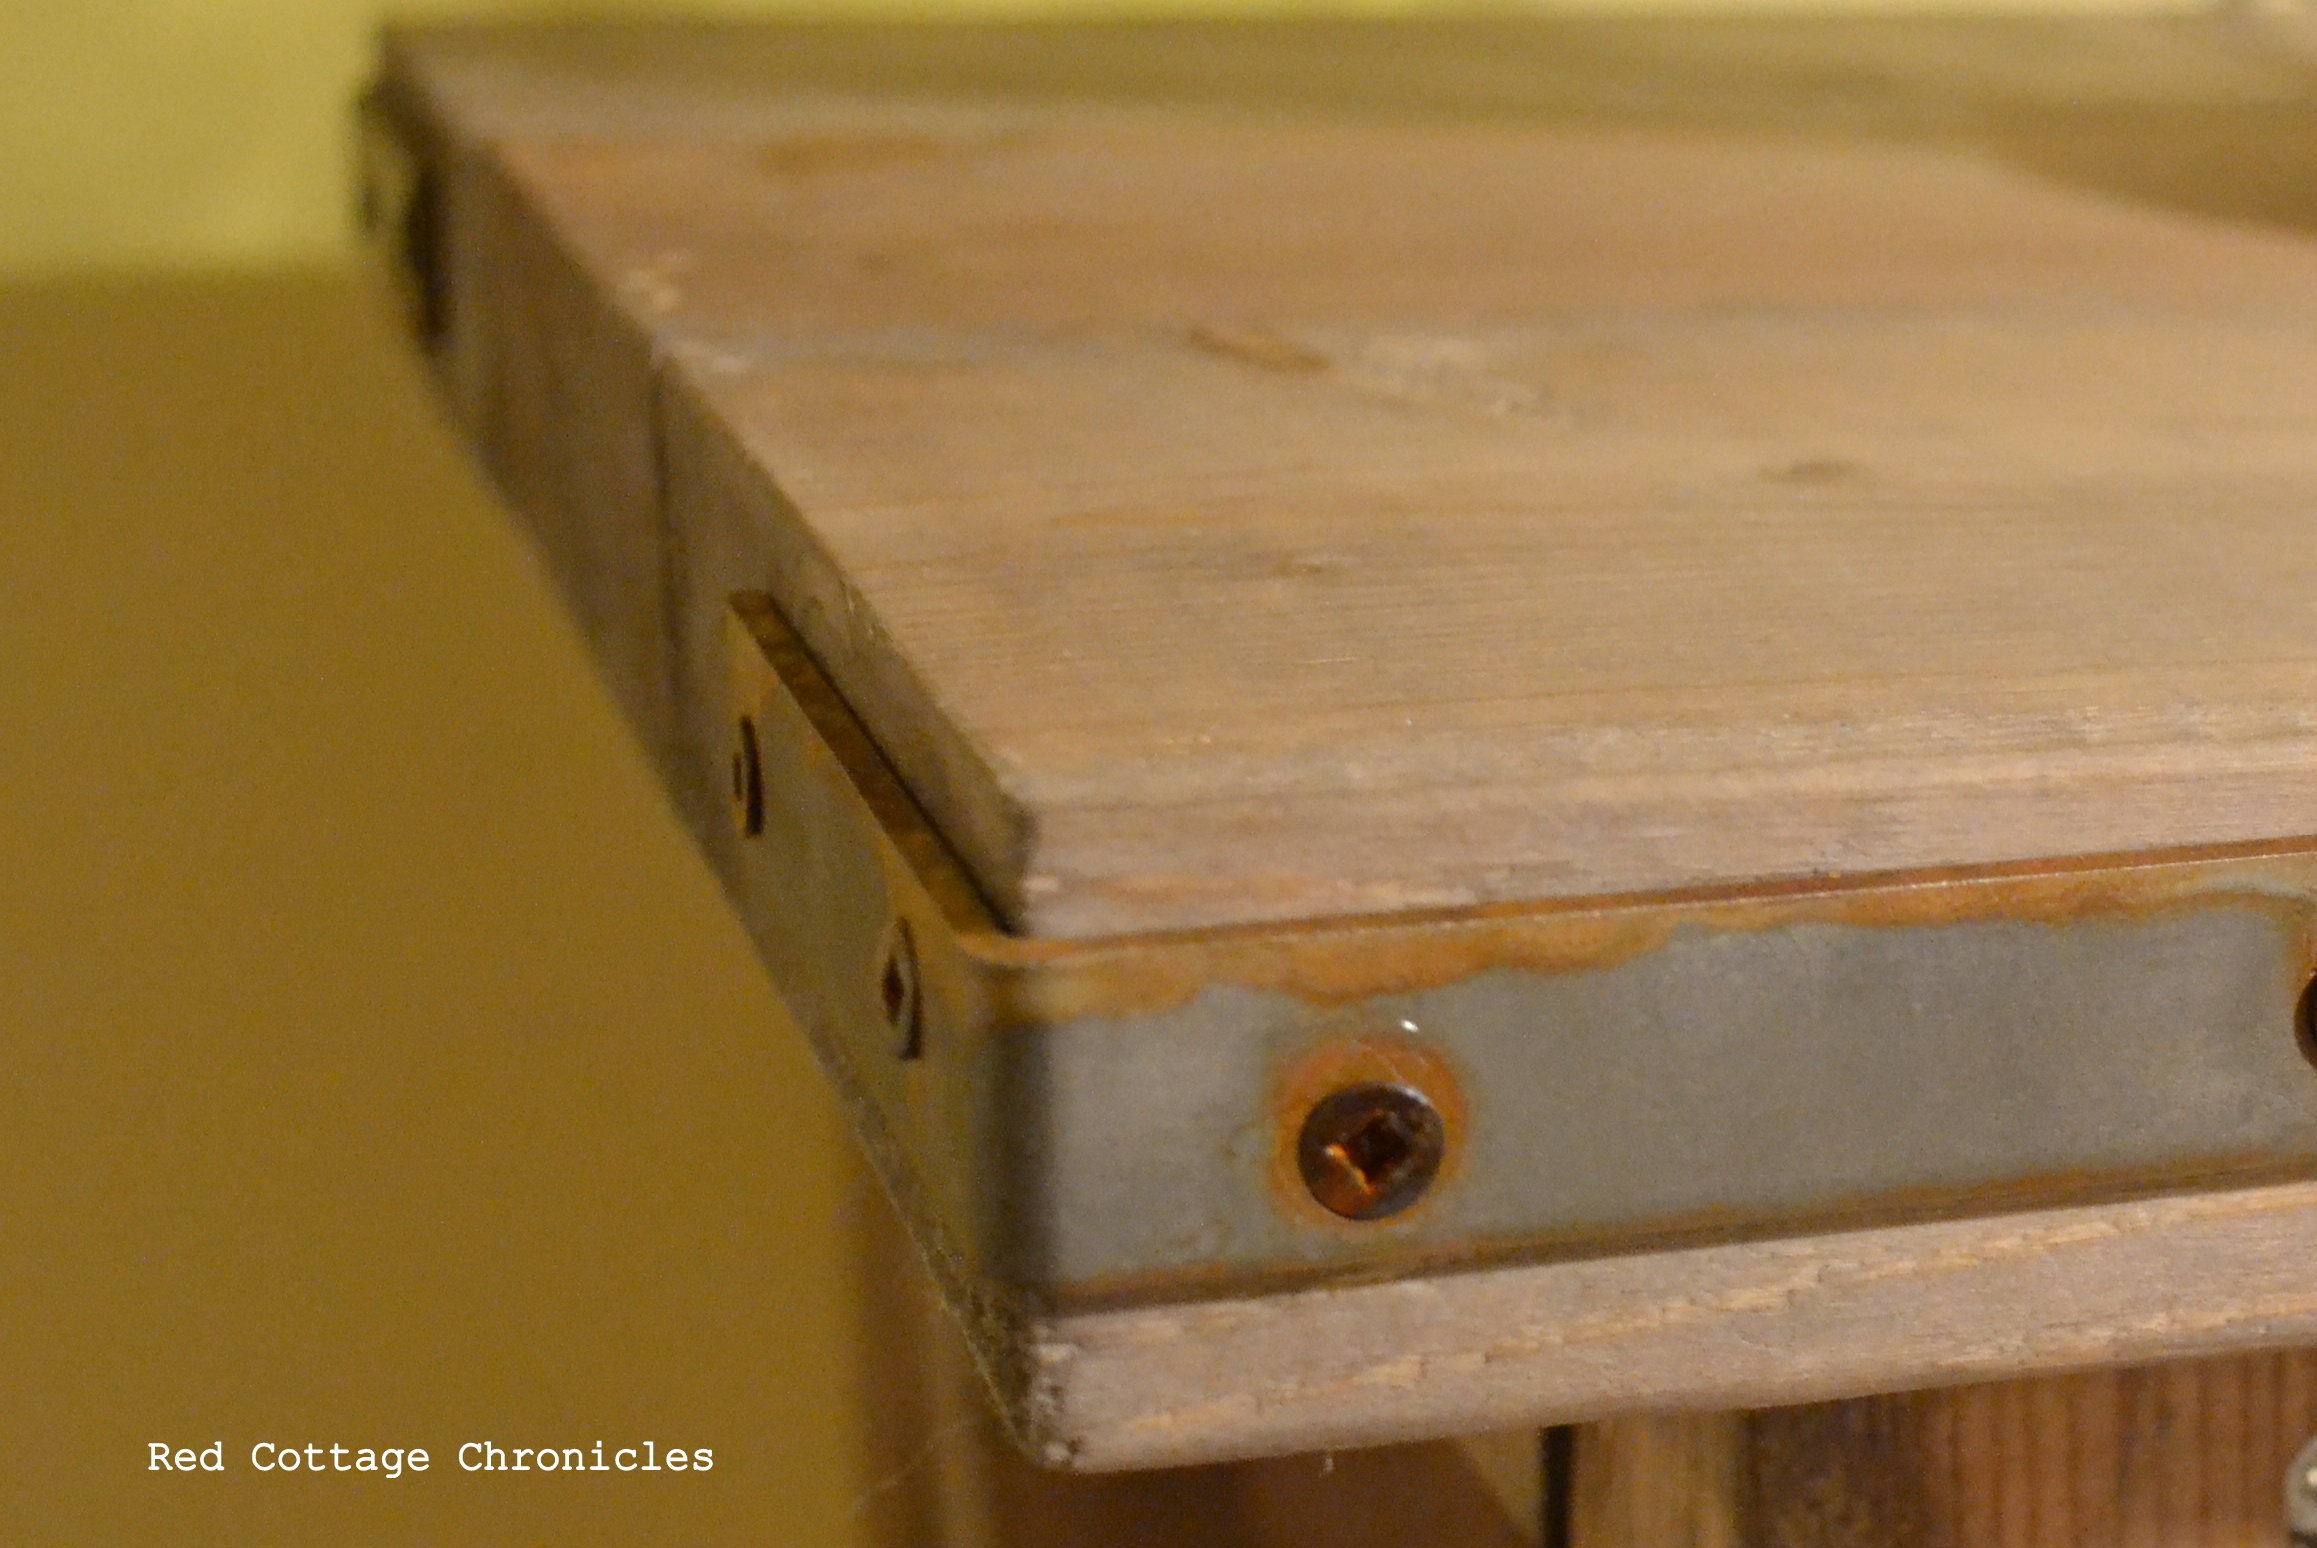
The corner details adds a bit of an old industrial feel.
Once the construction was finished, I “aged” the wood using a solution made by shredding a “wad” of super fine steel wool (use gloves and eye protection) and stuffing it into a 1 gallon (4 litre) jug of plain white vinegar. I left the lid slightly loose and using the handle of an old wooden spoon, gave it a bit of a stir a couple of times a day. After about three days the steel wool had completely dissolved.
Step one involved making some super strong tea. Stronger than you would ever consider drinking. Brush this over the entire surface of the table. Let it dry. This helps to add more tannins into the wood, which will help the vinegar/steel wool age the wood. Once dry, brush the vinegar solution on the wood. My table only required one coat to get the patina I wanted, but you easily could do two or three coats if you where wanting a darker color. Below is a picture of a piece of the virgin” wood laying on top of the “aged” wood. The last step was waxing the entire table with clear Minwax paste wax. This provides a light protective coating to protect the wood from spills. The wax helped to deepen the color of the wood slightly without really changing the aged gray colour.
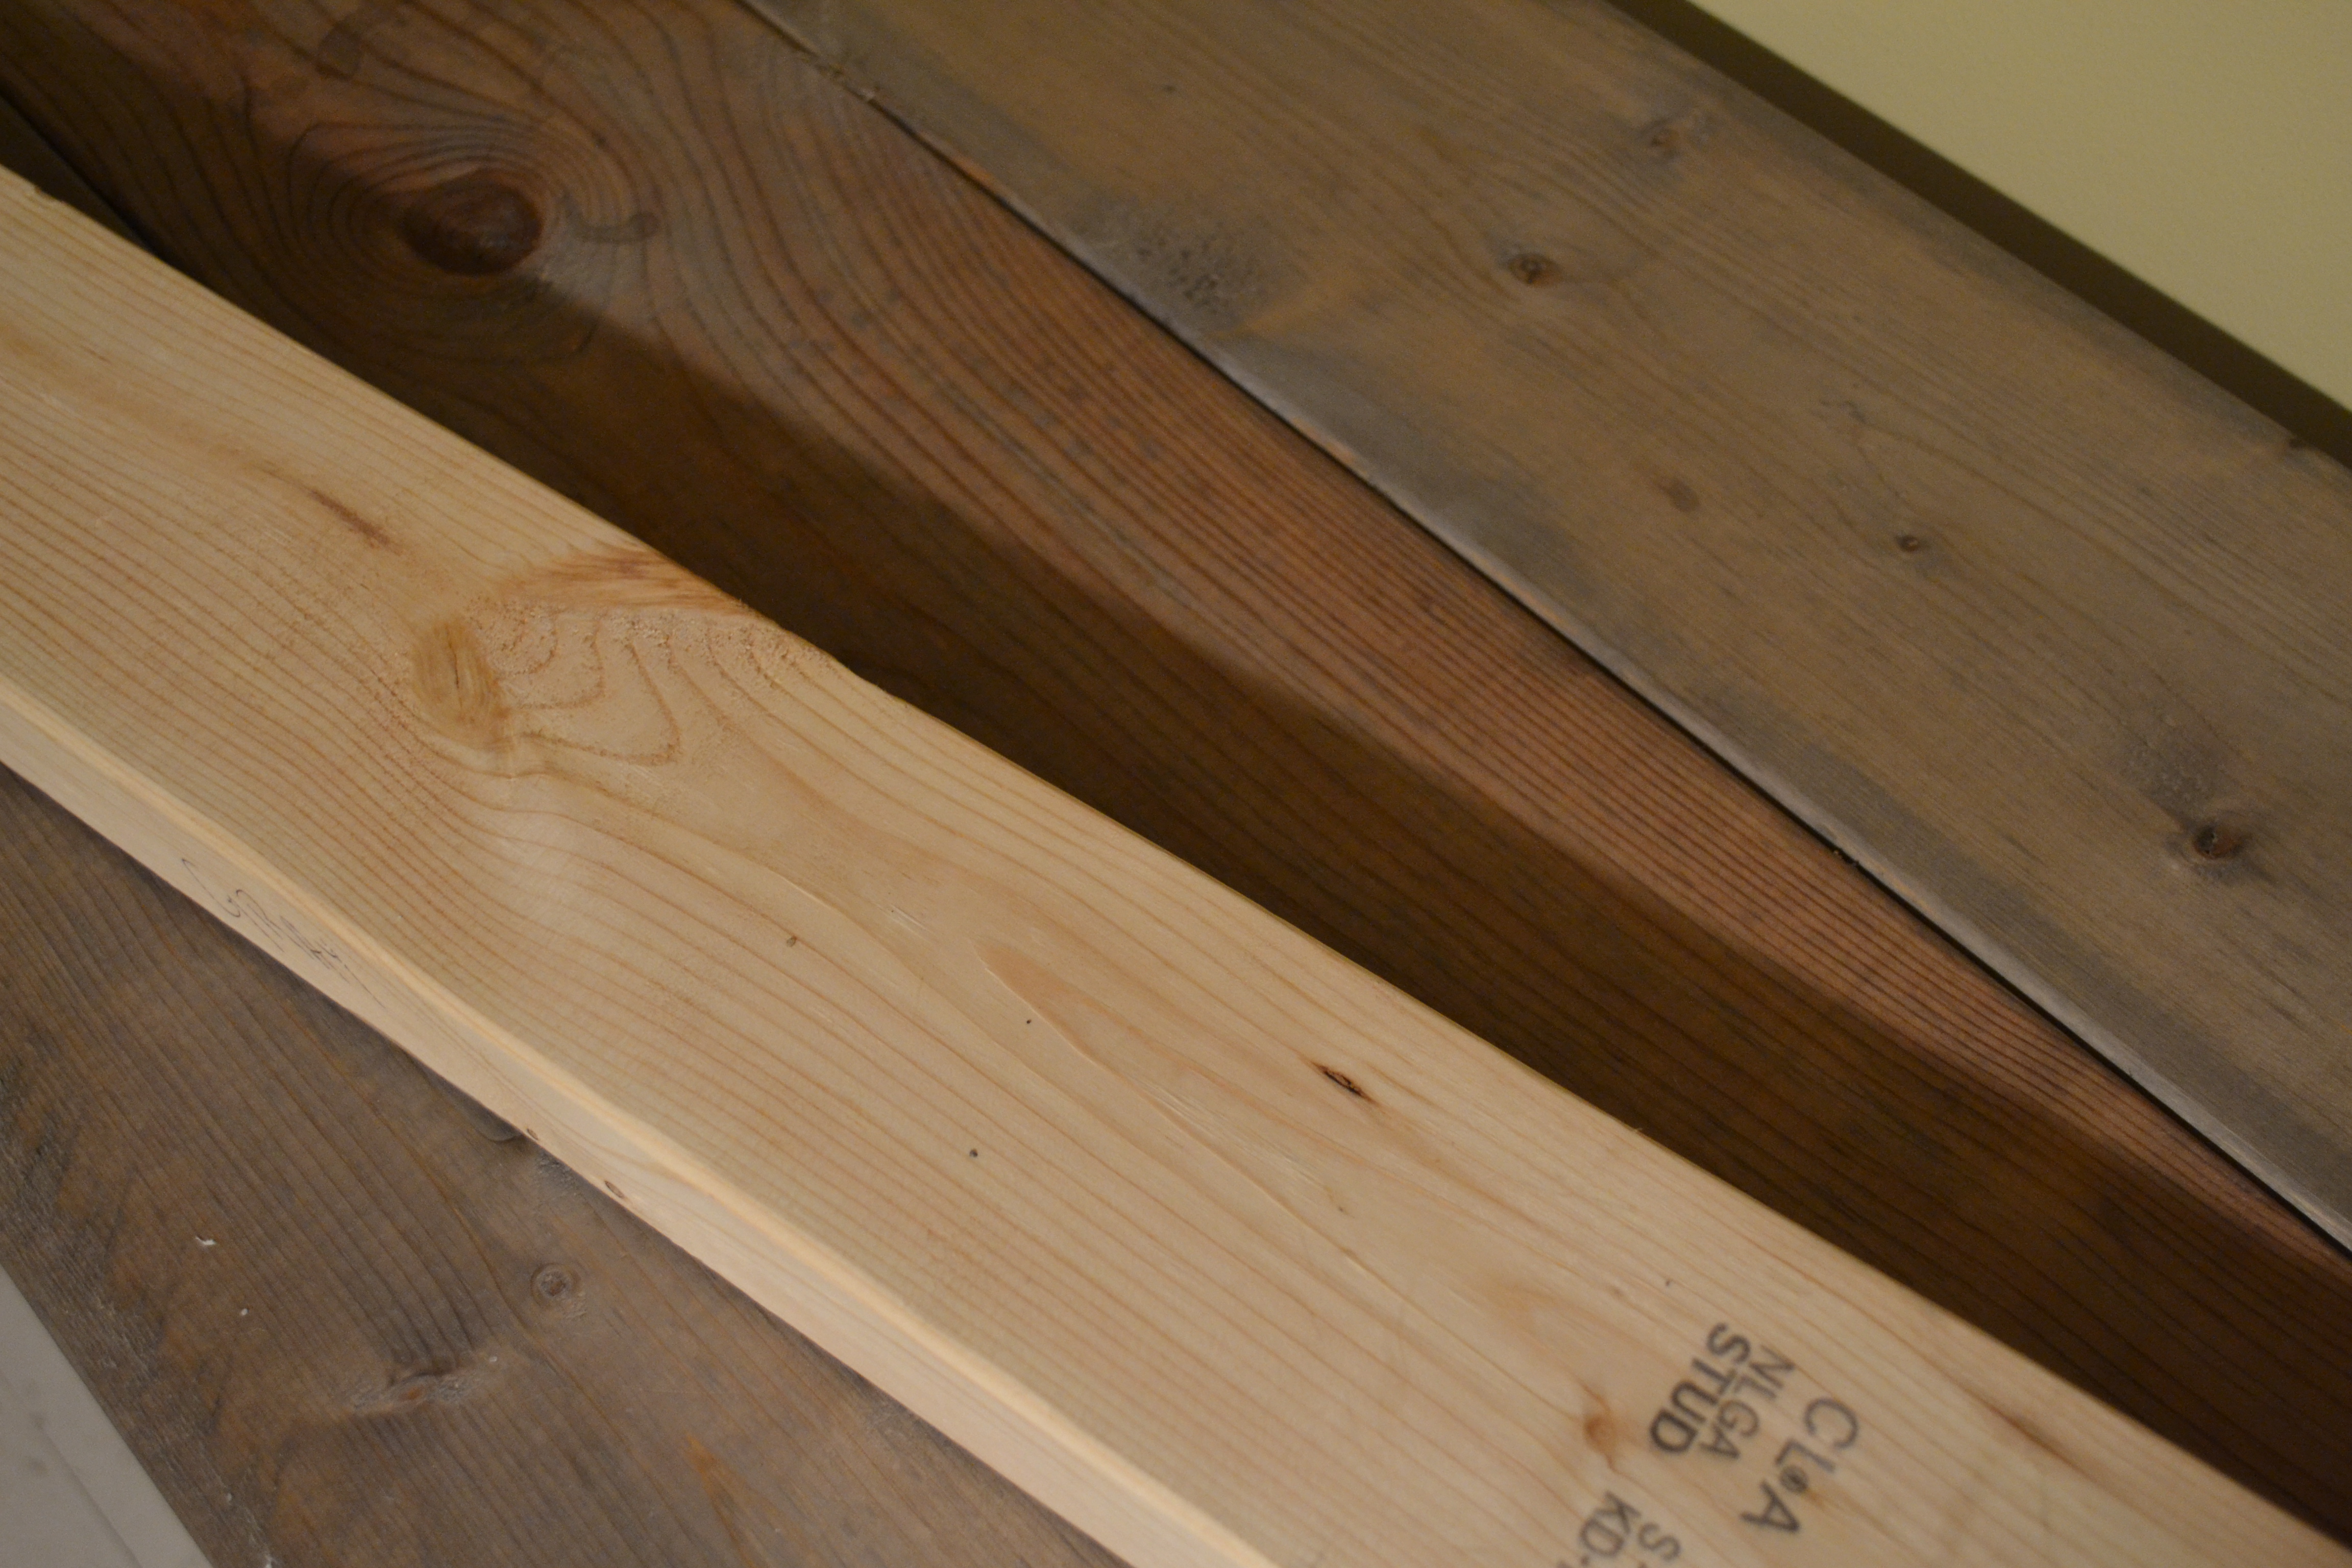
You will notice the variances in color of the aged wood. This adds a dimension of depth and that rustic character.
I also soaked all the corner brackets and their screws in the same solution over night. They were originally silver but this turned them grey and a bit rusty. Perfect!

Just imagine this buffet covered with desserts at Christmas time!
I borrowed these lamps from my living room, so now I will have to pick up some buffet lamps and find some more wicker and wire baskets to adorn the shelves below that will hide everything from cloth napkins to magazines, extra wine glasses and silverware!
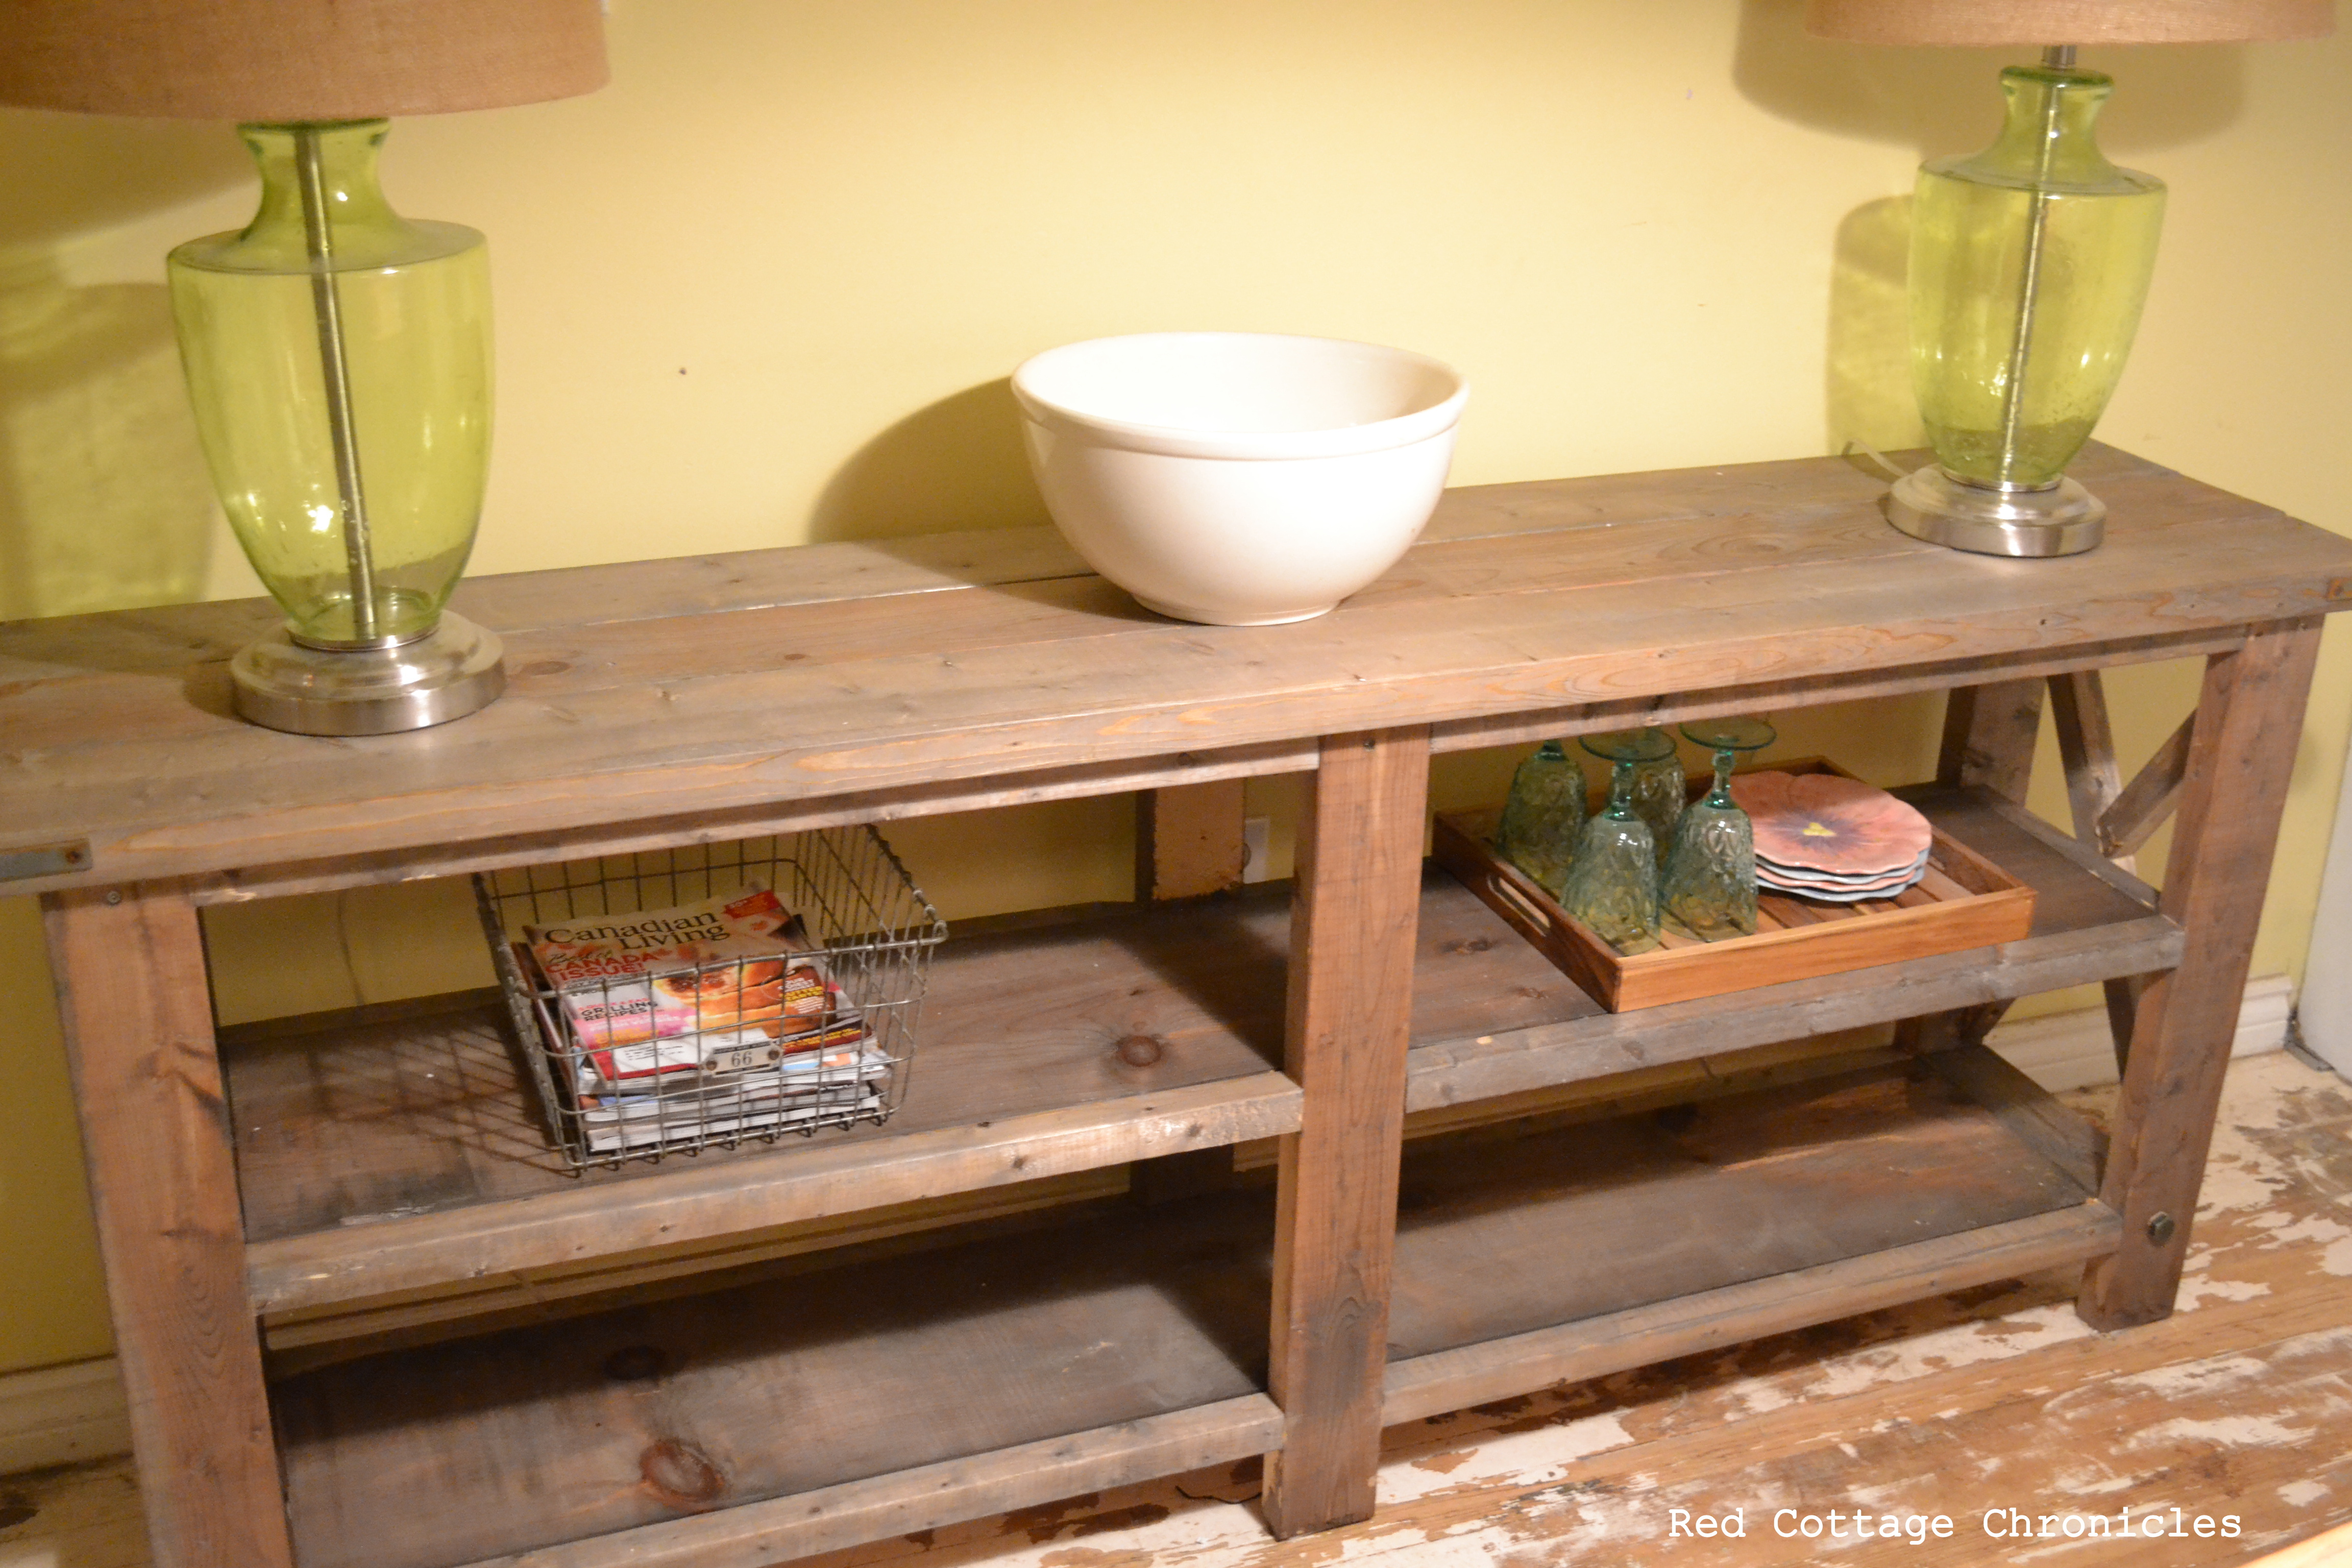
I think it turned out perfect.
Tim now has the task of building a matching one to house our television on top, with its components below! Since he found it a really easy project and is so pleased with the outcome he has promised to make it is this weekend while I start on my Christmas baking
Wednesday it will be back to the regularly scheduled programming – I will share a recipe for Blueberry Cheesecake Squares!
Until next time….


That is beautiful! And I love those floors!
Thank you Sarah Beth. The floors are kind of an accident. I was trying to remove old paint and it was way too frustrating without an industrial sander, so I left them as they were. They are growing on me!
Wow!!!, Maureen. Your buffet looks incredible. Your hubby did an amazing job ~ and it only took him 4 hours? Hmmm… I think I need to talk mine into making one for me. 🙂 I love the “natural” staining you did to yours. It all came together so beautifully. I’m super impressed.
Thank you Lori! It takes awhile to get him going on a project, but once he does he stays at it until its done.
Hi Maureen, I wanted to let you know that we’re featuring your Dessert Buffet table at our Making Monday link party, which goes live Sunday evening at 8pm eastern. Come take a look. 🙂 And we’d love to have you share more of your great projects and yummy recipes. http://www.abrightandbeautifullife.com/?p=8130
The buffet turned out so beautiful! We made Anna White’s barnyard desk and I’ve loved it! Adding this to the list for my husband 🙂 Thanks for sharing with Life Created Tuesdays!
Erin
http://www.theviewfromfiveten.com
Thank you Erin. This was our first Anna White creation, but there will be plenty more. I have my eye on a bedframe!
LOVE!!! D and I are suitably impressed! Tim did an amazing job!
Thank you Heather!
Wow, what great work!
Oh, I am soooo in love with this! GREAT job. So glad I hopped over to check out the details from the View From 510 link party!
Thank you Tasha! So happy you stopped by.
This is perfect! It’s exactly what I want in my kitchen! I love the aged wood and everything! Great job!